close

Apps

Apps

How to Insert Signature in Word Document: 3 Simple and Effective Steps!

How to Insert Signature in Word Document: 3 Simple and Effective Steps!

In this article, we are going to mention some effective ways to let you learn how to insert signature in Word Document.  A signature represents the visual representation of the name of a person and is written by the person in a very unique style. There are a lot of people who access Word documents daily for creating agreements, contracts, etc. But to finalize these documents, they may need to add their signature in Microsoft Word Document. How to do so? If you are willing to add a personal touch to your digital content to make things official, you can add your signature to that document. Remember that creating a signature directly from Microsoft Word is not possible.

Why Would You Need to Insert A Signature in Word Document?

There are different reasons due to which you may need to insert a signature in Word. Security requirements can be different in every case. For instance, you don’t need a high-security level when you just need to quickly sign & send back files that you have received through email. In addition, if you are just willing to add a personal touch to your professional letters and newsletters or digital documents, don’t require such top-quality security features. High security level is only essential when you use Microsoft Office Word for handling sensitive information. By inserting your signature in Word, you can keep yourself away from the hassles of printing and scanning the paper for a physical signature.

How to Insert Signature in Word Document:

Let’s follow the below-mentioned steps to learn how to insert signature in Word:

  • Scan, Create, Or Draw An Image Of Your Signature:

Do you want to create an image of your signature? Then, you need to scan your signature. You are able to take a photo of it or are capable of using the Microsoft Office Word drawing tool. How you will be able to use the tool relies on the version of Microsoft Office you use. If you use Microsoft 365, you can follow the instructions given here. However, if you use another version of Microsoft Office, you have to consult Microsoft’s support documentation.

Steps:
  • First, you need to find the Draw tab on the Ribbon to access the tool. Did you not find the drawing tool? In that case, your job is to add the tool.
  • After you right-click the Ribbon, you need to select the option “Customize the Ribbon.”
  • After finding the Draw command, your job is to select the option. Then, you have to tap on Add.
  • In order to finish the procedure, you have to follow the in-app instructions.
  • Once you see the Draw tab on your menu bar, you need to select this.
  • Then, your task is to navigate to the Drawing Tools group to choose the writing implement.
  • Ensure that Draw mode is enabled. If not, you have to enable the mode by tapping on this.
  • Now, drawing your signature is possible by using the mouse, touchpad, stylus, or finger.
  • If you want to exit the mode, you need to tap on the mouse cursor icon.
  • You have to select the signature and use the wrapping options from the contextual menu to position the signature on the page.

Readability is important when you want to take a photo of your signature or scan it. One thing that you have to ensure is that your signature is very clear and distinct. Make sure that you are using high-resolution settings to take a photo of your signature.

  • Saving The Image File in a Different Format:

After you have scanned your handwritten signature or taken a photo of it, it is essential to ensure that the file format is usable for signatures. For instance, it has to be in .bmp or .jpg. It is also possible to save the file in a .png or .gif format. You need to know that both of these image formats are compatible with transparent backgrounds, which is useful when the background of the document has a fill pattern or color. Remember that you are unable to import the .eps files into Office 365 documents. You have to share the image of the signature you have taken or scan it to the device where you are running Microsoft Word.

  • Inserting The Image Into Microsoft Word:

Once you have successfully created or scanned the image of your signature, you need to know how to insert it into Microsoft Word.

If you are a Windows user,

  • You have to select the Insert option.
  • Then, your job is to select Pictures.
  • Now, you have to select This Device.

If you are a Mac device user,

  • You have to tap on the location in the document where the picture will be inserted.
  • Then, you need to tap on Pictures on the Insert tab.
  • Next, your job is to find the picture in iPhoto, Photo Booth, or the file structure of your Mac.

If you are willing to resize the signature image, your job is to select the picture of your signature. Then, your task is to use the resize handles. Several options are available to crop the image.

  • Creating A Signature Line In Word:

Creating a proverbial dotted line in Word for signers to sign on is possible. In the Ribbon’s Insert menu, you have to find the Signature Line command to insert a signature line with an X that will indicate where signers have to sign.

You have to tap on the location in your document where you are willing to insert the line. After that, your job is to tap on Insert. Then, you need to click on the Signature Line.  Once you see the Signature Setup pop-up, you can fill in the details like your name, job title, mobile number, email ID, etc, in the optional fields. After filling out these details, your job is to tap on OK. Now you can see the signature line along with the text added already in the previous step in the Word doc.

Managing Signature in Microsoft Word:

You can find several options that will let you manage the signature in Word documents. For instance, you can insert a signature automatically. You can also add multiple signatures.

  • Adding Multiple Signatures In Word:

If you need to add multiple signatures in Word, your task is to repeat the instructions that we have mentioned above as many times as you need.

  • Automatically Inserting Your Signature In Documents:

For those who want to easily sign Word documents, automatically inserting signatures can be beneficial. In order to automatically insert signature lines, signature or both of them, you need to follow the below-mentioned steps:

Steps:
  • You have to use the Microsoft Office Signature Line command to insert a signature line in the Ribbon’s Insert menu.
  • You are able to any signature block or text group that you are willing to associate with the signature line.
  • Are you willing to insert your signature automatically later on? Then, you should use the signature image or drawing tool to insert the signature. Besides, you can highlight the signature line along with your signature and the text you have typed.
  • You need to go to the main menu.
  • Then, your job is to tap on File. Next, you need to click on Options.
  • After clicking on this, you have to tap on Proofing. Now, you have to tap on AutoCorrect Options. In order to trigger inserting your signature automatically, in the Replace field, you have to type your preferred characters (for instance, “sig1″).
  • Then, you have to tap on Add to save the selection.

In order to accept the changes, you are required to hit OK. Now, you have to exit the Word Options window by pressing OK. As soon as you type the trigger characters and hit Enter, you will see your signature appearing automatically.

How to Add a Signature Line in Word:

A signature is not complete without a signature line. The steps you need to follow to add a signature line to a Word document are as follows:

  • First, you have to locate the spot in the document where you wish to add the line, and then you need to left-click on it.
  • After that, your job is to go to the Insert drop-down to select the Signature Line.
  • Now, you can see a dialogue box.
  • After selecting the required options, you have to tap OK.

How to Add an Electronic Signature to Word Documents:

Follow the below-mentioned steps to learn how to add an electronic signature to Word documents:

  • First, you need to take a piece of white paper and write your signature on it.
  • After that, your job is to scan this. Now, you have to save the scanned item in these file formats: .bmp, .gif, .png, .jpg.
  • Next, you need to open the image file in the Word. Then, you need to tap on the Insert tab. Now, you have to select Pictures.
  • You need to use the Picture Tools Format tab to edit the image.
  • As soon as you edit the picture completely, your task is to right-click on the picture. Then, you need to select the option Save as Picture.
  • When you have to add the signature, you have to select Insert and Pictures. Once you select the option, your job is to find the image file you have edited.
  • Finally, your job is to drag and drop the signature to the place where you want to add it in your document.

The Bottom Line:

In this article, we have mentioned the methods to let you learn how to insert signature in Word. Still, if you have any doubts, you can ask us via comments.


read more
Apps

Effortless Guide: 5 Steps on How to Use iMessage on Windows Today!

Effortless Guide: 5 Steps on How to Use iMessage on Windows Today!

If you are an Apple user, you have not been able to access iMessage texts and media on Windows 11 for long. However, the new Phone Link app of Microsoft is developed for iOS and is capable of managing iMessage conversations via Windows PC. Do you want to reply to messages on iPhone’s iMessage while working on Windows? Then, just dig into this article.

Here, we have given you a few methods to help you learn how to use iMessage on Windows. It is recommended to use Phone Link for using this messaging app on Windows. However, you can apply this process only to Windows 11. Does your PC not run Windows 11? Then, you should try an emulator.

What is iMessage?

This one is an app that is developed mainly for iPhones to allow users to send and receive SMS as well as other forms of messages. With the help of this app, you can save messages and communicate with others. However, you have to switch to your phone from your system to use this app, and it is quite annoying. Let’s learn how to use iMessage on Windows.

How to Use iMessage On Windows: 

Use Microsoft Phone Link (for Win 11 Only):

If you are willing to know How to Use iMessage on Windows, you should first follow the official process which is using Microsoft Phone Link to run the app. Microsoft has developed the Phone Link app to send and receive text messages from phones on Windows. Previously, the company also enabled iOS devices giving the opportunity to users to manage notifications on a Windows 11 PC. Ensure that your device runs iOS 14 or later. Besides, your PC needs to run Windows 11. If you have not upgraded your operating system to the most recent version, you need to do so.

  • Open Phone Link:

Your first job is to tap on the Start button. Then, you need to navigate to All Apps. After that, your job is to select Phone Link from the available list. Once you see the first screen, you will be prompted to select your device. Now, you need to tap on the button for the iPhone.

  • Scan The QR Codes:

You can see a QR code in the Phone Link app. After launching your iPhone camera, you have to scan the available code. You now have to click on the link at the camera screen’s bottom to connect your devices. If you are unable to scan that code, you need to tap a link to follow the manual process.

In this case, you have to download and install the app by clicking on the “Link to Windows” option to pair devices. As soon as you have installed the app, you need to open it by clicking on Open to launch it.

Then, you need to click on the “Scan QR code” option. Now, you have to scan that code which you can see in the app on the PC. In order to pair Windows and smartphones, you have to click on Continue. Now, prompts can be available on computers and Windows 11. So, you have to select the Pair button. Then, you need to wait until the devices are paired.

  • Sync Your iPhone Data:

Your smartphone will ask you if you are willing to receive notifications from the iPhone on the PC. In order to OK this, you have to click on the Allow option. Your task now is to navigate to the Bluetooth settings screen. After going there, you have to click on the Info icon for your computer. Next, your job is to power on the switches for Sync Contacts, Show Notifications, and Share System Notifications. It enables you to access and use the apps of your phone on the computer. Also, you will be able to use your phone’s data on the computer.

  • Run Phone Link:

You can see the Phone Link welcome screen on your PC. It may ask you if you are willing to open the app every time you are going to log into Windows. If yes, then you have to check the box.

  • Access Your Recent Messages:

If you want to access the text messages in Phone Link, your first task is to click on the Messages heading at the top. When the app is active, messages sent to you recently can be seen. If there exists any, you will be able to reply to the message and then send it. After that, you will be able to carry on a conversation from your PC or iPhone. Both devices will sync with each other.

  • Start A New Chat:

If you are willing to begin a new conversation, you can do so. In this case, you need to select a contact among all the contacts you have. After that, you have to compose and send your text. Now, you need to tap on the New Message icon to chat with another person. Next, your task is to enter the recipient’s phone number or name. Finally, you have to send the message after composing it. 

Using iOS Emulator (for Win 7/8/10/11)

You can also use an iOS emulator to run this messaging app from a Windows PC. With the help of iOS emulator software, you can simulate the iOS device environment on a PC or computer. It enables you to run iOS apps from another device. We have given here the steps that you need to follow to use an iOS emulator in order to get iMessage from Windows:

  • Your first task is to go to the website of the iOS emulator you will use. Then, you need to download the emulator.
  • After downloading this, your task is to install this file with Extension.exe on the computer.
  • Now, Running the emulator is your task. In this case, you need to accept the terms and conditions.
  • Once you complete the process of installation, you need to launch it on the computer.
  • Now, you need to look for the Apple Messenger app. Then, you have to launch this.
  • Finally, you can access this app easily on your PC.

Using Third-party App:

Your first task is to ensure that both your PC and your iPhone are connected with the same Wi-Fi.

  • Once you download and install the app, you need to open the Settings app.
  • Ensure that the server remains enabled under the Remote Messages tab.
  • Then, you have to type your new username and password to generate a new user profile under the General tab.
  • If you are willing to visit the third-party app website, your task is to open the web browser you are using. Then, your job is to enter the string of numbers located under “Current IP.” Next, you need to add a colon as well as the server port number after these numbers.
  • Suppose the IP address of the server is 172.17.154.166, whereas 333 is the server port. Then, you need to enter the server into the URL bar:

http://172.17.154.166:333

  • Your iPhone will now be connected to the Remote Messages. So, you will be able to see the actual messages on Windows.

How to Use iMessage On Windows Using a MacBook:

You can use the Chrome Remote Desktop to use this messaging app on your windows. It is another alternative approach you can follow to use iMessage on Windows. However, your first task should be setting up both your Mac and iOS devices.

Steps:

  • Your first task is to open the Settings app on the iPhone you are using. Then, you need to select your Apple ID account. After that, your job is to select the option named “Select iCloud”.
  • In case it is not already, your task is to toggle Messages to green so that you can confirm that it is using iCloud.
  • Your task now is to switch over to the MacBook you are using. Then, you need to launch the Messages app. After launching the app, your job is to sign in with an Apple ID and password. Suppose you have enabled two-factor authentication. In that case, you need to enter the verification once prompted.
  • You have to select Messages followed by Settings in the app’s Menu bar.
  • As soon as the iMessage tab pops up, you need to select it.
  • You can enable your account and your messages in iCloud if you want.
  • Your task now is to activate your email address and number that you are willing to use with iMessage on Windows.
  • Then, you need to choose where you are willing to begin the new conversation. After that, you have to select the Sync Now button.
  • You can now see iMessage working. After that, your job is to set up the Chrome Remote Desktop. To do so, you need to go to the official Chrome website and download the browser from there. Then, you have to install the browser.
  • Your job now is to sign in to your Google account using Chrome. If you do not have a Google account already, you have to create a new one.
  • Your task is to visit the Chrome Remote Desktop page. Then, you need to select Share this screen. After that, you have to select the blue download button, which is adjacent to Share this screen. Then, you need to tap on the Add to Chrome button in the pop-up window.

Further Steps:

  • Then, you will be capable of downloading the Chrome Remote Desktop extension. Once you are prompted, your task is to grant permission to the essential settings.
  • Ensure that your Mac is active so that you can use iMessage on Windows. Now, you need to go to System Preferences. Then, your job is to move to Energy Saver. You have to set your Mac to not sleep mode automatically, if the display is off. Otherwise, when you use iMessage, you need to activate the Mac. When you do not use this messaging app, you can leave this to go on standby.
  • If Chrome is not available on the laptop or Windows PC, you can install it from the official site. Then, you need to sign in with your account.
  • Your job now is to go to the Chrome Remote Desktop extension page. In order to add an extension to the browser, your job is to select Add to Chrome.
  • You have to head toward the Chrome Remote Desktop web app on the MacBook. Then, your task is to select Share this screen > + Generate Code.
  • Now on Windows, your task is to move to the Chrome Remote Desktop web app. Then, your job is to select Share this screen. Now, your job is to input the code that you have created on your MacBook under the option Connect To Another Computer.
  • As soon as you are prompted on your MacBook, you need to provide permission for the connections.
  • Once you follow the steps accurately, you can stream your Mac’s screen to the Windows PC. Thereafter, launching the iMessage app is possible via your streamed MacBook.

The Bottom Line:

iMessage is a very useful service that lets users send and receive messages without any cost. While as an iPhone user, you can use this service on your phone, you are also capable of accessing this app on Windows. In this article, we have given different ways to let you learn how to use iMessage on Windows. Follow any of these methods mentioned in this article to get your job done. For any confusion or queries, feel free to ask us via comments.

read more
AppsInternetSoftware

Chat GPT-4o

Chat GPT-4o

OpenAI has recently unveiled an upgraded version of ChatGPT-4, known as ChatGPT-4o. The purpose of its design is to offer faster text, vision and audio processing. OpenAI CTO Mira Murati launched the new model in a livestream event on May 13. This new model can provide enhanced performance. Murati highlighted at the event that all users will be able to use this upgraded version of ChatGPT-4 for free.

If you are a paying user, you will get the chance to continue to enjoy the expanded capacity limit. In this case, you should know that this expanded capacity limit is five times greater compared to those which the free users get. 

What Is Chat GPT-4o?

Chat GPT-4o is the latest flagship model of OpenAI that will be able to integrate enhanced reasoning capabilities across vision, audio, as well as text modalities in real-time. All users can access this upgraded variant for free.

If you are one of the users who have an OpenAI API account, you can access GPT-4o within Assistants API, Chat Completions API, and Batch API. GPT-4o is compatible with JSON mode and function calls. As a user, you are capable of initiating interactions via the Playground interface.

Accessing Chat GPT-4o With ChatGPT 

ChatGPT Free Tier:

Free-tier users will be defaulted to this upgraded version and have a limit on the number of messages they will be capable of sending using this model. It will vary based on demand and current use. If it isn’t available, these users will use GPT-3.5.

If you are a free user, you can get limited access to messages using advanced tools. Names of these advanced tools are:

  • Data analysis
  • File Uploads
  • Browse
  • Discovering and using GPTs
  • Vision

The advanced vision capabilities allow the model to boost accuracy in understanding your shared images. If you are a free tier user, at any time you can tap on ChatGPT to upgrade to Plus.

ChatGPT Plus And Team:

If you belong to the subscribers of ChatGPT Plus and Team, you will get access to GPT-4o on the chatgpt.com website with a larger usage cap. So, if you are a ChatGPT Plus and Team user, you can select this model from the drop-down menu at the top of the page.

ChatGPT Enterprise:

The main motive of the ChatGPT Enterprise is to fulfil the requirements of large enterprises by giving access to GPT-4o as well as GPT-4. New conversation on this enterprise will be defaulted to this new model, GPT-4o. As a user, you can select other models from the drop down menu located at the page’s top.

How To Use GPT-4o:

Organizations and users can use it in different ways:

  • ChatGPT Free: This new model is already ready to be available to ChatGPT chatbot’s free users. If you are a free user, you should know that the new model will replace the current default for ChatGPT. However, the free users can have restricted message access. Moreover, they will not be able to access a few advanced features like vision, file uploads and data analysis.
  • ChatGPT Plus: ChatGPT paid users can access the upgraded variant completely without the feature restrictions, which are made for free users.
  • API Access: Developers are able to access this model via OpenAI’s API. It lets you integrate into apps in order to use the variant’s full capabilities for tasks.
  • Desktop Applications: This new version has been integrated into desktop applications. For instance, it is integrated into a new app for Apple’s macOS ( launched on May 13).
  • Custom GPTs: Organizations are able to create custom GPT versions of this model in order to meet specific business requirements or departments. Users can get this custom model through OpenAI’s GPT Store.
  • Microsoft OpenAI Service: As a user, you can explore its capabilities within the Microsoft Azure OpenAI Studio in a preview mode, mainly designed for handling vision, test and other multimodal inputs. Azure OpenAI Service customers can examine its functionalities using the initial release in a controlled environment.

GPT-4o Integration With ChatGPT:

This new model will be integrated within the Free, Plus, and Team tiers of ChatGPT. It lets you leverage its capabilities for activities like text and vision.

  • Upgrading Access:

If you are a free user, you will be assigned automatically to this new model. But in this case, you should know that you will have message restrictions that will depend on usages and demands. Moreover, during the peak usage times, free-tier users will be reverted to GPT-3.5. Free-tier users should know that data analysis, file uploads and vision capabilities are some advanced features that will be limited for them.

  • GPT-4o Subscription Benefits:

In order to access the GPT-4o with advanced features and higher usage limits, users are able to subscribe to the ChatGPT Plus or Team plans. GPT-4o subscribers will be capable of sending up to eighty messages per three hours. On the other hand, ChatGPT-4 Plus subscribers are able to send a maximum of 40 messages within a particular period.

  • GPT-4o Message Caps:

It may happen that message caps get adjusted during peak hours in order to ensure accessibility for all users. Messages that are not used within three hours are not going to carry over to subsequent cycles.

  • GPT-4o Workspace Features:

Compared to ChatGPT Plus accounts, the message limits for this model are higher in ChatGPT Team workspaces. It provides advanced capabilities for collaborative environments. This upgraded variant’s introduction makes artificial intelligence more accessible to people and enables users to use advanced tools for text and  vision-based tasks.

What Can GPT-4o Do?

Among all the OpenAI models, the best one based on performance and functionality was GPT-4o (at the time of its release). Things that the model can do are as follows:

  • Real-time Interactions: It is capable of engaging in real-time verbal conversation without making any delay.
  • Knowledge-based Q&A: Like the previous GPT-4 models, this new variant can respond to questions. It uses a knowledge base to get trained.
  • Text Summarization And Generation: Like other GPT-4 models, it is able to execute common text LLM activities such as text summarization and generation.
  • Multimodal Reasoning And Generation: It can integrate text, voice and vision into a single model. This feature enables the model to process a combination of data types and respond to them. In addition, it is able to understand text, images, and audio at the same speed. Moreover, the model can produce responses through text, images, and audio.
  • Language And Audio Processing: It can handle over fifty different languages.
  • Sentiment Analysis: This feature helps the model to realize user sentiment across various modalities of audio, text, and video.
  • Reduced Hallucination And Improved Safety: In order to reduce the creation of wrong information, Chat GPT-4o is designed. By using enhanced safety protocols, it ensures that the outputs are correct and safe for users.
  • Voice Nuance: It creates speech with emotional nuances. Thus, it becomes beneficial for activities where communicating should be done sensitively.
  • Audio Content Analysis: GPT-4o is able to create and understand spoken language. It is possible to apply this model in audio content analysis, voice-activated systems, and interactive storytelling.
  • Large Context Window: GPT-4o has a context window which is compatible with up to 128,000 tokens. Besides, this model is able to maintain coherence over documents or longer conversations. Thus, this model becomes ideal for detailed analysis.

Further Things That Do:

  • Real-time Translation: Its multimodal capabilities are compatible with real-time translation from one language to another one.
  • Image Understanding And Vision: It is capable of analyzing videos and images and permits users to upload visual content that the model can understand, analyze and explain.
  • Data analysis: With reasoning and vision capabilities, you can analyze data that is available in data charts. Creating data charts is also possible for this model based on a prompt or analysis.
  • File Uploads: This model enables users to upload files. Thus, you, as a user, can analyze specific data.
  • Memory And Contextual Awareness: It remembers old interactions. Besides, it is able to maintain context over longer conversations.

The Bottom Line:

Chat GPT-4o, the upgraded version of ChatGPT-4, can offer GPT-4-level intelligence but is faster and comes with improved capabilities across text, voice, and vision. This new model is really better than any existing model regarding understanding as well as discussing the images which you share.

Frequently Asked Questions  

  1. Is ChatGPT 4o free?

Yes, it is going to be available for free to all users.

  1. Is ChatGPT-4 available?

#Yes, ChatGPT Plus subscribers can use ChatGPT-4.

  1. Is ChatGPT 4o better than 4?

Yes. Compared to the 4.0 version, ChatGPT 4o is a more advanced, effective and versatile tool, which can provide more detail and precision.

read more
SoftwareApps

What is an INSV File?

What is an INSV File?

Want to use an Insta360 camera to shoot 360 degree videos? You should know that Insta360 helps to save the shots as INSV files which are actually an internal format. You are capable of exporting them into a standard format like MP4 or JPG. Let’s dig into the article to learn “What is an INSV File?”

You can record INSV videos through H.264 or H.265 (HEVC) video codecs. With the help of these codecs, you are able to reduce the video size. Also, the codecs allow you to maintain the video quality. That’s why videographers use these files so much. In addition, these files are popular among sports enthusiasts. The reason is that they are able to record plenty of top-quality video footage and store them in a 360-degree camera.

What is an INSV File?

An INSV file refers to a file format which you can use to store panoramic video that Insta360 cameras capture. In order to capture outstanding videos and images, these cameras are designed and permit you to generate such types of content which can offer a 360 degree view of their surroundings.

Photographers and videographers love to use these cameras. In addition, these are useful for those people who look for unique ways to capture moments to tell the story of the content in an innovative way.

Insta360 camera series includes Insta360 ONE, ONE X, Titan, EVO, Nano, Air, etc. These allow you to capture 360-degree videos in INSV file format. You can also capture Virtual Reality HD videos in this format. In order to view or open these files, you have to use some apps, but it depends on what device you are using.

If you are working on Windows or Mac, you need Insta360 Studio to see them. On the other hand, you have to use the Insta360 Players app when you are using an Android or iOS device. With the help of this app, you are capable of editing your camera footage. Also, it lets you share and manage the footage. The app syncs the camera footage automatically from the camera. That’s why it becomes simple to edit videos or export them.

How to Open an INSV File:

If you are willing to open INSV files, you should use some particular software offered by Insta360. For instance:

  • Insta360 Studio: This software is used in macOS and Windows. It lets you play and edit those videos which you can capture using Insta360 camera models, for instance, ONE, Nano, Nano S, and Air.
  • Insta360 Studio 2019: This one is mainly for those videos which you capture using ONE X or EVO models. If you are a user of Windows or macOS, you should use this.
  • Insta360 Player: This app is mainly designed to use for iOS and Android devices.

Convert INSV File To MP4:

When you are willing to make these files more widely compatible, you need to export them to .MP4 video format. And in this case, you need to use Insta360 Studio to do so. If you see that the Insta360 Studio isn’t available, it is possible to rename the file extension to .mp4 from .insv. You can use VLC and other MP4 players in order to open the file as an MP4 file.

Remember that you can only change the format when you convert INSV format files. It is not going to flatten them automatically. Therefore, in order to process the footage, you have to use software.

Convert INSV Format Files To MP4 Format By Renaming The File:

Renaming the file is the easiest process to convert Insta360 video to MP4. These are the steps you need to follow to convert these INSV files to MP4.

  • When you are using your PC, your first job is to right-click on the INSV format file. Then, clicking on the Rename option is your task.
  • Then, removing the.INSV extension at the end is your job. Now, you have to include the .MP4 extension in order to convert INSV to MP4.
  • After adding the extension, your task is to press Enter. Then, you need to open the file using the software which supports MP4 format.

Convert Insta360 Video to MP4 with Insta360 Studio:

This free software lets you edit the video files and export them to .MP4 video format. These are the steps you need to follow in order to change the file to MP4.

  • Your first task is to drag the .insv file into this app. Then, you need to click on the Export option.
  • After clicking on the option, your task is to open a new Video Export Settings tab. Now, you need to switch this to the 360 Video. After that, your job is to adjust the export quality settings.
  • Next, your task is to set the bit rate between 70 and 100mbps.
  • Now, your job is to select the format of encoding— H.265 or H.264. Try to use H.265. The reason is that it can provide advanced compression.
  • Colour Plus and Remove Grain are examples of AI effects options. These offer enhanced colour vibrancy to the video. Additionally, these are able to delete the noise in darker areas.
  • As soon as you adjust the settings, you need to export the .instv file to .mp4. by clicking on OK. In order to save the video, you have to ensure that you have chosen the destination path.

A Brief Overview of the INSV Video Format:

In order to facilitate the recording process of 360-degree videos, Insta360 cameras made the INSV video format. Mainly, photographers, as well as those who love extreme activities, use INSV files. With the help of the Insta360 Studio 2019, you can view, play and modify these videos on your Windows or Mac.

Using Insta360 Studio, it will be possible to convert INSV files to MP4 format. However, the registry sometimes can’t allow the video files to open. Moreover, because of issues with the files or the problems with the OS, sometimes it may happen that you can’t open INSV files. Now, check these problems:

  • If space is not enough, it is not possible to preserve identifying data.
  • If the software is missing or corrupted, the system will not play the videos.
  • The files can be corrupted because of the copies, transfers, decompresses, and compressions.
  • A mistake in production can corrupt the video file. Some of the video files can contain malicious software and viruses.

To fix the problems, you can change the media player. Besides, you can change the format of the video to MP4. Or you are able to install the third-party antivirus software.

What Causes INSV Video Files to Get Lost?

If you do not handle the Insta360 camera properly, the INSV file can get lost. These are a few reasons for losing these video files:

  • Logical damage to the SD card
  • Formatting of Insta360 camera SD card
  • You didn’t handle the camera properly
  • Malware or virus infection
  • You are shooting on low space or low battery
  • Intentional or accidental deletion.
  • Interruption when you transfer files to a computer from the Insta360 camera.

The Bottom Line:

In this article, we have elaborated “What Is An INSV File” and other details of this file. Keep in mind the facts that can cause INSV video files to get lost. For any queries or doubts, you can ask us via comments.

Frequently Asked Questions  

  1. What does An INSV file contain?

The INSV file has video data that an Insta360 camera captures.

  1. How do you open an Insta360 file?

You first have to select File. Then, you need to select Open Files/Open Folder. Next, your task is to select the folder or the footage. Then, you need to open it.

  1. How do you view your Insta360 footage?

You need to connect your camera to your smartphone. Then, you can see the shooting page opening automatically in the App. After that, clicking on the album icon in the bottom left corner is your job.

read more
AppsDo It YourselfInternet SecurityTechnology News

How to Set Up Stolen Device Protection in iOS?

How to Set Up Stolen Device Protection in iOS?

A new feature is introduced by Apple for iPhones and the feature is called Stolen Device Protection. If someone is attempting to access your iPhone, it will provide additional security to your iPhone. Besides, the feature offers security when anyone tries to change the sensitive settings of your iPhone. This crucial security feature is introduced with iOS 17.3 and helps to keep your device protected when it is stolen. If you are away from any location like your workplace or home, it helps you by offering a security layer. Therefore, if someone has stolen your iPhone, the feature ensures that your accounts and personal information remain protected. Now, let’s learn how to set up Stolen Device Protection in iOS.

What Is The iPhone’s Stolen Device Protection?

It is an optional security setting which has introduced extra steps when you or someone will try to access your personal data in an unfamiliar location. Suppose you are using your device in your home or workplace. You will not see any change in your iPhone. But once you use it in a less frequent location, you get to see iOS adding more steps to accessing sensitive information, including different Apple ID details or payment information.

About Stolen Device Protection:

If you are not in any of your familiar places and have turned on the feature already, a few actions and features will have extra security requirements. With these requirements, you can ensure that no one can make any critical changes to your device or account despite knowing your passcode or stealing your iPhone.

  • Face ID Or Touch ID Biometric Authentication:

    A few actions need a single biometric authentication with Touch ID or Face ID. For instance, accessing credit cards or stored passwords need this. And there will not be any passcode alternative or fallback option.

  • Security Delay:

    If you want to change your Apple ID password, you need to wait for an hour. After that, you need to perform a Touch ID authentication or a second Face ID.

When your device is stolen, you can stop a thief from doing some unwanted things using the security delay feature. It allows you to mark the iPhone as lost. Thus, you will be able to ensure that your Apple account is secured. So you need to know what are the essential things to do when your device is stolen or lost.

If you are using your device in one of the common places, you do not need these extra steps. So, using your device passcode is possible like normal. Some of the familiar locations are your workplace, home and some locations where you often use your iOS device. If you want, then set up the feature to always require these extra security measures also when you are using your iPhone in a familiar location.

The feature was introduced with the release of iOS 17.3 or later. Ensure that you enable this feature before your device is stolen or lost. Now, let’s learn what stolen device protection can do and how to set up this protection in iOS.

What Does Stolen Device Protection in iOS Do?

As soon as a person accesses your device, they are able to change your Apple ID password. Therefore, you will be unable to unlock your account. It is not even possible to turn on the Lost Mode on your device using Find My. In order to prevent this, the feature limits the locations where it is possible to take specific actions on your iPhone. Suppose your device is not currently in a familiar location.

Biometric authentication:

In that case. Biometric authentication is necessary for the following actions, which are not possible to be performed with only a passcode:

  • Seeing Apple Card virtual card number.
  • Using passwords or passkeys that are saved in Keychain
  • Disabling Lost Mode
  • Trying to apply for a new Apple Card
  • Auto-fill payment methods in Safari
  • Erasing all content and settings
  • Using the iPhone in order to set up another new device
  • Taking Apple Cash and Savings actions in the Wallet

The security is capable of adding a security delay for other actions when you are not using an iPhone in a familiar location. You should use Touch ID or Face ID, and then you need to authenticate it.

Security Delay:

Thereafter, you need to wait for an hour before doing the actions mentioned below:

  • Turning off Stolen Device Protection
  • Signing out of your Apple ID
  • Changing the Apple ID password you have.
  • Updating the security settings of your Apple ID ( for instance, adding or removing a reliable device, Recovery Contact or Recovery Key)
  • Changing the iPhone passcode you have
  • Adding or removing Touch ID or Face ID
  • Resetting All Settings
  • Turning off Find My

In order to mark your iPhone as lost, the one-hour security delay is more than sufficient when your iPhone is physically stolen. As a user, you are capable of using the Find My app on your device or on another device of yours or you can use the device of someone else.

How To Set Up Stolen Device Protection In iOS:

If you want to use this, you must require iOS 17.3 or later. In addition, it is necessary to have a device where you have enabled Touch ID or Face ID and turned on the Significant Locations settings. When you have done these tasks already, you can turn on this extra security within a few steps.

The below steps are especially for iOS 17.4 and later. The company added an option which lets you use the additional protection while you are even at familiar locations. People who are on 17.3 can toggle on the security without any extra steps. Let’s learn now how to turn on the security feature on your iOS device.

  • Your first job is to open the Settings application.
  • Then, you need to tap on Face ID & Passcode.
  • Next, typing in the passcode is your task.
  • After scrolling down, your job is to tap on the security.
  • Finally, you need to toggle on the Stolen Device Protection.

You need to choose Always, which is available under Require Security delay if you need extra delay time everytime. Or you can choose Away From Familiar Locations if you need the delay only when you are away from any common place.

How To Turn On Or View Significant Locations On An iPhone:

This security needs to use Significant Locations. This setting uses the most frequented location of your phone to add features in Car Play, Maps, etc. But now, it is impossible to customise the data. Based on the location of your device, Significant Locations data has been generated over time. It is possible to see the data’s summary or you are capable of clearing the data when you move to a new house.

If you are willing to access your Significant Location settings, these are the steps you need to follow:

  • Your first task is to open the Settings app.
  • Then, your job is to tap on Privacy & Security.
  • After that, you need to tap on Location Services.
  • Now, selecting System Services is your job at the page’s bottom.
  • Your task thereafter is to find Significant Locations and tap on it.
  • Then, you are capable of turning on or off Significant Locations. You can also view the location of your home or clear out the existing data.

Stolen Device Protection in iOS has Its Caveats:

But this security has a drawback which is that it does not remain active in familiar locations. Suppose a person has got your passcode and then he or she is attempting to change something to the device at your work, home or other familiar locations. If it’s the case, the security feature will not prevent them from doing this. So, ensure that you are not entering your passcode when someone is near you or seeing you to do this.

When another person gets access to your device with the passcode, they can access even your other accounts except your Apple account, where they may be unable to make any changes. However, they might try to access your social media accounts and say that they forgot the password. Then, the site is going to share a new password to the given email ID. Thieves can access the email addresses on the iPhone and get the new passwords. Thereafter, they are able to buy different things and access accounts and social media history. 

Issues That Can Be Created By Security Delay:

The security delay might pose an issue. Suppose you have traded in the old models of iPhones at Apple stores. And you need to turn off Find My and erase the device. In order to do so, you need to disable the security feature before you proceed. But you may need to wait for an hour after trying for the first time, in case the Apple Store is an unfamiliar place.

That’s why it is recommended to turn off Stolen Device Protection at work or home when you are willing to trade in or sell the iPhone. Ensure that you do this before navigating to an Apple Store or another place. So, if you ask, should you need to turn on Stolen Device Protection? Then, you should know that turning on this security setting is a good idea.

Good Practices In public:

Although you have turned on the feature, these are the practices you should remember always:

  • Ensure that you are not giving your iPhone over to strangers to connect on social media, get contact details, etc.
  • You should not enter the passcode of your device in public places. Rather than that, you need to use Face ID or Touch ID.
  • When you are not using an iPhone, you need to put this in your bag, pocket or purse.
  • You must not connect to open public WiFi networks.
  • Ensure that you are not using any public phone charger.

What Happens If Your iPhone Is Stolen?

It is an extra layer which is added to an existing suite of tools. Stolen Device Protection security feature doesn’t allow thieves to steal sensitive information or erase your iPhone. 

Apple’s Find My permits users to  use a web browser or another device in order to locate a missing device. When you realize that your iPhone is stolen, instead of being misplaced, you need to use the Find My tool to mark the device as lost. Thereafter, you are able to use a passcode to lock your iPhone. Additionally, the tool showcases a custom message. For instance, it is possible to see a message saying where to return the phone in case it is lost.

You can also use a web browser in order to change the Apple ID password. Also, Apple lets you erase your iPhone or iPad remotely. Remember that although the warranty can’t recover theft or loss, you can get theft protection from AppleCare+ With Theft and Loss.

The Bottom Line:

When your device is stolen, you can not ensure that your sensitive information remains safe only by enabling the security feature. As soon as someone has stolen your iPhone and accessed your passcode, they are capable of making changes easily in third-party apps. Here, we have discussed How To Set Up Stolen Device Protection In iOS. For any doubts or confusion, you can ask us via comments.

Frequently Asked Questions  

  1. What Devices Does It Apply To?

It is applicable to devices like

IPhone XS and other newer models— second- and third-generation SE models.

  1. How can you stop someone from using your stolen iPhone?

With the help of Lost Mode, you are capable of locking your iPad, iPhone, iPod touch, Apple Watch or Mac. It allows you to prevent others from accessing your personal information.

  1. Why is stolen device protection not available?

In order to enable this feature, it is essential to enable the two-factor authentication for your Apple ID. Besides, your device should have a Face ID, a passcode, or a Touch ID. Also, ensure that you have enabled Find My.

read more
AppsTechnology News

How AI and Imagery Keep Speed Limits on Google Maps

How AI and Imagery Keep Speed Limits on Google Maps

When it comes to making roads safer for everybody, the speed limit is very important. But it may be difficult for drivers to know what the speed limit is. For instance, you are driving in low-visibility conditions, such as on a foggy day, in places with unfamiliar traffic laws, or you don’t know what the speed limit is at a specific moment.How AI and Imagery Keep Speed Limits on Google Maps?

Speed limit information is shown in Google Maps for streets nearby and around the world in order to help drivers navigate. While the information helps drivers to stay safe, it is also useful for automakers. The reason is that they work to increase the assisted driving capabilities in cars.

Let’s have a look at this article to learn how AI and Imagery keep speed limits on Google Maps updated.

How Does AI Help To Identify Speed Limits Around The World?

In order to map the world, people usually rely on data from various sources. The same thing happens when you want to understand the speed limits. Authoritative data from local governments is a vital source that lets people know about the default speed limits for different road types when no signage is there. For instance, the default speed limit in California is 25 miles per hour.

However, several roads are still there that have different speed limits during various weather conditions. You should use AI & imagery to capture all nuances within Google Maps.

The sophisticated AI models come with such designs that let you detect the speed limit information from Street View imagery & 3rd-party imagery sources. AI models are trained on multiple different signs from all different areas of the world. Therefore, no matter — how different a sign is looking, the AI model is able to detect the speed limit.

For instance, signs in the United States could have “speed limit” written on them. Whereas, the sign in Germany shows the number only. As soon as the AI model detects a sign, you can use GPS information from the image to match this to its geographic location. You will get to know when you should change the speed limit shown to you on Google Maps depending on where you are on the route.

How AI And Imagery Keep Speed Limits On Google Maps Updated?

Imagery and data can offer a strong foundation for the model of real-world speed limits. But the speed limit can change constantly, because of which they become hard to update. A few things like construction, community input & long-term traffic conditions can change the speed limit permanently or temporarily.

Google Maps analyzes traffic trends in order to deal with the issue and to understand whether a speed limit change would be there or not. For instance, you can see trends showing that cars are traveling consistently below the speed limit. If it happens, then make sure that the speed limit has been reduced. It may happen when a new school is made. Besides, it can happen when a local government determines that a road is at high risk for accidents.

Once the speed limit in an area is suspected as updated, it is necessary to cross-reference the change with many sources to confirm the change or deny it. These sources can be official data from local governments along with the refreshed Street View imagery.

To improve road safety, pictures of the particular stretch from 3rd party partners that are capable of gathering road information are requested in such areas where recent Street View imagery is not available. A combination of artificial intelligence is used to help the operations team to detect the sign in the images, extract the new speed limit information & update Google Maps, whether the partner has images available.

How Speed Limit Data Is Powering Future Driving Technologies:

For automakers who build cars with assisted or fully automated driving features, the information is useful. When you want a lot of these features to work, cars should know the speed limit as a human would. Being able to do it accurately has become an ever-pressing trouble for automakers, because more policies can regulate the assisted-driving features.

For instance, GSR or General Safety Regulations of the EU need new vehicles that will be registered after July 2024 and come with an ISA or intelligent speed assistance feature that is capable of showcasing the legal speed limit to warn drivers if they go over this. In order to meet the needs, vehicles should offer the accurate speed limits of at least 90% of drive.

Cars have default sensors and cameras that help car manufacturers capture a few essential speed limits. However, due to similar changes, detecting speed limit signs has become very hard, such as inclement weather, physical barriers & poor sign placement. You should know that vehicle sensors are a vital component.

It can assist in keeping Google Maps updated for all. The data is very important when it comes to completing the picture for automakers. With the help of speed limit data, the ISA feature in Volvo’s EX30 passed the EU’s GSR certification. It indicates that EX30 can showcase the legal speed limit even while no clear signs are on the road.

The Bottom Line:

Speed limits are crucial to keep roads safe for cyclists, drivers, and pedestrians. In addition, technology should be enhanced to let automakers build highly accurate assisted driving features. As a result, drivers will always feel confident on roads anywhere in the world.

Frequently Asked Questions: 

How is AI used in Google Maps?

It helps to improve the map’s accuracy itself. In order to make detailed maps of buildings, roads, etc, Google includes a combination of user data, Street View imagery, & satellite imagery.

How does Google Maps keep updated?

Google Maps has more than 7000 employees at present, and they work full-time for keeping Google Maps updated. They get information from satellites, cameras, field researchers, & the public.

What type of AI is used in Google Maps?

According to Google, it uses NeRF or neural radiance fields, which is an advanced artificial intelligence technique used to generate these true-to-life scenes. These can turn normal images into 3D representations.

read more
AppsTechnology News

10 Google Maps New Features

10 Google Maps New Features


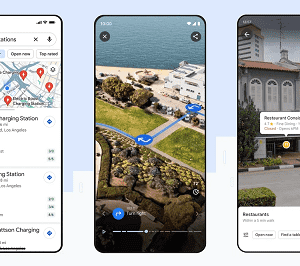
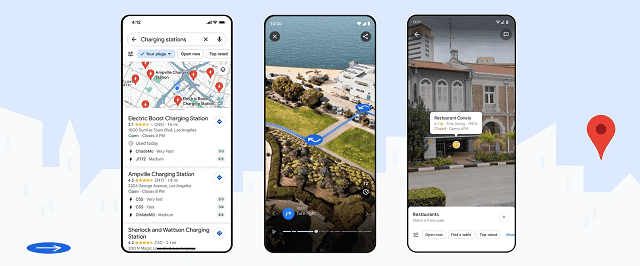
You can’t stop yourself from admiring the Google Maps New Features. While you will be able to discover new places, you can read reviews and check out menus before making a stop. Moreover, you are capable of checking the air quality of a place and if that place is wheelchair accessible. The Immersive View lets you experience virtually a new place like you are there and all credits go to AI & computer vision. It is possible to use the same technology for the entire route’s visualization. Here, we are going to mention 10 Google Maps New Features that you can try on your mobile when you are ready to get out.

10 Google Maps New Features That Help Me Navigate More Confidently:

  1. Navigate an unknown area more easily on foot:

The Live View walking direction feature helps to keep you pointed in the correct direction. If you want to use the feature, your task is to look for a spot in Maps & tap “Directions.” In the travel mode toolbar above the map, you will find a icon that indicates walking. You need to select the icon. Then, you need to tap on the  “Live View” option in the bottom center.

You need to follow the instructions that you can see on the screen to find the destination. As soon as Google Maps finds your location, it will provide you with directions through the camera view on your screen. Once you reach your place or if you need to take a turn, your mobile will start vibrating. This Live View feature allows you to navigate to tricky places indoors including airports, train stations & malls.

Amanda Leicht Moore, the director of Product Management for Maps, said that it was a technically complex feature to implement in Maps because it depends on Street View imagery which is paired with state-of-the-art AI & augmented reality technology.

  1. Find fuel-efficient routes when you drive:

If you are looking for any driving direction in Maps across the U.S., Canada, and Europe, the option informs you about the most fuel-efficient route. When you tap the path with the leaf icon, it can show the amount of fuel you save by taking eco-friendly ways along with the time difference between the route and the fastest one.

  1. Add many destinations to your directions:

Suppose you need to pick up your friend on your journey. After that, you will go to a restaurant for dinner. If something like this is going to happen, it is better to add multiple destinations to your directions in Google maps. After searching for the first destination, you need to tap on the “Directions” option. Now, choose the three dots in the top right.

Then, you have to tap on the option “Add stop” and thereafter,  you have to find the next destination. Ensure that you continue the method until you add all stops and tap “Done.” You should know that the app always computes the best possible way between your destinations. It gives users an estimated arrival time. Users can add up to nine stops in their path. Besides, it is possible to change the order of stops by applying the procedure of drag & drop. Moreover, you will be able to remove stops, and share the direction with others.

  1. Download maps for offline usage:

You should download a map for offline use when you drive in areas with spotty phone service. If you are willing to use the feature, your first job is to choose your profile picture or you can select the initial icon in the screen’s top right corner. Then, you have to tap “Offline maps,” and select the option “Select your own map.” By zooming in or out on the map, you will be able to select the area to where you want to have access when you are offline. Thn, your job is to tap on “Download.” Now, you will be able to use this for navigation without using an internet connection.

  1. Save places to check out later:

This feature lets you create lists that contain the names of the destinations you want to reach. Your first task is to press the “Saved” tab which you can view at the bottom portion of the Map home screen. While it is possible to generate new lists, you can add to the standard lists such as “Favorites” and “Want to go.” As soon as you generate a new list, the homepage will pop up with an “Add” button which lets you find destinations.

Otherwise, if you have discovered the place already that you are willing to add to a list, you need to pull up the location in Maps. Then, you have to scroll the screen to the right side through the chips. After that, you need to tap the “Save” option. Now, you have to select the list that you want to add it to. Additionally, adding notes is possible to remind yourself of the important information.

  1. Tweak arrival time to avoid being late:

Sometimes, you need to reach your destination on time like you may have a dinner reservation or a doctor’s appointment. Hence, you have to set an “Arrive by” time in Maps when you need to plan your route to ensure that you are not late.

Once you put your destination in the search bar, you need to hit the three dots in the top right. As soon as you click on the option “Set depart or arrive time,” your job is to enter your desired time. Now, you have to tap on “Done” in iOS or “Set” on Android. Next, Maps will compute the best way to reach your destination and will give you an estimated arrival time.

  1. Read reviews & see inside your place:

Before visiting a new place, most of us do a little homework like check out what is on the menu at a new coffee shop, or read the reviews of the foods. You will be able to do all this from Maps. If you want to access all these details at your fingertips, your task is to search for a place in Maps. After that, you have to scroll down to view reviews, images & videos from other users.

  1. Find out the ideal time to visit any destination:

If you are in a hurry, you may want to know how busy the place is, before you reach there. Waiting in a long line can be frustrating, if you have only a few minutes to grab a bite. After searching for a destination on Maps, you need to scroll down and a chart will show you the busy times of the spot at different times of the day.

  1. Share location with family & friends:

When you share your location to someone, it will help them to have an idea regarding when you will come after viewing your location. This one is beneficial as a safety feature also. If you are willing to share your location, you need to tap on the profile first. Then, you need to select people who can see your location by choosing the “Location sharing” option. Sharing location is possible with mobile contacts or Google or you can share with a link via the Messaging app.

  1. Find along your path for avoiding long detours:

Amanda said that the ability of Maps to find something along the route is the most requested feature. Suppose, you are willing to find a gas station along the route while making your way to the destination. Then, you need to tap on the search icon at the home screen’s top portion. You can choose any one chip which highlights the suggested categories. Otherwise, you can type what you are finding.

Now, you will get to see a list of results in Google Maps. It is possible to check ratings and the number of minutes the stop will add to your route so that you can choose the most efficient detour. Hence, your task is only to tap on your selection and hit the option named “Add stop”.

Conclusion:

This article has informed you about the 10 Google Maps New Features that will help you to navigate more confidently.

read more
AppsDo It YourselfTechnology News

How to Create a Contact Poster On iOS 17?

How to Create a Contact Poster On iOS 17?

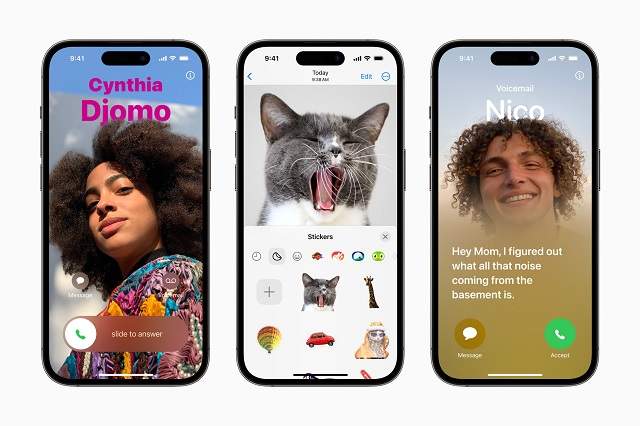
In June, Apple announced iOS 17 at WWDC. It is going to be released in the fall alongside the iPhone 15 models. Contact Posters is a feature belonging to the new software update. It is one of the communication upgrades brought by iOS 17 to the latest iPhones. If you use an iPhone 14 Pro or an older model, you can benefit from these features while updating. If you call someone who has saved your contact information in their address book, they can see your Contact Poster On iOS 17 entirely on their screen, instead of the old small thumbnail.

As soon as you set up, your selected contact picture & the personalized poster will become visible to someone with your matching phone number or Apple ID. NameDrop, developed by Apple, is a method that can exchange contact information across Apple devices. Just like AirDrop, for sharing contacts, it uses Bluetooth technology, and every person’s contact poster will be showcased as a visual representation of their identity. Let’s learn how to create a contact Poster on iOS 17.

What is contact poster iOS 17?

Contact Poster in iOS 17 is a new feature allowing you to customize how your contact card will appear when calling someone. You can customize the call screen appearing on other users’ iPhones, including the photo, name, typeface, style, pronouns, etc., for unfamiliar users. In this way, it is possible to present yourself & express your identity.

How To Create A Contact Poster On iOS 17:

You need to enable the beta software updates to get the Developer Beta in Settings. Beta software is not stable and can drain your battery life. In addition, it can carry the risk of data loss. You can expect a public release of iOS 17 this September.

Contact Posters work with NameDrop, a way through which we can exchange our contact info with someone new quickly. It is necessary to hold the mobiles together to exchange the name, number, and email.

Set up your Contact Poster—

  • First, your job is to move to Contacts app or the Phone app’ Contacts tab where you can get to see the contact card at the top. Then, you need to click on My Card and Contact Photo & Poster.
  • Next, you need to click on Edit so that you can generate or change contact posters.
  • Three slots will be available to make a Contact Poster. Then, you need to click the + for creating a new one.
  • Users can generate a Photo poster, a Memoji poster, or a Monogram poster. Once you click on Camera, you can create a Photo poster with an image that you have taken on the spot.

Create a Photo Contact Poster:

  • This interface is almost the same as making a Lock Screen. First, choose an image from your library, preferably a vertical photo. Try to take photos with Portrait Mode because the phone easily separates you from the background while applying color effects.
  • You need to swipe left & right between different filters on the picture separating you from the background. Then, your task is to click on the color circle which can be found in the bottom right corner so that you choose an accent color.
  • Next, customize font, and color by clicking on the name at the screen’s top. Use your two fingers to zoom the image and drag it around on the screen.
  • Then, you have to click on Done. Then, a preview of the contact image will appear. Now, you should click on the Crop option to reposition the photo. Otherwise, you can click Customize Photo to choose a different one. Once you complete the steps, you need to tap on Update or click on Skip to leave this as the default.
  • Once you complete the steps, a pop-up will appear and it will ask if you are willing to have this new contact poster and image to sync across all your devices.

Create a Memoji Contact Poster:

Use the Memoji contact poster when you are unwilling to present a picture of yourself. Hence, you can select a Memoji from the list. For instance, you can choose an animal or something you made of yourself. Has your Memoji fallen out of date? Then, try to update this with the available instructions. You can choose a preset face like winking, tongue out, thumbs up, etc. Besides, it is possible to capture your face’s expression. Some Memoji come with torsos and arms.

  • First, you need to tap on Memoji.
  • Then, your task is to select and click on the Memoji you prefer.
  • If you want to create a new Memoji, you need to tap the + icon.
  • You can pose as you want and then once you are ready, you need to click on the Shutter icon.
  • If you want to try again, you need to tap the Bin icon which you can find in the bottom left corner. However, you will be able to click and choose from the presets that can be found at the bottom of the screen.
  • Then, your task is to tap on Next in the top right corner.
  • You can use the pinch gesture, if you are willing to to resize and reposition the Memoji.
  • You have to tap on Cancel if you want to try again. Otherwise, you need to tap on Choose if you are okay with the image.
  • Now, what you need to do is to choose a background color for the Memoji.
  • Then, your task is to click on Next.
  • Now, the memoiji will be assigned to the Contact Poster. You need to click on the icon in the bottom left corner, if you want to change the background color.
  • After that, you need to tap and select your preferred color.
  • If you are willing to choose a custom color, you can click on the color wheel.
  • For adjusting the vibrancy of the background color, you can use the slider at the bottom.
  • Now, your job is to click on the X icon after customizing the background.
  • Next, you need to tap the contact name at the top to customize the same.
  • Now, you need to swipe and select your preferred font.
  • After that, your task is to use the slider so that you can adjust the font weight.
  • Now, you need to change your font color. To do so, tap the color wheel and select a custom color.
  • Then, you need to click on the X after customizing the contact name.
  • If you are willing to change the Memoji, you need to tap the icon in the bottom right corner.
  • Now, you will be able to select your preferred Memoji and customize it.
  • Then, you need to tap on Done in the top right corner after you finalize the Contact Poster.
  • After checking everything, you need to click on Continue at the bottom.
  • Finally, the poster will be assigned to the contact you have selected. Now, you need to tap on Done so that you can save the changes.

Create a Monogram Contact Poster:

The monogram contact poster lets you enter only two initials and choose a color. You will have a limited font selection: the system font, a rounded version, a condensed version, and a nice serif font. If you wish to create your name’s monogram, use the fancy serif font. You can see a shimmery bevel effect changing the light when you tilt your mobile. But it will appear so subtle that the letters seem blurry. You can expect this to change before iOS 17 releases this fall.

You need to follow this procedure to create a Monogram Contact Poster.

  • First, you have to launch the Phone application on your iPhone, and then your task is to navigate to the Contacts tab.
  • After that, your task is to click on the contact card at the top.
  • Next, you have to head toward the Contact Photo & Poster section.
  • Now, you should press the Edit button.
  • Then, you need to hit the plus (+) button at the bottom.
  • After that, you have to choose between Camera, Photos, Memoji, & Monogram.
  • You can then change the style by swiping horizontally.
  • Next, you have to change the style, color & typeface by clicking on your name at the top.
  • Press the Done button located in the top right corner once you do this.
  • After that, you need to hit the Continue button.
  • You can optionally set a profile image for iMessage & other Apple services.

It is very simple to create & customize a Contact Poster. As soon as you set up this, you are able to pick whether it’s shared automatically with all contacts or only those whom you approve.

Use your Contact Poster to share your contact info:

If you find a person who is using the iOS 17 beta, just bring mobiles together to exchange contact info. Then, both can view each other’s Contact Posters. Moreover, using the same feature, you will be able to start SharePlay. Once you receive a call from a person you know, their Contact Poster will appear on a beautiful new incoming call screen.

The bottom line:

People were previously able to share iMessage profile photos. And the availability of a Contact Poster On iOS 17 is certainly a welcome bonus that enriches iOS. The feature lets you recognize a caller by the larger photo and custom-made design. However, your contacts have to run iOS 17 or a later OS version to see your creation.

Frequently Asked Questions

  • What is a contact poster?

It is something through which Apple redefines the way you see your contacts & interact with them.

  • How do contact posters work?

You can customize how you will be represented when you call someone with the help of this new feature. Just like customizing your lock screen, changing your name’s font type, color, and full-screen image is also possible.

  • What is the poster template?

It refers to a basic template that can lay out what your finished poster will look like.

read more
AppsSocial MediaTechnology News

How to Delete a Playlist on YouTube

How to Delete a Playlist on YouTube

When you add videos to the playlist, you know things can get messy sometimes. That’s why it is essential to know how to delete a playlist on YouTube. Deleting a playlist is easy – no matter whether you are content creators or a normal run-off-the-mill YouTube viewer.

While YouTube is a famous site worldwide, it receives more than thirty million visitors daily. A lot of people spend most of their time watching YouTube videos. You can organize the videos through YouTube playlists. Besides, you may want to save a few videos for later. Playlists can help you in this case and let you organize the videos. You can use “Favorites” for all videos whereas “Music” playlist can be used for favourite songs. Let’s learn how you can delete a playlist on the app.

How to Delete a Playlist on YouTube as a Viewer:

Are you a casual YouTube viewer? Follow the process to delete the created playlists from both your phone and PC.

On the App:-

If you are using the YouTube app on an Android or iOS device, follow these steps to delete a YouTube playlist:

  • Your first job is opening the YouTube app on your mobile, whether you use Android or iOS.
  • After that, you should hit the profile icon that can be found in the YouTube app’s top right corner.
  • Then, your task is to choose Your channel.
  • After that, you need to go to Playlists.
  • Now, you can see a three-dot menu near every playlist. Click on the one beside the playlist which you are willing to delete.
  • The Delete option will be visible now, and you need to click on this. A confirmation message will appear thereafter. Then, you have to click on Delete again to delete your playlist.

Use Browser:

It is easy to delete a playlist on YouTube via the PC. You only have to follow the below-mentioned steps to do so.

  • Your first job is to open the YouTube app using a desktop or laptop browser.
  • After that, you need to find the profile icon that you can get on the top right corner of the screen. Then, you have to tap on it.
  • Now, your task is to find the Your Channel option and tap on this.
  • The Playlists section will appear then, and you have to tap on this.
  • It is now possible to see a list of all playlists you have created. Navigate to the one you are willing to delete. Now, you can see a three-dot menu where you have to tap on.
  • After tapping on the three-dot menu, two options will appear – Delete and Edit. Now, you have to tap on the Delete option.

 How to Delete YouTube Playlist as a Creator:

As a YouTuber, you may spend the most time with YouTube Studio. Therefore, learning how to delete a playlist on YouTube Studio is beneficial. You can perform the process both on your computer and phone.

On App:

  • First, you need to open the YouTube Studio app on your Android or iOS device.
  • The Content section will be available at the bottom panel. Then, you should click on it.
  • After that, your job is to click on the Playlists section.
  • Now, you will get to see the Playlists you have created. You need to click on the one you are willing to delete.
  • The edit icon is available in the topmost panel of the screen. Then, you need to click on it.
  • Now, what you need to do is choose the option: Delete playlist.
  • Then, you can see a confirmation popup window. After that, you need to tap on Ok.

Using browser:

  • First, you need to open the YouTube app on the PC browser.
  • Then, your task is to tap on the profile icon that you will get to see in the top right corner of the screen.
  • After that, your task is to navigate to YouTube Studio from the YouTube homepage.
  • Now, you have to select the option from the left window pane to visit the content section.
  • Tap on the Playlists section.
  • Next, you need to tap on the three-dot options menu near your playlist that you are willing to delete.
  • Now, the Delete Playlist button will be available. After tapping on this, a confirmation window will appear, and you need to tap on Delete again.

How can you (For Creators) delete individual videos from a YouTube Playlist?

YouTube not only allows users to delete the entire playlist, but also users can delete any specific video from their playlist. Let’s learn how to do it.

On App:

If you are a creator and willing to delete individual videos from a playlist, these are the steps that you need to follow.

  • Your first task is to open this app on your phone.
  • Then, you should hit the Profile icon at the top right corner.
  • Now, you need to choose Your Channel.
  • After that, your task is to head towards Playlists.
  • Then, you need to click on the playlist from which you are willing to delete the video.
  • Now, you have to select the three-dot menu near the video that you are willing to remove from your playlist.
  • Finally, your job is to click on the Remove from Playlist option.

Use Browser:

  • First, your job is to open this app on the computer using any browser.
  • Then, you need to hit the profile icon on the YouTube homepage.
  • Now, you have to choose YouTube Studio.
  • After that, your task is to select content on the left panel of YouTube Studio.
  • Next, you need to choose Playlists.
  • A list of playlists will appear thereafter. Then, your task is to move the mouse to the video to delete it. You can now see the Edit on YouTube option. Once you see this, you need to tap on it.
  • Recently added videos to the chosen playlist will appear on the right side of the next page.
  • Now, move the mouse over the video to remove it from the playlist so that you can see a three-dot menu. Finally, you need to tap on it.
  • When the Remove from [playlist_name] option will appear, you need to tap on this to delete it instantly.

How to Delete Individual Videos from a YouTube Playlist (For Viewers)

For mobile devices, this process is the same as that for creators. But for PCs, the process is a little bit different.

  • First, you need to choose the browser you want to open the app.
  • Then, what you need to do is choose the profile icon in the top right corner of the screen.
  • Thereafter, you have to select Your channel.
  • After that, your job is to tap on Playlists.
  • Now, you need to choose the playlist from which you are willing to remove videos manually.
  • You will see the recently added video start playing. Find the video you desire to remove from the playlist by scrolling the panel on the screen’s right side.
  • Now, your task is to move the mouse over the video to remove this from your playlist. Then, tap on the three-dot menu once it appears.
  • Finally, you should choose the Remove from [playlist_name] option.

Remove Another Creator’s Playlist from the Library:

We have discussed how to delete a playlist on YouTube. However, it is necessary to know that this app offers an option to save other creators’ playlists to your library. In addition, these can be stored in this playlist library. When you want to delete the Playlists, you need to follow these below-mentioned steps.

  • First, your task is to head towards your YouTube account and tap on the library page. Then, you will get to see a few playlists made by other accounts.
  • Now, you need to look for the playlist that you want to delete. After that, you have to tap the “view full playlist” button on that specific playlist’s bottom. Now, you can see a screen popping up. It looks similar to the previous screen but it has a difference. No drop-down menu exists to delete the playlist. The reason is that the playlist doesn’t belong to you any more. Therefore, you are unable to delete this. It is only possible to remove it from your library.
  • Your task is now to look for the symbol with the lines and the checkmark. Once you put a cursor on this, it will say “remove from library”. Finally, you have to hit the option to remove the playlist from the library.

The bottom line:

Creating playlists is one of the best features of YouTube. But sometimes, you may need to delete the Playlists, and this article is all about it. Go through the article properly to learn how to delete a playlist on YouTube. Still, if you have any questions or doubts, feel free to ask us via comments.

Frequently Asked Questions

  •  Why can’t you delete a playlist on YouTube?

If you want to delete a playlist on YouTube, you need to hit the three-dot menu from your mobile or PC. After that, your task is ro click the Delete option.

  • How do you delete a playlist from your YouTube library on your phone?

To delete a playlist from your YouTube library on your phone, first you should go to Profile. Then, you need to go to Your channel. After that click on Playlists. Then a Three-dot menu will appear and you need to click on it. Finally, tap on Delete.

  • How do you permanently delete a playlist?

When you select a playlist to delete, it will be deleted permanently. You will not be able to undo this.


read more
AppsDo It YourselfTechnology News

What is Mkv File? How to Open Files SKV File Extension?

What is Mkv File? How to Open Files SKV File Extension?

You may encounter MKV files when you download any video from the web or get any video from a person. These files especially appear when you download HD videos. It is not a popular video format like AVI or MP4. This one is often a puzzle where you have to find a process to play it. Let’s dive into this article to learn about mkv files like what is an mkv file, how to open it and so on.

What is an MKV File?

Mkv file is actually a multimedia container format instead of an audio or video compression format. With the help of this MKV container, it is possible to incorporate audio, video, and subtitles into a single file despite different encoding types being used by those elements. For instance, you can have a .mkv file which has H.264 video and MP3 or AAC for audio.

The primary purpose of the design of MKV container files was to make them future-proof. It means that these files will never be outdated. Many key features are included by the developers to make these things happen, like:

  • Fast seeking
  • Chapter, menu, and metadata support
  • Different chosen audio and video streams
  • Online streaming compatibility
  • Subtitle (hard-coded and soft-coded) support
  • Error recovery allows for the playback of corrupted files.

It is compatible with any audio and video format. Therefore, the format becomes simple to use & highly adaptive.

History:

These files are called Matroska Video files, originating in Russia in 2002. Lasse Kärkkäinen is its main developer who worked with Steve Lhomme ( Matroska’s founder) and a team of programmers for making the comprehensive multimedia container file format. The naming was done from the Russian word for Nesting Dolls, matryoshka.

Developers created the Matroska project, an open standards project. It indicates that this one is open source and free for everyone willing to use it personally. This company has several resources on their website, such as a list of playback options. The more time passed, the format got improved. Later in 2010, it became the basis for the WebM multimedia format.

How Can You Play MKV Files?

These files are not industry standard. Therefore, all media players do not support it though support has grown rapidly. There are several choices to play MKV files, which are as follows.

  1. Use VLC Media Player:

The preferable option, in this case, is using a VLC media player. You will like to use this mostly as it does not need you to install anything else, and it also comes with built-in support. Following the proper method, you can download & install the program easily. You need to start the process by visiting the official download page at videolan.org. Ensure that you are not going anywhere else, as many crapware vendors contain fake VLC download sites.

  • You need to run the file you downloaded for installing VLC. The whole process of installation needs up to two or three minutes.
  • Once you complete the installation, you can see any mkv file. Although VLC associates itself with all supported video & audio formats during the installation, it doesn’t register as a preloaded application for the file types.
  • If you want to watch an MKV file with this media player, you should first tap on the MKV file. Then, direct this to “Open With” and select “VLC Media Player.”
  • If you are willing to make VLC the default player for mkv files, tap on an mkv file, direct to “Open With,” and tap on “Choose Another App.”
  • You must choose “VLC media player” in the app selection window. Then, turn on the “Always use this app to open .mkv files” option, and hit “OK.”
  • Your task is to double-click an MKV file so that you can open this in VLC.
  • If you can not use the VLC player properly or it doesn’t suit you, use some suggestions from the Matroska website for Windows with built-in support.
  1. Use your mobile devices:

While on the move, you can get a chance to enjoy MKV videos & audio. When you are on the iOS platform, you can see the videos directly from the iPhone, iPad and iPod via the native PlayerXtreme Media Player. If you are an Android user, you should download and install the VLC’s mobile version or the Simple MP4 Video Player. Normal MP4 Player comes with a reader for other video formats.

  1. Download codecs for compatibility:

The media player can’t succeed at opening video files with an MKV extension. The reason is that it does not have the essential codecs to decide the file type. You should know that it is a viable option. So codecs let your media player decompress as well as play the MKV files.

You can turn the media player into an MKV file player, but remember that it can harm the PC. Ensure that you download codecs or other necessary software from the recommended sites. There are a few sites which hide crapware in famous software.

If you don’t know where to begin, navigate to Niite. It can offer free downloads devoid of any bloatware. When you go to Niite, you need to find a codec pack named Combined Community Codec Pack (CCCP). It can provide several codecs supporting many file formats.

If you are on the Niite landing page, your job is to choose the CCCP option. After that, tap on the “Get Your Niite” option. Then, the file starts downloading. As soon as it ends, you need to run this to install the codecs. You can select other apps from the site and install these, also. If you effect the changes, you should restart the PC. However, mkv files should mostly begin playing promptly.

  1. Converting to supported formats:

Sometimes, your MKV file reader does not detect mkv files despite downloading and installing the appropriate codecs. You can encounter an issue in your device that can lack the requisite resources to render MKV file formats. It is possible to convert MKV files to a format which hardware & software supports to solve the issue.

You can use a free video file converter to convert MKV files to other formats friendly to your device. It is possible to use the online version of some converters to save space on the device. However, ensure that it is not your first choice because video files are quite big. These take a lot of time to upload, convert and download the converted file.

You can use offline video converters when your device comes with ample storage space. But if there is no ample storage, it is possible to use external storage media, like thumb drives or external hard drives. Offline converters are cost-effective and fast enough because there is nothing to worry about bandwidth costs.

  1. Edit MKV files:

You can edit these files like other file types to apply changes you are willing to achieve. It is possible to include chapters & subtitles as well as delete them. Besides, you are capable of changing the video’s start & end points by trimming off unnecessary parts.

When you find a good video editor, your task is to start with the free versions first. There is nothing to pay for software if the free counterpart is capable of accomplishing as much. If you are willing, try MKVToolNix, a free program used for Windows, Mac & Linux. In most cases, free video editors suffer from major limitations. So you are unable to enjoy all the features.

How To Convert MKV Files?

Sometimes, any method you apply does not work. If so, try to convert the .mkv file to formats like MP4, AVI, etc. After that, play them on the preferable app.

1) Freemake Video Converter:

If you are a PC user, you may use Freemake Video Converter. This tool comes with a simple user interface. There are also many formats for output options.

It is the procedure following which you can convert MKV to MP4 or AVI with Freemake Video Converter:

  • Your first job is downloading and installing this tool in your system.
  • After that, you need to hit the +video button. Now, you should add this MKV file. It is also possible to drag and drop the file.
  • If necessary, edit the video.
  • The software comes with a default editor to cut, rotate, or join videos.
  • You can choose the output format, likely AVI or MP4.
  • While it is possible to choose from a ready preset, you can also custom-create one.
  • Tap on convert so that you can transform the MKV file into the selected mkv file format.
  • You can get a converted file in minutes and see it offline or upload it.

2) Handbrake:

Do you want to know how to open these files on Mac? If you are a Mac user, you can use Handbrake. Compared to the previous one, this one is a little complicated. However, it is not so hard to use.

Converting MKV file to MP4 or AVI is possible with Handbrake in the following way:

  • Your first task is to download Handbrake and install it on Mac.
  • Then, you should launch this.
  • After that, you must navigate to the Open Source button to add files or drag and drop the .mkv file.
  • You need to choose the output format, especially MP4, and a ready preset if you need this.
  • After that, your task is to head towards the Audio and Subtitles tabs so that you can choose the tracks to keep for future files.
  • It is possible to customize Codec, Framerate, bitrate, etc.
  • You should tap on Start to run the process of conversion.
  • After that, you will receive the converted MKV file.

3) CloudConvert:

Follow these steps to Convert MKV to MP4:

  • You need to open its website first and Signup.
  • Then, head toward Convert.
  • Choose MKV in the first box, and in the other box, you should choose MP4. Using this is possible to convert MP4 to MKV.
  • After that, head toward the Select File option. Now, choose the file that you are willing to convert.
  • It is possible to customize the Options.
  • Tap on Start Conversion.
  • Finally, your file is ready for downloading.

4) Wondershare Uniconverter:

All Media Player fans have to convert the MKV file to a format which allows to open & play this because Media Player doesn’t support MKV format. With the help of this tool, you can convert MKV File To Media Player Supported format for both Windows and Mac.

  • First, you have to launch the mkv file converter.
  • Then, hit the Add File icon on the toolbar.
  • After that, you should navigate to the folder with your MKV file.
  • Tap on Open to import the file. Otherwise, you can drag and drop the file.
  • Now, head toward the Output Format option.
  • Once you see the dropdown menu, choose a format that Media Player supports, such as WMV.
  • Hit the Start All button to begin the conversion.
  • You can receive that file in the format you have chosen. Open this thereafter in the Media Player.

It is possible to use the free trial version. However, it is not so helpful. If you want, purchase its Annual Plan for one year, one PC at $29.95. Otherwise, choose its Perpetual Plan, one PC for a lifetime. You can purchase this at $45.96. If you want a business plan, buy it at $161.91 for 2 Pcs. Remember that the cost can vary if you want more than two PCs.

Conclusion:

A few files use the same file extension though the formats are not related. They appear to be for similar-looking suffixes. For instance, files which are available in the MKA format are Matroska-related audio, without video. You can use Matroska 3D video files (MK3D) for stereoscopic video.

Frequently Asked Questions

How do you extract subtitles from MKV?

Downloading the MKVExtracGUI-2 special MKV subtitle extractor tool can extract subtitles from an MKV file. With the help of the tool, you can import an MKV file. After that, you have to choose the subtitles to extract. The program can extract the files in ASS or SRT format on the PC.

How do you burn MKV files to DVD?

Your first task is to convert the file to a supported file format with the help of Freemake Video Converter or any other program. As soon as the conversion is complete, you need to burn that new file to a DVD. You may use BurnAware Free and WinX DVD Author in this case.

Is MKV a better format than MP4?

We know mkv for converting DVDs and Blu-Ray discs to video files. Most people prefer to use MP4 to play videos on a browser. Besides, this one has less file overhead. Each one is better for some uses, whereas not so good for others.


read more
1 2 3 10
Page 1 of 10