close

Software

AppsInternetSoftware

Chat GPT-4o

Chat GPT-4o

OpenAI has recently unveiled an upgraded version of ChatGPT-4, known as ChatGPT-4o. The purpose of its design is to offer faster text, vision and audio processing. OpenAI CTO Mira Murati launched the new model in a livestream event on May 13. This new model can provide enhanced performance. Murati highlighted at the event that all users will be able to use this upgraded version of ChatGPT-4 for free.

If you are a paying user, you will get the chance to continue to enjoy the expanded capacity limit. In this case, you should know that this expanded capacity limit is five times greater compared to those which the free users get. 

What Is Chat GPT-4o?

Chat GPT-4o is the latest flagship model of OpenAI that will be able to integrate enhanced reasoning capabilities across vision, audio, as well as text modalities in real-time. All users can access this upgraded variant for free.

If you are one of the users who have an OpenAI API account, you can access GPT-4o within Assistants API, Chat Completions API, and Batch API. GPT-4o is compatible with JSON mode and function calls. As a user, you are capable of initiating interactions via the Playground interface.

Accessing Chat GPT-4o With ChatGPT 

ChatGPT Free Tier:

Free-tier users will be defaulted to this upgraded version and have a limit on the number of messages they will be capable of sending using this model. It will vary based on demand and current use. If it isn’t available, these users will use GPT-3.5.

If you are a free user, you can get limited access to messages using advanced tools. Names of these advanced tools are:

  • Data analysis
  • File Uploads
  • Browse
  • Discovering and using GPTs
  • Vision

The advanced vision capabilities allow the model to boost accuracy in understanding your shared images. If you are a free tier user, at any time you can tap on ChatGPT to upgrade to Plus.

ChatGPT Plus And Team:

If you belong to the subscribers of ChatGPT Plus and Team, you will get access to GPT-4o on the chatgpt.com website with a larger usage cap. So, if you are a ChatGPT Plus and Team user, you can select this model from the drop-down menu at the top of the page.

ChatGPT Enterprise:

The main motive of the ChatGPT Enterprise is to fulfil the requirements of large enterprises by giving access to GPT-4o as well as GPT-4. New conversation on this enterprise will be defaulted to this new model, GPT-4o. As a user, you can select other models from the drop down menu located at the page’s top.

How To Use GPT-4o:

Organizations and users can use it in different ways:

  • ChatGPT Free: This new model is already ready to be available to ChatGPT chatbot’s free users. If you are a free user, you should know that the new model will replace the current default for ChatGPT. However, the free users can have restricted message access. Moreover, they will not be able to access a few advanced features like vision, file uploads and data analysis.
  • ChatGPT Plus: ChatGPT paid users can access the upgraded variant completely without the feature restrictions, which are made for free users.
  • API Access: Developers are able to access this model via OpenAI’s API. It lets you integrate into apps in order to use the variant’s full capabilities for tasks.
  • Desktop Applications: This new version has been integrated into desktop applications. For instance, it is integrated into a new app for Apple’s macOS ( launched on May 13).
  • Custom GPTs: Organizations are able to create custom GPT versions of this model in order to meet specific business requirements or departments. Users can get this custom model through OpenAI’s GPT Store.
  • Microsoft OpenAI Service: As a user, you can explore its capabilities within the Microsoft Azure OpenAI Studio in a preview mode, mainly designed for handling vision, test and other multimodal inputs. Azure OpenAI Service customers can examine its functionalities using the initial release in a controlled environment.

GPT-4o Integration With ChatGPT:

This new model will be integrated within the Free, Plus, and Team tiers of ChatGPT. It lets you leverage its capabilities for activities like text and vision.

  • Upgrading Access:

If you are a free user, you will be assigned automatically to this new model. But in this case, you should know that you will have message restrictions that will depend on usages and demands. Moreover, during the peak usage times, free-tier users will be reverted to GPT-3.5. Free-tier users should know that data analysis, file uploads and vision capabilities are some advanced features that will be limited for them.

  • GPT-4o Subscription Benefits:

In order to access the GPT-4o with advanced features and higher usage limits, users are able to subscribe to the ChatGPT Plus or Team plans. GPT-4o subscribers will be capable of sending up to eighty messages per three hours. On the other hand, ChatGPT-4 Plus subscribers are able to send a maximum of 40 messages within a particular period.

  • GPT-4o Message Caps:

It may happen that message caps get adjusted during peak hours in order to ensure accessibility for all users. Messages that are not used within three hours are not going to carry over to subsequent cycles.

  • GPT-4o Workspace Features:

Compared to ChatGPT Plus accounts, the message limits for this model are higher in ChatGPT Team workspaces. It provides advanced capabilities for collaborative environments. This upgraded variant’s introduction makes artificial intelligence more accessible to people and enables users to use advanced tools for text and  vision-based tasks.

What Can GPT-4o Do?

Among all the OpenAI models, the best one based on performance and functionality was GPT-4o (at the time of its release). Things that the model can do are as follows:

  • Real-time Interactions: It is capable of engaging in real-time verbal conversation without making any delay.
  • Knowledge-based Q&A: Like the previous GPT-4 models, this new variant can respond to questions. It uses a knowledge base to get trained.
  • Text Summarization And Generation: Like other GPT-4 models, it is able to execute common text LLM activities such as text summarization and generation.
  • Multimodal Reasoning And Generation: It can integrate text, voice and vision into a single model. This feature enables the model to process a combination of data types and respond to them. In addition, it is able to understand text, images, and audio at the same speed. Moreover, the model can produce responses through text, images, and audio.
  • Language And Audio Processing: It can handle over fifty different languages.
  • Sentiment Analysis: This feature helps the model to realize user sentiment across various modalities of audio, text, and video.
  • Reduced Hallucination And Improved Safety: In order to reduce the creation of wrong information, Chat GPT-4o is designed. By using enhanced safety protocols, it ensures that the outputs are correct and safe for users.
  • Voice Nuance: It creates speech with emotional nuances. Thus, it becomes beneficial for activities where communicating should be done sensitively.
  • Audio Content Analysis: GPT-4o is able to create and understand spoken language. It is possible to apply this model in audio content analysis, voice-activated systems, and interactive storytelling.
  • Large Context Window: GPT-4o has a context window which is compatible with up to 128,000 tokens. Besides, this model is able to maintain coherence over documents or longer conversations. Thus, this model becomes ideal for detailed analysis.

Further Things That Do:

  • Real-time Translation: Its multimodal capabilities are compatible with real-time translation from one language to another one.
  • Image Understanding And Vision: It is capable of analyzing videos and images and permits users to upload visual content that the model can understand, analyze and explain.
  • Data analysis: With reasoning and vision capabilities, you can analyze data that is available in data charts. Creating data charts is also possible for this model based on a prompt or analysis.
  • File Uploads: This model enables users to upload files. Thus, you, as a user, can analyze specific data.
  • Memory And Contextual Awareness: It remembers old interactions. Besides, it is able to maintain context over longer conversations.

The Bottom Line:

Chat GPT-4o, the upgraded version of ChatGPT-4, can offer GPT-4-level intelligence but is faster and comes with improved capabilities across text, voice, and vision. This new model is really better than any existing model regarding understanding as well as discussing the images which you share.

Frequently Asked Questions  

  1. Is ChatGPT 4o free?

Yes, it is going to be available for free to all users.

  1. Is ChatGPT-4 available?

#Yes, ChatGPT Plus subscribers can use ChatGPT-4.

  1. Is ChatGPT 4o better than 4?

Yes. Compared to the 4.0 version, ChatGPT 4o is a more advanced, effective and versatile tool, which can provide more detail and precision.

read more
InternetSoftwareTechnology News

Apple Unveils iOS 18 Accessibility Features, Including AI-Powered Eye Tracking

Apple Unveils iOS 18 Accessibility Features, Including AI-Powered Eye Tracking

Apple recently unveiled some new and exciting accessibility features in iOS 18. Apple Unveils iOS 18 Accessibility Features, Including AI-Powered Eye Tracking. These new features, such as Taptic Engine, Eye Tracking, Vocal Shortcuts, Music Haptics, and more for iOS and iPad OS can empower people with disabilities.

The company said that these features are ready to hit the market later 2024 and are expected to be a part of the iOS 18 update. You can expect the features to be available with other future software updates such as iPadOS 18, and visionOS 2. When it comes to talking about accessibility features, this tech giant never fails to impress its users. This year again, these new and exciting accessibility features are announced by Apple in order to help users with disabilities. Among the beneficial features that Apple previewed, eye tracking grabs the most attention. It is a unique feature of Apple Vision Pro and will be available on iPhone and iPad.

What Did Apple Say?

In order to enrich lives, Apple always tries to bring innovative features while having faith in the transformative power of innovation. That’s why this tech giant has championed inclusive design while embedding accessibility at the core of their hardware as well as software. Their intention is always to push the boundaries of the technology level and through these new features, Apple is trying to provide the best experience to its users.

iOS 18 Accessibility Features To Look For:

Eye Tracking:

Eye tracking is a feature powered by AI. This feature enables you to navigate your device with your eyes if you are an iPhone or iPad user. It is similar to what was seen on the Apple Vision Pro. This Eye Tracking feature on iPhones and iPads is mainly designed for people with physical disabilities to allow them to control their devices by looking at them.

In this case, a front-facing camera is used in order to determine the element you are viewing. As a user, you only need to gaze at a button to make this highlighted. After that, you need to hold the gaze for a few seconds so that you can select the button using your eyes. You can see every data stored on your device because of the on-device machine learning technology. The best thing is that all data will remain protected and will not even be shared with Apple.

This feature can work across iOS and iPadOS apps. So there is no need to use extra hardware or accessories. If you are willing to activate any element and also access functions including swipes, physical buttons, and other gestures with eyes, your job is to use the Dwell Control.

Music Haptics:

This feature is designed especially for people with hearing disability. It helps them to experience music on their iPhones via haptic feedback (powered by Taptic Engine). Once you enable this accessibility feature, the Taptic Engine will begin playing textures, taps as well as refined vibration to the music’s audio. Developers get this feature as an API because of which music can be accessed more easily in their apps. It can work for many songs in the Apple Music catalogue.

Vocal Shortcuts:

iPhone and iPad users are capable of designating Siri with verbal instructions using the feature. Thus, they are able to launch shortcuts and complete actions. Atypical Speech is one of the features which let you widen the scope of speech recognition. Apple says that the vocal shortcut feature has the ability to recognize vocal patterns via ML technology.

Vehicle Motion Cues:

For iPhone and iPad users, it is a new experience. With the help of this feature, reducing motion sickness is possible for those people who are in moving vehicles. According to research, a sensory conflict between your view and your feelings causes motion sickness. As a result, users may not use their iPhone or iPad comfortably while in a moving vehicle.

With this feature, animated dots on the screen edges help to represent changes in vehicle motion so that it can reduce sensory conflict without interfering with the actual content. This feature uses the built-in sensors of iPhone and iPad to recognize when you are in a moving vehicle and according to this, it will respond. In order to show the feature on your iPhone automatically, you can set it. Moreover, you are able to turn the feature on or off in the Control Center.

Enhanced CarPlay Accessibility:

CarPlay is going to be available with three new accessibility features, including sound recognition, color filters, and voice control.

  • Voice Control:

With the help of voice control feature, you can navigate CarPlay. It allows you to use your voice in order to control apps.

  • Sound Recognition:

This feature is able to alert drivers to nearby sirens and is mainly designed for the deaf or those who have hearing issues.

  • Color Filters:

This feature improves the CarPlay interface for color-blind users.

These features, which can be launched with iOS 18, give a hint at a major focus on machine learning and artificial intelligence technology at the future WWDC event.

VisionOS Accessibility Updates:

VisionOS is expected to bring new accessibility features such as Smart Invert, Live Captions for FaceTime, and a Dim Flashing Lights feature to boost usability for all users.

  • Live Captions: It can help you to follow spoken dialogue in apps and live conversations.
  • Apple Vision Pro Updates: These will enhance the caption control. Also, it offers support for more hearing devices.
  • Additional Vision Accessibility Updates: It comes with Smart Invert and Reduce Transparency features which are useful for people with low vision.

These features are already available in the Apple Vision Pro in order to provide a flexible input system as well as an intuitive interface that is designed to aid the maximum number of users. With the help of VoiceOver, Zoom, and Color Filters features, blind people or users with low vision can access spatial computing. Moreover, you are capable of controlling Vision Pro with your hands, eyes or voice. In this case, you need to use accessibility features such as Switch Control, Sound Actions, etc. In addition, a feature called Dwell Control exists that is beneficial for people with physical disabilities.

Additional Updates:

  • VoiceOver: This feature will come with new voices, custom volume control, a flexible Voice Rotor, etc which are advantageous for blind people or the users with low vision. Besides, Mac users can use the feature to customize VoiceOver keyboard shortcuts.
  • Magnifier: The Magnifier will be available with a new Reader Mode. In addition, it will include an option allowing you to easily launch Detection Mode with the Action button.
  • Braille Screen Input: Braille users will be able to get a new way in order to start as well as stay in Braille Screen Input for faster control & text editing. Moreover, the Japanese language will be available for Braille Screen Input. It will be compatible with multi-line braille with Dot Pad. There will be an option letting you choose different input and output tables.
  • Hover Typing: People with low vision can use the hover typing feature to see larger text when they type in a text field and in their preferred font & color.
  • Personal Voice: If you are one of those who is at risk of losing speaking ability, then you should use the Personal Voice feature, which is available in Mandarin Chinese. If you can’t pronounce or read full sentences easily, you should create a Personal Voice using shortened phrases.
  • Live Speech: This feature will be available for non-speaking users. It adds categories as well as simultaneous compatibility with Live Captions.

More iOS 18 Accessibility Features:

  • Virtual Trackpad for AssistiveTouch: This feature is useful for people with physical disabilities, as it allows them to control their devices using the screen’s small region as a resizable trackpad.
  • Switch Control: This feature comes with an option with the help of which using camera to recognize finger-tap gestures as switches in iPhones and iPads will be possible.
  • Voice Control: It is one of the features that provides support for complex words and custom vocabulary.
  • You can see the Hover Typing experience and the new Reader Mode in Magnifier on iPhone 15 Pro.

Celebrate Global Accessibility Awareness Day With Apple:

Apple brings new exciting features along with some curated collections to celebrate the Global Accessibility Awareness Day:

  • Apple Store locations can host free sessions, allowing the customers to explore these accessibility features.
  • You can visit Apple Support to learn the way of customization using default accessibility features. Apple Accessibility playlist allows users to learn the way of personalizing Apple Vision Pro, iPhone, iPad, Apple Watch, and Mac by helping them to adapt the gestures to customize the way in which information is presented on the screen of the device.

The Bottom Line:

Apple, the tech giant has previewed a few accessibility features which are expected to arrive with iOS 18, iPadOS 18, and visionOS 2 later 2024. Some important accessibility features of iOS 18 and iPadOS 18 include— Eye Tracking, Vocal Shortcuts, Vehicle Motion Cues, Music Haptics, and CarPlay improvements. If you are an iPhone or iPad user, you can navigate your device with your eyes using the eye tracking feature.

Frequently Asked Question: 

  1. Do iPhones track your eyes?

Yes. The eye-tracking feature of iPhones, which is useful for people who are disabled physically, uses Artificial Intelligence and the front-facing camera in order to calibrate in seconds to permit the users to navigate their iPad and iPhone with their eyes.

  1. Which iPhone is best for blind users?

The iPhone 15 Plus is considered the best model for visually impaired users as this model comes with a large screen and extensive accessibility features.

  1. Can you use Apple Vision with one eye?

Yes, you are able to adjust the settings to use Apple Vision with only one eye.


read more
SoftwareApps

What is an INSV File?

What is an INSV File?

Want to use an Insta360 camera to shoot 360 degree videos? You should know that Insta360 helps to save the shots as INSV files which are actually an internal format. You are capable of exporting them into a standard format like MP4 or JPG. Let’s dig into the article to learn “What is an INSV File?”

You can record INSV videos through H.264 or H.265 (HEVC) video codecs. With the help of these codecs, you are able to reduce the video size. Also, the codecs allow you to maintain the video quality. That’s why videographers use these files so much. In addition, these files are popular among sports enthusiasts. The reason is that they are able to record plenty of top-quality video footage and store them in a 360-degree camera.

What is an INSV File?

An INSV file refers to a file format which you can use to store panoramic video that Insta360 cameras capture. In order to capture outstanding videos and images, these cameras are designed and permit you to generate such types of content which can offer a 360 degree view of their surroundings.

Photographers and videographers love to use these cameras. In addition, these are useful for those people who look for unique ways to capture moments to tell the story of the content in an innovative way.

Insta360 camera series includes Insta360 ONE, ONE X, Titan, EVO, Nano, Air, etc. These allow you to capture 360-degree videos in INSV file format. You can also capture Virtual Reality HD videos in this format. In order to view or open these files, you have to use some apps, but it depends on what device you are using.

If you are working on Windows or Mac, you need Insta360 Studio to see them. On the other hand, you have to use the Insta360 Players app when you are using an Android or iOS device. With the help of this app, you are capable of editing your camera footage. Also, it lets you share and manage the footage. The app syncs the camera footage automatically from the camera. That’s why it becomes simple to edit videos or export them.

How to Open an INSV File:

If you are willing to open INSV files, you should use some particular software offered by Insta360. For instance:

  • Insta360 Studio: This software is used in macOS and Windows. It lets you play and edit those videos which you can capture using Insta360 camera models, for instance, ONE, Nano, Nano S, and Air.
  • Insta360 Studio 2019: This one is mainly for those videos which you capture using ONE X or EVO models. If you are a user of Windows or macOS, you should use this.
  • Insta360 Player: This app is mainly designed to use for iOS and Android devices.

Convert INSV File To MP4:

When you are willing to make these files more widely compatible, you need to export them to .MP4 video format. And in this case, you need to use Insta360 Studio to do so. If you see that the Insta360 Studio isn’t available, it is possible to rename the file extension to .mp4 from .insv. You can use VLC and other MP4 players in order to open the file as an MP4 file.

Remember that you can only change the format when you convert INSV format files. It is not going to flatten them automatically. Therefore, in order to process the footage, you have to use software.

Convert INSV Format Files To MP4 Format By Renaming The File:

Renaming the file is the easiest process to convert Insta360 video to MP4. These are the steps you need to follow to convert these INSV files to MP4.

  • When you are using your PC, your first job is to right-click on the INSV format file. Then, clicking on the Rename option is your task.
  • Then, removing the.INSV extension at the end is your job. Now, you have to include the .MP4 extension in order to convert INSV to MP4.
  • After adding the extension, your task is to press Enter. Then, you need to open the file using the software which supports MP4 format.

Convert Insta360 Video to MP4 with Insta360 Studio:

This free software lets you edit the video files and export them to .MP4 video format. These are the steps you need to follow in order to change the file to MP4.

  • Your first task is to drag the .insv file into this app. Then, you need to click on the Export option.
  • After clicking on the option, your task is to open a new Video Export Settings tab. Now, you need to switch this to the 360 Video. After that, your job is to adjust the export quality settings.
  • Next, your task is to set the bit rate between 70 and 100mbps.
  • Now, your job is to select the format of encoding— H.265 or H.264. Try to use H.265. The reason is that it can provide advanced compression.
  • Colour Plus and Remove Grain are examples of AI effects options. These offer enhanced colour vibrancy to the video. Additionally, these are able to delete the noise in darker areas.
  • As soon as you adjust the settings, you need to export the .instv file to .mp4. by clicking on OK. In order to save the video, you have to ensure that you have chosen the destination path.

A Brief Overview of the INSV Video Format:

In order to facilitate the recording process of 360-degree videos, Insta360 cameras made the INSV video format. Mainly, photographers, as well as those who love extreme activities, use INSV files. With the help of the Insta360 Studio 2019, you can view, play and modify these videos on your Windows or Mac.

Using Insta360 Studio, it will be possible to convert INSV files to MP4 format. However, the registry sometimes can’t allow the video files to open. Moreover, because of issues with the files or the problems with the OS, sometimes it may happen that you can’t open INSV files. Now, check these problems:

  • If space is not enough, it is not possible to preserve identifying data.
  • If the software is missing or corrupted, the system will not play the videos.
  • The files can be corrupted because of the copies, transfers, decompresses, and compressions.
  • A mistake in production can corrupt the video file. Some of the video files can contain malicious software and viruses.

To fix the problems, you can change the media player. Besides, you can change the format of the video to MP4. Or you are able to install the third-party antivirus software.

What Causes INSV Video Files to Get Lost?

If you do not handle the Insta360 camera properly, the INSV file can get lost. These are a few reasons for losing these video files:

  • Logical damage to the SD card
  • Formatting of Insta360 camera SD card
  • You didn’t handle the camera properly
  • Malware or virus infection
  • You are shooting on low space or low battery
  • Intentional or accidental deletion.
  • Interruption when you transfer files to a computer from the Insta360 camera.

The Bottom Line:

In this article, we have elaborated “What Is An INSV File” and other details of this file. Keep in mind the facts that can cause INSV video files to get lost. For any queries or doubts, you can ask us via comments.

Frequently Asked Questions  

  1. What does An INSV file contain?

The INSV file has video data that an Insta360 camera captures.

  1. How do you open an Insta360 file?

You first have to select File. Then, you need to select Open Files/Open Folder. Next, your task is to select the folder or the footage. Then, you need to open it.

  1. How do you view your Insta360 footage?

You need to connect your camera to your smartphone. Then, you can see the shooting page opening automatically in the App. After that, clicking on the album icon in the bottom left corner is your job.

read more
InternetSoftwareTechnology News

What is AAE File Extension?

What is AAE File Extension?

Several Apple users can see AAE file after sharing edited images from one device to such a device which is running a different OS-based device. Have you encountered this problem also? Do you want to know what is a .aae file and which step you should take? Then, check this article.

 What is an AAE file extension?

AAE files refers to the record of all edits made to a picture by a person in the iOS version of Apple Photos. People can use this to share edits from iOS to macOS. Besides, reverting the pictures to the original form is possible when necessary. These files remain stored alongside the pictures whose edits they contain.

What Does AAE Stand For?

According to some people, these originated with the Apple Aperture photo management application on Mac. For a non-destructive editing system, it used XML sidecar files. Hence, you need to know about the term which stands for “Apple Aperture Edits,” “Apple Aperture Extension,” etc. Apple introduced the files first in iOS 8 and Mac OS X 10.10 Yosemite in 2014. They announced the discontinuation of Apple Aperture & iPhotodflr, the new photos app.

More Information:

Photos app makes these files in iOS 8 and later and macOS 10.10 and later. These files save edits that are created in Photos. Therefore, original pictures of the user aren’t overwritten when edited.

If you open an edited .JPG file in the Photos app, it will indicate the linked AAE file of the JPG & apply edits it contains. Data of the AAE file is saved in the XML format. It indicates that you can open the files & see them using a text editor like Apple TextEdit or Microsoft Notepad.

Photos app makes a unique XML file with an AAE file extension every time you will edit an image. This extension contains information on the edits made to an image to allow original pictures to retain without any changes. Moreover, you will be able to undone the edits at any time.

The iPhone stores these files alongside the images. Therefore, for instance, if you share the images from an iPhone to Windows, you can see a file called “IMG_0026.AAE” and it will match another file called “IMG_0026.JPG.”

Can you delete AAE files in Windows?

While importing images edited with the help of the Photos app to Windows or the old version of mac OS, you can see AAE files accompanying the photos. If you use Windows, you will see the .aae extension hidden by default. But the names of AAE files remain the same as the JPG files whose edits they contain. Once you share images into Windows, deleting pictures’ AAE files is possible without erasing the connected pictures.

How Do You Open an AAE File in Windows?

This one is an XML formatted file, so you can open it on Windows or Android. Although it does not function in Windows, the file can still be viewed. Check this below-mentioned procedure to learn how to open an AAE file in windows 10:-

  • Your first task is to tap on the “AAE” file.
  • Now, choose “Open with” from the dropdown menu.
  • After that, your job is to select a text editor to open the file. Use Notepad or Microsoft Word in such cases.

Although users open the files in a text editor or on Windows or Android devices, applying changes to the corresponding JPEG file is impossible.

AAE File Format:

These are saved as XML files, human-readable file format, to disc. Therefore, you can open this in text editors like Apple TextEdit on macOS and Microsoft Notepad on Windows OS. You can use Notepad++ to open AAE files.

Opening an edited JPG file in the Photo app will read the change log from the respective .aae file. Next, it will apply edits to the image before showcasing this to the user.

Do you Need to Save AAE Files?

People planning to keep iPhone photos permanently on a platform that is incompatible with the Apple Photos app, such as Windows or Linux, should not save these files.

Conclusion:

Do you want to open the files later on a Mac, iPhone, or iPad? If so, then you need to keep these AAE files with the original photos in the same directory. The Photos app can read them.

Frequently Asked Questions:

Can you Delete AAE Files From iPhone?

Remember that these files are essential if you want to apply any change to the original images on your iPhone. Deleting the files allows the corresponding edited picture to return to its actual condition. As these files are not so big, they will not consume too much space. However, if you want to save space, you can convert AAE files to JPEG. Then, you should delete the AAE file.

How Do You Open an AAE File on iPhone?

These files can be analyzed automatically on Apple devices that run on the latest versions of iOS or macOS. There is no need to open the files. You can use a text editor program. The similar thing is applicable to Windows, Linux, or Android devices.

What is the AAE file?

It is a unique file type used by Apple Photos to keep track of changes you make to the images.

read more
Do It YourselfInternetSoftwareTechnology News

How to Fix File Explorer Not Responding Windows 10

How to Fix File Explorer Not Responding Windows 10

Windows Explorer is the basic way through which you can navigate into your System. With the help of Explorer, you are capable of seeing, accessing, & managing all files on your device. But sometimes, the explorer does not respond, or it gets frozen or won’t open. Therefore, you will encounter several issues when you try to use your PC. When it doesn’t respond, you will no longer be able to interact with the app’s interface. Let’s see how to fix file explorer not responding windows 10 problem.

What Is File Explorer?

File Explorer, known as Windows Explorer is a default application in Microsoft Windows operating system. The graphical user interface enables users to access & manage drives, folders and files.

What causes Windows Explorer not to respond to errors?

No specific reason exists which could be the origin of the disturbing problem. Depending on user reports, it can be said that several causes can lead to this error.

  • Ensure that your File Explorer history is cleared. The history of File Explorer can be clogged, resulting in Windows Explorer behaving incorrectly. Try to clear the history. We have mentioned later how to do this in the solution section.
  • If there is any change to display settings like the font size, the issue can appear. Have you changed the settings recently or allowed an app to change them? Then, remember that reverting is the most effective way to do so.
  • If you use an outdated Windows 10 version, it can cause you the problem. Therefore, you must update the windows. The new update always comes with new bugs, which sometimes irritates you. It can patch up multiple existing problems and security holes. Ensure that you update to the latest release of Windows 10 if you run its older version.
  • File Explorer cannot work properly when your System drive runs out of space. Hence, it is essential to create some space to make windows explorer functional.

Solutions to resolve File Explorer not responding windows 10:

Solution 1. Restart File Explorer in Task Manager:

  • Your first job is tapping Ctrl + Shift + Esc to start the Task Manager.
  • After that, you need to tap on Windows Explorer in Task Manager. Then, you should select the End task.
  • Next, your task is tapping File on the upper left corner. Now, you should select Run new task.
  • Now, you have to input explorer.exe in the box. You should tap on Enter thereafter.

Thus, windows explorer can restart. Finally, check if the file explorer is not responding Windows 10 problem has been fixed or not.

Solution 2. Manually Restart the Explorer.exe Process via Command Prompt:

 According to some people, it is possible to restart file explorer through Command Prompt commands. If you are unable to launch file explorer normally or facing the windows explorer not working issue, restarting the explorer.exe process is possible with some easy commands.

  • You should go to the Windows 10 Cortana box and input cmd in it. Then, you have to tap on the most suitable match to open the Command Prompt window.
  • Next, input taskkill /f /im explorer.exe in the CMD window. Then, you need to tap on Enter. Once you apply the command, you can end the explorer.exe process. Then, a blank screen will appear behind the Command Prompt window.
  • You should type start explorer.exe in Windows for starting the procedure again. Therefore, tap on Enter.

Now, you can see desktop icons, Taskbar, etc.

Solution 3. Run System File Checker Scan:

It is a default tool to scan for corruption in Windows system files and restore corrupted files. Sometimes, your drive’s corrupted files can be behind the problem. Several people say that performing System File Checker scans allows them to fix the problem. You should try the scan to see if the process works.

  • Enter cmd into the Cortana search box of Windows 10. Then, you need to look for the most suitable match and tap on it. Then, you should select Run as Administrator.
  • Now, your task is to input sfc /scannow and tap on Enter.
  • Once the scan completes, try to restart the PC to check if the problem has been fixed.

Solution 4. Clear File Explorer History:

⅘ th of the users encountering the problem said that clearing its history can help you to fix the issue. If you have tried the above fixes and can’t resolve the issue, you must try this.

  • Your first job is to type Control in the Cortana search box of Windows 10. Thereafter, tap on the Control Panel from the Best Match result.
  • Now, your job is to look for File Explorer Options from the interface. Then, you need to tap on it.
  • Next, tap on Clear. After that, you have to tap on OK so that you can clear File Explorer history.
  • Finally, you should again try to open file explorer.

Solution 5. Change Display Settings:

The display setting usually doesn’t have any relation with the file explorer not responding Windows 10 problem. However, it can affect your PC if not configured to the recommended sizes of text, apps, etc. In this it needs to be mentioned that the screen’s unaccepted size & text can crash the file explorer.

  • Your first task is to hit the Windows Start button and select the settings. After that, select System while the interface of Windows settings will appear.
  • If you are on the Display Panel, you should try to change the text size to 100% or reset the size to the Recommended Point.
  • Finally, you need to check to see if File Explorer is accessible.

Solution 6. Extend System Partition If It Is Full:

 You can encounter an error when the system drive doesn’t have sufficient space. Hence, using third-party software is possible to extend the partition. You can use any famous partition manager that can offer better performance than the Windows default Disk Management and using which you are capable of extending partitions, formatting partitions, resizing partitions, checking file systems, converting MBR to GPT without data loss, etc. Additionally, changing cluster size, copying the disk, and converting NTFS to FAT are possible.

Solution 7. Create a New User Account:

 You should create a new user account to deal with the problem. As soon as you create a new account and log into this, you will see the Windows 10 File Explorer working normally. People with one user account on their computers need to follow Microsoft’s instructions that let them generate another new local user account. Now, check if file explorer is working or not.

If you use a new account, it allows you to remove the currently used files in Quick Access. If you fix this issue following this process, you may try to move all data from the old account to your new account. But there exists an issue that you might have to reinstall a few applications for a new account.

Solution 8. Keep Windows 10 updated to the Latest Version:

 Ensure that your Windows is running its latest version. If not, we recommend you upgrade this to the latest version. Microsoft can resolve popular problems like file explorer not responding Windows 10 via updates.

  • Your first task is to tap on the Windows Start menu and select Settings.
  • After that, you need to select Update & Security once you get the Windows setting interface.
  • Tap on Windows Update. Next, you should hit the Check for updates button for installing the latest updates.

Solution 9. Restore Windows 10 to an Earlier Date:

 Is the System Restore feature active on your PC? If so, you have to restore Windows 10 to a previous date when it was offering smooth performance. You must follow these steps to restore your operating system to an earlier date when Windows Explorer usually works.

  • Go to the Cortana search box of Windows 10 and type create a system restore in it. Then, you are required to select the best match for opening System properties.
  • Tap on System Restore in the System Protection section. Disabling the System Restore greys out the System Restore button.
  • At last, your task is to follow the instructions on the screen. Then, you should choose a restore point for the System’s restoration to an earlier date when it works accurately.

The bottom line:

These nine solutions can help you to resolve the file explorer not responding Windows 10 issue. You need to try each method individually to check if the problem is resolved or not.

 Frequently Asked Questions

What do you do when Windows Explorer is not responding?

You can try to clear the history of file explorer to deal with the problem. Hence, your task is to open the Control Panel. After that, your task is to set the view by large icons. Now, tap on File Explorer Options from the interface. Hit the Clear button. Then, tap on OK to clear Windows Explorer history. Finally, you should try to open file explorer again.

How do you fix File Explorer problems in Windows 10?

 These are some methods that you can try to deal with the problem, and these are as follows—

  • Restart File Explorer in Task Manager
  • Manually Restart the Explorer.exe Process via Command Prompt
  • Run System File Checker Scan
  • Clear File Explorer History
  • Change Display Settings
  • Extend System Partition If It Is Full
  • Create a New User Account

What to do when File Explorer stops working?

 If it happens, you need to restart windows expo via Task Manager. Now, your task is to hit Ctrl + Shift + Esc so that you can start Task Manager. Then, you should look for File Explorer in the Task Manager and select End task. Next, you need to tap on File in the upper left corner. Then, your job is to select the option Run new task. Now, you have to type explorer.exe in the box. Restart this immediately by hitting Enter.


read more
Do It YourselfInternetSoftwareTechnology News

How to Enable TPM 2.0?

How to Enable TPM 2.0

Several users who have downloaded Microsoft’s PC Health Check app encountered the “The PC can’t run Windows 10” error message. This app is available on the new Windows page after the new OS version was announced. It happens especially when TPM 2.0 is not enabled in the BIOS.

Remember that the TPM 2.0 chip, which can be found on the PC’s motherboard, is necessary to run Windows 11. It is a security chip used to handle the task of encryption for your fingerprint, other biometric data, and other things like Windows BitLocker. In most computers, it is already enabled, and people can find this in most modern systems which they bought in the last few years.

After the launch of windows 11, TPM 2.0 has become a key feature. It was present in computers for a long time but gets important when Microsoft says that it must be in the PCs to install Windows 11. Modern motherboards usually come with TPM, but it remains disabled sometimes. Don’t you know how to enable tpm 2.0 in Windows?  Then, just go through this article.

What is a TPM?

It is a security technology that can improve the pc security against software vulnerabilities.

Why will you Enable TPM 2.0 of Motherboard in Windows?

Usually, people enable it so that their PC can support the Windows 11 upgrade. TPM stands for Trusted Platform Module, indicating a small chip installed on the motherboard to offer an additional security layer to the PC when it’s booting up. If someone has hacked your pc or broken th security, this module prevents the PC from booting. Firefox, Outlook, Chrome, Thunderbird, and many apps use this feature to handle the encryption. If you turn on this feature, you can get several advantages. Thus, you can make your PC suitable if you want to install Windows 11 OS.

How to Enable TPM 2.0 and Secure Boot to pass PC Health Check:

You must enable Secure Boot in the mobo BIOS for a PC health check. Ensure that you use a TPM 2.0 chip. Let’s know how to enable tpm 2.0 on your PC.

Check for TPM using the Windows Security App:

You need to confirm that you have a TPM 2.0 chip on the computer. It is possible to do this manually via the Windows 10 settings. It informs you if it is possible to continue with the Windows 11 install method.

Step 1: Your first job is to open Windows 10 settings by tapping on Windows Key and I on the keyboard. After that, head toward Update and Security.

Step 2: Go to the Update and Security section to tap on Windows Security, followed by Device Security and Security Processor Details. If a Security Processor section does not appear on display, there is a chance that your TPM 2.0 chip is disabled or unavailable. A spec lower than 2.0 does not allow your device to run Windows 11.

How to Enable TPM 2.0 in BIOS:

When you are willing to check the status of the current rig, you should move to the BIOS. Although BIOSs are made differently, these may have a few similar features. AMD and Intel have different terminology.

Intel = PTT

AMD = FTPM

STEP 1) Enter the BIOS:

If you use the system’s BIOS regularly, it can be a trial which takes about keypress timing. Hence, you should restart the operating system. Whether you don’t know which key you need to hit to access the BIOS, it starts flashing up on display for some seconds. The rule says that you should hit the DEL or F2 key.

Hit the key a few times as the display appears. If you get successful, it will direct you to the PC’s BIOS screen.

STEP 2) Switch Your BIOS into ADVANCED Mode:

People usually boot into an EASY mode in most bios because it is the place where it causes serious problems. You can head toward ADVANCED Mode. Then, tap on any button to switch the mode. In this case, you should try to hit F2.

STEP 3) Inside the MISCELLANEOUS Option, Enable TPM 2.0:

For an Intel board, you should find the PTT option. It indicates Intel Platform Trust Technology or Intel’s TPM. But for AMD, it is different. You may find it disabled. Hence, you should tap on this to turn it on from the drop-down option.

SAVE & EXIT your BIOS. After that, reboot this. Alternatively, you can hit F10.

Enable Secure Boot:

You should ensure that you keep Secure Boot enabled, like enabling TPM 2.0. Otherwise, it will not be possible to complete the installation of Windows 11.

STEP 1) Enter the Bios:

Once you restart, your job is to start again. After that, you should use the same process to enter the bios – usually F2 or DELETE.

STEP 2) Select Advanced Mode:

After booting into an EASY mode in most bios, you can head toward ADVANCED Mode. Tap on something to switch the mode again. Try to tap on F2 in this case.

STEP 3) Select Boot Options in Bios:

You can see the option on an AMD motherboard under Security instead of Boot Options. For the Intel board, it is available in the right place where you need to go.

STEP 4) Choose Secure Boot from the options:

Head toward the Secure Boot tab and choose it.

STEP 5) Enable Secure Boot:

Tap on Secure Boot. Then, you should change this to Enabled from Disabled. After that, you should press F10 or choose Save & Exit. Finally, you should reboot your computer. It is possible now to pass the PC Health Check.

How to Enable TPM / TPM 2.0 in Windows 11, 10, 8, 7?

Before enabling TPM 2.0 on your motherboard, ensure that it is in disable mode. Hence, you should follow the steps to check the status of TPM on the PC.

  • Your first task is to hit the ‘Win’ + ‘R’ keys on your keyboard so that you can open the Run dialog box. Next, you should type ‘tpm.msc’ and hit the ‘OK’ button.
  • If you view ‘Compatible TPM cannot be found’ in the Trusted Platform Protocol Management window, ensure that the feature remains disabled on the motherboard. Therefore, you should enable it.

Enabling the feature of a Gigabyte motherboard has two main options: AMD motherboards and Intel motherboards. Usually, for both cases, you need to follow about the same steps.

Method 1) Enable TPM for AMD Motherboard:

You should follow the steps to enable it.

  • Your first job is rebooting the PC. After that, you must put the BIOS of the Gigabyte motherboard. Now, you need to hit the ‘F2’, ‘F12’, ‘Delete,’ or any button you want to tap to enter the BIOS.
  • As soon as you enter the BIOS, you will hit the ‘Peripherals’ or ‘Settings’ tab.
  • You need to find the ‘AMD CPU fTPM’ option inside the Peripherals or Settings. You can see ‘Disabled’ in front of this. After that, you should tap on the option.
  • Next, select the ‘Enabled’ option in the pop-up box.
  • After that, the option ‘Enabled’ can be seen in front of the AMD CPU fTPM option.
  • You should hit the ‘Save & Exit’ tab.
  • Your job is to tap on the ‘Save & Exit Setup’ option.
  • Confirm what you’ve selected by tapping on the ‘Yes’ option. Then, you should try restarting the PC.

We have discussed how to enable tpm 2.0 Gigabyte AMD motherboard in Windows. Now, let’s dig into method two.

Method 2) Enable PTT for Intel:

If you have Intel motherboards, you can see the mention of the TPM feature as PTT or Intel Platform Trust Technology. You should go through the steps for enabling the PTT of this motherboard.

  • You should restart the PC first. Then, you need to hit the ‘F2’, ‘Delete,’ ‘F12’, or other buttons to enter the motherboard’s bios. Then, enter the BIOS.
  • After that, you should hit the ‘Peripherals’ or ‘Settings’ tab in the BIOS.
  • Then, your job is to find the ‘Intel Platform Trust Technology (PTT)’ option in Peripherals or Settings. Then, ‘Disabled’ can be seen in the front. Once you see it, tap on the option.
  • Next, you should select ‘Enabled’ in the pop-up window.
  • After that, the option ‘Enabled’ is available in front of the Intel Platform Trust Technology (PTT) option. In this case, your job is to hit the ‘F10’ key on the keyboard.
  • Hit the ‘Yes’ button if you are willing to save the settings. Then, you should restart the PC.

Following the above mentioned steps, it is possible to enable the PTT of the motherboard in Windows.

Method 3) Verify TPM is Enabled:

You should undergo the process to confirm that the feature is activated in Windows. These are the steps you must follow to perform the procedure.

  • You should first open the Run dialog box by hitting the ‘Win’ + ‘R’ keys on the keyboard. Then, you should hit the ‘OK’ button after typing ‘tpm.msc’ in the dialog box.
  • Go to the Trusted Platform Protocol Management window. Then, suppose you view under ‘Status’ that ‘The TPM is ready for use’ & under ‘TPM Manufacturer Information’ that ‘2.0’ is the Specification Version. It indicates that the PC is ready to run the operating system.
  • Finally, you can say that the PC can support Windows 11 upgrades.

How to enable TPM on Dell?

If you are willing to enable the feature on the PC in bios, these are the steps you should follow.

  • First, your task is to restart the PC.
  • Once you see the Dell logo, you need to hit F2.
  • After entering the BIOS, you should indicate the section corresponding to the brand of the PC for more instructions.

In this regard, you should know that you might need to head toward BIOS using a mouse, but it relies on the PC model. If not, use the up or down and left or right arrow keys to go here & there. You need to choose options by using the Enter key.

The menu options can be different because it is based on the pc model.

Latitude, OptiPlex, Precision, Vostro, and select XPS:

  • Your job is to expand this Security section.
  • Then, you need to choose TPM 2.0 Security.
  • Choose TPM On.
  • After that, you have to choose Apply.
  • Finally, you should choose Exit.

Alienware:

  • First, your task is to choose Security.
  • Then, you must set the Firmware TPM to enabled.
  • Next, you should choose Exit.
  • Now, choose Save Changes.

OR

  • Your job is choosing Security.
  • Enable the Firmware TPM.
  • Now, save this by hitting F10 and Exit.

Inspiron:

Step 1: You should choose Security.

Step 2: Switch On the toggle located below Intel Platform Trust Technology.

If your PC has the Aptio Setup Utility, you should go through these steps. Head toward the upper right corner to check if the pc uses this. You should first choose Firmware TPM. Then, your task is to choose Enabled. It is essential to use the up or down arrows and then hit the Enter key.

Step 3: You must choose Apply Changes. If your PC has the Aptio Setup Utility, follow these steps.

  • First, you need to hit the F10 key.
  • Next, you should save by choosing Yes and exit. Hit the Enter key.

Step 4: Now, you need to choose the Exit option .

You can see the PC restarting to the Windows desktop.

Conclusion:

In this article, we have elaborated on how to enable TPM 2.0 easily. After following the methods, you should not face any issues. Try the solutions to enable the feature.

Frequently Asked Questions

  1. How do I enable TPM 2.0 in Win10?

Hence, your job is to head toward the System Utilities display and choose System Configuration. Then, go to BIOS/Platform Configuration (RBSU), then to Server Security and Trusted Platform Module options. You should check if the “Current TPM Type” keeps the feature turned on.

  1. How do you enable TPM 2.0 ASrock BIOS?

These are the steps you should follow to learn how to enable tpm 2.0 asrock bios.

  • Your job is to continuously hit ‘Del’ or ‘F2’ on the PC startup to enter bios.
  • After that, you should go to the ‘Advance’ Tab and tap on “CPU Configuration.”
  • Now, your task is to tap on the option “Security.”
  • Next, you should tap on the “Intel Platform Trust Technology” option.
  • Set this to the ‘Enable’ option.
  • Head toward the Exit tab. Now, you should choose “Save changes and exit.”
  1. How do you enable TPM 2.0 in Intel BIOS Asus?

Steps that you need to follow to learn how to enable tpm 2.0 in Bios Asus are:-

  • You should hit “Del” to enter bios once you see the ASUS or ROG logo.
  • After that, you should navigate to the Advanced\AMD fTPM configuration page. Then, you need to switch the “TPM Device Selection” option to “Firmware TPM.”
  • Finally, you need to save the changes by hitting F10 and after that you need to reboot the PC.


read more
AppsSoftwareTechnology News

Realtek Audio Driver

Realtek Audio Driver

Do you know how the popular Realtek Audio Driver works? It requires the latest HD Audio Drivers to function. It is the audio driver, due to which it becomes easier to communicate between the audio device and PC. If the audio drivers are outdated, then these may cause several sound quality issues, such as no sound at all, leading sound to be cut out, and so on.

You should know that Windows 11 and 10 version comes with pre-installed Realtek high-definition audio. However, it never means that you will not face sound problems. So, is the Realtek audio not working? Don’t worry. Here, we are going to mention the most effective ways through which you can solve the issue.

As a window user, facing audio issues is very common. You can encounter Audio problems after every Windows update. As a result, you will not be able to hear any sound. So, in this case, your first task is to fix the problem. Here, we are going to elaborate on the most possible ways following which you can troubleshoot the issue.

How to Update Realtek Audio Drivers in Windows 11:

You can easily update the Realtek Audio driver windows 11 by checking for updates, finding drivers through the Device Manager, or downloading files from the Realtek website.

You should go through the steps to update these drivers in windows 11.

  • Your first task is to use the “Windows + I” hotkeys to open “Settings,” or you can open it through the “Start Menu.”
  • After that, your job is to select the option “Windows Update,” which is available in the left corner.
  • Then, you need to hit the “Check for updates” option.
  • Now, you have to install the update.
If you are willing to find the audio driver through the device manager, follow the steps:
  • First, you need to tap on “Start.” Then, you have to select the option: “Device Manager.”
  • After that, you have to expand the “Audio inputs and outputs” option. After that, you need to tap on the “Speaker/Headphone (Realtek (R) Audio.”
  • Now, your task is to select the option “Update Driver.”
  • Then, go to the prompt and choose “Search automatically for drivers.”
  • Now, you need to wait until you can find the latest Realtek Audio drivers. Now, you should tap on “Install” to complete the procedure.
  • When you complete the installation process, choose the “Close” option. Next, you have to reboot the computer so that the changes can be done.

But if you cannot get the drivers by following the previous method, you should download the Realtek Audio driver from the Realtek website.

  • In this case, you need to head toward the HD Audio Codecs Software page in a new web browser.
  • Then, find the appropriate driver for the system below the “Description” category. Now, tap on the “Download” icon.
  • If you can not find your system in the list, you must download “High Definition Audio Codecs Software.” But for older systems, you need to download the driver for “AC’97 Audio Codecs Software.”
  • Tap two times on the setup file once you download it. Then, ensure you go through the latest Realtek HD Audio Drivers installation steps.

Updating Realtek Audio Drivers in Windows 10:

In Windows 10, it is possible to update the audio drivers following three ways:

  • Checking for updates through Update & Security.
  • Using the Update Driver function through Device Manager.
  • Installing the update directly from the Realtek website.

These are the steps you should follow to update audio drivers with the help of the update status.

  • Your first task is to open “Settings” with the help of the “Windows + I” hotkey, or you can open it through the “Start Menu” option.
  • Now, you have to select the “Update & Security” option.
  • Hit the “Check for updates” button, which is available under “Windows Update.”
  • If you find updates available for your computer, tap on the “Install” option. Next, you should reboot the PC.

Hence, if you want to update the Realtek Audio driver through Device Manager, you should follow these steps.

  • Your first job is to type “Device Manager” by going to the search box on the taskbar.
  • Then, you need to tap on this from the menu.
  • After that, you must expand the “Sound, video, and game controllers” option. Now, your job is to hit the “Realtek High Definition Audio” option.
  • You should select the option “Update Driver.”
  • Tap on “Search automatically for updated driver software on the next screen.”
  • As soon as you find the latest sound driver, tap on the option “Install.”
  • Tap on the option named “Close” once you install the drivers. After that, you need to restart your computer to save the changes.

If you want to download these from the Realtek website, you can follow the steps that we mentioned earlier.

The Most Common Realtek Audio Issues:

Here, we will discuss the issues of Realtek Audio drivers that users usually face.

Missing Audio Manager Icon: Sometimes, when you update your windows 10, you may not find the Realtek HD icon in the taskbar. If it happens, ensure that there is a driver problem.

Conflicts with Pre-installed Microsoft Drivers: Several problems exist between Microsoft system drivers and Realtek.

Why is Realtek High Definition Audio on your PC?

It is a famous driver for windows because it can adjust surrounding sound, Dolby, and DTS sound systems. Unfortunately, people need the driver for their audio devices to work on PCs. Therefore, uninstalling this may generate harmful audio errors.

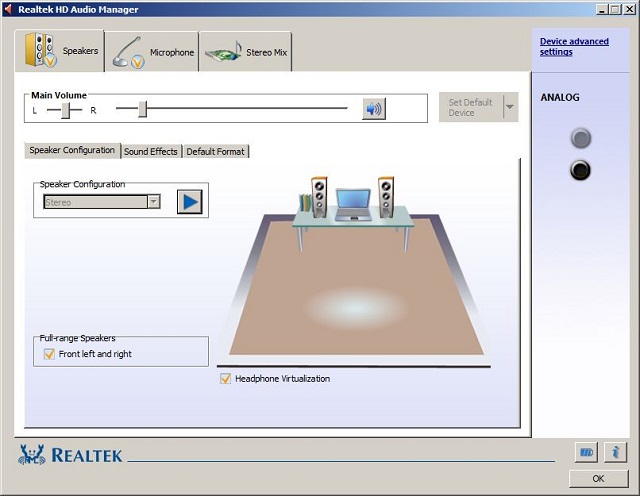
Suppose you want to customize the sound experience; download Realtek High Definition Audio Manager. However, users don’t have to connect new speakers or use the system’s sounds.

How to resolve problems from Outdated Drivers or System Update Conflicts:

Here, we will mention a few ways you can follow to resolve problems from Outdated Drivers or System Update Conflicts.

How to Disable Microsoft UAA Bus Driver for High-Definition Audio:

Realtek and Microsoft’s UAA Bus Driver are the two high-definition audio drivers which never mix. If you have not done this before, you need to disable the default driver. Follow these steps to do so.

  • First, your task is to scroll down to System Devices in Device Manager. After that, you need to see the list for this Bus Driver for High Definition Audio. If you see this unavailable on the list, ensure it gets disabled already. On the other hand, if it is available, then you must disable this.
  • If you want to disable the Bus driver, tap on this for High Definition Audio. Next, you should choose Disable device.
  • At last, you need to perform a restart to make it disabled.

Check now if you get to see any error messages in the output list or not.

Fix Realtek Audio Issues with a Rollback:

You should roll back your recently installed driver to the earlier version if you still encounter the version error compatibility message.

Step 1: You should open Device Manager first. Then, you need to head toward your Sound, Video and Game Controllers. After that, you need to expand the menu and find the driver in the list. Then, tap on it. Choose Properties.

Step 2: You need to hit the Driver tab at the menu’s top portion with the driver information up. After that, the driver provider, installation date, and version can be seen. You should write down the version number on a paper piece if you are willing to have a reference for it later.
Now, you should choose the option to Roll Back the Driver. Once you tap on the option, you will be directed to the installer driver.
When you find the RollBack greyed out, ensure that there is no previously installed version. Now, you need to tap on the Roll Back Driver. After that, you need to click on the option OK.
Then, you should go through the prompts for confirmation of the rollback.
Step 3: You need to restart again to make driver changes and check if the error remains.

How to Troubleshoot Realtek Audio Problems in Windows 11:

If your system has updated audio drivers, but you are still experiencing problems with sound, these can be some reasons, including:—

  • Broken audio settings
  • Incompatible audio enhancements
  • A conflict between Realtek and Windows driver

Try these methods to check if the problem gets resolved or not.

Restart the PC:

Restarting your system can easily clear the temporary glitches which interfere with the sound. You can restart the windows 11 operating system to eliminate the issue quickly. But to do this, you need to hit the “Power” button, which you can see in the lower-right corner of the “Start Menu.”

Tweak the Audio Settings:

If you don’t hear any sound, incorrect Audio settings may be the problem. If you want to adjust the settings, you should follow the steps.

  • Your first job is to hit the “Windows” key so that you can access “Search.”
  • Next, you should go to the search bar and type “Control” there. Now, press enter.
  • You should select the option “Hardware and Sound” and then select “Sound.”
  • When you are in the “Sound” section, it is possible to change many sound settings, like the microphone and speakers.

Disable Sound Enhancements:

Remember that you can encounter a problem with the sound card because of the audio enhancements. In this case, you should disable the enhancements to check if the error is still available.

  • You need to hit the “Windows +R” keys enabling you to open “Run.”
  • After that, your task is to enter a search for “control.”
  • Now, you need to select the option “Hardware and Sound.”
  • You should choose “Sound” and select the speaker available under “Playback.”
  • Now, your job is to hit the “Enhancements” tab. Then, you should choose the “Disable all enhancements” option and tap “OK.”

Uninstall and Reinstall the Realtek Audio Drivers:

You can try the procedure to clean up temporary bugs which cause sound issues.

  • First, your task is to tap on the “Start menu.”
  • After that, you need to select “Device Manager.”
  • You must choose “Sound, video, and game controllers.”
  • Tap on “Realtek High Definition Audio.”
  • Now, you should select the “Uninstall device” option.
  • After that, you must check the “Attempt to remove the driver for this device” box.
  • Next, you need to choose “Uninstall.”

You should follow the steps if you want to reinstall the Realtek Audio driver.

  • First, navigate to the Software page of HD Audio Codecs, from where you can download the latest Realtek Audio driver.
  • Once you download the file, try running the installation program.
  • Finally, you should go through the on-screen instructions for the completion of the driver’s installation.

Restart the Audio Driver:

You can face multiple software issues for the device driver in Windows. Hence, you need to check if the Audio driver forces Realtek to work or not when you restart it.

  • In this case, you need to hit the Windows icon and choose “Device Manager.”
  • Now, you should tap the down arrow, which is available beside the option “Sound, video, and game controllers.”
  • Tap on the Audio driver. Next, you need to hit the “Disable device” option.
  • Tap on “Yes” for confirmation of the disabled confirmation pop-up.
  • Now, you can see the “System Settings Change” window appearing to reboot the PC. Then, you have to save the unsaved task. Finally, select “Yes” so that you can reboot the computer.
  • Once the PC reboots, you have to hit the Windows icon. Next, your job is to tap on the “Device Manager.”
  • Finally, your job is to tap on the Audio driver. Then, re-enable the Audio driver by hitting the “Enable device” option.

Restart Windows Audio Service:

The error may appear when you don’t load Windows audio services properly or if these are malfunctioning. Hence, you need to check whether or not the problem gets resolved after restarting.

  • In this case, your task is to press the “Windows + R” hotkeys to open “Run.”
  • Then, you should now enter “services.msc” and press “OK.”
  • You can see a list of available “Windows Audio” services. Then, you should tap twice on it.
  • Next, press the “Stop” button so that you can stop the Windows audio service.
  • Shut down the “Windows Audio Service Properties” window. After that, you must tap twice on the Windows audio service again.
  • Hit the “Start” button when you want to restart the “Windows audio service.”
  • Tap on “OK” to shut down the properties window.

Use a Generic high-definition Audio Device Driver:

Moving to a generic driver to fix the audio driver is possible. If you want to know the procedure, check the below-described steps.

  • First, you need to type Device Manager in the Windows search bar.
  • After that, you have to find Audio inputs and outputs.
  • Tap twice on the audio drivers to expand.
  • Then, you have to tap on the Realtek Audio device. Next, you should choose Update driver from the list.
  • Now, you must choose the option Browse my computer for driver software.
  • Then, select the option “Let me pick from a list of available drivers on my computer.”
  • Choose an audio driver from the list. Then, you should choose Next and go through the on-screen instructions.

It can load the sound driver. Thus, you can fix the issue with your driver.

Change Default Sound Format:

Try to change the default sound format to resolve the high-definition audio devices not working issue. Next, you should perform these steps to change the default sound format.

  • Your first job is to hit the sound icon available in the system tray.
  • Then, your task is to choose Open Sound settings.
  • Tap on Device Properties in the new window.
  • After that, you need to tap on the Additional device properties option.
  • A new pop-up window will appear, and then hit the Advanced tab.
  • Tap the down arrow. Then, choose the details given underneath, and it is based on the speaker configuration.

24bit/44100 Hz
24bit/192000Hz
speakers properties

  • Tap on Apply. Now, click on OK to save changes.

Thus, you can resolve the problem. Try the next process if you can not fix it by following it.

Select the Correct Output Device:

You can encounter issues if you choose the wrong output device. Therefore, it is essential to move to the appropriate output device. These are the steps that you need to follow.

  • You need to hit the volume icon, which is available in System Tray.
  • Then, you need to go to the context menu and choose Open Sound settings.
  • Then use Headphones or Speakers as the output device.
  • At last, check if the error remains or not.

Conclusion:

These solutions we have mentioned in this article can help you to fix the Realtek Audio problems. We recommend you check the speakers to confirm if these are properly connected. Moreover, you have to ensure that you have not muted the speaker. However, you can use Advanced Driver Updater if you want to keep your driver up to date.

Frequently Asked Questions:

How do you fix Realtek’s no sound?

You should set speakers as default to resolve the problem. Then, perform the steps to do so.

  • Tap on Windows + R. after that, your job is to open the Run window.
  • Your task is to type mmsys.cpl and hit enter.
  • Next, you have to hit the Playback tab. Then, tap on Speakers and choose Set as Default Device. After that, select the option Apply and OK.
  • Restart your computer after exiting from the Sound Settings window.
  • Check now if the process fixes the problem related to the driver or not.

Why is there no sound on your Windows 10?

Your Audio device may be muted or gets disabled, or the driver can be outdated. If you want to resolve the audio device, try enabling this. Then, you should update the driver through Device Manager or Advanced Driver Updater.

How do you fix a corrupted Realtek driver?

Reinstalling and updating the driver is the simplest process to resolve it. Users can manually do this or use Advanced Driver Updater’s help to update corrupted drivers.

read more
AppsDo It YourselfSoftwareTechnology News

What is conhost.exe File?

What is conhost.exe File?

Conhost.exe, called the Console Windows Host file, is legitimate and offered by Microsoft. You should run this so that Command Prompt works with Windows Explorer. With the help of the feature, you can drag and drop files into Command Prompt directly. When any third party requires access to the command line, it can use conhost.exe as well.

If you find something is going wrong with your PC, then you need to pull up the Task Manager and find files that may seem to you in such a way as these do not belong. conhost.exe is one of the files which stands out the most. It is a necessary file that can be found running always, and it doesn’t depend on the version of the PC you use.

What is conhost.exe?

Conhost.exe refers to Console Windows Host that you can find in the Processes tab of the Task Manager. In addition, the file has connections with csrss.exe and cmd.exe, referring to ClientServer Runtime System Service and Command Prompt processes, respectively.

What is Conhost File’s job?

It can add some external specifications to the command prompt. The earlier Windows versions didn’t come with these. For example, Command Prompt uses the same window frame due to conhost.exe as other programs.

This one is a crucial part of running windows on the PC. It is also a recent addition to this procedure. Conhost.exe was specially made for Windows 7 to simplify the heavy burden that is put on the csrss.exe file.

What Does Conhost.exe Do?

Basically, the main job of conhost.exe is shifting a few elements of running the system-level services from csrss.exe so that it can permit additional customization and security. While the moving process of the elements is going, Windows can do more theme-related elements so that there will not remain any risk of corrupting the csrss.exe file.

Software that use Conhost.exe:

You can start the process using every example of CMD and programs that use the command line tool, even though you cannot see the program running like its performance in the background.

These are a few processes that can start conhost.exe:

  • Dell’s “DFS.Common.Agent.exe”
  • NVIDIA’s “NVIDIA Web Helper.exe”
  • Plex’s “PlexScriptHost.exe”
  • Adobe Creative Cloud’s “node.exe.”

Is Conhost.exe a Virus?

Most people don’t think that it is a virus or they need to delete it. However, users should check a few things if they are unsure about this.

If you are a beginner and find this running in Windows Vista or XP, it is probably a virus or maybe an unnecessary program. The reason for that is these windows versions do not use the file. Have you seen conhost.exe in any of these windows versions? Then, navigate to the page’s bottom to see what you should do.

The file may be malicious or fake if it is in the wrong folder. The original file runs from a particular folder. Therefore, using Task Manager to do a few things, like verifying its description and checking the folder from which it’s running, is one of the simplest things to learn if the process is harmful or not.

Step 1:

You should first open Task Manager by hitting the Ctrl+Shift+Esc keys on the keyboard.

Step 2:

You need to look for the process in the Details tab. If you use Windows 7, find the Processes tab.

You should follow these steps now because several instances of conhost.exe are available. However, if you want to gather all conhost.exe processes, choose the Name column to sort the list. If you don’t see any tab in Task Manager, you have to use the More details link, which is available at the Task Manager’s bottom section, so that you can expand the program to full size.

Step 3:

You must see the far right section below the Description column within that conhost.exe entry, ensuring that it can read Console Windows Host.

The correct description never indicates the safety of a process because a virus may use the same description. But if you get to see another description, it may happen that the .exe file is not the real Console Windows Host process. So, it can be treated as a threat.

Step 4:

You should tap on the process and select Open file location.

Step 5:

The folder will display where the file is available.

You need to use Microsoft’s Process Explorer program if you cannot open the file location following this process. In this case, you need to tap twice to open the Properties window. After that, you should use the Image tab, letting you find the Explore button, which can be seen near the file’s path.

Why Are There Several Instances of the Console Window Host Process Running?

As a user, you can get to see several examples of the console Window host process which runs in Task Manager. Every example of cmd can create its Console window Host process. Besides, other applications that use command lines can create their Console Windows Host process even if the user can’t get to see an active window available for them. The Plex Media Server app is a good instance that can run in the background. Besides, it may use the command line so that other devices can find this on your network.

Several apps running in the background can work this way. Therefore, you may see many examples of this process that run at any given time. In most cases, every process consumes little memory, below 10 MB, and zero CPU when the process remains inactive.

Why is Conhost.exe Using So Much CPU and Disk?

If you find any specific example of this process causing issues such as continual excessive CPU or RAM usage, check into particular apps that get involved in finding a minimum concept of where to start the troubleshooting procedure. However, it is unfortunate that the Task Manager can not offer good information about it.

Microsoft can offer an extraordinary tool to work with processes as being part of its Sysinternals lineup. Hence, you only need to download Process Explorer and run this. Moreover, as the app is portable, you do not have to install it. Furthermore, it can offer several advanced specifications.

Tapping Ctrl+F enables you to begin a search. It is the simplest way to track down these processes. Then, you have to look for “conhost,” and your task is to tap through the results. Then, the main window will appear to display the app connected with that specific instance of the console window host. If you get notified by CPU or RAM that this instance is creating issues, then you need to narrow it down to a specific app.

Can you remove it?

It is a vital file. Due to which, you should not remove it. This file is linked to csrss.exe and cmd.exe. Therefore, removing it indicates your Windows OS will not be able to function.

How to Remove a Conhost.exe Virus:

Have you found the file a virus? If it is, then you should know that you can delete it easily from the PC.

First, you should try to shut down the parent process which uses the file. It prevents the process from running malicious code. Do you know which program can use conhost.exe? If you know, then skip the steps given below. Next, you should attempt removing the app expecting that you can remove the linked virus as well. Hence, you need to use a free uninstaller tool to ensure that all are deleted.

  • Your first task is to download the Process Explorer. Then, you need to double-click on the file which you are willing to remove.
  • After that, you should go to the Image tab to choose Kill Process.
  • Next, you should tap on OK for confirmation. Finally, you should try running a virus scan when you see that it is impossible to shut down the process.
  • Hit OK so that you can go back to the main display. If you want, shut down the Process Explorer at this time.

The file is now disconnected from the parent program, which has started this. You should try to reboot the PC and check if the conhost.exe is removed. If you are willing to remove it, you need to run Task Manager or Process Explorer every time you restart to ensure that you have deleted the virus.

Step 1:

You should try to delete conhost.exe. After that, you need to open the folder from the fourth step mentioned above and delete this.

You may use Everything for doing a complete search on your PC, ensuring that the file you are viewing is in the \system32\ folder. For example, there could be another file in the C:\Windows\WinSxS\ folder, but it is not the one which can be found running in Task Manager or Process Explorer. If you want, delete other conhost.exe imitations.

Step 2:

It is possible to run a full system scan by installing any conhost.exe virus removal tool. With the help of this, you can find the conhost.exe virus and remove it.

Step 3:

If the previous methods don’t work, you should try installing a full antivirus program. While it helps to delete the fake file, it also assists in setting up the PC with a scanner used to keep viruses away from the PC.

Step 4:

If necessary, you may take the help of a free bootable antivirus tool that lets you scan the entire PC before the operating system starts up. This method is expected to fix the virus because the process will not run during the virus scan.

Is it a legit process?

You should know that the original one is a legit process. The OS or operating system needs this, and you must not remove this. But what will you do if the process isn’t original? The process might take up much memory and CPU usage. What will you do now?

To verify the process, you should go through these steps.

  • You should right-click on the process in Task Manager. Then, you need to choose the option Open file location.
  • If the file is in C:\Windows\System32, you can ensure that a legitimate app runs the process.

But it may happen that the process is not in System32. If it is the case, there is a chance that a virus or malware disguises itself as a Console Windows Host process. A few viruses can keep memory usage at a high level. Hence, you need to use antivirus software to scan suspicious files and remove this.

conhost.exe Runtime Errors:

These refer to the windows errors that occur during “runtime.” You should know that Runtime is self-explanatory. Therefore, EXE errors can be triggered while loading conhost.exe during the starting up of the position of windows or in its running condition. Remember that these errors are the standard form of EXE error that Windows users may face.

If this error occurs when the program runs, you can see the program terminating awkwardly. In most cases, the error messages indicate that Windows cannot find the file on startup or the file gets corrupted. As a result, it can cause a prematurely-aborted startup procedure. Without fixing issues, Windows cannot start the process.

Here, we are going to mention a few common conhost.exe errors, including —

  • exe – Bad Image.
  • exe Application Error.
  • exe could not be found.
  • exe could not be installed.
  • exe could not be launched. Class not registered.
  • exe could not be started.
  • exe failed to initialize properly.
  • exe has encountered a problem and needs to close. We are sorry for the inconvenience.
  • exe is not a valid Win32 application.
  • exe is not running.
  • Cannot find conhost.exe.
  • Error starting program: conhost.exe.
  • Faulting Application Path: conhost.exe.
  • The file conhost.exe is missing or corrupt.
  • Windows failed to start – conhost.exe

How can you resolve the conhost.exe Console Window Host issue?

We have given here a few processes using which you can troubleshoot the issue.

Execute the SFC and DISM Commands:

If your device contains corrupt system files or images, these can cause a Console Window Host problem. Therefore, you should run the SFC and DISM tools to eliminate the issue. Hence you should know that SFC stands for System File Checker. This one is a default Windows OS tool used to find corrupt system files. Besides, the tool helps you to restore the files with the correct copy.

On the other hand, DISM stands for Deployment Image Servicing and Management. It is a default Windows tool used to prepare system image files and change and repair them. These are the steps that you are required to follow:-

  • Your first job is to hit the ‘Windows’ logo to open an ‘Options’ menu.
  • After that, you need to go to the menu to find the ‘Search’ option and tap on this. Once you tap on the option, you can see a new default search area.
  • You must type the “command prompt” text in that area. Now, you can see the results page coming up. Then, you should find the ‘Command Prompt’ option and tap on it.
  • Once you see the pop-up menu, you can locate the ‘Run as administrator’ option and select this after that. Then, you can see a new window with the ‘Command Prompt’ title.
  • Type the “sfc /scannow” command inside the window. After that, you should hit the ‘Enter’ key for execution.
  • After running the SFC tool, you should try running the “DISM /Online /Cleanup-Image /RestoreHealth” command. Finally, your task is to hit the ‘Enter’ key so that it is possible to run the command on the earlier line.

A Clean Boot:

The problem may appear when any app prevents the ‘Console Window Host’ process from running. Performing a clean boot can help you to get rid of the issue. If you are willing to perform the method, these are the steps that you should follow.

  • You should first hit the ‘Windows + R’ keys together to open ‘Run,’ a new dialog box.
  • You need to go to the blank area in the dialog box to type “msconfig.” Next, you will get to see the blank space beside the ‘Open:’ label. After that, you should hit the ‘OK’ button.
  • Once you hit the button, you can see a new ‘System Configuration’ dialog box. Afterward, your task is to head toward the ‘Services’ tab inside the dialog box. Then, you should tap on it.
  • All services that are running or recently stopped on a list can be seen under the tab. Now, you should locate the ‘Hide all Microsoft services’ option. After that, you have to put a checkmark on this. Next, hit the ‘Disable all’ button.
  • Next, you should head toward the ‘Startup’ tab on the ‘System Configuration’ dialog box. Once you go inside the tab, you should hit the ‘Open Task Manager’ link.
  • Then, you can see a new dialog box named ‘Task Manager’ where the ‘Startup’ tab is opened already.
  • You should choose each startup app from the list. Then, your task is to hit the ‘Disable’ button. Next, hit the ‘OK’ button for the ‘Task Manager’ and ‘System Configuration’ dialog boxes.
  • Finally, you should start the computer again. Now, check if this process resolved the issue or not.

Update all the Device Drivers:

Sometimes, your PC may not have updated device drivers. If this is the case, you may encounter high CPU issues. Hence, you can resolve the problem by updating all device drivers which are available within the system. These are the steps that you should follow to do so.

Steps:
  • Your first task is to hit the ‘Windows + X’ keys together simultaneously so you can launch the ‘Options’ menu.
  • Afterward, you must go to the menu to locate the ‘Device Manager’ option. Once you find the option, you should tap on this. After tapping, you can see a new window named ‘Device Manager.’
  • When you open the window, you can see a list containing the names of all devices which you have previously installed in your system. In addition, the window contains a sublist where the name of their respective drivers is available.
  • Go to the list to find the first one. Then, you should tap twice so that you can reveal the driver on a sublist. After that, you should select the driver and tap on this.
  • As soon as the pop-up list appears, you should choose the ‘Update driver’ option. After clicking on the option, you will see a dialog box containing two distinctive links.
  • You should click on the initial link asking ‘Search automatically for updated driver software’ among two links that you have seen before.
  • After tapping on the link, Windows will find updates for the selected device driver.
  • If windows find any update, it will get downloaded and installed automatically.
  • If you are willing to update the remaining drivers of your device, you need to repeat those mentioned above in the fourth to seventh steps.
  • After completing the update of device drivers, your task is to reboot your PC.
  • At last, you should check whether you still encounter the problem.

Perform Windows Update:

If you can’t resolve the conhost.exe high memory usage problem, try to update the windows operating system. The steps which you should follow are:-

  • First, to display the ‘Start’ menu, you should hit the ‘Windows’ logo.
  • Once you navigate to the menu, you should head toward the left pane, and then you need to hit the gear icon so that a new window appears with the heading ‘Settings.’
  • When you open the window, find the ‘Update & Security’ category and tap on this after that. A new page will appear, and then you should head toward the left side. Now, you should select the ‘Windows Update’ option.
  • Then, you should navigate to the page’s right side. Hit the ‘Check for updates’ button, which you can see under the ‘Windows Update’ heading.
  • Once you tap on this, windows will locate the updated packages automatically. You can see if any available package needs to be updated on a list. This package will be downloaded automatically.
  • You should hit the ‘Restart now’ button when you complete downloading the packages that need updates.
  • Once you reboot your device, the installation procedure of updating the packages you have downloaded will start one by one.
  • Finally, when the installation process is completed, you should check whether the error exists.

Restore your PC back to the latest restore point:

For Windows XP, Vista, 7, 8, and 10, you should follow these steps to start System Restore:

  • You should first tap on the Windows Start button.
  • Next, you need to type “System Restore” when the search box is available, and then you need to tap on “ENTER.”
  • Locate System Restore in the search results, and tap on it.
  • Then, you should put the password of the administrator if prompted.
  • You should follow these steps to select a relevant restore point in System Restore Wizard.

Use System Maintenance Troubleshooter:

It is a Microsoft application to locate system errors and eliminate them.

  • You should first log in to the Windows Server. After that, you need to find the “Control Panel” and open it.
  • Then, you should move to Troubleshoot.
  • After that, you have to tap on the option View All.
  • Finally, you need to open System Maintenance.

The process needs some time based on the system’s performance. For example, suppose you find an issue related to your system. In such cases, you have to fix it accordingly. After finishing the troubleshooting procedure, you should try booting the OS in safe mode.

  • Hence, you need to log in to the Windows Server first. Then, you should find “Run” and open this.
  • Then, you should enter msconfig, and you have to tap on OK.
  • Now, you need to head toward Boot.
  • Finally, you should check the Safe Mode option and tap on Apply. After that, you have to tap on OK so that you can reboot the OS.
  • Check the services now to ensure whether they are consuming high resources.

How did Conhost.exe infiltrate my computer?

We generally see computer viruses in our devices when cyber criminals spread these via Trojans, spam campaigns, software ‘cracking’ tools, etc. In addition, they use fake software updaters and unreliable software download sources. While installing trojans, you are downloading PC infections. You should know that malicious programs can cause chain infections.

Cyber criminals proliferate viruses via spam campaigns; to do so, they send emails where malicious attachments are available. Generally, these files are MS Office documents, JavaScript or archive files, PDF documents, executables (.exe files), etc. As soon as users open these files, cyber criminals download the computer infections and install them.

The fake software updaters download malicious programs & install them instead of updating or fixing them. Besides, cybercriminals exploit bugs and flaws in outdated software. They can use freeware, third-party downloaders, unofficial, Peer-to-Peer networks, free file hosting websites, etc., to make these programs legitimate.

These viruses act as harmless files also. As soon as people download the files, they install the viruses. Software cracking tools bypass paid software activation. But these can cause PC infections. It means that people download viruses and install them instead of activating programs.

Conclusion:

In this article, we have elaborated on conhost.exe, which is a Windows 7 core process. It is used to operate the cmd prompt. You should know that the process is safe and that you must not delete it. However, you should be aware of malware and viruses which disguise themselves as conhost.exe files to hide their actual nature.

Frequently Asked Question:

  • Is cmd.exe a virus?

No, it is not a virus. This one is an executable file for Command Prompt. When you open this, it will allow you to bring up the command window. But you must be aware of the viruses which disguise as this .exe file.

  • What happens if you delete conhost.exe?

If you delete this, it will affect the process of the windows function. Therefore, delete this only when you are sure that it is a virus.

  • Why does conhost.exe keep popping up?

A running procedure may trigger the file. So, you should force quit those programs you cannot identify. If you still find the issue, ensure that it is a virus.

read more
Do It YourselfSoftwareTechnology News

What is Ctfmon.exe File or CTF Loader?

What is Ctfmon.exe File or CTF Loader?

Have you found that the CTF Loader is running on the system in the Task Manager? Therefore, now you may want to know what this is or if it is a virus or malware. Furthermore, you may wonder if it is possible to disable it. This article will give answers to all your questions related to Ctfmon.exe alias CTF loader. Let’s dig in.

What is Ctfmon.exe File?

Ctfmon.exe file is called CTF loader and the term CTF stands for Collaborative Translation Framework. It is a Microsoft procedure that always runs in the background. Microsoft Office uses the app so that it can control the Alternative User Input Text Input Processor and the Microsoft Office Language Bar.

You should note that the ctfmon.exe/ ctf loader process offers test support to identify speech, handwriting, and so on. Besides, the procedure can provide other alternative user input services. Therefore, if you use any of these above, it is recommended not to disable the process on the PC. But remember that the process can always run in the background. However, it won’t interfere with the system’s functions.

Where is ctfmon.exe File Located on the Computer?

The loader is available in the C:\Windows\System 32 folder on the Computer. Moreover, you can get this available in the C:\Windows\SysWOW64 folder.

CTF Loader Error Messages:

These are a few of the common Ctfmon.exe error messages. Let’s check it

  • exe – Bad Image.
  • exe Application Error.
  • exe could not be found.
  • exe could not be installed.
  • exe could not be launched. Class not registered.
  • exe could not be started.
  • exe failed to initialize properly.
  • exe has encountered a problem and needs to close. We are sorry for the inconvenience.
  • exe is not a valid Win32 application.
  • exe is not running.
  • Cannot find ctfmon.exe.
  • Error starting program: ctfmon.exe.
  • Faulting Application Path: ctfmon.exe.
  • The file ctfmon.exe is missing or corrupt.
  • Windows failed to start – ctfmon.exe.

The Root of Ctfmon.exe Problems:

In most cases, the  Ctfmon.exe issues can be seen due to virus infection or missing or corrupted ctfmon.exe. Whereas invalid Windows registry entries linked with the MSDN Disc 1755 can cause the issues.

Here, we have given a few reasons behind the Ctfmon.exe problems. So, let’s have a look.

  • Corrupted or invalid Ctfmon.exe entry.
  • Corrupted file exe due to virus infection.
  • Software that does not link to the MSDN Disc 1755 application deleted exe by mistake.
  • Any program that conflicts with MSDN Disc 1755 shared referenced files.
  • MSDN Disc 1755 (ctfmon.exe) gets corrupted while downloading or during the installation process.

Is Ctfmon.exe a Virus?

We have already mentioned that it is a Microsoft process, not a virus. So, you can remain worry-free as the process will not cause harm to the PC. But a few viruses and malware can be found which disguise aa ctfmon.exe files. As a result, it remains undetected on the PC. Hence, you need to pay attention to this.

You need to check the file location if you want to determine whether the file is a virus or not. The actual file location is C:\Windows\System32. Hence, you need to tap on the CTF Loader process in the Task Manager. After that, you should select the Open file location. Suppose you find the file in the System32 folder. If it is the case, try performing a virus scan. Remember that this loader needs to have a light workload on the hardware. But if you see high system resource usage, you should check for malware.

Scan for Viruses or Malware:

If you are using Windows 11, use Windows Security to scan the system, but one thing to note is that the scanning method is unable to catch everything. Sometimes, malicious codes can be disguised as a CTF Loader.

If you want to scan the system for malware, follow the steps below.

  • Your first job is to tap on the Windows key. Then, you should type windows security. Finally, tap on the top result after that.
  • After that, you need to choose Virus & threat protection on the left by going to the column. Then, you should hit the Quick scan button on the right.
  • Once you complete the scanning process, if Windows Security does not find anything but you see the usage of the CTF loader is high, then you have to run the deeper system scan.
  • After that, you should tap on the Scan options link. Next, you should choose a Full scan or a Microsoft Defender Offline scan.

AndIf you perform the deeper scan, it will take more time to complete, but it can discover and troubleshoot the malicious codes. If Windows Security finds malware, try to run a scan with a free and reliable antivirus suite.

Why Leave CtfMon Running?

The loader is advantageous for those who can use an alternate language or language input device. Besides, the tool is handy for keyboards and similar input devices which depend on voice recognition, unique input schemes, or electronic input like an electronic touchpad, the main task of which is converting handwriting into text. Here, we have given a few benefits of CtfMon. Let’s check it.

  • You should know that if you keep the process running in the background, it is advantageous.
  • It allows the users to type in Mandarin without a keyboard featuring Mandarin characters.
  • People may want to use a keyboard with characters from a non-English language.
  • A person using Windows 10 prefers typing with a braille keyboard.

Can CtfMon Be Harmful?

The file is not harmful on Windows 10 or other Windows versions. But remember that this file never weighs down the central processor or memory resources. It indicates that leaving this running in the background won’t affect the primary computing needs. The process does not consume any system resources when it runs in the background. Therefore, you will not experience any performance drop when the Windows task manager activates the loader. If you want to close the file, tap on the Task Manager’s loader. Then, you have to tap on the End task.

Is CtfMon in System32?

You may feel frustrated if the file keeps popping up at Startup or after you turn it off. But if you find CtfMon.exe outside of the System32 folder, you should know that it can be a virus that disguises itself as CtfMon.

How to know whether the location of CtfMon is system 32 or not?

Follow the below steps to determine the location of CtfMon:

  • First, you need to open the search bar. Now, you have to type Ctmon.exe.
  • Now, your task is to right-click on ctmon.exe. Then, you need to tap on the option open file location.
  • Now, the system 32 directory can be seen in Windows File explorer.

Is the directory other than system32? Then, you need to perform a full system scan using the latest antivirus software.

How can you enable ctfmon.exe automatically on Windows 11?

  1. Use the ctfmon.exe shortcut:

  • Your first job is to hit Win + R keys so that you can open the Run dialog.
  • After that, you should enter the Ctfmon.exe What is an Aspx File? path in the input field. Next, you should tap on Enter. Hence, C:\Windows\System32 is the path.
  • Now, you need to find the file. Once you find the file, you need to tap on this.
  • Then, you have to select Send to. Now, you have to choose Desktop (create a shortcut).
  • After that, your task is to open the Run dialog again.
  • Then, you should execute the following command.

shell:common Startup

  • You can find yourself in the startup location’s folder.

C:\ProgramData\Microsoft\Windows\Start Menu\Programs\StartUp

  • Now, your job is to copy the file by going to the Desktop. After that, you should paste this into the startup folder.
  • Finally, you need to reboot the Computer. Then, you should check whether this file starts automatically in Windows 11 or not.
  1. Use Registry Editor:

  • In this case, you have to open your Start menu first.
  • Then, you need to find the Registry Editor and open this.
  • After that, you have to head towards the following path:

HKEY_LOCAL_MACHINE\SOFTWARE\Microsoft\Windows\CurrentVersion\Run

  • You need to tap on the empty place and choose the option New. Then, you should select the String value.
  • After that, you have to name ctfmon, the new string.
  • After tapping two times on this, you have to choose the Value to
  • C:\Windows\System32\ctfmon.exe.
  • Finally, reboot the PC to fix the issue.
  1. Use the Task Scheduler:

  • Your first task is to open your Start menu.
  • Now, you should find Task Scheduler and later open this.
  • Next, click on expand Microsoft.
  • After that, tap on expanding Windows.
  • Now, you have to choose TextServicesFramework.
  • After that, you need to click on MsCtfMonitor, which is available on the right side. Then, you have to choose Enable.
  • Now, you need to shut down the Task Scheduler.
  • Finally, you have to reboot your Computer to check whether the file is still running automatically at Startup.

How Do You Disable Ctfmon.exe:

A few people find the process not useful as it keeps running in the background always. So, they want it to disable this. But there is a fact you should know. You can disable it directly if you use neither the Language bar in Windows nor any alternative input device ( pen tablet). So, here we will mention the methods you need to follow to disable ctfmon.exe.

Disable ctfmon.exe at Startup—

If you want to prevent the file from running at Startup, perform the steps.

  • You should first tap on the Ctrl+Shift+Esc so that you can launch the Task Manager. Next, you should tap on the taskbar. After that, you have to select Task Manager to launch this.
  • After that, you have to move to the Startup tab. Then, tap on the CTF Loader, and then you should select the option: Disable.

Completely Disable Ctfmon.exe—

Do you want to stop running this permanently? Those who want to know the ctfmon.exe Windows 10 disable method need to unregister the DLL file connected to alternative user input. Follow the below steps to do so.

  • Your first job is tapping the Windows+R keys on your keyboard, which helps bring up the Run dialog box. After that, you should tap on the Windows Start menu. Now, you need to open this by selecting Run.
  • Next, you have to type these commands one by one. You need to hit Enter after every command so that you can unregister the DLL files.

regsvr32.exe /u msimtf.dll

regsvr32.exe /u msctf.dll

Disable through the services console:

If you disable the loader, it can result in malfunctioning specifications in Office. But people can disable this if they want. Although if you wish, you can enable this again. It is possible to disable the process on Windows through the services console. You just need to follow the below steps to do so.

  • Your first job is to use the Windows key + R, a keyboard shortcut that allows you to launch the Run dialog. Then, you should type services.msc. Now, you need to tap on OK.
  • After that, you have to look for the Touch Keyboard and Handwriting Panel Service entry. Then, you should tap on this and choose Properties.
  • Once you open the Properties display, you should set the Startup type to Disabled. Then, you need to tap on Apply.
  • Finally, you have to choose the Recovery tab. After that, you must change the failure fields to Take No Action. Now, tap on Apply and OK.

Turn Off CtfMon.exe in Administrative Tools:

However, you can follow this alternative: turning off Administrative Tools. Unfortunately, the solution can cause problems with Bluetooth keyboards and other onscreen keyboards. However, according to other users, the process prevents CtfMon from appearing continuously at Startup.

  • Your first task is to open the Control Panel. Then, you need to find the Administrative Tools, which can be seen in the upper right search bar.
  • Double-click on the option named Services after opening the Administrative Tools window.
  • After that, you have to scroll the page down in the Services window. Now, you should choose the Touch Keyboard and Handwriting Service Panel.
  • Next, you have to change the setting of the Startup type to Disabled.

How can you fix ctfmon.exe not starting automatically?

These are a few methods through which you can solve the ctfmon.exe not starting windows 10 error.

  1. Run SFC Scan:

  • You should open the Start menu first.
  • After finding Command Prompt, you need to tap on this. Then, you have to select Run as administrator.
  • Now, type the sfc /scannow command and hit Enter.
  • Then, you can find the Computer scanning the problem.
  • Now, you have to restart the Computer.

If you want to fix the issue, try another way which is scanning the Computer deeply.

  1. Check for Windows updates:

  • You should first hit Win + I buttons to open Settings.
  • Now, you need to choose Windows Update, which can be seen on the left pane.
  • Then, you should hit the Check for updates button.
  • Your system checks for the latest updates after that. If the system detects any update, it will install the update automatically.
  1. Re-enable CTF Loader Service:

  • You need to tap on This PC first and choose Manage.
  • After that, you have to choose Services and Applications.
  • Now, you need to tap twice on Services.
  • Next, your task is to find Touch Keyboard and Handwriting Panel Service.
  • Then, you should tap on this and select Properties.
  • Now, you should choose Startup Type as Disabled.
  • Tap on Stop.
  • After that, you have to tap Apply and OK.
  • Then you need to restart the Computer.
  • After restarting your Computer, you need to repeat these steps. But you have to enable the service this time.

Remove CTFMON Using Freeware App:

In case none of the methods work, you can try this process. CTFMON Remover is a freeware program that displays whether you have installed this or not. So, with the help of the app, you can remove it. Besides, if you want, you will be able to restore this.

You only have to hit the Deactivate CTFMON.EXE button so that you can begin the method of removing the Windows process. You should know that it is an old program that supports only previous versions of Windows, such as Windows XP, Windows 2000, etc. If you want, try this on Windows Vista and 7, but remember that it won’t work.

Conclusion:

Ctfmon.exe is a Microsoft process used for the Language Bar and Alternative User Input Text Input Processor. But if you don’t want to use such services, it is possible to disable it from Startup. However, it uses minimal system resources. Therefore, when you find a problem with your CPU or hard drive, ensure that you solve the issue by performing a virus scan.

Frequently Asked Question:

  • What is Ctfmon exe?

It plays an important role in monitoring active windows and offering text input service support for different purposes, such as speech recognition, handwriting recognition, keyboard, translation, and so on.

  • Is Ctfmon exe needed?

It is a Microsoft procedure for the Language bar and Alternative User Input Text Input Processor.

  • Should you delete Ctfmon exe?

This process helps in recognizing handwriting, speech, etc. So, ensure that you do not disable the procedure on the PC.

read more
AppsDo It YourselfSoftware

What is .DS_Store File?

What is .DS_Store File?

Do you use a MacBook? Then, you need to remain cautious of DS_Store files. But what are they? It may happen that you are exposing information about your website Or app unknowingly. If you want to know what the .ds_store file is and other details related to it, check this article.

What is a .DS_Store file?

A .DS_Store is the abbreviation of Desktop Services Store. This is an invisible file on macOS, and your system can create the file automatically whenever you use a ‘Finder’ to find the folder. After that, the file follows the folder wherever it goes, even when it is archived in ‘ZIP.’

Suppose you are a developer or system administrator and willing to transfer files from a PC to your server. Or suppose you have not taken any essential precautions with the automated deployment procedure. If it is the case, it may happen that unconsciously, you are putting the files on those servers where your site or apps remain.

Why should you know about .DS_Store File?

These files can store information or custom attributes of the containing folder along with other file names. Therefore, hackers can do malicious work if you expose the information by chance, allowing the hackers to view your private files.

This file was exploited in 2015. It was previously used so that people could access the TCL Corporation’s admin portal, a multinational Chinese electronics company. You should know that the app’s whole backend and database can be exposed to those who have access to the .DS_Store file.

Purpose and location:

The location of the file is a folder or directory accessed by the Finder app; it can remain on remote file systems mounted from Server Message Block (SMB) protocol, the Apple Filing Protocol (AFP), and other servers that can share files. However, your OS settings, like permissions, can exclude Remote file systems. However, Finder uses these files, which can be assumed to be a more metadata’s general-purpose store regarding the folders’ display options like icon positions and view settings. For instance, these files have spotlight comments on Mac OS X 10.4 “Tiger ” and later. However, the comments can be stored in the extended file attributes, but the issue is Finder cannot read these.

If it comes to talking about the earlier Apple OS, you should know that Finder apps can generate similar files. However, if foreign file systems can be accessed at the volume’s root, it can collect every setting for the files that remain on the volume.

Where will you see DS_Store files?

Generally, these are invisible, but you can find these hidden files suddenly on the desktop. Besides, these can be seen suddenly in an open folder that has been copied to a Windows PC or over a network. In addition, you can get to see the files when it gets restored from a backup or if you, by chance, enable Show All Files on Mac.

So, we can say that the file can be created on each folder that Finder has access to. Besides, these files can be seen on a PC or any folder if you use MacOs 10.11 and earlier. But remember that you can see them in the folder only after configuring the Mac to display hidden files. For example, the files can’t be seen if the default write com.apple.Finder AppleShowAllFiles TRUE command.

DS_Store files in Google Drive:

If you transfer data from the external SSD to Google Drive, multiple hidden files, such as DS_Store files, are uploaded.

DS_Store files on Windows PC:

Are you a cross-platform user? Or do you receive files shared from Mac? Then you will get to see these files when you open a Mac-created folder or archive on Windows.

DS_Store files in the GitHub repository:

GitHub repository can track all changes created to a file such as DS_Store. If you do not want to commit unnecessary stuff, try to use .gitignore files available in the root directory so that you can ignore these files.

How to open DS_Store files on Mac/Windows?

Several Apps can use the same file extension.DS_Store for several data types. Therefore, no particular opener is there for the files.

On Windows:

If you want to open these files in your Windows, you need to right-click on the file first. Then, you must tap on the option “Open With” option and select an app. Here, we are going to mention a few user-recommended apps: Windows Notepad, WinRAR, Free File Viewer, Adobe Acrobat, Microsoft Office, and so on. Finally, you may try to drag the file to a browser so that you can open this.

On Mac:

To do so, you should first tap on the file. Then, you must tap on the “Open With” option and select a proper app. If you have not found any supported software, you need to find a free online DS_Store file opener.

Can you delete DS_Store files on Mac?

Deleting these files on Mac without losing any vital data is possible. However, there is a chance of reverting the folder appearance to the default preferences. Moreover, you can see a new empty Ds_Store file if you open the folder next time. Therefore, if you are unwilling to see them, you should hide them instead of deleting them.

How to hide DS_Store files on Mac?

If you want to hide these on your Mac, you should follow the steps:-

  • Your first job is to open Finder.
  • Then, you need to go to Applications.
  • Then you have to head towards Utilities.
  • Next, go to the option named Terminal.
  • After that, you need to put the command: defaults write com.apple.finder AppleShowAllFiles FALSE and tap on Enter.
  • You should use the earlier command to exit Finder.
  • If you still get to see the file, you need to force quit the app. After that, you have to check whether it is hidden or not.

Are DS_Store Files Harmful?

These files are sometimes available in archives which you can receive from other Mac users. But remember that these files never cause harm if you get them in a folder. Generally, these files are hidden, but it is possible to enable their setting and see the files.

  • If you want to enable the hidden files, you should choose Go and select the option Computer. Next, you should choose Macintosh HD so that you can expand the section.
  • After that, you have to choose Command + Shift +. (the period key). Then, in your Mac operating system, you can see the hidden files, which will appear as greyed-out files.
  • But if you upload this DS_Store file with other files to the Mac, you should know that these files may be misused to get information, including file attributes or metadata about files. As a result, hackers can perform malicious acts and see private files.

Reasons to Delete a DS_Store File:

Although the fact is that it is not harmful and does not consume enough space in a folder, but there are a few reasons due to which you need to delete the file.

  • When Finder acts up to open a folder, these corrupted files do not allow you to change view options easily. Besides, these files prevent you from sorting the file icons within the folder.
  • If a folder gets closed instantly, it indicates that this one is a sign of a corrupted file.
  • You can delete them to reset the display preferences. In this case, you may lose custom Finder view settings for the specific folder. However, it is possible to change the settings or view options of the folder.
  • You can face a few issues caused by the DS_Store files when you transfer files from Mac to another system.

How to delete it?

These are a few methods following which you can fix the issues caused by the files.

  • Your first task is to use suitable apps for opening these files on non-macOS systems such as Windows. For example, you may use a few tools like WinRAR, Adobe Acrobat, and Free File Viewer to open these files in Windows.
  • Now, you have to make sure that the file is not corrupted. Besides, ensure that malware or virus is not infecting the file. In this case, you should try running a malware scan with the help of the best antiviruses for Mac. If necessary, you should try to check for potential threats.
  • You will not lose any data when you delete a file. But as soon as you change the folder preferences, Finder will help make a new DS_Store to store all the custom view settings.

However, we have given methods for deleting a DS_Store file for—

  • A specific folder
  • Multiple folders via the Terminal app on the Mac

How to Delete a DS_Store File for a Specific Folder:

You should go through these steps if you want to learn how to remove the ds_store file from Mac from a particular folder.

Step 1: Your first job is to choose the option named: Go. Then, you need to select the Utility option. After that, your task is to choose the option: Terminal. If you haven’t logged in as an administrator, you may have to put in your name and password to access the Terminal app. Next, you need to take the help of the commands for deleting the DS-Store files.

Step 2: Now, you have to locate the folder. Then, your task is to change the directory to the folder that contains the DS_Store file. For instance, if the folder is on the PC, then you need to use the cd desktop command. Next, you have to tap on Enter.

Step 3: You should type find . –name ‘.DS_Store’ –type f –delete so that you can delete all files in your current directory. Now, you should hit Enter. Ensure that you are typing the command exactly. Otherwise, you may lose other essential files on the Mac.

Step 4: Next, you have to choose OK. Then, .DS_Store files that are available in your chosen folder will get deleted. The terminal can send messages only when the entered command does not work.

How to Delete a DS_Store File for Multiple Folders:

First, you must follow the steps to delete all files from the Mac.

  • Next, you should choose Go, then Utilities, and Terminal after that.
  • Now, you have to put the following command in the Terminal window: sudo find / -name “.DS_Store” -depth -exec rm {} \; and hit Enter.
  • Then, you need to put the password when prompted. Then, you can see that all the files are deleted from the folders. The application can only give you a return message when your entered command does not work.

How to Prevent Automatic Creation of DS_Store Files?

Developers & system administrators want to prevent security breaches via .DS_Store files. Remember that looking for the files in random folders on your server is not easy. Sometimes, you can leak any information unknowingly. If you find any, you should try to delete the file with the ‘rm.DS_Store’ command. Thus, you can fix the problem.

The simplest process through which you can resolve the error is to turn off the automatic creation of these files. You should follow the below-described steps to do so:

  • Your first task is to hit command + spacebar. Then, you should look for Terminal.
  • Now, you have to open the section Terminal. Now, you have to copy the given command and paste this:

defaults write com.apple.desktopservices DSDontWriteNetworkStores true

  • Next, you should hit enter.

If you want to reverse this in the future if required, you should change true to false:

defaults write com.apple.desktopservices DSDontWriteNetworkStores false

  • Once you run any command, you have to restart the device.

You should use Git to fix the error if you are a developer.

  • You should place the DS_Store in the .gitignore file. Thus, it is possible to ignore this .DS_Store file.

How to Automatically Delete .DS_Store Files Periodically

Do you not want to delete the file manually? If so, you should use a UNIX command to remove files automatically at regular intervals. Here are the steps that you need to follow:-

  • Your job is to choose Go. Then, you have to select Utilities and Terminal.
  • Type the command in Terminal and paste this after that: sudo crontab -e and hit the Return key.
  • If prompted, you should put in the administrator password.
  • If you use vim editor, you should hit i on the keyboard. Next, you need to type the command and paste this: 30 10 * * * root find / -name “.DS_Store” -depth -exec rm {} \;

You can see the entry of the crontab in this format: <Minute> <Hour> <DayOfMonth> <Month> <DayOfWeek> <User Command>. If you want, use separate values to configure this command for another time. You can see the command running if the Mac is on or in Sleep mode.

  • You should hit the Esc key on the keyboard, and after that, you need to hit Shift + Z + Z simultaneously so that you can save the crontab entry.

How to Fix the Ds_store File Issue:

We have given here a few fixes that can be followed for troubleshooting the Ds_store File Issue:-

Reason 1) MacOSX is not installed:

You need to double-click on the file. Once you do so, it will prompt you with the message “Windows 10 cannot open the ds_store file”. The error can appear if you don’t install the macOS X Finder for Windows 10. There is no need to double-click to open its typical path, as Windows 10 cannot set up a program connection.

Reason 2) MacOSX Finder version is wrong:

It may happen that, by chance, you have installed an outdated version of macOS X Finder, which does not support the macOS X folder setting file type. So, if you install the wrong version, you need to install the correct version. Mainly, macOS X Finder generates the macOS X folder settings files. This Finder is newer compared to the files which you have installed.

Although you install the correct version of macOS X Finder, you can face issues when you open the file. You may even encounter other problems which are not related directly to the software. These issues can prevent you from opening the DS_Store file.

The error messages are as follows:-

  • Ds_store file reference error in the Windows registry.
  • Incorrect deletion of Windows registry ds_store instructions.
  • Invalid installation of ds_store -related programs (such as macOSX Finder).
  • Ds_store itself is corrupted.
  • Your ds_store is infected with malware.
  • Ds_store -related hardware has outdated device drivers.
  • Your computer does not have enough system resources to open the macOS folder and set the file format.

The Bottom Line:

In this article, we have elaborated on what is a ds_store file, how to open a .ds_store file on macOS, how you can delete the file, and so on. Besides, after checking the entire article, you will get to know how to delete them automatically. Still, if you have any queries, let us know via comments.

Frequently Asked Questions

  • Can you delete .DS_Store files on Mac?

Mac Finder generates these files, due to which you will not lose any data when you delete the corrupted files. These files are generated to store viewing options like icons’ positions, the Finder window’s size, and window backgrounds. If you want to delete the .DS-Store file, you must use the Terminal.

  • Why is the DS_Store file on Mac?

Mac OS X Finder generates these files automatically in browsed directories. You should know that you can get information regarding system configuration from these files.

  • What does a DS file mean?

DS_Store stands for Desktop Services Store.


read more
1 2 3 5
Page 1 of 5