For Windows OS, DLL is the one that offers most of the OS functionality. Besides, the dynamic link library provides much of the program functionality if a program runs on any Windows OS. For instance, a few programs can contain different modules. Every program’s module is contained and distributed in dynamic link libraries. It can promote modularization of code, code reuse, efficient memory usage, and reduced disk space. As a result, the OS and programs can load & run quickly. Besides, these consume less disk space on the PC. Now, let’s know what is a DLL file is. How to open it?
What is a DLL File?
DLL is the shortened name of Dynamic Link Library. It is a type of file with instructions that other programs can call upon to do specific things.
For instance, many programs can all call upon the veryuseful.dll for finding the free space on a hard drive, finding a file in a specific directory, and printing a test page to the default printer. But you can not run these directly, unlike executable programs.
However, other code running already can call upon it. These are in the same format as EXEs. A few users even use the .EXE format. In most cases, the Dynamic Link Libraries end with .DLL while others use .OCX, .CPL, or .DRV.
More information about DLL Files:
The term “dynamic” in Dynamic Link Library is used while you put the data to use in a program. In this case, the program actively calls for it rather than keeping it in memory forever.
Plenty of these come preloaded in windows. However, third-party programs can also install these. But people don’t usually open it as they don’t need to edit. Besides, if you do so, it may create problems with programs. So, if you know what you are doing, follow Resource Hacker in this case.
A program can separate its components into unique modules using them. You can add the modules or remove them to include or exclude specific functionalities.
If the software works this way, the program will consume less memory. The reason is that the program does not have to load all at once.
You can also update parts of a program without rebuilding or reinstalling the complete program. You will get more benefits when a program uses a dynamic link library. The reason is that all apps can get the benefits of the update from that single one. ActiveX Controls, Control Panel files, and device drivers are a few names used by Windows as Dynamic Link Libraries. These use the OCX, CPL, and DRV extensions.
A dynamic link library uses instructions from another one. Thus, the first one becomes dependent on the second one. As a result, its functionalities can break more easily. If the second one experiences any problem, it could affect the first one. Once you update a dependent dynamic link library to a newer version, overwrite it with an older version, or remove it from your PC, the program (depending on the dynamic link library) may stop working.
Resource dynamic link libraries are data files in a similar format but use the ICL, FON, and FOT extensions. ICL types are icon libraries, while FONT and FOT types are font ones. This list will let you know about it.
ActiveX Controls (.ocx): This calendar control is an instance of an ActiveX control. It enables you to choose data from a calendar.
Control Panel (.cpl): This one is available in the Control Panel. Every item is a specialized dynamic link library.
Device driver (.drv): It is a printer driver that can control a printer’s printing.
DLL advantages:
These are the benefits it can provide.
Uses Fewer Resources:
Most programs use the same library of functions. However, it can decrease the duplication of code loaded on your disk and in physical memory. Besides, it helps to influence the performance of programs running in the background and the Windows OS.
Promotes modular architecture:
It helps promote the development of modular programs. Besides, you can develop extensive programs that need many language versions or a program that needs modular architecture. For example, an accounting program is an instance of a modular program. The accounting program comes with multiple modules which can be dynamically loaded at run time.
Makes deployment and installation simple:
If a function requires an update, you don’t need to relink the program with a dynamic link library for the deployment and installation. In addition, many programs will benefit from the update using a similar dynamic link library. You can encounter the error more often using a third-party dynamic link library.
DLL troubleshooting tools:
Many tools can fix these problems. We have given the names of these tools:-
Dependency Walker:
This tool can scan for all dependent dynamic link libraries a program uses. While opening a program in this tool, it will check the following:
- Missing dynamic link libraries.
- Program files or invalid dynamic link libraries.
- Import and export functions match.
- Circular dependency errors.
- Invalid Modules because these are for a different OS.
The dynamic link libraries can be documented and used by a program with the help of Dependency Walker. It can prevent the issues which might occur in the future. The location of this tool is in the following directory while installing Visual Studio 6.0:
drive\Program Files\Microsoft Visual Studio\Common\Tools
DLL Universal Problem Solver:
It helps to audit, compare, document, and display dynamic link library information. DUPS contains the following utilities:
Dlister.exe: It can enumerate all dynamic link libraries on the PC.
Dcomp.exe: It compares only those which are listed in two text files. In addition, the utility can make a third one containing the differences.
Dtxt2DB.exe: It loads the text files made with the help of the Dlister.exe and the Dcomp.exe utility into the dllHell database.
DlgDtxt2DB.exe: It offers a graphical user interface version of the Dtxt2DB.exe utility.
DLL Help Database: This utility can locate specific versions of dynamic link libraries installed by Microsoft software products.
DLL development: It describes the problems and requirements that should be considered while developing dynamic link libraries.
Types of DLLs:
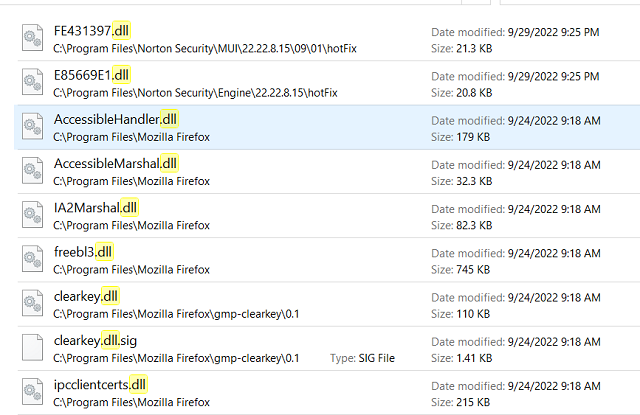 You can call the exported functions in two ways while loading a dynamic link library in an app. These are as follows: load-time dynamic linking and run-time dynamic linking.
Load-time dynamic linking: In this case, an app makes explicit calls to exported functions such as local ones. If you want to use this, give a header (.h) and an import library (.lib) file while compiling and linking the app. While doing this, the linker will provide the necessary information to the system to load the dynamic link library. Thus, it is possible to fix the exported function locations at load time.
Run-time dynamic linking: An app can call the LoadLibrary or the LoadLibraryEx function to load the dynamic-link library at run time. Once it is loaded, use the GetProcAddress function. It will help you to obtain the exported function’s address. An imported library file is of no use in the run-time dynamic linking.
We have given here applications letting you know when to use them.
Startup performance: If the app’s initial startup performance is crucial, use run-time dynamic linking.
Ease of use: The exported functions are the same as local functions in load-time dynamic linking. As a result, it becomes simple to call the functions.
Application logic: An app may branch to load various modules in run-time dynamic linking. It is vital while developing multiple-language versions.
The DLL entry point:
While making a dynamic link library, you may specify an entry point function. You can call function while the processes or threads connect to the dynamic link library or disconnect themselves from it. This function helps to initialize data structures or destroy these.
In addition, if the app is multithreaded, use TLS, thread local storage, for memory allocation. Remember that the memory is private to every thread in the entry point function. This code is an instance of this entry point function.
C++:
BOOL APIENTRY DllMain(
HANDLE hModule,// Handle to DLL module
DWORD ul_reason_for_call,// Reason for calling function
LPVOID lpReserved ) // Reserved
{
switch ( ul_reason_for_call )
{
case DLL_PROCESS_ATTACHED: // A process to load the DLL.
break;
case DLL_THREAD_ATTACHED: // A process to create a new thread.
break;
case DLL_THREAD_DETACH: // A thread usually exits.
break;
case DLL_PROCESS_DETACH: // A process to unload the DLL.
break;
}
return TRUE;
}
If the function returns a FALSE value, the app won’t begin if you use load-time dynamic linking. But if you use run-time dynamic linking, the individual dynamic link library will not load only. Therefore, this function should perform simple initialization tasks only. It must not call other loading or termination functions. For instance, you must not call the LoadLibrary or the LoadLibraryEx function directly or indirectly in the entry point function. Besides, you must not call the FreeLibrary function while the method is terminating.
Ensure that access to the dynamic link library is synchronized in multithreaded apps to avoid data corruption. In this case, you need to use the TLS as it can offer unique data per thread.
Export DLL Functions:
If you are willing to export these functions, try to add a function keyword to the exported functions. Instead, you may generate a module definition (.def) file listing the exported functions.
Whether you are willing to use a function keyword, declare every function to export with the following keyword:
__declspec(dllexport)
If you want to use exported functions in the app, declare every function to import with the following keyword: __declspec(dllimport)
The header file contains a defining statement and an ifdef statement which can separate the export and the import statement. A module definition file can help you to declare the exported functions.
While using this, you may not need to add the function keyword to the exported functions. Instead, you can declare the LIBRARY and the EXPORTS statement in this. The code is an instance of it.
C++:
// FileedgeDLL.def
//
LIBRARY “FileEdge”
EXPORTS Hi FileEdge
Sample DLL and Application:
It is possible to make a dynamic link library by choosing the Win32 Dynamic-Link Library or the MFC AppWizard project type in Visual C++ 6.0. Hence, you should check out this code.
C++:
// FileEdgeDLL.cpp
//
#include “stdafx.h”
#define EXPORTING_DLL
#include “FileEdge.h”
BOOL APIENTRY DllMain( HANDLE hModule, DWORD ul_reason_for_call, LPVOID lpReserved
)
{
return TRUE;
}
void HelloWorld()
{
MessageBox( NULL, TEXT(“Hi FileEdge”), TEXT(“In a DLL”), MB_OK);
}
// File: FileEdge.h
//
#ifndef INDLL_H
#define INDLL_H
#ifdef EXPORTING_DLL
extern __declspec(dllexport) void Hi FileEdge();
#else
extern __declspec(dllimport) void Hi FilEdge();
#endif
#endif
This code is an instance of a Win32 Application project calling the exported function.
C++:
// SampleApp.cpp
//
#include “stdafx.h”
#include “sampleDLL.h”
int APIENTRY WinMain(HINSTANCE hInstance, HINSTANCE hPrevInstance, LPSTR lpCmdLine, int nCmdShow)
{
Hi FileEdge();
return 0;
}
Ensure that you link the FileEdgeDLL.lib import library made while creating the FileEdgeDLL project in load-time dynamic linking. But for run-time dynamic linking, use code that is the same as the following code. Hence, it is used to call the SampleDLL.dll exported dynamic link library function.
C++:
…
typedef VOID (*DLLPROC) (LPTSTR);
…
HINSTANCE hinstDLL;
DLLPROC Hi FileEdge;
BOOL fFreeDLL;
hinstDLL = LoadLibrary(“FileEdgeDLL.dll”);
if (hinstDLL != NULL)
{
HelloWorld = (DLLPROC) GetProcAddress(hinstDLL, “Hi FileEdge”);
if (Hi FileEdge != NULL)
(Hi FileEdge);
fFreeDLL = FreeLibrary(hinstDLL);
}
…
While compiling and linking the SampleDLL application, the windows OS finds it in these locations in this order:
- The application folder
- The current folder
- The Windows system folder
- The Windows folder
How to Call the DLL File Function
If you want to call this function from your script, go through these steps.
- Your first task is to add this to the project as a support file. Ensure that you should do this if you haven’t done so.
- Tap on InstallScript in the View List under Behavior and Logic.
- After that, your job is to tap on the InstallScript file (.rul), calling the function in the InstallScript explorer.
- At the beginning of the script, you should prototype the function using the following syntax:
prototype [CallingConvention] [ReturnType] DLLName.FunctionName( ParamType1, ParamType2, … );
- You should load it by calling the UseDLL function. For example:
UseDLL( SUPPORTDIR ^ “MyDLL.dll” );
There is no need to load _isuser.dll, _isres.dll, or Windows API dynamic link library files like User32.dll, Gdi32.dll, and Kernel32.dll. Remember that you must not call UseDLL and UnUseDLL to load and unload them.
- Ensure that you need to call this function like others. For instance:
bResult = MyDLL.MyFunction( nInt1, nInt2, nInt3 );
- Once you have made all script calls to the dynamic link library, you should unload the file by calling UnUseDLL. For instance:
UnUseDLL( SUPPORTDIR ^ “MyDLL.dll” );
What is DLL Hijacking?
It is a process through which you can inject malicious code into an app. Hence, it is essential to exploit similarly, like a few Windows applications, search and load Dynamic Link Libraries. Only Microsoft OSs are susceptible to these hijacks.
How to Import DLL Files For Advanced C Function:
If you want to include these files in the Advanced C function, perform these steps.
You will need the file to create the modulation signal. In this case, you might use several methods to let you know how to make a DLL file.
Once you make this, add its location in the “DLL functions” tab in the Advanced C function menu. In addition, you should try to add the H file (aka header file). As soon as you configure, search for the function’s interface in the “Name” tab.
If you want to add the “Controller” function in the Schematic Editor, use this output_fcn function. Let’s see the implementation of the “Controller” function.
output_fnc(){
Controller(Vo,&duty,Vref);
}
We have given it in C language.
/* Replace “dll.h” with the name of your header */
#include “dll.h”
#include <math.h>
#define Dmin 0.
#define Dmax 1
//PI
//double Vref = 40;
double Vsense = 0.;
double err = 0.;
double anti = 0.;
double Rc = 0.;
double Rsat = 0.;
double intg = 0.;
double ka = 166.67;
double kp = 0.006;
double ki = 0.436;
double in0, in1, out = 0;
void Controller(double Vo,double* duty,double Vref)
{
#define Ts 100e-6 //100kHz
Vsense = Vo;
err = Vref – Vsense;
anti = err – ka*(Rc – Rsat);
intg += ki*Ts*anti;
Rc = kp*err + intg;
if ( Rc < Dmin ) Rsat = Dmin;
else if ( Rc > Dmax ) Rsat = Dmax;
else Rsat = Rc;
*duty = Rsat;
}
You should know that the PI regulator is implemented in the void function “Controller .”These inputs are the reference voltage. Hence, its source is the SCADA Input component and the output voltage of the Boost Converter. Here, the duty cycle is set for the PWM modulator as output for this function.
The header file is as follows:
#ifndef _DLL_H_
#define _DLL_H_
void Controller(double Vo,double* duty,double Vref);
#endif
You can see the function interface implemented in the header file needed for the app.
How to Open DLL Files:
You should follow these steps to learn how to open a DLL file.
-
Determine the Use:
These run in the background while using Windows programs. This type of file might have many functions that it can perform. Besides, the programs may need access to perform that function. There are a few functions which it has to include:
- Drawing graphics
- Displaying text
- Managing fonts
- Making calculations
-
Find a Program to Open a DLL File:
Several programs can open it. For example, windows computers come with a registry program where it is possible to register them. Visual Studio or a decompiler help to read these. You can download them if necessary. Besides, you can use Visual Studio online, allowing you to see the dynamic link libraries without downloading or finding a program ahead of time.
These are four processes which you should follow to open it.
Microsoft Windows 7 and Newer Registry:
These steps could assist you in opening a file on Windows 7 and newer ones.
- Your first task is to navigate to the Command prompt and open it. Hence, your task is to first move to the Windows Start menu or hold Windows Key+R. Then, you need to type “cmd” in the prompt appearing on display.
- Use this to open the folder. As soon as you look for the folder, hold the Shift key. Afterward, your task is to tap on the folder to open CMD directly in that folder.
- Write “regsvr32 [DLL name].dll” and tap on Enter. This function enables you to add this to the Windows Registry and access the file. In addition, it is possible to use the function to add new files to the PC.
- Now, write “regsvr32 -u [DLL name].dll” and hit Enter. If you want to remove this from the registry, use the function. The function can help you to remove those that are not behaving correctly.
Microsoft Windows Visual Studio:
It is a program used to see, edit and build code into a file. Thus, you can learn how to edit a DLL file. Once you import code into Visual Studio, it will convert it into the programming language C#. It doesn’t matter if the programming language was different before.
- Your first task is to download the Microsoft Visual Studio. Before downloading the program, check if the PC fulfills the needs to run the program. Once you are sure that your PC can run the program, try to run the installer to add it to the pc.
- Choose “Export to Project” after opening the folder containing the file. It is possible to use another program to see the code. Besides, the program helps to find something which you need to change. Tap on the file in another program to export it to Visual Studio. As a result, you may find the file being moved into Visual Studio.
- Try to edit the code with the help of Visual Studio. Thus, you can run the functions which you need. In addition, it lets you learn how to read dll files without editing the code.
Visual Studio Online:
Have you not installed Visual Studio in the Window of your computer? Then, you can go with the Visual Online Studio. You should follow these steps to use the online version of Visual Studio.
- First, your job is to open the web browser so that you can reach the online Visual Studio more efficiently. It is because you are familiar with the browser already.
- Now, your task is to enter this web address for Visual Studio. When you go to the browser’s address bar, write https://online.visualstudio.com/login to reach the site. You may find the term “visual studio online.”
- Next, your task is to log in to your account or make a new one. If you wish to use the Visual Studio Online, you should use a registered Microsoft account. So first, sign in whether you have one already.
- Finally, you need to upload it. When you enter Visual Studio Online, find this in the file explorer. Then, you should upload this to the program to read a DLL file and edit it.
Decompiler Program:
It is another process you can try. The DLL File Decompiler is designed to take the functional code. Besides, it makes a usable file where it can adjust and redesign the code as functional. You can use this one safely as it lets you look at the code without changing it and affecting the PC. We have given the steps you need to follow to open them.
- First, you must look for a decompiler program and install it. This program can offer you some choices. However, you need to select one with which you feel more comfortable while using.
- Now, you have to open the files in the decompiler. The method varies from program to program. First, however, there is a button that you need to click labeled “File.” Then, a list will open where you can find it.
- Next, your job is to use the “Assembly Explorer” for browsing it. These store information as “Nodes” & “Subnodes,” and it is possible to explore it in a decompiler. When you tap on one node, all subnodes will be available.
- At last, you need to tap on the node twice to see the code contained within it. Once you see the code, scroll through to review. You must ensure that various aspects are involved in executing your desired functions.
Missing DLL Files Error Messages:
These are a few error messages which you can encounter.
” The .dll file is missing.”
“.dll file not found.”
“This application failed to start; an important component .dll is missing. Reinstalling the application may fix the error.”
Reasons for Missing DLL Files:
You can experience the most common “missing or not found DLL errors” due to missing DLL file in Windows 10. However, there can be very reasons why you can encounter the problem.
-
Mistakenly deleting a DLL file:
If a program is installed or uninstalled, the error can happen. Besides, you can experience the problem if you have attempted to clean up space on the hard disk.
- Overwriting this file: Installing a current application can overwrite an existing file with an incompatible or invalid one.
- Malware Infection: It can happen if any malicious program has been deleted or damaged.
- Corrupted or crashed: A bad installation of a program that corrupted one or more than one can cause the error.
- Hardware Malfunction: If a bad hard disk drive has damaged the data on the drive, you can encounter the problem.
How to Fix Missing DLL Files:
These are a few steps you should learn how to fix missing DLL files.
Fix 1) Reboot the PC:
Restarting the system can help you to fix the problem. Sometimes, these errors are temporary. A few examples include ‘Not Found’ or ‘DLL is missing.’ Therefore, you should perform this method. If it works, there is no need to try complex ways.
Fix 2) Find Those Which You Removed Mistakenly:
Sometimes, you may delete them in a hurry. But remember that all of these are not useless. Therefore, you should try to find these in the Recycle Bin. You might not remember if you have deleted it. In this case, you should navigate to Recycle Bin and restore it once you find it there.
Fix 3) Use the Power of System Restore:
Performing a system restoration can help you to fix the problem. Therefore, the problem will not appear after that. If you are a Windows user, you must have made a system restore point, a copy of the Configuration. Whether you are willing to protect the PC, save a Copied Configuration. It will note the time before making any changes to the system. Creating a restore point can be a lifesaver. Go through these steps to fix the problem.
- First, tap on This PC or My computer.
- Then, move to the Properties option.
- Next, tap on System Security and System protection.
- After that, you should look for the ‘System Restore’ option.
You can use Safe mode for any situation, including starting this process. If you are a windows 10 user, perform these steps.
- If you use Windows 8/10/11 on your PC, hit the Restart button first. You must hold the Shift key while doing so.
- Then, the ‘Choose an Option’ menu appears.
- Tap on the ‘Troubleshoot’ option.
- After that, ‘Advanced Options’ will appear on it. Now, you need to tap on it.
- Next, tap on Restart in the ‘Startup Settings’ menu.
- If you want to access Safe Mode, tap on a key. Then, you can see any Safe Mode version.
- You should select Command Prompt (Admin) option by hitting the Start button.
For Windows 7:
- If you use Windows 7, tap on the F8 key. You should do this while the computer is starting. In this case, it is possible to access the Advanced Boot Options menu. Ensure that you should perform the step quickly. Whether you use SSD, try it more than once.
- Now, choose Safe Mode with Command Prompt option using the Arrows Keys. The Command Prompt window (CMD) will appear in a few seconds.
- Once you enter this, write cd restore.
- After that, write the command rstrui.exe.
- Then, the System Restore window appears.
- After starting the System Restore tool, you can see the dialogue box. Follow the steps properly to end the process of Restoration.
- Once you complete the method, check if the errors still exist.
Fix 4) Use a File Recovery App:
Sometimes, you or malware can delete it. Therefore, you need to reinstall Windows operating system or download it from the third-party dynamic link library sites. However, you can use a file recovery app. It is possible to recover a lost one within a few clicks. In addition, it allows you to recover over 1000 types of files.
Then, you should use the software to scan the partition. If you wish to perform a full scan, it will take more time. You may look for the necessary files and try to recover them during the scan. If you want the best recovery, never stop the scan. You need to wait until the full scan is completed.
The software will show all found files in the result. If you are willing to look for the missing ones, try to unfold each folder. But it may take more time. In this case, there is a Find option ( in the upper left corner) that you need to use. Now, write the correct file name and hit the Find button. You must repeat the step if you are willing to find other ones. After finding these, you need to check the boxes. Hit the Save button.
You can see a small pop-up. Remember to save these in any location or directory according to the requirements.
Fix 5) Run System File Checker:
Run this to solve the corrupted errors by your Windows OS. SFC Scanner is a tool from Windows that you can use to eliminate the problem. In this case, you should perform these steps listed below:
- Head toward the “Start” menu button and hit it. After that, you should tap on it. Then, select Command Prompt (Admin).
- Enter the command given underneath and hit the Enter button:
Sfc /scannow
- Then, you need to wait until the method is completed. This is because it can take a while to scan the entire pc to detect the errors.
- Reboot the PC after completing the above step.
- At last, check if it is missing or not.
Fix 6) Run DISM:
You can try to use Deployment Image & Servicing Management tool if the scanner can not repair system files or find the missing one.
- Run “Administrative Command Prompt” by hitting the start button.
- Then, you should enter the following command into Command Prompt and hit “Enter”:
DISM /Online /Cleanup-Image /RestoreHealth
- Now, wait for a while till the process is not completed.
- After completing the method, you need to reboot the PC.
It is expected that DISM will help you to fix the issue. But if it fails, you may try to fix it manually.
Fix 7) Scan for the Malwares or Viruses:
As the internet is a dangerous side, your browser or a Pendrive might harm your device. Besides, a cyber threat can cause errors. Sometimes, a virus or malicious piece of software can create issues. In those cases, you should perform a thorough Device Scan. You need to download authentic antivirus software. Therefore, it is possible to scan all causes of the problems. Once the virus or malware is removed, you will not face errors. Try to update all Virus Definitions and avoid system problems in the future.
Fix 8) Reinstall the Software:
If you encounter a problem because of installed software or app, you should go through these steps:
- Your first task is to uninstall the software installed from the control panel.
- Reboot the PC.
- Then, reinstall your software.
- Visit the official download page of the software and download the setup file.
- After downloading the setup, you should install it accurately.
- Whether you get a “repair” option from your software, your task is to select that first and check if it can help.
Fix 9) Time to Maintain the Registry Keys Hygiene:
The registry is a key module of each version of Windows. Remember that any registry error can affect the operating system. It contains records of all information and settings. In this record, you can find your hardware and software information. Most users save their database. When someone modifies any settings, the registry has a record of it.
It has information regarding:
- Software Installations
- Control Panel settings
- Files and their properties
Remember that the sources of additional data may be any of these:
- application errors
- Incomplete installations/uninstallation,
- configuration conflicts, etc.
These issues can decrease PC Performance. As a result, you can experience problems. Using Registry Tools can help you to fix the problem.
Fix 10) Manually Re-registering a Contaminated DLL File:
Again, perform the steps with utmost care. But before this, you should write the actual name appearing in System Prompts. After that, you should begin performing the steps.
- Open cmd with the help of your Admin Account. Hence, you must keep the Admin privilege active. Then, use the key-combo of Windows + X. Next, choose Command Prompt (admin).
- After that, you should run the commands. First, write the command and hit Enter key.
- You can repeat it for the second command.
The solution is expected to be effective for Windows 11, 10, 8, 8.1 & 7.
Fix 11) Reinstall the Visual C++ Redistribution:
If necessary, address the errors with this.
As soon as you reinstall Visual C++ Redistribution, these errors will stop appearing. You could view this while installing applications, games, or similar installations. However, several desktop apps will not function without the correct version of Redistributions. These are the steps you should follow.
Visit the Visual C++ Redistributable Packages download page by opening it in the browser. Unfortunately, a few software might need their previous version. Therefore, you have to reinstall the related version. After that, these problems should disappear.
Fix 12) Copy it from Another Healthy System:
There are multiple software developed to run on the Windows older version. Therefore, you may need a specific windows version to run them. You may copy it from the systems where the software is running perfectly. In this case, you need to replace the copies one on the PC by pasting it in the proper Directory. Then, check if the process can fix the problem.
Fix 13) Download it Manually:
Download it manually if no method works. Hence, checking the software’s official website for the missing ones is better. You can get many chances to get these on a genuine website. Whether you can’t find the original one and can’t fix the issue, visit the following websites from where you can download the missing one. In this case, you must investigate whether the site is genuine before downloading.
DLL-FILES.COM
dllme.com
dlldump.com
dlldownloader.com
How To Manually Unregister/ Register dll File:
How to manually register a DLL file or OCX file:
For Windows Server 2012, Windows 8, Windows Server 2012 R2, Windows 8.1, or Windows 10:
You can find the Start button hidden in these versions of Windows. If you want to see this button, move the cursor and hover it over the desktop’s lower left corner, where you see it in earlier versions of Windows.
- Hit the Start button, which comes in front of you, and a menu will appear. Choose the Command Prompt (Admin).
- A cmd window shows the “Administrator: Command Prompt” term at the Window top.
- At last, you should enter REGSVR32 “PATH TO THE DLL FILE” at the Window top.
Windows 7, Windows Server 2008, or Windows Server 2008 R2:
Is User Account Control or UAC enabled? If yes, then you should register it from an elevated Command prompt. Next, you need to perform these steps.
- Tap on Start.
- After that, click on All Programs, and after that, Accessories. Next, you should tap “Command Prompt” and choose the “Run as Administrator” option. Then, or once you are in the Search box, write CMD. Then, tap on it as soon as you see cmd.exe in your results.
- Now, choose “Run as administrator.”
- Finally, you must enter REGSVR32 “PATH TO THE DLL FILE” at the cmd.
But if you find UAC disabled, you need to perform these steps.
- Your first job is to tap on the Windows key and hold it afterward. Now, tap on R.
- When you go to the Run line, enter cmd and tap on OK.
- Enter REGSVR32 “PATH TO THE DLL FILE” at cmd.
- Finally, tap on OK.
OR
- Tap on Start, and Run. Instead, you can hold the Windows key after tapping on it. Next, you should tap on R.
- Write REGSVR32 in the Run line.
- Hit the Space button on the keyboard.
- Choose the pertinent .dll file from the file location.
- Drag and drop it into the Run line after the space.
- Hit OK.
How to Manually Unregister a DLL File:
With the help of the REGSVR32 tool within Windows, you can unregister it to fix the problem.
- If you want to unregister these, tap on Start. Then, go to Run. Instead, you may use the Windows command line. Hence, you should navigate to Search and CMD, respectively. Then, tap on Run as Administrator.
- For instance, use REGSVR32 /U “C:\Program Files\Microsoft SQL Server\80\Tools\Binn\SQLDMO.dll” to unregister the SQLDMO.dll type. Then, if you take the help of a Customer Support Analyst, you will get a path and file name.
- At last, hit OK.
The Bottom Line:
Several PC users encounter messages like ‘Missing DLL files .’You might need to reinstall Windows to avoid the message popping up again. But are you encountering the problem every time while restarting the PC? Remember that the most common Windows errors are Runtime errors. These can appear in multiple different forms. Different run-time errors depend on different reasons.
Frequently Asked Questions:
- How do you open it?
These are generally called upon by an application. If you want to see the code, you need to decompile it with a third-party app.
- How do you install it?
You can not install it like others. However, it is possible to install by placing these in the directory where an app is set to find a specific one.
- How do you fix the Startupchecklibrary DLL?
You need to download an automatic software used to fix the problem, or you may perform it manually.
