
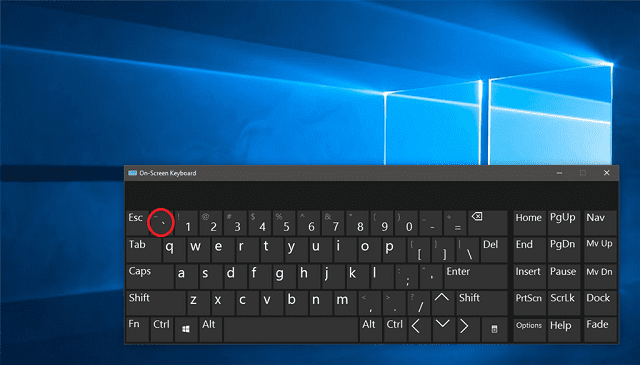
When you cannot use an external physical keyboard for Windows or a computer, the on-screen keyboard on Windows comes to your help. Generally, for several users, using an on-screen keyboard is the same as using a physical keyboard. However, for normal physical keyboards, there is a chance of getting broken or not responsive. We are fortunate that Windows has a visual on-screen keyboard that can be helpful when you can’t access the physical keyboard. Do you know, how to open On-Screen Keyboard.
Sometimes, you can find your devices infected with keylogger malware. In that case, malware can steal sensitive data input like login data or bank details through physical keyboard. A Windows on-screen keyboard gives you all the standard physical keys.
Besides, you will be able to create visual keystrokes with & without tablet mode, with a mouse, and with selected key groups. To learn how to open on-screen keyboard, dig into the entire article.
What is an on-screen keyboard?
It is a standard input tool in Windows 7, 8, and 10. This tool allows you to navigate the system so that you can use text input without a classic keyboard. While you can use this with a touch screen, typing with a mouse or a game controller from your couch is also possible.
How to open on-screen keyboard:
Use Run Command Window:
Launching any file or program on Windows PC is the specialty of the Run command window. Therefore, you can use the tool to show the keyboard on the screen. The process to use the Run Command window is as follows:-
- Your first task is to search for Run by going to the magnifying icon on your Taskbar. As soon as you will get to see the program, you need to click on it to launch this. Do you use a working keyboard? Then, your task is to open Run on your Windows by hitting Windows + R keys.
- Now, you need to type ‘osk’ in the typing field and tap on Ok.
- Based on the computer speed, you need to wait one or two seconds to open the On-Screen Keyboard.
Simply Search From the Start Menu:
Searching the tool directly from the Start Menu or the Search Icon is another process of showing the keyboard on the screen. The steps that you need to follow in this case are:
- First, you need to head toward the Windows icon on the bottom-left corner of windows or select the Search icon near it.
- Then, you have to type ‘osk’ or ‘keyboard’ or other related keywords on any of these tools.
- As soon as you will get to see the On-Screen Keyboard option, launch this by clicking once.
If the start Menu is not working, you might face issues while launching other tools.
Directly Use the Keyboard Shortcut to open the on-screen keyboard. :
Use the dedicated Keyboard shortcut to launch the On-Screen Keyboard. In this case, your task is to simultaneously hit Windows + Ctrl + O keys. After that, the tool will pop up within a second.
Remember that the shortcut key is beneficial only if you use a working keyboard. Otherwise, the technique is not used when your device is not working properly or if you cannot hit the dedicated keys. Try the next methods to check if you can launch the On-Screen Keyboard.
From Windows Settings:
Windows features a section for On-Screen Keyboard in Settings. To know the process through which launching the tool is possible check below:
- First, you need to tap on the Windows icon and then select Settings.
- After that, you have to enter the Accessibility tab. Then, find the Interaction section by scrolling down. Now, you should select the Keyboard option.
- Then, you need to head towards the On-screen keyboard, access keys, and Print Screen section. Next, you will get to see that the On-Screen Keyboard option is turned off. As soon as you turn on this, you can see the virtual keypad opening up on the screen.
Launch From the Installed Location:
When you navigate to the installed location, you will get an idea of where Windows stores the Keyboard file. You need to follow the steps to launch the tool from Windows File Explorer:
- Your first job is to head toward the Desktop and double-click on This PC.
- After that, you should go to Local Disk (C:) to open the Windows directory.
- Now, you need to launch System 32 to scroll down.
- At last, you need to find the osk application and double-click on it.
Alternatively, it is possible to copy & paste the location directly on the Windows File Explorer address bar to launch the On-Screen Keyboard:
C:\Windows\System32\osk.exe
From Ease of Access Center:
Opening the keyboard from the control panel is possible. Follow these steps to perform the procedure.
- Your first job is to launch Run by hitting Windows + R keys.
- Then, you need to type ‘control’ when you will get to see the dialogue box. Then, your task is to press enter to go to the Control Panel window.
- After that, your task is to select Ease of Access.
- Now, you should click on Ease of Access Center.
- Then, you need to choose Start-On Screen Keyboard from the Quick access to the common tools.
- Now, the tool will be opened up and you will be able to use this for different purposes.
Use the Windows Terminal:
If you work on a Windows terminal, you will be glad to know you can see a keyboard on your screen from Powershell and CMD. Follow the steps to do so:
- Your first task is to launch Command Prompt from the Start Menu. Hit Windows + X keys to run Windows Powershell. Then, you should choose the Windows Terminal option.
- If you use CMD or Powershell, your job is to enter the command osk and press Enter.
- Next, you should wait for a second or so. Then, the On-Screen Keyboard will pop up on the screen.
Make a Batch File:
Creating a batch file is possible to load on-screen Keyboard on Windows. You need to follow these below-mentioned steps to show the keyboard on screen using a batch file.
- Your first job is to open the Notepad from the Search Menu.
- Then, you need to paste this location:
C:\windows\system32\osk.exe
- Now, you have to open Save as the dialogue box. To do so, hit Ctrl + S keys.
- After that, you need to choose an appropriate location so that you can open the file easily.
- Give a name to the file but ensure that you add ‘.bat’ at the end. For instance, name it ‘osk.bat.’
- At last, you have to hit the Save button.
- Next, head toward the saved location and then double-click on the batch file to open up the On-Screen Keyboard.
Create a Shortcut Icon on Windows Taskbar:
When you create a shortcut icon on the Windows taskbar, you will be able to see the keyboard on the screen with just a single click. It eliminates the effort of hitting the shortcut keys for navigating a specific location to launch the On-Screen Keyboard.
The process to create a shortcut to On-Screen Keyboard manually is as follows:
- First, your task is to tap on the screen anywhere.
- Then, you should click on New and choose Shortcut.
- As soon as you see the Create Shortcut window, your task is to copy & paste the following location:
C:\windows\system32\osk.exe
Otherwise, you need to tap on Browse and then your task is to select the same location.
- Then, you need to tap on Next.
- After that, give a name to the shortcut file & tap on Finish.
- Now, Return to the Desktop and tap on the recently made shortcut file.
- At last, your task is to tap on the Pin to Taskbar option.
- Now, check if the On-Screen Keyboard shortcut is available on the Windows Taskbar. You need to launch the tool by tapping on this.
- Alternatively, it is possible to search for the Keyboard from Search Menu. After that, tap on the tool and choose Pin to the taskbar.
Use a Third-Party Virtual Keyboard:
Those who don’t prefer an On-Screen Keyboard can download any 3rd party app from the internet. Thus, getting a customizable virtual keyboard with a few extra features is possible.
How to Open on-screen keyboard Windows 8:
To open Open on-screen keyboard Windows 8, check the below-mentioned steps:
- You need to use your mouse to go to the bottom taskbar and then, tap on the free area.
- After that, you have to head toward the “Toolbars” at the top of the menu you have opened.
- Next, your task is to check the “On-screen keyboard” box.
- Now, you will get to see the Windows on-screen keyboard icon at the taskbar’s bottom right corner. You can open this visual keyboard by tapping on it.
- Tap on the keyboard icon again to close the keyboard. If you want to turn off the on-screen keyboard, tap the taskbar menu again. Then, you should uncheck the “On-screen keyboard” option.
- Otherwise, you can also open the Windows on-screen keyboard by swiping inward from the screen’s right edge. Then, you need to type “on-screen keyboard” into the search bar and tap on this.
How can you activate an on-screen keyboard in Windows 7?
If you want to activate an on-screen keyboard in Windows 7, follow the steps mentioned below:
- Your first job is to open the Start menu by tapping the Windows logo at the bottom left.
- After that, you need to head toward the “All Programs” on the Start menu. Now, your task is to tap on it.
- Next, you need to hit the “Accessories” and “Ease of Access” tabs.
- Then, you should tap on “On-Screen Keyboard” to activate the visual keyboard.
- If you want to deactivate the keyboard again, then you need to tap on the “x.”
Pin an on-screen keyboard to Windows 10 taskbar:
You can pin the on-screen keyboard to the taskbar in Windows 10 so that you can open it quickly.
- Your first job is to type “system icons” at the Windows search bar’s bottom section & then you need to open the system icons menu.
- You need to set the slider to “On” in the menu window. After that, you can see the on-screen keyboard pinned to the taskbar. So, it is possible to open this with just a single click.
The bottom line:
Now, we hope that you have understood how to open on-screen keyboard on Windows 10. Check the entire article to know different ways that can be followed to open the on-screen keyboard on Windows 10, Windows 7 & Windows 8. Still if you have any doubts or queries, do ask us via comments.
Frequently Asked Questions
How do you resize the on-screen keyboard in Windows 10?
Resizing the on-screen keyboard in Windows 10 is not a simple process. In this case, you need to position the cursor at the on-screen keyboard’s corner. After that, you need to drag this to your preferred size.
How do you bring up the onscreen keyboard?
For bringing up the onscreen keyboard, your first job is to head towards Start. Then, you need to choose Settings. Next, go to the option Ease of Access. Then, click on Keyboard. After that, enable the toggle under Use the On-Screen Keyboard. You can now get to see a keyboard used to move around the screen & enter text. The keyboard will still be available on the screen until you close this.
How do you get rid of the on-screen keyboard on a Chromebook?
If you want to get rid of the on-screen keyboard on a Chromebook, first, you need to navigate to Settings and then choose Advanced, followed by Accessibility. After that, you need to select Manage accessibility features. Now, your job is to select Enable on-screen keyboard in the Keyboard and Text Input section to disable it.


