close

Social Media

Social Media

How to Play iMessage Games on iPhone with Friends: 5 Fun Tips

How to Play iMessage Games on iPhone with Friends: 5 Fun Tips

You will be glad to learn that you are able to play iMessage games with your friends. Your iPhone has an integrated App Store button that allows you to download games and play them in iMessage. In order to play these games on your iPhone, you have to use the App Store extension, which is built into iMessage. Downloading various iMessage games is possible on iPhone. People can play these games for free. However, there are several iMessage games that you need to purchase to play. Let’s learn how to play iMessage games on iPhone with friends.

What Are iMessage Games?

These games refer to those ones that you are capable of playing with your family and friends on your iPhone via the iMessage app. The design of iMessage games was done in such a way that it allows players to play these games within a conversation thread.

How to Get iMessage Games:

  • If you are using iOS 10 and texting someone, the text box will appear with a small bar located at the bottom section of your messages.
  • Now, the picture icon can be seen. After that, your job is to click on the message icon. Next, your task is to tap on the app store icon.
  • Now, you have to tap on the app store icon.
  • A section called ‘Games in Messages’ will appear. Finally, you need to explore the entire selection.

How To Enable iMessage On iPhone:

If you want to play these games on your iPhone, ensure that you are messaging such a person who is using iMessage. It is also important to ensure that you have kept iMessage enabled on your iPhone.

These are the steps you have to follow to enable iMessage on iPhone:

  • You first have to open the Settings app.
  • After opening the app, you need to scroll down the page. Once you scroll down, you need to click on Messages.
  • Ensure that you have set the iMessage toggle switch to the On position.
  • Now, iMessage is active on the device you are using. If you want to play these games, you are required to download an extension, which is possible to get from the App Store.

Downloading Game Extension On iMessage:

We have given you the steps you are required to follow in order to play games using the extension with your friends over a conversation. Let’s see how to install the game extension:

  • Your first job is to start opening the iMessage app on your iPhone.
  • Now, you can open a conversation that already exists, or you are able to begin a new one with a contact.
  • You need to click on the + icon, which is available beside the message typing field.
  • After that, your job is to select the option More from the menu.
  • You have to hit the Store.
  • As soon as you see the App Store, your task is to scroll to the section named Top Free.
  • Finally, you have to click on the Get button, which is adjacent to the game extension.

How to Change The Settings Of Games On iMessage:

The gaming extension gives you the opportunity to customize your gaming profile. In addition, turning the sound from the settings of selected games on or off is possible. The steps that you have to follow to personalize your game profile are:

  • You have to access the iMessage conversation in which you are willing to play a game.
  • After accessing this, your job is to click on the + button.
  • Then, you need to navigate to More and go to the game extension.
  • Now, you have to hit Settings in its panel.
  • After clicking on the avatar, your job is to select the smile, hairstyle, or t-shirt.
  • Now, your task is to change facial expressions.
  • You have to push around the slider to set the color tone and adjust color grading.
  • As soon as you complete the customisation, you need to click on the back arrow button to return to the conversation thread and play games.

If you are willing to disable your game’s sound, then these are the steps you should follow:

  • You first have to click on the + button, which is available in the iMessage conversation.
  • Now, you need to choose the option More. Then, select the name of the game extension.
  • Then, you have to click on Settings in its panel.
  • Now, you need to hit Music and Sound so that you can turn this on or off.

A check mark exists adjacent to Music/Sound. This mark can help you to know whether it is enabled or not. If you see a cross Mark, it means that you have turned off the Music and Sound for the games. Now, let’s learn how to play iMessage games on iPhone with friends.

How to Play iMessage Games on iPhone:

Once you download the gaming extension, you can play different games using this within your conversation.

  • You have to open a conversation with your contact in iMessage.
  • Then, you have to click on the + button, which is located adjacent to the text field.
  • You have to select the option More.
  • Next, your task is to navigate to the gaming extension and click on this.
  • Now, your job is to select a game among all those which are available on this extension.
  • In order to message the person to play the selected game, your job is to click on the green upward arrow button.
  • Finally, you have to hit the play button on the game thumbnail, which allows you to start playing the game.

How To Play iMessage Games On iPhone With Friends:

Let’s check out the steps that you need to follow to play iMessage games on iPhone with friends: 

  • Your first job is to open the Messages app on the iPhone. Then, you need to search for the contact with whom you are willing to play the game. Now, you have to tap on that contact.
  • Next, you are required to continue scrolling through the options until you get the App Store icon. Once you see the icon, your job is to click on it.
  • Tapping on the App Store icon opens a particular App Store version showing extensions for the iMessage app. Generally, you can find mostly stickers here. After scrolling down, there is a section known as “iMessage Games We Love.” You have to click on the “See All” button, which is next to that title.
  • Now, you can see a complete list of iMessage games. Every game includes a page to check out images, videos, and many other details related to the game. You need to browse and find out the one that you will enjoy playing.
  • As soon as you find the game you are willing to download, your job is to click on the “Get” button, which is adjacent to its icon. Then, you have to download the game.

Further Steps to play iMessage games on iPhone with friends:

  • If you want to get out of the App Store, your job is to click on the “X” icon in the top-right corner. Then, you have to go back to the iMessage screen.
  • You have to scroll through icons below the keyboard until the downloaded game app is available. Once you see the app you have recently downloaded, your job is to click on it.
  • After that, you can see a menu allowing you to customize the game you are playing with the contact. After selecting the type of game, you can see that it loaded automatically into your keyboard.
  • Like a regular message, the game will say a “Delivered” message. If you want to start the round, you need to click on any place on the message.
  • Once you complete your turn, wait until your friend completes his or her turn.
  • As soon as your opponent finishes the turn, a new message arrives with the game preview. In order to start the next turn, your task is to open the game again by clicking on it.
  • You have to continue playing until the game ends.
  • A few games can go on for longer, whereas a few ones can only have some rounds. As soon as the game ends, an option appears allowing you to click on “Play Again” from within the game. Otherwise, you are capable of sending a new invitation like you did earlier.

The Bottom Line:

You can do a lot of things using this message app on your iPhone. For instance, it enables you to add a person to a group text. In addition, you are capable of using iMessage with multiple users at a time. Moreover, using iMessage, you will be able to share contacts with others easily & quickly. Are you bored of the green or blue text bubbles?

Then, you should know that you can change the color of iMessage. Now, you know how to play iMessage games on iPhone with friends. So, now your task is to look for the game you want to play and someone who is interested in playing the game as your opponent, and then just enjoy playing your favorite game.


read more
AppsSocial MediaTechnology News

How to Delete a Playlist on YouTube

How to Delete a Playlist on YouTube

When you add videos to the playlist, you know things can get messy sometimes. That’s why it is essential to know how to delete a playlist on YouTube. Deleting a playlist is easy – no matter whether you are content creators or a normal run-off-the-mill YouTube viewer.

While YouTube is a famous site worldwide, it receives more than thirty million visitors daily. A lot of people spend most of their time watching YouTube videos. You can organize the videos through YouTube playlists. Besides, you may want to save a few videos for later. Playlists can help you in this case and let you organize the videos. You can use “Favorites” for all videos whereas “Music” playlist can be used for favourite songs. Let’s learn how you can delete a playlist on the app.

How to Delete a Playlist on YouTube as a Viewer:

Are you a casual YouTube viewer? Follow the process to delete the created playlists from both your phone and PC.

On the App:-

If you are using the YouTube app on an Android or iOS device, follow these steps to delete a YouTube playlist:

  • Your first job is opening the YouTube app on your mobile, whether you use Android or iOS.
  • After that, you should hit the profile icon that can be found in the YouTube app’s top right corner.
  • Then, your task is to choose Your channel.
  • After that, you need to go to Playlists.
  • Now, you can see a three-dot menu near every playlist. Click on the one beside the playlist which you are willing to delete.
  • The Delete option will be visible now, and you need to click on this. A confirmation message will appear thereafter. Then, you have to click on Delete again to delete your playlist.

Use Browser:

It is easy to delete a playlist on YouTube via the PC. You only have to follow the below-mentioned steps to do so.

  • Your first job is to open the YouTube app using a desktop or laptop browser.
  • After that, you need to find the profile icon that you can get on the top right corner of the screen. Then, you have to tap on it.
  • Now, your task is to find the Your Channel option and tap on this.
  • The Playlists section will appear then, and you have to tap on this.
  • It is now possible to see a list of all playlists you have created. Navigate to the one you are willing to delete. Now, you can see a three-dot menu where you have to tap on.
  • After tapping on the three-dot menu, two options will appear – Delete and Edit. Now, you have to tap on the Delete option.

 How to Delete YouTube Playlist as a Creator:

As a YouTuber, you may spend the most time with YouTube Studio. Therefore, learning how to delete a playlist on YouTube Studio is beneficial. You can perform the process both on your computer and phone.

On App:

  • First, you need to open the YouTube Studio app on your Android or iOS device.
  • The Content section will be available at the bottom panel. Then, you should click on it.
  • After that, your job is to click on the Playlists section.
  • Now, you will get to see the Playlists you have created. You need to click on the one you are willing to delete.
  • The edit icon is available in the topmost panel of the screen. Then, you need to click on it.
  • Now, what you need to do is choose the option: Delete playlist.
  • Then, you can see a confirmation popup window. After that, you need to tap on Ok.

Using browser:

  • First, you need to open the YouTube app on the PC browser.
  • Then, your task is to tap on the profile icon that you will get to see in the top right corner of the screen.
  • After that, your task is to navigate to YouTube Studio from the YouTube homepage.
  • Now, you have to select the option from the left window pane to visit the content section.
  • Tap on the Playlists section.
  • Next, you need to tap on the three-dot options menu near your playlist that you are willing to delete.
  • Now, the Delete Playlist button will be available. After tapping on this, a confirmation window will appear, and you need to tap on Delete again.

How can you (For Creators) delete individual videos from a YouTube Playlist?

YouTube not only allows users to delete the entire playlist, but also users can delete any specific video from their playlist. Let’s learn how to do it.

On App:

If you are a creator and willing to delete individual videos from a playlist, these are the steps that you need to follow.

  • Your first task is to open this app on your phone.
  • Then, you should hit the Profile icon at the top right corner.
  • Now, you need to choose Your Channel.
  • After that, your task is to head towards Playlists.
  • Then, you need to click on the playlist from which you are willing to delete the video.
  • Now, you have to select the three-dot menu near the video that you are willing to remove from your playlist.
  • Finally, your job is to click on the Remove from Playlist option.

Use Browser:

  • First, your job is to open this app on the computer using any browser.
  • Then, you need to hit the profile icon on the YouTube homepage.
  • Now, you have to choose YouTube Studio.
  • After that, your task is to select content on the left panel of YouTube Studio.
  • Next, you need to choose Playlists.
  • A list of playlists will appear thereafter. Then, your task is to move the mouse to the video to delete it. You can now see the Edit on YouTube option. Once you see this, you need to tap on it.
  • Recently added videos to the chosen playlist will appear on the right side of the next page.
  • Now, move the mouse over the video to remove it from the playlist so that you can see a three-dot menu. Finally, you need to tap on it.
  • When the Remove from [playlist_name] option will appear, you need to tap on this to delete it instantly.

How to Delete Individual Videos from a YouTube Playlist (For Viewers)

For mobile devices, this process is the same as that for creators. But for PCs, the process is a little bit different.

  • First, you need to choose the browser you want to open the app.
  • Then, what you need to do is choose the profile icon in the top right corner of the screen.
  • Thereafter, you have to select Your channel.
  • After that, your job is to tap on Playlists.
  • Now, you need to choose the playlist from which you are willing to remove videos manually.
  • You will see the recently added video start playing. Find the video you desire to remove from the playlist by scrolling the panel on the screen’s right side.
  • Now, your task is to move the mouse over the video to remove this from your playlist. Then, tap on the three-dot menu once it appears.
  • Finally, you should choose the Remove from [playlist_name] option.

Remove Another Creator’s Playlist from the Library:

We have discussed how to delete a playlist on YouTube. However, it is necessary to know that this app offers an option to save other creators’ playlists to your library. In addition, these can be stored in this playlist library. When you want to delete the Playlists, you need to follow these below-mentioned steps.

  • First, your task is to head towards your YouTube account and tap on the library page. Then, you will get to see a few playlists made by other accounts.
  • Now, you need to look for the playlist that you want to delete. After that, you have to tap the “view full playlist” button on that specific playlist’s bottom. Now, you can see a screen popping up. It looks similar to the previous screen but it has a difference. No drop-down menu exists to delete the playlist. The reason is that the playlist doesn’t belong to you any more. Therefore, you are unable to delete this. It is only possible to remove it from your library.
  • Your task is now to look for the symbol with the lines and the checkmark. Once you put a cursor on this, it will say “remove from library”. Finally, you have to hit the option to remove the playlist from the library.

The bottom line:

Creating playlists is one of the best features of YouTube. But sometimes, you may need to delete the Playlists, and this article is all about it. Go through the article properly to learn how to delete a playlist on YouTube. Still, if you have any questions or doubts, feel free to ask us via comments.

Frequently Asked Questions

  •  Why can’t you delete a playlist on YouTube?

If you want to delete a playlist on YouTube, you need to hit the three-dot menu from your mobile or PC. After that, your task is ro click the Delete option.

  • How do you delete a playlist from your YouTube library on your phone?

To delete a playlist from your YouTube library on your phone, first you should go to Profile. Then, you need to go to Your channel. After that click on Playlists. Then a Three-dot menu will appear and you need to click on it. Finally, tap on Delete.

  • How do you permanently delete a playlist?

When you select a playlist to delete, it will be deleted permanently. You will not be able to undo this.


read more
Social Media

View Private Instagram Without Human Verification 2021

View Private Instagram Without Human Verification 2021

Nowadays, this social media platform, Instagram, has become one of the popular ones for a few years. It is a photo-sharing app that helps to influence multiple people and the business and careers. It comes with a few fantastic features such as Instagram reels, Instagram Shops, AR filters, IGTV, live emojis, etc. These features of the app make it very famous among the young generation. Here let us know how to view private Instagram without any hassle.

From celebrities, bloggers, and influencers, every person keeps their profiles in public mode to their fans and followers. When you make a new account on this platform, the privacy setting remains public mode by default. It allows all the people to see your photos and videos although they don’t follow you.

If you want, you can change the privacy settings in your account. For this, you need to switch your profile from private to public mode. As a result, only followers of your account can see your content. It is pretty simple to access the public ones, whereas private accounts come with some limitations.

You may want to see others’ private Instagram accounts for any personal or professional reason. However, sending a follow request to the person can help you to see the profile you want to see.

Along with this, there are many other ways that you can follow to see your private account. It doesn’t matter whether someone blocks you there or not, as these methods can pass through it also. Want to know how to do this? Go through our entire article properly to view the personal account.

Private Instagram Account Viewer— Insta Story Profiles

Is there anyone who blocked you? Do you want to know how to view someone’s private Instagram photos? If yes, then use the Private Instagram viewer. It is a unique software that enables you to watch locked or blocked profiles. What makes it special is that you do not have to download it. Always use the recent version of the software. It is entirely free and consumes only one minute to finish the method.

Facebook owns this social networking service. Users can send pictures as well as videos to other people through the platform. This standalone app is specially developed for iOS devices. However, later it supports all the android versions along with Windows 10, Windows 10 mobile version, etc. You can get a web interface for the app. Along with being a standalone app, it allows you to use other supplements also with third-party apps. Private Instagram viewer is an example of it.

Does Private Instagram Viewer Allow You To See Personal Profiles As Well As The Insta Stalker?

The third-party app allows you to hide images, videos, etc. if you don’t prefer to showcase them in front of the public. It enables you to toggle your private account. Thus, it helps control who can view your profile ( pictures, videos, etc.) and who can’t. You only need to go to the setting option. Then, turn your profile into a personal account. After that, only any approved follower can see your content like videos, stories, etc. The private account web viewer enables you to see all the pictures, and for this, you don’t need to follow any steps. When your profile is in public mode, you should not include your content in search results.

The procedure of using the Instagram web viewer service:

  • First, your job is to open the tool page with the help of a button.
  • After that, you need to put the name of the username that you want to target.
  • Then, confirm the particular user by checking the details.
  • Next, you have to select the profile that you prefer to watch.
  • After that, repeat the 3rd step.
  • Now, you can get to see the profile.

Why Do You Need A Private Instagram Story Viewer?

By default, Instagram allows you to enjoy its features. However, if you need, you can use the third third-party app. For instance, this third-party app enables you to change the way in which Instagram shows the contents. The app also comes with a few features which are essential for you. We know these applications as the Instagram profile viewer also.

Instagram Story Viewer is also one of the third-party apps that act like them. Therefore, for many users, it is very special. It can happen that you don’t want the app changing its display. That is why you should use a profile viewer to check the way the app displays its contents. Insta profile viewer offers a few latest features to bypass the settings. n the other hand, the PrivatePhotoViewer allows you to bypass the Default setting so that you can see the personal contents. You need to consider the applications as private viewers.

You can find the apps available easily online. To do this, you only need to go to the search area. Then, you have to type “Instagram private profile viewer” or “Instagram private account viewer.” Use any of the search engines you prefer. The method is similar to the process of finding private web viewers online.

While looking for them online, you can see multiple sites offering the apps to download. A few of the sites can be malicious for your device. However, whether you know the right place to download, then it doesn’t cause any problem. If you are an android user, you can use the Photo Downloader Online.

Where to Get Private Account Viewers?

You can’t get these private account viewers on the official app store. However, before using these, you might need to follow an additional step. Always keep in mind that you must not jailbreak your iOS device to use the apps there.

View Private Instagram without Human Verification 2021 without any Survey:

A set of services are available on the web where you can use the private Instagram viewer properly. However, it is not recommended to view anyone’s account secretly. Here, we have listed some points to let you know more about the details.

List of Instagram Viewer Features:

  • Allows seeing the unique contents of anyone.
  • It enables you to browse personal media and export it into a .zip file
  • Helps to recover documents, messages, etc.
  • It allows you to see any profile, and you don’t need to log in here.
  • Check the latest updates automatically.
  • Tests and improves proxy support repeatedly.

View private Instagram without human verification:

Here, we have given a list of the working Private Instagram Viewers.

  1. Watch Insta:

It is a simple tool that allows you to see the Private Instagram Account freely. To use the app, you don’t have to download it. Just search it on the web and then tap on the ‘Access private profile viewer.’ Always remember that you must input valid profile details to get success.

  1. Istaprivate Private Account Viewer:

You can use this free service also to see personal profiles without any survey. In this case, your job is only to put the URL in the application. Then, you can see the account without any survey.

  1. Insta Looker Without Survey:

It is the best choice for those who want to use something different for the purpose. The app is both free, as well as easy-to-use as it does not cause any problem. It allows you to use it safely also.

  1. InstaDPS:

You can use the tool also to see private images on Instagram. In this case, your job is only to put the Instagram username. After that, you have to tap on the Get Profile Photo option. When you look for any image in the tool, it shows successful results. Here, your task is merely to tap on the photo you want to download on your device.

  1. IGLookup:

It is also one of the tools that help to see profile photos. You can use the app for free, and there doesn’t exist any hidden payment. You only have to put the username of the account that you want to see. While using the app, you can’t get to see the images directly. To see these, you have to download the pictures on your device using a minor download key.

  1. Private Photo Viewer:

Whether you want to get the best free service without a survey is the best option. You only need to type a username of your choice. As soon as you do this, you will get the private photos and videos of the account. The process is straightforward, and therefore you can get access to the private Instagram account using the tool.

  1. View Private Photos:

This one is also a helpful tool. It is a full account viewer instead of a Private Photo viewer. The tool enables the users to use it freely. You merely need to go to the website. Then, you have to put the username of the profile you want to find details. According to the latest update, the site of the tool is not working. As a result, you are not capable of using it.

Can You Install Instagram Stories Profiles Viewer On Your Computer?

You can use native apps like Private account viewer. It allows you to use it in Windows 10 applications.

If you are an android user, you have to enable a specific setting before the installation process. People know it as the “Unknown sources.” Generally, the app is available under the security options of the Android setting menu. However, the original location of the app varies as it depends on the device you have. Similar to the location, the app’s name also varies as it relies on Android devices or versions. As soon as you enable the setting, the Instagram private profile viewer apk file allows you to open it.

Then, you can install the apk file. Keep in mind that you have to enable the setting before installing Instagram plus apk file and Instagram private profile viewer apk file. If you don’t enable “Unknown sources” settings but open the apk file, you can see a message on the screen. It lets you know that the action you are going to take is blocked. By going to the message box, you can get the option “Unknown sources” setting with ease. It is because there exists a key near the confirmation button. As soon as you tap on this, it will take you to the “Unknown sources” setting.

Is Instagram Profile Viewer Free?

Sometimes, you may want to see the contents of anyone’s account but don’t prefer to follow the profile. It is when you need to take help from a Private Photo Viewer. The app enables you to use it easily. You don’t need to log in while seeing anyone’s profile using the free web app. You have to put the URL of the profile only of the account. As soon as you enter the details, the app gives you a list of all images available in that particular account.

Procedure to View Followers of Private Instagram Account:

Here, we have given a process to see followers of any personal profile.

  • First, your job is to open the Private Instagram Viewer.
  • Then, you have to type the username of the account.
  • After that, you need to put the captcha to verify.
  • Next, click on the submit button.
  • Now, you can see the followers of the account.

Whether you are still unable to view the private profile followers, undergo the process we have given below.

Send a Follow Request:

You can ask the person directly, and it is the most effective way of getting in touch with them. You can use the method, but it requires a lot of patience and interaction skills.

Here, we have given a few prominent ways that you can follow.

Ask Nicely:

Here, you need to send a request first and then wait till they give you any reply. It does not take too much time if they know you already directly or via a friend of a friend. As soon as they respond and include you as a friend, you can see their photos and videos after that.

Be Patient:

Keep in mind that you must not lose patience. After sending the following request, you have to wait patiently. Whether you are lucky enough, they will reply to you very fast. However, it relies on the user’s character whom you want to target.

Drop a Line:

Sometimes, you can see a few people don’t respond to the requests as they are restricted to the friend’s circle. If it happens, then it is better to send a direct message. Thus, you can let them know why you want to follow them. Always give genuine reasons to them.

Inform Or Remind The Person:

Remind only if you have seen them earlier. You can start by saying messages like “Hi” and then say previous memory, if any. For example, you can tell where you saw or say something about the place.

Interact With The Person:

In case you get responses, then begin a conversation with attractive interactions. You can remind the person to check it out and always keep genuine behavior. If you want, you can keep your profile public. It allows them to see your content on your timeline. If you don’t react genuinely, they might not feel safe to respond.

Create a Dummy Account:

You can follow the process when another method does not work for you. Generally, it is not recommended to use, but it works. This process can reach your destination quickly.

Tips to Start with Your Fake Account:

  • You need to make a female profile first. Choose always decent photos as well as profile pictures. Try to make your profile more genuine and exciting.
  • You can check the trending videos popular among female users. Then, you can use this in your account.
  • If you want, you can keep the account personal. It helps to generate curiosity for your target.
  • When you make your profile, send a follow request to the person.
  • In case you don’t get any response, then you can send messages directly.

Process To Make An Instagram Account Private:

You need to undergo the given steps to make the account private.

  • First, you have to open your profile.
  • Then, tap on the profile picture that you can see at the bottom right corner.
  • After that, your job is to tap on the three bars. It is available at the top right corner. Then, you have to click on the Settings option from the bottom.
  • Next, open the Privacy option.
  • Now, you need to swipe the key to enable it.
  • After that, you have to turn the account to Private
  • If you wish, you can turn it into “public” mode similarly.

Hacks to View Private Instagram Accounts Immediately:

  1. Call on Google for Help:

You can go to Chrome or Safari and search by typing the person’s username. Generally, when you make your account private, all the previous posts remain saved to Google’s library.
When the loading of the search page completes, you can see search results like “All,” “Images,” “News,” and “Videos.” You have to tap on the image tab. As soon as you do this, you get to see all the person’s public posts and profile pictures.

You can take photos from their account to use in a picture frame or add it to a birthday cake. This trick looks like a good one to apply.

  1. Search Other Platforms:

Do you want to see the account of someone? Then, you can use other social networking platforms like Facebook, Twitter, TikTok, Snapchat, Pinterest, etc. Whether you want to know the user’s full name, you can check the Instagram bio of that person. Checking all the platforms helps you to collect multiple photos of the person.

  1. View through a Friend:

Sometimes, you can find that your friend follows the person you want to target. Besides, a friend of your friend can also follow the person. You can ask your friend to check out the account you wish to. Thus, you can get the posts of that user from your friend.

  1. Use IGmods.com:

It is a third-party app that enables you to see private Instagram accounts. You can go through the method step-by-step to use it.

For iPhone Users:

  • If you are an iPhone user, then go to the “Settings” option and then open it. After that, you have to move to the “General” option.
  • After that, you have to look for the “Background App Refresh” key. You need to confirm that you have activated the key.
  • Now, your job is to move to the “Battery” section. After that, you have to power off the low power mode.
  • Then, open the App Store and make the automatic downloads ON.
  • After that, go to com.
  • As soon as you get the list of options on the screen, tap on the “VIEW PRIVATE ACCOUNT.”
  • After the completion of page loading, a box appears labeled as “Target Instagram Username.”
  • Now, go to the box and write the user account’s name that you want to see.
  • Tap on the “Connect” option and then wait till the system gives you a response.
  • Now, a message appears on the screen asking you for the account confirmation. At that time, it asks you to check the user name twice that you have written in the box. As soon as you complete this, tap on the option “Confirm.”
  • After that, you get to see a progress bar popping up. Therefore, wait for a few moments. The amount of time the progress bar takes for completion relies on the number of posts available on the profile.
  • Then, a message appears on the screen that lets you know, “Private data successfully unlocked for XYZ.”
  • Next, return to the app and then look for the username.
  • Now, you can see all the things on that profile.

What about Android and PC Users?

For android users, it is pretty straightforward. If you are an android user, you don’t need to change anything in the settings on your device. You need to merely open the IGmods.com site and then follow the under given steps.

  1. Use InjectBox.com:

This site is beneficial as it supports both iPhone and Android models. Here, we have given details regarding this.

  • First, open the app and then look for the username of that personal account.
  • After that, open the site InjectBox.com. Now, your job is to scroll down the page until you get the option “Private Instagram Viewer” available.
  • You have to tap on the option and then put the person’s username.
  • After that, tap on the “View Private Account.”
  • When the system gives a response, it displays the number of followers and followings of the person. If there is any doubt, you can check it with the original account page.
  • Next, hit the “Confirm Username” button.
  • Then, the system asks you whether you want to see photos or followers or unlock the account.
  • As soon as you hit the “Unlock Profile” button, it will tell you to input a CAPTCHA.
  • Next, you have to return to the app and then refresh the page. The profile is available in a public mode which means you can see all contents.
  • You can take the help of the Instagram++ extension.

For iPhone Users:

  • First, you have to power off the auto rotation.
  • Then, move to the Settings option and then tap on the “General” option. Next, you have to power on the “Background App Refresh” mode.
  • Now, go to the browser you have and then open the site HXTweaks.com.
  • Then, you can see the search bar available on the homepage. It is available beside the “ALL APPS” icon. Then, you have to click on the option “Instagram.”
  • You can see a name appearing as “Instagram ++.”
  • Tap on the app to download on your device. Then, you have to put the app extension into the original app.
  • After that, it takes you to a new window. There you need to do some simple commands.
  • After the process gets finished, you need to wait for some moments for the commands to activate. Next, you have to return to the app.
  • Now, find the personal profile again. As all the accounts become Public this time, you can see any private profiles.

For Android Users:

Are you an android user? If yes, then you only have to change auto-rotation. After switching off the auto-rotation, move to the HXTweaks.com site. Now, you have to perform all the steps given above. Thus, you can see private profiles with ease.

  1. Use the UnlockPrivate app:

Till now, we are using different web options. So, let’s try to unlock private profiles using a mobile app.

  • If you want to download the UnlockPrivate app on the device, then open the settings option first. Then, go to the General option. Next, you need to power on the mode “Background App Refresh.”
  • After that, move to the “Battery” option. You need to confirm that you have turned off the low power mode.
  • After that, go to the browser you generally use and open the site XTweak.co.
  • After entering the site, your task is to look for the option “Private Instagram Viewer.”
  • Now, we hope that the application will pop up. You can inject that into your device.

For Android Users:-

  • They have to open the settings first.
  • Next, they should switch off the power-saving mode.
  • Now, move to the “Display” option and power off the auto-rotate option.
  • After that, your job is to open the site XTweak.co. Then, you have to download the application as we have described.

For Viewing The Private Accounts Using The Unlockprivate App:-

  • You have to open the app first and find the profile you have targeted.
  • Now, keep the page open and minimize the screen. Then, you have to open the app.
  • After entering the app, put the username of the profile.
  • Next, you have to tap on the “View Profile” button.
  • Wait for some moments till the system loads.
  • After the completion of the procedure, return to the app. Then, you have to refresh the page of your private profile that you opened.
  1. Creating Duplicate Account: The Doppelganger

You can check on Facebook with whom the person interacts mostly. Then, make a false profile of that name. You can use the person’s picture along with the information available at Instagram bio.

Unfortunately, you don’t open any profile on Facebook as you prefer, as users can lock it now.

The process is not going to last for a long time. It is because a fake account can be figured out with ease. Besides, the user can report on the account. On the other hand, the person can lodge a legal complaint also against the app. It can cause serious issues.

Public Instagram Account vs. Private Instagram Account:

Let’s know about the difference between these two types of accounts.

When you create an account, people coming across the profile can access the account. Besides, if someone searches by username, they can also get the account easily. Here, you can share images and videos, send messages, leave comments, etc. You can use the Direct Message option. By tapping on this, it will take you to the inbox of the account you want.

Public Profile:

You can access public profiles through third-party searches. While you find the name associated with the public profile on any search engine, you will get the link to the profile. After clicking on the link, it redirects you to the app. Now, you can see the account. You can view the contents of any public profile in Google image search results and other apps.

Private Profile:

Many people want to share the visual content but not with the entire world. They want to keep their profiles restricted to a certain number of people. To do this, you have to turn the account private. You only need to make changes in the settings menu of the app. Turning the profile into private helps to prevent unwanted interactions with your profile. As a result, it is entirely upon you whom you allow you to see your shared contents, who can check out your account and message you, etc. They only get access to it. However, after accepting the following request, others can see that account.

Does This Social Platform Alert You While You Take Screenshots Of Its Stories?

When you post your content, it is visible in your profile. Whether you give restrictions to the privacy settings, your followers can see it. However, by default, the contents are open to all.

The app is facing problems regarding this recently. Usually, for any post, it doesn’t notify the user for screenshots taken.

It was February 2018 when the app began to notify its users. According to the users, when they try to take screenshots, it prevents them from doing so. However, the app is working on the updates of the screenshot.

How Can You Take Screenshots Without Alerting The Person While Seeing Stories?

If you are not sure about the screenshot issues, it is better to follow the under-given steps to keep yourself safe. You can take screenshots when you are viewing them in the web browsers. To do this, you have to go to the Privatephotoviewerdotcom site on the PC.

Final words:

In this era, you can share personal images, videos, texts, etc., with almost every social media platform. A few people are happy in keeping their accounts public, whereas a few are restricted to private. Naturally, you want to see the private accounts of other people. Parents often check the accounts of their kids for security purposes.

Frequently Asked Questions:

 Does a private Instagram viewer work?

A few private Instagram viewer apps are there that you can give a try. These are not human verification tools. The primary purpose of their design is to crack the security protocol so that no one can recognize you.

How do you know what the account looks like?

You have to select the image that you set in your profile using hard data. The PrivatePhotoViewer app helps you know how it looks— Attractive, Smart, Trustworthy, Fun, Confident, etc.

Can you find an account without hashtags?

Yes, you can get accounts without hashtags when you type on the search area.

read more
AppsSocial Media

How to Save Instagram Videos: Tips and Tricks

How to Save Instagram Videos: Tips and Tricks

Are you acquainted with how to save Instagram videos? Don’t worry. Nowadays, it is not so tough to download any Instagram videos. If you follow the proper guidelines and the accurate tools, then saving Instagram videos will be very easy for you. This social media networking site helps you to get in connect with your beloved ones and your friends.

Here, people can follow each other to know about them. After taking a photo or video, you can share your living moment with your followers. In case, you like any picture or video of others and want to see it offline, you need to download the images and videos.

Instagram doesn’t permit you to save others’ videos or pictures. For this, you have to know how to save them. That is why we come here to let you know how you can save Instagram videos on your computer, PC, Android, iPhone, tablet, etc. Let’s look at the steps with the help of which you can save Instagram videos on your Android, iPhone, tablet, PC, etc.

Processes to save Instagram videos

Here is the process that can help you to know about how to see Instagram videos later or save it to your gallery.

Method to save Instagram Stories

If you want to download and save Instagram videos from others’ stories, you need to follow the under given steps. Although you are unable to save any images or videos that have been posted in Instagram stories directly. For this, you need to take assistance from a third-party application.

Step 1:

First, you need to go to the Instagram app.

Step 2:

After opening the app, you need to go to that story from where you want to save the video.

Step 3:

Next, select the three dots available in the lower right corner.

Step 4:

Then, click on the Save button.

Step 5:

After saving, you need to select the save story option.

Step 6:

At last, click to save photos directly. But it is when you don’t want to save any text, color, or shade.

HOW TO SAVE INSTAGRAM VIDEOS TO Your COMPUTER

Step 1:

First of all, visit the web browser from where you will download and save the video.

Step 2:

Next, you need to right-click on the video part.

Step 3:

After that, you get to see a context page on the screen. What you have to do is to go to the page source. You can inspect it also as it depends on the browser.

Step 4:

After inspecting, there comes a new page that shows you the code of the front page.

Step 5:

Then, after appearing the search option, you need to enter .mp4.

Step 6:

When you get the results, you have to go to the first URL. And copy it from there. Sometimes, you may require to choose the URL for opening the link in a new window.

Step 7:

After that, go to the new tab option and open a new window. And then, put the URL that you have taken from the address bar.

Step 8:

Next, you need to press the enter button.

Step 9:

Then, you can see that the video is loading in a standalone player.

Step 10:

After that, you can right-click on the video. And then, save it to your computer.

Step 11:

Next, rename the file that you have recently downloaded.

Step 12:

Now, you can place the MP4 file anywhere on your computer.

HOW TO SAVE INSTAGRAM VIDEOS TO YOUR ANDROID PHONE OR TABLET

Do you use a tablet? Or do you want to save Instagram videos on your phone? Usually, Android and iOS can save Instagram videos from the camera roll already available on their devices. But for this, you have to use the third-party app. That’s why if you want to see any Instagram video, you need to save it to your computer first. And then, you can transfer it to your device. For this, you can follow the instructions given above.

How to save Instagram videos on an iPhone

As Instagram has some terms & conditions, it contains some security restrictions. Saving Instagram videos on the iPhone is a little bit different. You have to take the help of a proper application.

You can use the blaze app in this case. For this, what you need to do is only to copy it. And then transfer it to camera roll to save it on your phone.

How to save Instagram videos on Android

If you are an android user, as mentioned above, you can have multiple choices. Apps can help you to save Instagram videos with ease.

How To Save Instagram Videos Posted By Other

People can also go for the screen recording option. And by taking help of it, you can save any video that others posted on Instagram.

Frequently Asked Questions:

Can you download Instagram videos?

First of all, open the Instagram app. And then, go to the video that you want to save. If you are using the app, then click the ‘more’ option. After tapping on it, you need to copy the URL. Then, you will get the download option under the URL. Click the option, and you will get the Instagram video quickly.

How do I save a photo from my Instagram story to my phone’s camera roll?

You need to open your profile page. Here, you will get a three dot option at the top right corner. Tap on it. Then, click on the settings option that you can get to see in the below of the menu bar. Then choose the ‘Account’ option and then ‘original photos.’ And then, click the ‘Save Original Photos’ option.

How do you save other people’s Instagram videos?

For saving others Instagram videos, you can use the third-party app. Or you can do it with the help of a computer by following the above-defined instructions.

How do I download a video from Instagram to my phone?

To download an Instagram video to your phone, follow the steps:

Use an app named as InstaSave. After that, copy the video URL and put it into the app. Then, go to the previous tab to select the video you want to save. And at last, tap on the download option for saving the Instagram video.

How can I download Instagram videos without the app?

  • First, tap on the video that you want to save. Then, click the right button of the mouse to inspect the tape.
  • Next, tap on the inspect option to get the URL of the video you want to save.
read more
Social Media

WhatsApp Finally Lets Users Unsend Messages They Regret

WhatsApp Finally Lets Users Unsend Messages They Regret

 DELETE – THE LATEST WHATSAPP FEATURE

The most sought after feature for all Whatsapp users is here – the Delete Feature or Unsend Feature.

This feature has been eagerly awaited for a long time by the Whatsapp users to unsend embarrassing messages or messages sent to a wrong group or individual.

There are already apps like Google’s Gmail that have been using the unsend function.

What does the WHATSAPP Delete feature entail?

First of all, the sender and the receiver of the Whatsapp messages should have the latest version of Whatsapp, where the Delete function is available. To obtain the latest Whatsapp version, you need to go to PlayStore and download the same.

Another criteria is that the iOS or Android or Window phone users should have the latest Whatsapp version for the delete feature to function. On a blog post by Whatsapp, the delete feature will also be made available to Whatsapp for desktop users too.

If the sender is not too happy with the message he has sent which may cause him some embarrassment or if he has sent it to a wrong group, he can unsend the message or delete the message.

The option to delete the message is open to him for only seven minutes of him sending the message. It is also possible that the message he wants to delete can be read by the receiver within the seven minutes or before he has got a chance to delete it, then in that case, there is no option for the sender.

The option the sender has, is to “delete messages for everyone” in a chat within seven minutes only, of his message being sent.

Considering that he has managed to delete the sent message, all the receivers of the message will get a notification “this message was deleted” appearing in place of the original message.

This “Delete” feature of Whatsapp is slowly becoming functional and one can check it out by following the Whatsapp’s FAQ page.

How does the “Delete” Whatsapp feature work?

For Android users:

After the message has been sent, the sender can delete the message within 7 minutes by tapping, holding and selecting the message. Several options appear on the top of the screen. Click on the delete bin icon. Three options will appear – a)delete for me, b)cancel and c) delete for everyone. Earlier, when selecting the delete bin icon, the message would get deleted automatically. By selecting the “delete for everyone” option, both the sender and the receiver will get  this message – “this message was deleted”.

For iOS users:

In the case of iphone users, if the sender wants to use the delete function for a message he wants to delete, he needs to select that message and click on the delete bin that appears at the bottom left of his screen. When he clicks the delete bin, he will get the same three options as the android user.

For Windows phone and desktop users:

The delete feature works in the same manner as the android and iOS users.

This “Delete“ feature of Whatsapp, which was sought after for a long time has finally  become a reality, saving users from a lot of embarrassment. Surely, one of Whatsapp’s greatest features!


read more
Social Media

Facebook Safety Check is now a permanent, anxiety-inducing fixture in our lives

Facebook Safety Check is now a permanent, anxiety-inducing fixture in our lives

Safety Check – Permanent Tab in FaceBook App Menu

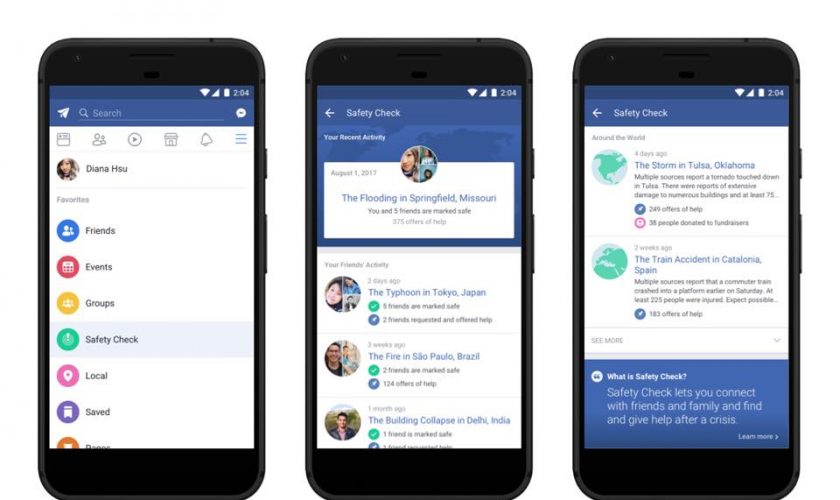
In the repercussion and during the terrorist attacks and natural disasters, Facebook’s Safety Check was organized enabling users to mark themselves as safe and to check if their loved ones were alright. The social network has now announced a permanent tab in the app menu which leads to a Safety Check page or hub of moody snooping, if one will.

In an update, the Facebook team had mentioned that there is now a single place to go to see where Safety Check has been activated recently, get the Safety Check information one needs and probably be capable of helping the affected areas.  The introduction means that the tool is not a locally-relevant one;on the other hand, more of a news hub of global conflicts and emergencies, possibly overwhelming news feed for disasters.

The motive behind the launch of Safety Check is not known but Facebook had informed that it simply wants to build a safe and supportive community with this Safety Check tab. Acceptance and demand for the feature could have augmented resulting in the change.

It could also be the cause of the world getting worse and needing a social network page to check that misery.  Or probably it could be due to the response of those users finding the feature baffling and upsetting when it tends to show up in their feed.

Safety Behaviours to Distract/Protect

Whatever may be the reason, it is stress-free to see the page for those with a gloomy fascination for tragedy and disasters.  It could be a focus for users who tend to fight with mental health matters. Users who tend to suffer from social anxiety are said to set up Safety Check behaviours to distract and protect themselves. The habit had been researched for decades by experimental psychologists and the categorical conclusion was that these behaviours frustrate instead of counter feelings of anxiety. Each time safety behaviour tends to be utilised, in social condition, it could be something as avoiding eye contact.

It strengthens the notion that the situation seems to be frightening and the anxiety levels tend to get raised if not heightened in expectation of disaster. In Psychology Today, Craig Marker, chair of Mercer University’s department of clinical medical psychology, had explained that he advises patients to do the opposite of what their anxiety tells them.

He adds that their anxiety is telling to play it safe though to get past it, they need to push themselves.  They make them wear bright and outrageous clothing to draw attention to themselves.  When they do these opposite behaviours they tend to be telling their body that there is nothing to fear and they then have the potential of coping on their own irrespective of the circumstance.

Safety Check: Dipping Safety Behaviour/Reduce Self-Focus

These researchers have been related precisely with social behaviours and social anxiety and not in-app fear mongering. However minus the data to comprehend how Safety Check tends to affect the two billion users of Facebook, the prevailing peer-based studies provides an insight on the influence of the tool.

In the US itself, around 18% of the inhabitants tend to suffer from anxiety and the figure seems to differ from nation to nation, each year though inferred to the community of Facebook it would amount to 360,000,000, excluding those with panic disorders, phobias, post-traumatic stress disorder together with other related mental health problems.

Study of 2008 published in the Journal of Behaviour Therapy and Experimental Psychiatry portrayed that the value of dipping safety behaviours and reducing self-focus as a way of therapy for those suffering from social phobias.

Safety Check is not a strange concept of associating social media with social anxiety. The medium tends to offer a powerful platform for some of our negative social behaviour which can be performed to the maximum.

Instagram – Negative Effect on Mental Health

The Royal Society for Public Health and the Young Health Movement had carried out a survey and observed that among 1,500, 14 to 24 years of age, Instagram had been the most negative effect on mental health. While Snapchat, Twitter and Facebook had all been deemed harmful by the research, the image and video sharing platform had been discovered to develop feelings of anxiety and insufficiency.

Laura Turner, a writer for the Atlantic had written an article in July wherein she described how Twitter aggravated her own mental health problems. She commented that `as a lifelong sufferer of anxiety utilising Twitter is also making my anxiety easier than ever, but the comparison Twitter enables has made the experience of anxiety worse’.

Turner went on to describe the two major strands of medically recognized anxiety – namely trait, which is said to be a habitual as well as obstinate tendency to worry and state – a temporary response to a threatening condition. The permanent Safety Check tab of Facebook can be debated to feed both the issues.


Tool for Reinforcing Fear

Those who tend to have opened the Facebook app in a distracted manner and scrolled for some minutes through their news feed before asking themselves why they are again gaping at baby photos and holiday snap of their friend could relate how painfully habitual social media tends to become.

Safety Check can offer a tool for reinforcing fears, as safety behaviours tend to do in social conditions. The fear of death or of their loved one is said to be a common kind of anxiety though could present in overwhelming manner in severe cases, resulting in the user being a housebound, suffering panic attacks, continuously imagining various ways of dying and generally being preoccupied with thoughts as well as fear of death which could interfere with their routine way of life.

Safety behaviour of an individual who tends to be anxious would be to collect all details regarding probable dangerous situations. For all the apprehensions that social media can worsen, harassment, body issues, social worries, bodily fear for one’s safety and their loved ones was maybe  something which had got away from its purview.

Opening the Facebook safety check  app now for some could provide an increased heart rate as the evolutionary fight or flight fear response comes in and they tend to find out the daily, hourly, minute-to-minute opportunity that the predicament has been affecting their own sense of safety.

read more
Social Media

How To Get The Rainbow Flag Reaction At FaceBook

How To Get The Rainbow Flag Reaction At FaceBook

More than just a “Like”: In the future, Facebook users can react differently to contributions. The expanded Reactions responses will gradually open up Facebook for all.

So far, Facebook users could only press “Like” for contributions from friends and subscribed pages. This was not always the desired and appropriate response. To enable users to react more differently to content, Facebook now offers more emotions: “Love”, “Haha” and “Wow” are available except “sad” and “angry”. A “do not like” does not exist.

Rainbow reactions

How the new “Facebook Reactions”

To post a comment with a response, you have to hold down the favorite button on the smartphone. Then further reactions appear in the form of Emoji. In the desktop version of Facebook, move the mouse pointer over the button until the reactions pop up. Still, the new Emojis are not available for all users. Facebook wants to introduce them gradually worldwide.

Already in September 2015, Facebook had announced the introduction of the complementary interaction possibilities for users. According to its own data, the company has carried out various tests in different countries in order to make a selection of reactions.

The usual Reactions equipment at Facebook includes – in addition to the like – five reactions: Love, Haha, Wow, Sad, Furious. Now there is a sixth reactions: Pride. A rainbow flag with which Facebook celebrates the LGBTQ community. And so you get them.

The rainbow flag now comes for no reason. The June is considered the Pride month because during this time people around the world celebrate the LGBTQ community. With parades, festivals and parties. And Facebook would like to draw attention to this. Far too often people – like you and me – are discriminated against because of their way of life. And we should stop doing that.

But how do you get them? Quite simply: Go to the LGBTQ @ Facebook page, like you and suppy you have the new reaction. Great!

So: Use the rainbow flag, no matter what post, show your pride and let Facebook become colorful. Since Friday, Facebook has introduced them and the users are looking forward to:

By the way, the colorful flag was “invented” by the activist Gilbert Baker in 1978, who died in March of this year. Since then, it has been a worldwide symbol of the lesbian and gay movement.

More Pride? We have accompanied the probably most recent transgender model in the world on their courageous path. For she is born in the body of a boy, but feels like a girl:

So get your rainbow reactions-like at Facebook

The colorful reactions can be put under any contribution like the other Facebook reactions, ie “anger”, “mourning” or the “thumbs-up”.

The reactions are visible to everyone. However, in order to be able to use the Rainbow-Like, you have to do a little bit of work.

  • First of all you have to liken the Facebook page “LGBTQ @ Facebook”.
  • Now the rainbow-like is released for you and you can use the icon to leave a reaction to a post.
  • You may have to wait a little while the like is available to you.
  • Click on the “Like” button and you can select the flag as an additional reaction.
read more
Social Media

Snapchat Spectacles Arrive in UK

Snapchat Spectacles Arrive in UK

The Snapchat Spectacles

Snapchat, as we know, started the idea behind timed images as well as videos, slowly integrating other social media platforms to start their own version for people to post stories showing timed images/videos etc. As the app developed over time, newer updates were added including various filters, screenshot notification, replay notifications, personal bit-mojis, introduction of scores as well as other cool features.
Slowly Instagram as well as Facebook has incorporated the idea of stories, allowing people to broadcast to public, clips of their life, which can again be modified.
Snapchat Spectacles _1

More than a social media platform?

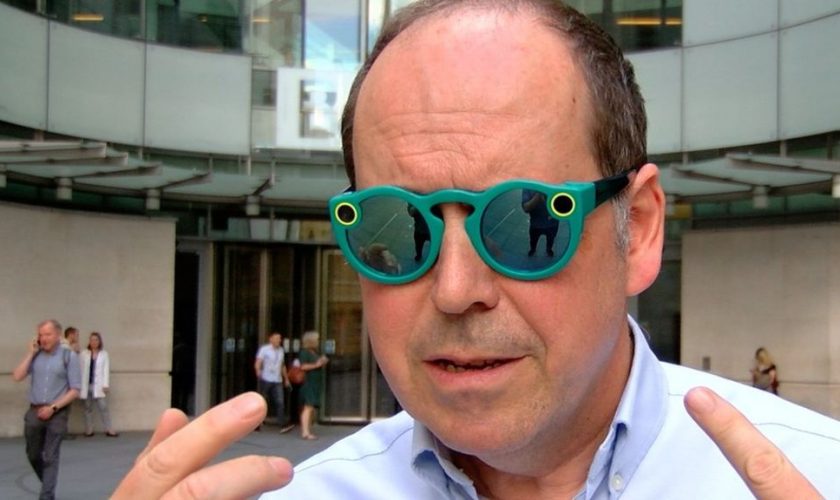
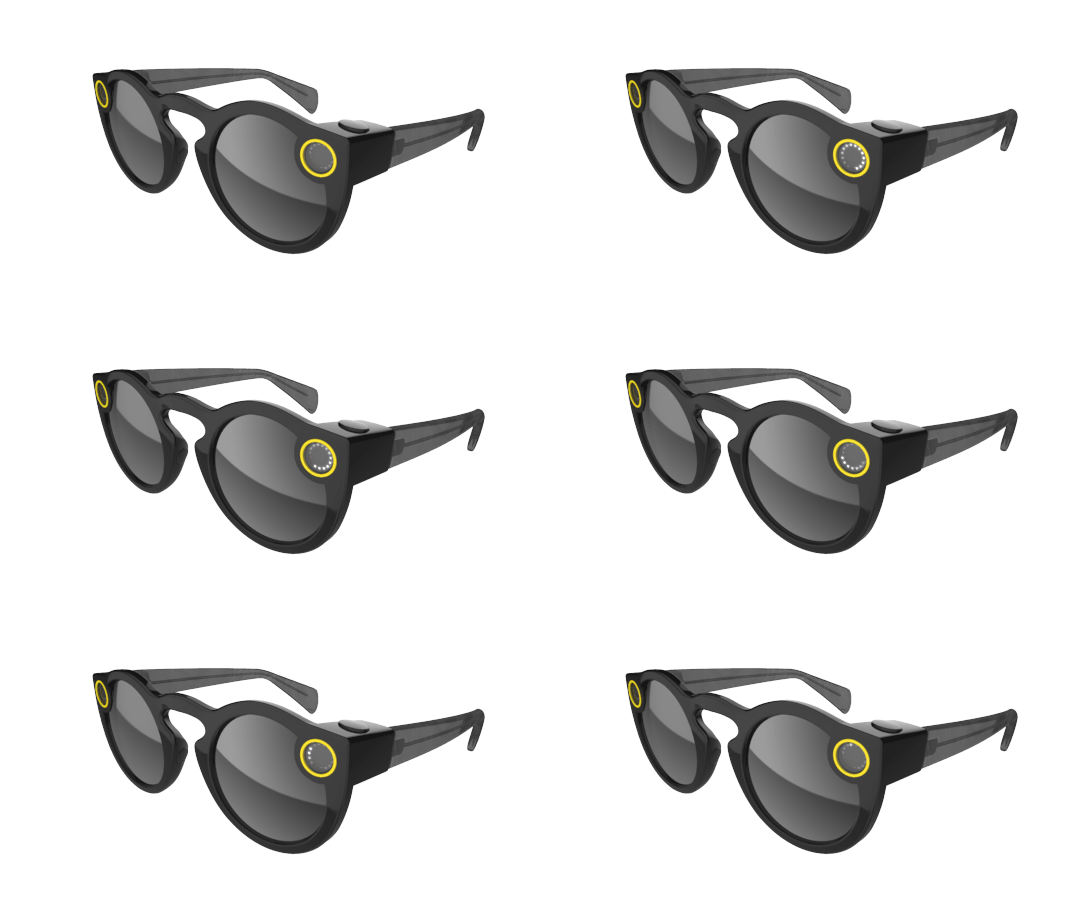
Versions of video recording sunglasses called snapchat spectacles have been introduced by the company in UK. Already released in the States, these snapchat spectacles serve the purpose of a recording device as well as specs. Snapchat thus has broadened its horizon and included video recording and cameras in its concept. At the press of a button one can record things in their surrounding and replay it later. Really cool, right?
The Snapchat spectacles might look a little out of place and bulky at first, but they are a great device to own. No hassle of a camera to carry around or a cell phone to capture precious moments, People can now capture images at the click of a button, adding pictures to their memorabilia.
Snapchat has features which are enjoyed by various users, including the famous filters. People create their avatars via the Bitmoji app and link it to Snapchat, making the app more creative and personalized. The Story feature, was the first to introduced by Snapchat, by virtue of which, people can rewind to the most memorable part of the day by replaying the snaps and allowing close friends and family to cherish it too. Now with the help of these awesome Snapchat spectacles, making memories is faster, simpler and easy.

Snapchat Spectacles _2

This snapchat spectacles device is sold by unique vending machines called Snapbots. They come in various colors and is affordable. To record a video, one must long press the button and release. It comes with a charging cable and a case. The snapchat spectacles is released by Snapchat itself, so there is product guarantee as well as excellent feedback too. The snapchat spectacles are in sync with a person’s Snapchat account, so the story gets directly uploaded to the individual’s Snapchat accounts, for their friends to as many times as they want.

The working method of Snapchat Spectacles:

For the device to work, it needs to be fully charged as well as paired to mobile phone via bitmoji app or Snapchat app. If not taking snaps would be unsuccessful. The pairing is easy, and done by Bluetooth pairing method. Once paired, the magic begins. Being cheap is an advantage why every picture crazy individual wants to use it.
The snapchat spectacles device sees a bright future with the advent of better and sleeker spectacles.

read more
Social Media

Facebook Wants to Merge ParlAI Systems for a Smarter Chatbot

Facebook Wants to Merge ParlAI Systems for a Smarter Chatbot

Facebook is all set to Bring Together ParlAI Systems with the Chatbot

The world’s widely used the social media platform i.e. Facebook is going through a rapid of features enrichment. Now Facebook has decided to launch a platform which will help in combining the artificial intelligence with the machine learning. This framework has been named ParlAI which will allow researchers to have simple way at building the conversational ParlAI systems.

Now researchers will be able to combine quite a number of different approaches to the machine dialogue. Making intelligent chatbots which doesn’t get stumped with the unexpected questions is extremely easy and fun exercise using this framework. Over the years the chatbots released by Facebook has been criticized for being quite narrow minded as well as can get easily confused by the users’ unexpected questions. Facebook is trying to improve upon the chatbots by making it work with the artificial intelligence.

ParlAI  Greater advantage for the developers

ParlAI has been designed to enable developers at developing highly smart and intuitive chatbots which in the long term will help in reducing the amount of work needed to develop them. This platform has built in support with data sets for more than 20 different natural languages. This platform has been boosted with the question-and-answers examples fetched from the Microsoft and Standard apart from the Facebook.

Future applications of this ParlAI platform

Facebook and a number of other tech firms has stated that development of the ParlAI is great achievement as it will help in paving way for developing highly interactive systems in future with incredible commercial applications. The chatbots built using this platform will be able to perform a wide variety of tasks which weren’t possible for the earlier versions such as ordering products or looking up for some information. Facebook has also brought some of the resources from its upcoming assistant named ‘M’ which is currently being tested by a very specific group of users.

The best thing about this platform is that it is making huge progress in bringing together the machine learning and computer dialogue on a completely different level. It is worth noting that in order to have complete questing and answering system in place one has to being together a number of different components but this new platform makes all of its readily available for the developers. ParlAI will certainly benefit the developers and it will enable them to bring chatbots quite intelligent and intuitive in every manner.

One of the AI expert has stated that this new ParlAI platform isn’t really a breakthrough in itself but it will be act a much needed enabling technology in the upcoming days. He also points out that in the last couple of years tech firms has lost their focus towards developing this kind of platform or system which brings intelligent dialogue between the users and machine. This new ParlAI is making use of the reinforcement learning which works just like the way animals learns through the positive feedback. This will enable them to come up with highly conversational machines with smarter and witty intelligence in future rather the monotonous and machine responses offered by the current generation devices.

read more
Social Media

The Best Ways to Clean Up Your Facebook News Feed

The Best Ways to Clean Up Your Facebook News Feed

Declutter Your Facebook News Feed for Efficient Use

In the age of social media, Facebook is an efficient mode of communication as well as a platform for self-expression. It has over a billion users and seems to be constantly buzzing with activity. You possibly have everyone you have known your entire life on your friend list. Ever felt like your news feed has more of what you don’t want to see and less of what you do? Just like our wardrobes, Facebook needs a bit of decluttering too, to give us a better experience. Here are a few tips and tricks that you can use to customize the content you see on your social media.

Learn to Unfollow

Unfollow friends to keep their posts away from your news feed, without having to unfriend them. They won’t find out. Use the downward arrow on any post on your news feed or go to a friend’s profile to unfollow them.

See Fewer Posts Instead of Unfollowing

Click Hide Post on the top-right of any post on your news feed and Facebook will show less posts by that person in the future.

Prioritize Your Friends According to ‘Close Friends’ or ‘Acquaintances’

Add the friends you care more about to a ‘Close Friends’ list and add others to an ‘Acquaintances’ list to see more posts from your inner circle on your social media.

FaceBook _1

Create Separate Friend Lists

To organize the posts you see create friend lists and you can separately see the updates by friends on that list. Head to the Lists page, click on Create List and add your friends to it.

Send the Posts You Want to See on the Top of Your News Feed

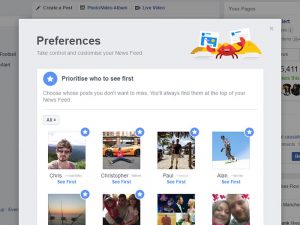
Find the three dots beside the News Feed option and click on Edit Preferences. Select what you want to see on top.

View What’s New

Click on the three dots and select Most Recent instead of Top Stories. Voila! Facebook will show your feed in a chronological order and you won’t have to miss out on a lot of stories.

Avoid Content from Pages or See them Separately

‘Hide All’ from a page and say goodbye to all its posts. To view posts from pages separately, go to Pages and click on Pages Feed.

Adjust or Block Ads

Head to Settings and click on Ads to edit your interests. Your social media usage also affects which ads you see on the rest of the internet. Enable or Disable this option in Ad Settings. Furthermore, you can use ad blockers to block ads and sponsored posts on Facebook.

Use Social Fixer

If you’re still unsatisfied after tweaking the site’s in-built options, you can get the Social Fixer extension for more advanced filtering. Install the extension, open Settings and choose your filters. You can effectively block posts containing certain words. It is great in keeping out spoilers of a new episode of your favorite tv series or political posts you don’t want to see.

Take a Survey

Click on the top-right of any post and select ‘Take a survey to make news feed better’. You will have to rate screenshots based on how much they look like a paid advertisement.

read more
1 2
Page 1 of 2