close

Internet

AppsInternetSoftware

Chat GPT-4o

Chat GPT-4o

OpenAI has recently unveiled an upgraded version of ChatGPT-4, known as ChatGPT-4o. The purpose of its design is to offer faster text, vision and audio processing. OpenAI CTO Mira Murati launched the new model in a livestream event on May 13. This new model can provide enhanced performance. Murati highlighted at the event that all users will be able to use this upgraded version of ChatGPT-4 for free.

If you are a paying user, you will get the chance to continue to enjoy the expanded capacity limit. In this case, you should know that this expanded capacity limit is five times greater compared to those which the free users get. 

What Is Chat GPT-4o?

Chat GPT-4o is the latest flagship model of OpenAI that will be able to integrate enhanced reasoning capabilities across vision, audio, as well as text modalities in real-time. All users can access this upgraded variant for free.

If you are one of the users who have an OpenAI API account, you can access GPT-4o within Assistants API, Chat Completions API, and Batch API. GPT-4o is compatible with JSON mode and function calls. As a user, you are capable of initiating interactions via the Playground interface.

Accessing Chat GPT-4o With ChatGPT 

ChatGPT Free Tier:

Free-tier users will be defaulted to this upgraded version and have a limit on the number of messages they will be capable of sending using this model. It will vary based on demand and current use. If it isn’t available, these users will use GPT-3.5.

If you are a free user, you can get limited access to messages using advanced tools. Names of these advanced tools are:

  • Data analysis
  • File Uploads
  • Browse
  • Discovering and using GPTs
  • Vision

The advanced vision capabilities allow the model to boost accuracy in understanding your shared images. If you are a free tier user, at any time you can tap on ChatGPT to upgrade to Plus.

ChatGPT Plus And Team:

If you belong to the subscribers of ChatGPT Plus and Team, you will get access to GPT-4o on the chatgpt.com website with a larger usage cap. So, if you are a ChatGPT Plus and Team user, you can select this model from the drop-down menu at the top of the page.

ChatGPT Enterprise:

The main motive of the ChatGPT Enterprise is to fulfil the requirements of large enterprises by giving access to GPT-4o as well as GPT-4. New conversation on this enterprise will be defaulted to this new model, GPT-4o. As a user, you can select other models from the drop down menu located at the page’s top.

How To Use GPT-4o:

Organizations and users can use it in different ways:

  • ChatGPT Free: This new model is already ready to be available to ChatGPT chatbot’s free users. If you are a free user, you should know that the new model will replace the current default for ChatGPT. However, the free users can have restricted message access. Moreover, they will not be able to access a few advanced features like vision, file uploads and data analysis.
  • ChatGPT Plus: ChatGPT paid users can access the upgraded variant completely without the feature restrictions, which are made for free users.
  • API Access: Developers are able to access this model via OpenAI’s API. It lets you integrate into apps in order to use the variant’s full capabilities for tasks.
  • Desktop Applications: This new version has been integrated into desktop applications. For instance, it is integrated into a new app for Apple’s macOS ( launched on May 13).
  • Custom GPTs: Organizations are able to create custom GPT versions of this model in order to meet specific business requirements or departments. Users can get this custom model through OpenAI’s GPT Store.
  • Microsoft OpenAI Service: As a user, you can explore its capabilities within the Microsoft Azure OpenAI Studio in a preview mode, mainly designed for handling vision, test and other multimodal inputs. Azure OpenAI Service customers can examine its functionalities using the initial release in a controlled environment.

GPT-4o Integration With ChatGPT:

This new model will be integrated within the Free, Plus, and Team tiers of ChatGPT. It lets you leverage its capabilities for activities like text and vision.

  • Upgrading Access:

If you are a free user, you will be assigned automatically to this new model. But in this case, you should know that you will have message restrictions that will depend on usages and demands. Moreover, during the peak usage times, free-tier users will be reverted to GPT-3.5. Free-tier users should know that data analysis, file uploads and vision capabilities are some advanced features that will be limited for them.

  • GPT-4o Subscription Benefits:

In order to access the GPT-4o with advanced features and higher usage limits, users are able to subscribe to the ChatGPT Plus or Team plans. GPT-4o subscribers will be capable of sending up to eighty messages per three hours. On the other hand, ChatGPT-4 Plus subscribers are able to send a maximum of 40 messages within a particular period.

  • GPT-4o Message Caps:

It may happen that message caps get adjusted during peak hours in order to ensure accessibility for all users. Messages that are not used within three hours are not going to carry over to subsequent cycles.

  • GPT-4o Workspace Features:

Compared to ChatGPT Plus accounts, the message limits for this model are higher in ChatGPT Team workspaces. It provides advanced capabilities for collaborative environments. This upgraded variant’s introduction makes artificial intelligence more accessible to people and enables users to use advanced tools for text and  vision-based tasks.

What Can GPT-4o Do?

Among all the OpenAI models, the best one based on performance and functionality was GPT-4o (at the time of its release). Things that the model can do are as follows:

  • Real-time Interactions: It is capable of engaging in real-time verbal conversation without making any delay.
  • Knowledge-based Q&A: Like the previous GPT-4 models, this new variant can respond to questions. It uses a knowledge base to get trained.
  • Text Summarization And Generation: Like other GPT-4 models, it is able to execute common text LLM activities such as text summarization and generation.
  • Multimodal Reasoning And Generation: It can integrate text, voice and vision into a single model. This feature enables the model to process a combination of data types and respond to them. In addition, it is able to understand text, images, and audio at the same speed. Moreover, the model can produce responses through text, images, and audio.
  • Language And Audio Processing: It can handle over fifty different languages.
  • Sentiment Analysis: This feature helps the model to realize user sentiment across various modalities of audio, text, and video.
  • Reduced Hallucination And Improved Safety: In order to reduce the creation of wrong information, Chat GPT-4o is designed. By using enhanced safety protocols, it ensures that the outputs are correct and safe for users.
  • Voice Nuance: It creates speech with emotional nuances. Thus, it becomes beneficial for activities where communicating should be done sensitively.
  • Audio Content Analysis: GPT-4o is able to create and understand spoken language. It is possible to apply this model in audio content analysis, voice-activated systems, and interactive storytelling.
  • Large Context Window: GPT-4o has a context window which is compatible with up to 128,000 tokens. Besides, this model is able to maintain coherence over documents or longer conversations. Thus, this model becomes ideal for detailed analysis.

Further Things That Do:

  • Real-time Translation: Its multimodal capabilities are compatible with real-time translation from one language to another one.
  • Image Understanding And Vision: It is capable of analyzing videos and images and permits users to upload visual content that the model can understand, analyze and explain.
  • Data analysis: With reasoning and vision capabilities, you can analyze data that is available in data charts. Creating data charts is also possible for this model based on a prompt or analysis.
  • File Uploads: This model enables users to upload files. Thus, you, as a user, can analyze specific data.
  • Memory And Contextual Awareness: It remembers old interactions. Besides, it is able to maintain context over longer conversations.

The Bottom Line:

Chat GPT-4o, the upgraded version of ChatGPT-4, can offer GPT-4-level intelligence but is faster and comes with improved capabilities across text, voice, and vision. This new model is really better than any existing model regarding understanding as well as discussing the images which you share.

Frequently Asked Questions  

  1. Is ChatGPT 4o free?

Yes, it is going to be available for free to all users.

  1. Is ChatGPT-4 available?

#Yes, ChatGPT Plus subscribers can use ChatGPT-4.

  1. Is ChatGPT 4o better than 4?

Yes. Compared to the 4.0 version, ChatGPT 4o is a more advanced, effective and versatile tool, which can provide more detail and precision.

read more
InternetSoftwareTechnology News

Apple Unveils iOS 18 Accessibility Features, Including AI-Powered Eye Tracking

Apple Unveils iOS 18 Accessibility Features, Including AI-Powered Eye Tracking

Apple recently unveiled some new and exciting accessibility features in iOS 18. Apple Unveils iOS 18 Accessibility Features, Including AI-Powered Eye Tracking. These new features, such as Taptic Engine, Eye Tracking, Vocal Shortcuts, Music Haptics, and more for iOS and iPad OS can empower people with disabilities.

The company said that these features are ready to hit the market later 2024 and are expected to be a part of the iOS 18 update. You can expect the features to be available with other future software updates such as iPadOS 18, and visionOS 2. When it comes to talking about accessibility features, this tech giant never fails to impress its users. This year again, these new and exciting accessibility features are announced by Apple in order to help users with disabilities. Among the beneficial features that Apple previewed, eye tracking grabs the most attention. It is a unique feature of Apple Vision Pro and will be available on iPhone and iPad.

What Did Apple Say?

In order to enrich lives, Apple always tries to bring innovative features while having faith in the transformative power of innovation. That’s why this tech giant has championed inclusive design while embedding accessibility at the core of their hardware as well as software. Their intention is always to push the boundaries of the technology level and through these new features, Apple is trying to provide the best experience to its users.

iOS 18 Accessibility Features To Look For:

Eye Tracking:

Eye tracking is a feature powered by AI. This feature enables you to navigate your device with your eyes if you are an iPhone or iPad user. It is similar to what was seen on the Apple Vision Pro. This Eye Tracking feature on iPhones and iPads is mainly designed for people with physical disabilities to allow them to control their devices by looking at them.

In this case, a front-facing camera is used in order to determine the element you are viewing. As a user, you only need to gaze at a button to make this highlighted. After that, you need to hold the gaze for a few seconds so that you can select the button using your eyes. You can see every data stored on your device because of the on-device machine learning technology. The best thing is that all data will remain protected and will not even be shared with Apple.

This feature can work across iOS and iPadOS apps. So there is no need to use extra hardware or accessories. If you are willing to activate any element and also access functions including swipes, physical buttons, and other gestures with eyes, your job is to use the Dwell Control.

Music Haptics:

This feature is designed especially for people with hearing disability. It helps them to experience music on their iPhones via haptic feedback (powered by Taptic Engine). Once you enable this accessibility feature, the Taptic Engine will begin playing textures, taps as well as refined vibration to the music’s audio. Developers get this feature as an API because of which music can be accessed more easily in their apps. It can work for many songs in the Apple Music catalogue.

Vocal Shortcuts:

iPhone and iPad users are capable of designating Siri with verbal instructions using the feature. Thus, they are able to launch shortcuts and complete actions. Atypical Speech is one of the features which let you widen the scope of speech recognition. Apple says that the vocal shortcut feature has the ability to recognize vocal patterns via ML technology.

Vehicle Motion Cues:

For iPhone and iPad users, it is a new experience. With the help of this feature, reducing motion sickness is possible for those people who are in moving vehicles. According to research, a sensory conflict between your view and your feelings causes motion sickness. As a result, users may not use their iPhone or iPad comfortably while in a moving vehicle.

With this feature, animated dots on the screen edges help to represent changes in vehicle motion so that it can reduce sensory conflict without interfering with the actual content. This feature uses the built-in sensors of iPhone and iPad to recognize when you are in a moving vehicle and according to this, it will respond. In order to show the feature on your iPhone automatically, you can set it. Moreover, you are able to turn the feature on or off in the Control Center.

Enhanced CarPlay Accessibility:

CarPlay is going to be available with three new accessibility features, including sound recognition, color filters, and voice control.

  • Voice Control:

With the help of voice control feature, you can navigate CarPlay. It allows you to use your voice in order to control apps.

  • Sound Recognition:

This feature is able to alert drivers to nearby sirens and is mainly designed for the deaf or those who have hearing issues.

  • Color Filters:

This feature improves the CarPlay interface for color-blind users.

These features, which can be launched with iOS 18, give a hint at a major focus on machine learning and artificial intelligence technology at the future WWDC event.

VisionOS Accessibility Updates:

VisionOS is expected to bring new accessibility features such as Smart Invert, Live Captions for FaceTime, and a Dim Flashing Lights feature to boost usability for all users.

  • Live Captions: It can help you to follow spoken dialogue in apps and live conversations.
  • Apple Vision Pro Updates: These will enhance the caption control. Also, it offers support for more hearing devices.
  • Additional Vision Accessibility Updates: It comes with Smart Invert and Reduce Transparency features which are useful for people with low vision.

These features are already available in the Apple Vision Pro in order to provide a flexible input system as well as an intuitive interface that is designed to aid the maximum number of users. With the help of VoiceOver, Zoom, and Color Filters features, blind people or users with low vision can access spatial computing. Moreover, you are capable of controlling Vision Pro with your hands, eyes or voice. In this case, you need to use accessibility features such as Switch Control, Sound Actions, etc. In addition, a feature called Dwell Control exists that is beneficial for people with physical disabilities.

Additional Updates:

  • VoiceOver: This feature will come with new voices, custom volume control, a flexible Voice Rotor, etc which are advantageous for blind people or the users with low vision. Besides, Mac users can use the feature to customize VoiceOver keyboard shortcuts.
  • Magnifier: The Magnifier will be available with a new Reader Mode. In addition, it will include an option allowing you to easily launch Detection Mode with the Action button.
  • Braille Screen Input: Braille users will be able to get a new way in order to start as well as stay in Braille Screen Input for faster control & text editing. Moreover, the Japanese language will be available for Braille Screen Input. It will be compatible with multi-line braille with Dot Pad. There will be an option letting you choose different input and output tables.
  • Hover Typing: People with low vision can use the hover typing feature to see larger text when they type in a text field and in their preferred font & color.
  • Personal Voice: If you are one of those who is at risk of losing speaking ability, then you should use the Personal Voice feature, which is available in Mandarin Chinese. If you can’t pronounce or read full sentences easily, you should create a Personal Voice using shortened phrases.
  • Live Speech: This feature will be available for non-speaking users. It adds categories as well as simultaneous compatibility with Live Captions.

More iOS 18 Accessibility Features:

  • Virtual Trackpad for AssistiveTouch: This feature is useful for people with physical disabilities, as it allows them to control their devices using the screen’s small region as a resizable trackpad.
  • Switch Control: This feature comes with an option with the help of which using camera to recognize finger-tap gestures as switches in iPhones and iPads will be possible.
  • Voice Control: It is one of the features that provides support for complex words and custom vocabulary.
  • You can see the Hover Typing experience and the new Reader Mode in Magnifier on iPhone 15 Pro.

Celebrate Global Accessibility Awareness Day With Apple:

Apple brings new exciting features along with some curated collections to celebrate the Global Accessibility Awareness Day:

  • Apple Store locations can host free sessions, allowing the customers to explore these accessibility features.
  • You can visit Apple Support to learn the way of customization using default accessibility features. Apple Accessibility playlist allows users to learn the way of personalizing Apple Vision Pro, iPhone, iPad, Apple Watch, and Mac by helping them to adapt the gestures to customize the way in which information is presented on the screen of the device.

The Bottom Line:

Apple, the tech giant has previewed a few accessibility features which are expected to arrive with iOS 18, iPadOS 18, and visionOS 2 later 2024. Some important accessibility features of iOS 18 and iPadOS 18 include— Eye Tracking, Vocal Shortcuts, Vehicle Motion Cues, Music Haptics, and CarPlay improvements. If you are an iPhone or iPad user, you can navigate your device with your eyes using the eye tracking feature.

Frequently Asked Question: 

  1. Do iPhones track your eyes?

Yes. The eye-tracking feature of iPhones, which is useful for people who are disabled physically, uses Artificial Intelligence and the front-facing camera in order to calibrate in seconds to permit the users to navigate their iPad and iPhone with their eyes.

  1. Which iPhone is best for blind users?

The iPhone 15 Plus is considered the best model for visually impaired users as this model comes with a large screen and extensive accessibility features.

  1. Can you use Apple Vision with one eye?

Yes, you are able to adjust the settings to use Apple Vision with only one eye.


read more
Do It YourselfInternetInternet Security

How to Export Passwords in Firefox? 5 Easy Steps

How to Export Passwords in Firefox

Have you saved too many passwords in Firefox? If so, then you might face issues while switching to another browser or moving between devices without syncing your accounts. Hence, you need to export the saved passwords from Firefox. While you are able to save them as a CSV file which is possible to be stored offline, you can also import them into a password manager. If you don’t need them, you are even able to delete them. In recent times, exporting passwords from Firefox has become easier. We have given here some methods to let you learn how to export passwords in Firefox.

Why Should You Export Your Firefox Passwords?

Some reasons why you are willing to export your Firefox passwords are as follows:

  • If you no longer have access to your device or browser, you have to back up the passwords.
  • You need to switch to a password manager or another browser. Then, you have to import your passwords there.
  • You need to print passwords to save them offline.
  • You may need to delete passwords from browsers for any type of security purpose.

Exporting passwords allows you to manage your online accounts without depending on the browser that you don’t want to use always. Remember that you have to be careful with the exported file. As CSV files are not encrypted, anyone can read them easily. You need to know that storing the file safely is necessary if you need to export passwords without importing them into a password manager. It is recommended that you should delete the exported file on Mac or Windows after you use this.

Where Can You Find And Edit Saved Passwords In Firefox?

Here, we are going to elaborate on the process you need to follow to view the saved passwords and edit them in Firefox:

  • Your first job is to open Firefox.
  • Then, you have to tap on the menu button, which is three vertical lines that can be found at the top right of your screen.
  • Finally, your job is to select Passwords.

How to Export Passwords in Firefox:

Step 1) Open Firefox:

Opening the browser is the first task to start the procedure of exporting your passwords from this browser. If you use a Mac, a Windows PC, or a Linux-based system, your job is to launch Firefox so that you can set the stage to access the Password Manager. It also allows you to initiate the password export process.

Open the Browser

You need to locate the icon to open the browser on your desktop, taskbar, or application menu. Then, you need to tap on this. Alternatively, you are able to find and launch this browser by using the search function on the PC. As soon as you launch Firefox, its familiar interface will greet you. The interface features an address bar, tabs, and different menu options.

Have you set the browser as the default browser? Then, you need to tap on any web link or HTML file to open Firefox automatically. In addition, you are able to customize the startup behaviour of the browser. And to do so, you need to set particular web pages in order to load upon launch. It can deliver a personalized browsing experience.

Once you open the browser, you have to make sure that you use the browser’s most recent version. It is important to keep your software updated for different security purposes. The reason is that it confirms your access to the latest features and enhancements. In order to improve stability, address security vulnerabilities, etc, the browser releases updates regularly. Therefore, it is advantageous to use the latest version.

Steps to Export

When the browser is open and starts running, you can go to the next step to export your saved passwords. You can unlock the capability of Password Manager to export your valuable login credentials.

Opening Firefox will allow you to reach one step closer towards exporting the saved passwords. It helps to set the stage for a secure process that allows you to manage your login data effectively. With the help of the browser interface, you can move to the next process of accessing the Password Manager within Firefox.

This step allows you to navigate through the features of the browser, while setting the foundation for subsequent actions and embarking on the journey in order to export saved passwords from the browser.

Step 2) Access The Password Manager:

The next step you need to perform is to access the Password Manager within the browser. The Password Manager works as a secure repository for the login credentials. With the help of this, you can see, edit, and organize the passwords that are connected to your different online accounts. Once you move to the Password Manager, you can initiate the export process. Then, you need to retrieve the valuable login data in a simple format.

Steps:

You have to follow these steps in order to access the Password Manager in the browser.

  • Your first job is to open the Menu at the top-right corner of the Firefox browser window. The menu is available as an icon with three horizontal lines. In this case, your task is to reveal a dropdown menu by clicking on the icon. The menu contains different options and features.
  • Next, you have to locate the “Logins and Passwords” option and click on it within the dropdown menu. Once you do this, it will take you to the Password Manager. Now, you are able to manage and see your login credentials that are associated with Firefox.
  • Next, your task is to move to Saved Logins. Once you access the Password Manager, you will view a list of the saved logins, like the associated website URLs, usernames, and the option that can reveal passwords. You are capable of reviewing and managing your saved passwords with this comprehensive view. It ensures that you are able to understand clearly the login credentials stored within the browser.
  • If you are in the Password Manager, you should explore some extra functionalities and features which the browser provides. The search bar can be used in order to locate specific saved logins, organize passwords into various categories, etc. Additionally, you can update the outdated credentials or remove them as necessary.

Once you access the Password Manager, you can manage the saved passwords. Now, you need to follow the next step to export your saved passwords.

Step 3) Export Saved Passwords:

It is simple to export saved passwords from the Firefox browser. This procedure can empower users to control valuable login credentials. Exporting these passwords allows you to make a backup of your vital information. So, you can easily move to another browser or a new device, while having a secure copy of your login data. This browser lets you create a file where all of your saved passwords will be available in a convenient format. Thus, it can make the export process simpler. You have to go through these steps in order to export the saved passwords from the browser.

Steps:

  • As already mentioned, you need to first head toward the Password Manager to access it. To do this, you need to open the menu and do the necessary steps we have said earlier.
  • In order to start the export process, you need to find the “Saved Logins” section within the Password Manager. The section can display a list where you can see your saved passwords, the linked website URLs and usernames. Thereafter, your job is to tap on the “Settings” icon, which you can identify through three vertical dots. It lets you reveal a dropdown menu of options.
  • Your task now is to select the “Export Logins” option from the dropdown menu. Then, you can see a dialog box where you get choices to export the saved passwords to a file. You should know that the browser is able to support the exporting of passwords in a CSV or comma-separated values format that is supported by different applications and platforms.
Export Logins
  • As soon as you select the “Export Logins” option, the browser will send a confirmation request to proceed with the export procedure. Now, you need to authenticate your identity. You can use your computer login credentials or other security measures in order to authenticate your identity. It makes sure that only an authorized user is able to export the passwords.
  • Now, your task is to choose Export Location and Name. After confirming the export, you are required to specify the exported file’s name and location. Next, your task is to choose a secure location on the PC. Then, you need to offer a descriptive name for the file so that you are able to retrieve it easily.
  • Your final job is to save this Exported File, which can be done by specifying the file name and location of the exported file. Hence, what you need to do is tap on the “Save” or “Export” button to create a file that contains your saved passwords. The browser can generate the export file that compiles your login credentials into an easy-to-access format.
Note:

If you follow the steps properly, you will be able to export these passwords from the browser. Thus, you can make sure that you have a secure backup of all saved login credentials. By following the method, you can easily maintain control over their valuable login data. It helps to facilitate seamless transitions between browsers and devices, while securing the accessibility of your online accounts.

Step 4) Choose Export Format:

Once you initiate the export process in your browser, you need to undergo a vital step which is choosing the export format for the file you have made. The browser allows to export passwords in CSV format. In this way, you can use the exported data across different platforms and applications.

The CSV format is simple and popular for its universal compatibility. This structured data format separates values within a file by using commas. When you are going to export saved passwords from the browser, you need to choose this format. It ensures that you can import the resulting file into password management tools, spreadsheet applications, etc. Also, you are able to import the file into other software that is compatible with CSV files. Because of the versatility, you can leverage your saved password in various environments. It helps to streamline the procedure to manage and use login credentials.

You can choose the CSV export format to embrace a standardized approach for storing saved passwords and organizing them. It can foster simple usage across different systems. In the CSV file, you can see columns that represent key attributes, including usernames, website URLs, and encrypted password data. These can offer a snapshot of login information in a structured format, which you can access easily.

Moreover, the CSV format can help in the seamless integration & migration of  saved passwords into password management solutions. For better security, it lets you centralize your login data.

How to Export:

Do you need to analyze data in a spreadsheet app to import a CSV file into a password manager, or have to transfer the passwords to another browser? Then, you should know that the CSV format can provide a versatile medium, allowing you to handle your exported passwords.

When you choose this export format, you will align with an adaptable standard for data interchange. It makes sure that your saved passwords can be accessed across various platforms and software.

Now, you are going ahead to perform the next and final step of saving these exported passwords. Once you perform the step, you can successfully complete the export process. It will lead to the successful acquisition of your login data’s secure backup.

Step 5) Save Exported Passwords:

Once you choose this format for the passwords you have saved in Firefox, you have to save the exported file that has valuable login information. In order to perform the step, you need to ensure that you have backed up your passwords securely, which enables you to have control of your login credentials and allows you to access your credentials seamlessly when necessary. Once you are prompted to save the exported file, you need to consider some aspects in order to optimize the security of your saved passwords.

Choose A Secure Location: In order to save your exported file, you have to select a secure location that you can access on your PC. Try to choose a designated folder or directory which should be password-protected or encrypted, as it will help to enhance the security of saved passwords. Thus, it can mitigate the risk of unauthorized access.

Use A Descriptive File Name: You need to give a descriptive name for this file. The name should reflect its contents and purpose. When you incorporate related details like export dates or linked websites, it helps to organize and identify the file amidst your digital assets.

Implement Encryption: You can encrypt the exported file, which contains saved passwords, in order to bolster its security. It is essential to use encryption mechanisms or secure storage solutions when you are willing to include an additional protection layer. It prevents potential breaches or unauthorized persons from accessing login credentials to keep it safe.

Backup The Exported File:

As soon as you save the file, you have to make a backup copy in another location. For example, you can create a copy in a cloud-based storage service or an external storage device. In order to enhance resilience, you have to establish redundant copies of these passwords. It makes sure that several avenues are available to access the vital data.

If you keep in mind these aspects which we have mentioned above, you can fortify your information’s security when you want to save these passwords. Moreover, it will help in protecting your sensitive information. Performing this proactive approach lets you control your saved passwords from this browser, while you can have a reliable backup strategy that is able to prioritize the accessibility as well as confidentiality of the login data.

As soon as you have saved the exported file securely and organized it, the method to export passwords in Firefox has been successfully completed. In this way, you are able to ensure that a resilient backup of your valuable login credentials will be available to you.

How⁣ To Transfer Your Passwords Safely And Securely:

You may face issues in making secure passwords. But keep in mind that these can be remembered easily when you follow these tips:

  • Never use‍ real words or phrases.
  • You should add symbols and capital letters.
  • Mix up numbers and words.

If you wish, you are able to use unique passwords for various accounts. Just use a password protector in order to track them. These kinds of software can store all passwords and usernames securely and allow them to be located and recalled quickly. In addition, these software let you create strong passwords whenever you want to make new accounts.

After making secure passwords, you need to transfer them safely. These are the tips you should follow:

  • You have to check that the websites you enter⁤ passwords ⁢on⁢ are encrypted.
  • You should always use password-protected programs or files.
  • Never save passwords on browsers.

Thus, you can make sure that no one is able to access your credentials. It also ensures that your accounts remain secure and safe.

How To Quickly Export Firefox Passwords With A Few Simple Clicks:

Now, exporting Firefox passwords has become very simple. So, you will not lose access to any social media credentials or confidential accounts while exporting the passwords. These are the steps you should follow:

  • Your first job is to hit the ‘Options’ button on the browser’s top right corner.
  • Then, you need to choose the ‘Security’ option. After that, you have to tap on the ⁣‘Saved Logins’ option.
  • Now, you need to hit the ‘Show Passwords’ button. Next, your task is to press Export as⁣ a ⁢CSV file.
  • As soon as you perform these steps, you can download your passwords in an encrypted CSV file.
  • You need to secure your file in a password-protected folder. Thus, you can make sure that all the personal details remain secure and protected.

How To Keep Your Password Data Secure With Firefox Export:

When it comes to talking about online safety, you should know that it’s important to secure your password data. The Firefox⁢ Export feature allows you to store your login information and save them. And there will not be any risk of  your credentials getting stolen or exposed. These are the major benefits of using this feature to keep passwords secure:

  • It makes sure that your data remains secure and safe in one place.
  • You can set up your system of password protection and customize this.
  • It allows you to sign into different accounts with your stored credentials in order to save time.
  • You are able to transfer passwords onto various devices easily.

In order to enhance the data security, you are able to set up a Master Password. Once you have set a⁤ Master Password,⁣ you are capable of shielding all Firefox Export data ‍from unwanted access.

How To Remove Exported Passwords From Firefox:

You should remove your passwords from the browser only when you are sure that you have exported them from the browser. So, you have to follow these steps in order to remove all passwords in the Firefox password vault.

  • Your first task is to open a new Firefox window.
  • Then, you have to select Passwords after tapping on the menu icon.
  • Next, you need to tap on the menu icon in the top-right corner of the password menu of the browser.
  • Then, you need to select Remove All Logins from the drop-down menu.
  • Now, you should follow the extra on-screen instructions in order to complete the method.

Firefox Export Passwords To New Computer:

  • You first need to connect your USB drive or external disk to the new computer.
  • Then, you need to open the browser Firefox.
  • After that, you have to tap on the menu icon.
  • Now, your job is to select Logins and Passwords.
  • You should now tap on the menu icon in the Firefox Lockwise window.
  • Your next task is to select Import from a File.
  • Once you choose the CSV file you have, you need to tap on
  • Finally, you can add or update the passwords and logins in Firefox Lockwise.

Firefox Export Saved Logins To Google Chrome:

  • Your first task is to close Firefox.
  • Then, you have to open the Chrome browser. Now, you need to tap on the three-dot menu icon.
  • Next, your job is to select Settings.
  • After that, you have to tap on Import bookmarks and settings.
  • Now, your job is to choose Mozilla Firefox from the drop-down menu.
  • Then, you need to uncheck all the other available items. But you need to keep your Saved passwords.
  • At last, you need to tap on Import.

The Bottom Line:

In this article, we have discussed how to export passwords in Firefox. Besides, we have covered how to save these exported passwords and how to remove them from the browser. For further queries or confusion, you can ask us via comments.

Frequently Asked Questions

What is⁣ Firefox ‌Password Exporting?

Firefox ‌Password Exporting enables you to save passwords from the browser. Thus, you are able to access them whenever you need.

How do you export your Firefox passwords?

If you are willing to export passwords, your job is to open the browser. Then, you need to select Options at‍ the top right corner. You need to head toward the Security tab. Now, you should select the “Saved Logins” button. Finally, you are able to save passwords to your computer as a file.

What ⁢are the benefits of exporting Firefox passwords?

Exporting passwords helps to keep passwords safe and secure. Moreover, it helps to remember them and you do not need to enter the passwords whenever you sign into a website.⁤

read more
GadgetsDo It YourselfInternetTechnology News

Triple Monitor Setup

Triple Monitor Setup

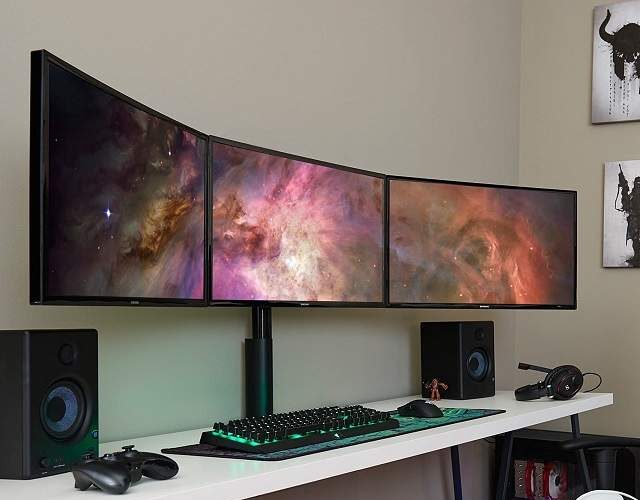
Multitasking has become necessary to the daily work routine in today’s fast-paced digital world. However, it is challenging to manage multiple tasks simultaneously with a single monitor. It is where many monitors come into play. In order to increase productivity, multitask efficiently, and smoothen workflow, you need to set up multiple monitors. You are capable of displaying many windows, apps and documents side-by-side with more screen estate. Let’s dig into the article to learn more about the Triple Monitor Setup.

What Is A Triple Monitor Setup?

A triple monitor setup refers to three monitors that are connected to a single source — a computer or laptop — in order to display one image. Several cables are able to connect a laptop to three monitors like HDMI, BGA, or Thunderbolt three.

Is A Triple Monitor Setup Worth It?

Yes, it is able to increase productivity & improve your work or gaming experience. Whether you are a creative freelancer, a professional who works from home or a gamer, you are capable of reaping the advantages of a laptop with multiple screens.

Why Do You Need To Use Multiple Monitors?

Multiple monitors can offer several advantages, such as:

  • Increased Productivity:

With multiple monitors, it is possible to open many apps simultaneously. Thus, you can switch between them seamlessly. Therefore, you do not need to switch between windows. It helps to save time & increase productivity constantly.

  • Multitasking:

Multiple monitors enable you to work on many tasks simultaneously and make multitasking simpler to do. Remember that it is beneficial for professionals who work on various projects simultaneously.

  • More Screen Real Estate:

Multiple monitors can offer more screen real estate, the result of which is that you get more space to work with. It is useful for programmers, designers, and professionals who work with many apps and Windows.

  • Enhanced Viewing Experience:

Multiple monitors deliver a better viewing experience so that you can see various apps and windows side-by-side. It is beneficial for video editors & photographers who are willing to compare many videos or images.

These are the advantages that you can get while using multiple monitors. However, a few users can find more benefits in particular fields like live streaming, data analysis, & video conferencing.

Cons Of Triple-Monitor Desk Setup: 

  • Expensive – Undoubtedly, a triple monitor setup is costly with all the hardware requirements.
  • Space Required – If you are planning to set up three monitors, remember that it will require enough space on your desk. In fact, you need to have a very spacious desk so that there will be enough space to keep other items as well.
  • Time For Adjustment – If you are going to use the triple monitor setup for the first time, it will take a certain time to get used to. Although it seems great from the outside, to adjust your eyes to different dimensions of the monitors, you will require some practice.

Features To Consider When Choosing The Triple Monitors For Laptops:

You have to look for particular features to ensure that your selected portable monitor is the correct fit for you.

Size:

This factor is paramount. You need to select the ideal size, which depends on the size of your laptop’s screen. Besides, you have to consider for which purpose you require this. If you are willing to design or edit multiple code lines, you can go with a slightly bigger size. 

Weight:

It is another factor which you have to think about. You have to determine whether you need the monitor at home or lug this around with you to school, a coffee shop, etc. Ensure that the monitor you will carry has to be comfortable. Besides, it must not seem like a burden while making longer or more frequent trips.

Screen Clarity:

It is essential for a second or 3rd screen. As meetings in the office are common, the screen needs to be clear when a person shares the screen with you. You have to give importance to screen clarity when you code, edit images or videos, or design logos. On the flip side, a 4K resolution isn’t a must for gaming.

Multi Connectivity:

The screens must be capable of connecting to your laptop & other devices. It will be best, if you select a USB C or USB A connection. The reason is that it is the new standard for most devices.

Screen Protector:

You should keep your tri-screen laptop protected from being scratched at home or on the go. The longevity of your portable screen relies on the existence of the screen protector. Try to cover the bases when you make a big investment.

Power Supply:

Ensure that your screen has to be battery-operated. Or it does not leech on too much of the laptop’s power.

Multiple Monitors Increase Your Productivity:

Within this setup, you are able to boost your productivity in different ways. When you work, the additional display will assist you in performing different tasks. It lets you create a more efficient workflow. Besides, when you multitask, there will be no need to flip between screens.

Why Should Triple Monitor Setup Be Done?

These are the tasks that multiple screens can make easier.

  1. Work And Conferencing:

Are you a professional who is working from home? Then, you must be familiar with the meetings on your laptop with team members. Whenever it comes to remote work, communication plays a vital role. The job can be easier with the help of triple monitors. You are capable of conducting a Zoom call with team members on a screen & using the other in order to polish up a few of your work or share a screen.

Tri-screen laptops help you in multitasking. You don’t need to switch between screens. Besides, you are able to listen in on the meeting while ticking something off the to-do list.

  1. Gaming:

A triple-screen setup can easily help you to enhance your gaming experience. The reason is that it can generate a more wholesome experience.

  1. Video Clips Or Programming:

Sometimes, you may have to learn a new technique or need to take the help of a tech guy to explain how a problem is solved in a video. A triple-screen setup enables you to pull up the video on one screen, and fix the issue on the other, or you are able to follow along with what the guy is doing. It makes the procedure more seamless to get through.

  1. Streaming:

What could be better than one screen for streaming? Three! You are able to create an immersive experience with a triple-screen setup.

  1. Sharing:

Several people need to present physically at work, share collected data or anything else. It relies on your role. You are capable of sharing your screen & communicating with the team more efficiently using this setup.

  1. Creating:

If you are a graphic designer and illustrator, you will benefit by having multiple screens, as these let you look closely at your work. The reason is that you need to ensure that each detail is perfect.

Connecting Multiple Monitors:

You first have to check the number of monitors that your GPU is able to support. In addition, you have to check the available number of graphic ports like DVI, HDMI, DisplayPort, and VGA. If you do not have a discrete graphics card, you will only get to see two ports.

In most cases, motherboards are able to run with only two monitors set up while they have their integrated graphics. But when you have a discrete graphics card, at least three ports will be there, excluding those available on your motherboard.

For a multi-monitor setup, users are capable of using ports on their graphics card & motherboard. While moving Windows between monitors, performance drop or lag is something you will experience.

Your graphics card may have three or more ports. However, it does not indicate that you are able to use them all simultaneously. You have to check if the available graphics card is compatible with multiple monitors.

If you are willing to find the graphics card’s name on Windows 8, these are the steps you should follow:

  • Your first task is to tap on Windows+I.
  • Then, you need to head toward the Control Panel.
  • After that, your task is to tap on Device Manager.
  • Now, your task is to tap on the arrow beside Display Adapters.
  • You will see the name of your graphics card under this.

For Windows 10:

Windows 10 users need to follow these steps:

  • First, you have to navigate to the Control Panel.
  • Next, you need to tap on Display.
  • After that, your task is to move to Screen Resolution.
  • Then, you have to tap on Advanced Settings.
  • Now, you should tap on the Adapter tab.

As soon as you have found the graphics card’s name, you need to do these steps:

  • Your first task is to Google the graphics card’s name.
  • Now, you should look for its product specifications.
  • The number of monitors supported by your GPU is available under Processor Graphics information.

Alternative Way:

It is possible to daisy-chain those monitors that have DisplayPort and are compatible with multi-streaming from a single DisplayPort connection on your Graphics card. There is no need to have displays of the same size. For instance, the size of the main display is 27 inches, whereas 24″ is the size of two other displays with a super-thin bezel. They work together in an exceptional way.

Know Your Ports:

Let’s know about different ports on systems and monitors.

DisplayPort: It is the latest digital standard for ports. You can use them to connect monitors & computers. These look like a USB but with one angle on one side. You should use this if the PC & monitor have one.

HDMI:

This standard port is used to connect different video devices. It can provide similar video quality to DVI. Besides, it is able to offer audio through cable.

DVI:

It stands for Digital Video Interface. This digital standard port is used to connect monitors to computers. These come in color-coded with white labels or plastic. It can provide video quality similar to HDMI.

VGA:

This term stands for Video Graphics Array. It refers to an analog standard port that you can use to connect computers & monitors. They come in color-coded with a blue label or plastic. As these are analog connectors, they are capable of creating considerably fuzzier images with less vivid pictures. So, you need to use this only when no other connectors are available.

Time To Pick Your Monitors

Displays:

After ensuring that your system is compatible with many monitors, let’s learn about picking monitors before knowing how to set up multiple monitors with a single laptop. Generally, monitors are available at reasonable prices, and have a good display.

Do you not want to go for a second-hand monitor? Then, you need to go with a 24-inch Acer with an IPS display. But gamers would require a full off-axis view with a slower response time. Hence, you can choose a 24″ Asus with a TN screen. You are even capable of selecting a smaller IPS monitor from the HP Pavilion of 21.5 inches. If you want a budget-friendly option, a bigger 27″ monitor from ViewSonic will be a great option.

No monitor is perfect. There are several factors to consider, such as available space, current monitor, etc. In addition, determining what you are willing to do with your extra monitors is crucial in selecting the ideal one.  Do you not like to play games? Then, you can choose monitors of different sizes, and make the bigger monitor your primary one. But, those who want to play games on a multi-monitor setup can have less pleasant experiences because of the variable sizes.

Before you plan to purchase a monitor, you have to ensure its input ports correspond to the ones on the output port of your system. You may use a conversion cable, but it is a hassle. In addition, you should avoid VGA ports because these are analog connectors. It makes the display less sharp & less vivid in colour. 

Triple Monitor Setup Guide

If you want, you are able to just put the monitors side by side. Definitely they will work fine. But it is not the only option. You are able to maximize your multi-screen setup based on your needs.

  • Side By Side:

Several users prefer this option for 2 or 3 monitor setups. It is the easiest setup, mainly for double or triple monitor setup. You will be able to keep an eye on many tabs and you will not need to move your head from side to side. But, it will take a lot of space on the desk. The issue can be overcome by mounting them. The best thing is you will not need a lot of planning for this very easy and functional set up.

  • Stack Them

Although this setting is the preferred option for the 4 monitor setup, it is possible to use this setting for the 3-screen monitor setup. This setting helps to free up a lot of desk space, but you need to crane your neck up in order to look at the other two screens. If you use this setting for triple monitor setup, you need to mount one or two screens, and keep the primary monitor at the desk.

Most of the users find this setup useful with one ultrawide monitor alongside secondary displays for 3 monitor setup, as it is difficult to put them side by side.

However, you are able to put the secondary monitor below the main one. But it may occupy a lot of space. However, it will be more comfortable for you to look at. In order to stack the monitors, you will require a stand that is capable of supporting stacking. Otherwise, you are able to mount them.

  • Landscape or Portrait

You may find a few stands that allow you to rotate the screens to 180 degrees. This setting is very useful for specific types of work, such as programming. The extra vertical view will be helpful for reading and writing the code. Does your work need more vertical space compared to horizontal space? Then, go for this setup. Do you need a lot of vertical space? Then, you need to go for an ultrawide monitor with a rotatable stand.

  • Setup for Non-Monitor Monitor

A lot of people are there who use tablets or TVs as the primary monitor. You definitely do not want a massive TV resting on the desk. Isn’t it? Then, you are able to mount the TV monitor above or beside the desk setup. You can use an extendable wall mount for pulling it closer or move it away as per your requirements. Although tablets are smaller, these are very useful. You are able to connect multiple tablets to the PC and then you can use their touch screen function for different tasks.

How to Set Up Three Monitors?

Configure Your PC:

In order to use multiple monitor setups, you have to configure your PC. It can be done in several methods.

Windows+P:

  • Your first job is to hit the Windows logo key & P simultaneously.
  • Then, you have to select Computer (Or PC Screen) Only in order to view the pictures on your PC’s monitor.
  • You can make a duplicate to view the same pictures as your PC. It will deduct the resolution on other screens. You are able to use the option for lectures or presentations.
  • Then, you need to click & drag the title bar to extend. Now, you need to extend your windows across your screens.
  • If you are willing to use a higher resolution on the external monitors, you can use Projector (or Second Screen).

Screen Resolution Menu:

  • Your first job here is to right-click on the void space on the desktop.
  • Now, you need to choose Screen Resolution.
  • Then, you have to tap on Multiple Displays.
  • You have to choose to Extend these displays or duplicate these display options.
  • Now, you need to tap on Identify these monitors so that you can understand which of the monitors are labelled as 1,2, 3, and so on.
  • You should record them by dragging the icons in order to match the settings.
  • Next, you need to choose the screen resolution by tapping on the Resolution menu.
  • Now, you need to tap on OK.
  • Finally, your task is to restart the system.

Connecting Two Monitors to a Laptop with a Docking Station:

The process you need to follow to set up multiple monitors with a laptop using a docking station is:

  • First, you have to connect the laptop to a power outlet. Next, you need to turn on this.
  • Then, you have to connect monitors to the docking station.
  • After that, your job is to turn on the monitors.
  • If you use external USB devices or ethernet cables, you have to connect them to the docking station.
  • Now, your task is to connect the power cable to the docking station, and later, you should turn on this.
  • Next, your task is to connect the docking station to the laptop.
  • Finally, your task is to download drivers and install them for the docking stations.

How To Set Up Multiple Monitors In Windows 11:

It is simple to set up three or more monitors in Windows 11. These are the steps you have to follow:

  • Your first job is to right-click on the Desktop. Then, your task is to choose “Display settings.” Once you see the settings window, you get to see the current display(s) & some options to change them.
  • In order to set up many monitors, you need to choose the “Extend these displays” option. It lets you use both displays as separate screens instead of duplicating the same content on both.
  • As soon as you have chosen the displays that you are willing to use, you need to apply the changes by tapping on “Keep changes.” Now, you can see that your monitors are set up and ready to use. However, you are able to adjust a few things in order to optimize your multi-monitor setup.

Rearrange Monitors & Select A Main Display:

Suppose you have set up many monitors & are willing to adjust every display’s position. Then, these are the steps you have to follow.

  • You can see the monitors’ position relative to each other by looking at the boxes labelled “[1]” and “[2]”.
  • Now, you need to tap on “Identify” in order to identify which number corresponds to which display. You get to see a number on the screen of the display.
  • Thereafter, your task is to choose the display & drag it to the selected position.
  • Save the changes by tapping on the “Apply” option. You will always get to see the Windows 11 task tray, Quick Settings, & calendar on the main monitor. There are a few apps that run best on the main monitor with optimal display settings. In order to ensure this, you need to open the “Multiple displays” menu. Next, you should choose “Make this my main display.”

Thus, you are able to make sure that the important apps run on the main monitor with the optimal display settings.

Change The Size Of Text, Apps, and other Objects:

When you deal with many monitors, you can see a few text, icons, & other objects that may appear too large or too small on the screen.

  1. Automatic Scaling:

Windows 11 is able to adjust the text size and apps for the display of your monitor automatically with the purpose of optimizing it. It indicates that you will not need to adjust the settings manually for every app or text.

  1. Changing The Size Of Text, Apps, And Other Objects:

Are you willing to customize the text size, apps & other objects? Then, you should know that it can be done in the “Scale” menu. Right-click on the desktop, and thereafter, you have to choose “Display settings” to access it. Then, you need to tap on “Scale and layout” from there. You have to use the given slider to adjust the size.

  1. Changing The Display Resolution:

Do you want to change the display’s resolution? It can be done in the “Display resolution” menu. Right-click on the desktop, and thereafter, your job is to choose “Display settings” in order to access it. From there, your task is to tap on the “Display resolution” option. Then, you need to select the resolution from the given option. Once you change the resolution, it will affect the screen’s text size & apps.

How to Set Up Three Monitors In Windows 10:

As soon as you create a triple monitor setup on your Windows laptop, it will increase productivity & expand the workspace. Do you have all the essential hardware? Then, you know that it is simple to set up multiple monitors.

These are the steps you have to follow to set up a 3-monitor display on your Windows laptop:

  • You need to open Settings from the Start menu. Otherwise, you are able to hit the Windows + I keys simultaneously.
  • In the Settings menu, your task is to tap on the “System” option.
  • It is essential to make sure that you are on the “Display” tab. Next, you need to hit the “Detect” button. It enables Windows to detect all the connected displays.
  • Three monitors can be seen now that are possible to be arranged in any order. If you are willing to rearrange them, your job is to tap & drag every monitor to the chosen position.
  • As soon as you arrange your monitors, you can save the changes by hitting the “Apply” button.
  • Tap on the “Identify” button in order to identify the position of a monitor. You can then see a number on the display screen to which it is assigned.
  • You have to scroll down & then check the box adjacent to “Make this my main display” in order to turn a monitor into your primary display.
  • When you navigate to the “Scale and Layout” option in the Display settings, you are able to change the orientation or the screen resolution.

How to Set Up Three Monitors for Macbooks: 

  • First, you need to go to Finder.
  • Then, you have to go to “system settings”.
  • Now, you need to click on “displays’ ‘ that you can see in the sidebar. Otherwise, you can search “displays” in the search bar.
  • After that, your task is to select the “+” pop-up menu, which can be seen on the right, below the Mac’s name.
  • Now, your job is to choose your display.
  • In case a display isn’t showing, you need to click “detect display” on the right. Otherwise, you are able to put your Mac to sleep and then wake it.

Can Your Computer Support Three Monitors?

Remember that a computer must have proper software & hardware to support three monitors at a time. You should know that computers with even enough physical video outputs won’t even support three monitors when the driver for the graphics hardware does not have enough support for multiple displays.

Do you know what the incredible diversity of PC hardware means? It indicates that no easy and fast rule is there to determine if your PC is compatible with three monitors or not. Rather than that, you should test the physical connectors. In addition, examining the published specifications is possible for your PC’s graphics hardware.

You are able to tally the physical video outputs at the ports of your PC. But a common exception is there. Most desktops are able to handle video connections from a graphics solution at a time. Using video output is not possible from a motherboard & video card in case you have installed one.

It is necessary to check the published specifications for the available graphics hardware. You should determine the hardware used by your PC with a Windows Search for Device Manager. Your first job is to open Device Manager. Next, you need to find Display adapters in the drop-down list. You can see the graphics hardware used by your computer in order to expand the option.

Once you get to know the graphics hardware, you are capable of hitting your favourite search engine. It is essential to find a specification page or support on the company’s official website that produced the graphics hardware of the PC.

You can face difficulties in looking for the official specifications for hardware more than five years old. In this case, you need to be aware of the results from the unofficial websites. Several 3rd-party websites try to compile graphics hardware specifications. But in most cases, these are unreliable.

How Do You Connect 3 Monitors With an HDMI Splitter?

Three monitors can be connected using an HDMI splitter. However, you might not get the results you desire. Hence, you need to know what an HDMI splitter is. It refers to a video adapter that is capable of taking a single output, and then splitting it into many duplicate outputs. On multiple monitors, it is able to only display a single video output.

In simple terms, on all three monitors, you can see the same picture. So, it does not have so much use on a PC. You need to know that no simple way exists to expand a PC’s display output limitation with an adapter or a splitter. An external graphics card is the only option that can be used to extend the display output of your PC. It bypasses the default graphics hardware. This one is a costlier option and supports a small selection of PCs.

Connecting 3 Monitors With a Daisy Chain:

A daisy chain is an option used to connect three monitors. It is supported by DisplayPort 1.2, Thunderbolt 3 (or newer), and USB-C connections that include DisplayPort mode. Remember that HDMI is not compatible with daisy chains.

In a daisy chain, the first monitor is used to connect to the PC through a video output. Next, the first monitor lets you connect to the second & then the second monitor to the third. You need to know one thing: the daisy chain has limitations, though it is functional. The 1st and 2nd monitors need to have video connections that work as an output. This configuration is very rare. Therefore, you have to carefully check the specifications of the monitor you are willing to use.

Make sure that your PC supports this feature. PCs that people bought in the last few years will, but the older ones often don’t. It is essential to check the manufacturing website of your PC or the website of the company (producer of the graphics card) in order to check if Daisy chains are supported.

Tips for Better Productivity With Multiple Monitors:

Once you learn how to connect many monitors, these are the steps you should follow to increase your productivity with them.

#1) Reduce Multi-Tasking:

When you have a larger screen, you can easily access multiple things, which can increase productivity. You must organize screens in a way that shows things that are relevant to the task at hand.

#2) Take Out Distractions:

Ensure that you are not working on one screen & filling others with games or social media feeds. Several monitors enable you to see all at a time. But it does not indicate you should. You should not open anything which is not related to your work.

#3) Use Desktop Cloud-based Apps:

Cloud-based apps generally use a browser. It indicates that you need to open many browsers. Hence, you have to toggle back and forth. It can waste plenty of time. When it comes to desktop-based cloud apps, these enable you to use many monitors effectively. And the interesting thing is that you don’t even need to toggle back and forth.

#4) Adjust According To Your Eyesight:

If you are unable to see things clearly at a distance, ensure that the monitors are placed at a comfortable distance. Do you have trouble reading the small fonts? Then, you should try to make them big. When you spend less time focusing on adjusting your eyesight to the monitors, you could be able to get more done.

#5) Pick A Proper Monitor Setup:

Ensure that you set up your monitors in a way that assists you in getting a seamless view of the tasks. In addition, there is no need to use one monitor per app. If you are able to access your application on half the screen, you can use the other half for another application, which will be useful for ongoing work.

What To Look For In Triple Monitors For A Laptop? 

You have to keep in mind several things while choosing your second and third monitors. Let’s check it: 

  • Suitable Screen Size For The Laptop:

You have to find a screen that will not look awkward next to the laptop’s. Generally, the sizes of the screen range from 3.5 inches to 22 inches. So, make sure that you are choosing something that is neither too small nor too big for the size of the laptop. Basically, the screen size needs to be between 12 to 17 inches. Most of the users go for something that is the exact same size as the laptop or just a little bit smaller. 

  • High-Resolution

You need to either go for a high-resolution screen to get a better viewing experience or you can opt for something similar to the native resolution of your laptop. Generally, the extra monitors tend to be dimmer compared to a laptop at the maximum brightness levels. 

  • Auto-Rotation Display

Is this aspect important to you? Or do you need to read large chunks of text? Or do you need to work on a creative piece? Then, you have to check if the monitor that you have chosen comes with an auto-rotation display. 

  • Eye-Care Mode

You should know that harsh glare of the screen can damage your eyes, mainly if you are using it for a long period. So, it is essential to protect your eyesight from damage. Therefore, you need to look for eye-care modes when you are buying additional screens. Make sure that the screen comes with a blue-light filter in order to protect vision as well as to reduce eye strain by reducing the contrast. 

  • Multi-Device Compatibility

Are you willing to switch between devices with your monitor? Then, you should go for a screen that has multi-device compatibility. It means the screen will be able to support several devices like regular laptops or the Samsung DeX, Macbook, or Nintendo Switch. 

  • Hybrid signal input

Remember, hybrid signal input will allow you to quickly set up the screen with any laptop. In a few cases, it means quick connectivity with those laptops that have USB C or USB A port.

How To Wall-mount Multiple Monitors In Tight Workspace?

 Can’t you squeeze a second or third monitor on the desk? Then you can mount one on the wall. It is possible to do so when the desk is pressed up against the wall that can support a mounted monitor. Do you have an HP monitor? Then, it is possible to mount it on the wall using an HP B300 PC mounting bracket. You are able to easily install this bracket with the help of some simple tools. It will help to keep the monitor securely fastened to the wall.

A few brackets are available that can hold multiple monitors which are possible to be mounted onto the desk’s back edge when the wall is not an option. Choose that one, which will fit the brand as well as size of the monitor in order to confirm that the monitors are held securely in place.

 Use A Standing Desk With 3 Monitors

 These desks are one of the most popular office accessories nowadays. You definitely know that sitting for long hours is not good for health. If you use a standing desk, it will allow you to quickly transition between sitting and standing when you are working.

 Can You Close The Laptop And Still Use The External Monitor?

Yes, you can do so. You just need to tweak the settings a little.

  • First, you need to right-click on the battery icon of the laptop.
  • Then, you need to tap on Power Options.
  • Now, your task is to choose the “When I close the lid” option.
  • Next, your task is to click on Do Nothing.
  • Finally, you need to tap on Save Changes.

The Bottom Line:

When you set up multiple monitors, it allows you to enhance workflow and improve productivity. In addition, it lets you generate more space for your apps. In this article, we have discussed in detail how Triple Monitor Setup can be done. Still, if you have any queries, let us know via comments.

Frequently Asked Questions

How do you set up three monitors?

An HDMI cable or DisplayPort can be used to connect three monitors. Otherwise, you are also able to use Daisy chains. Navigate to the screen resolution. Next, you should tweak the settings under the display option in order to extend or duplicate the monitors. Then, you have to select the main monitor.

  What cables do you need to set up dual monitors?

You will require an HDMI cable for a standard connection. In addition, it is also possible to use a DVI or VGA cable to set up the dual monitors.

How do you connect three monitors to your laptop with one HDMI port?

Connecting three monitors to your system is possible using an adapter or splitter with an HDMI port.

read more
Do It YourselfInternetInternet SecurityTechnology News

Auto Delete Old Files on Windows 10 and 11

Auto Delete Old Files on Windows 10 and 11

There are several people for whom a cluttered desktop & downloads folder is a way of life — no matter how hard you are trying, they will end up disorganized. Do you wanna perform a bit of digital spring-cleaning? You will be glad to know that several ways exist through which you are capable of keeping your Windows 10 PC decluttered. While you are able to get rid of Windows 10 bloatware, you are also capable of sorting the right click menu. In addition, decluttering the search results is possible, along with cleaning up your desktop. Do you want a more passive approach? Then, this article is for you where you will get to know how to auto delete old files on Windows 10 And 11

Pros And Cons Of Auto-Deleting Files:

Like every technology, auto-deleting files also comes with its benefits and drawbacks. Here are some pros and cons that should be considered:

Pros:

  • The most obvious benefit that you can get by setting up an auto-deletion function is that there is no need to manually delete files. So, it helps to save a lot of time as well as your efforts.
  • It prevents your PC from being cluttered with unnecessary files. Thus, it helps you improve system performance.
  • When you delete files automatically, it will help you to decrease the risk level of accidentally leaving sensitive information on your PC.

Cons:

  • Unintentional removal of files is probably a big fear which a person can encounter.
  • You might not have much control over the type of files that you need to auto-delete. As a result, this process can remove the files that you are willing to keep.
  • After the files are deleted, it is hard to retrieve the files.
  • It is challenging to set up auto-deletion rules. And remember, improper configuration may cause issues like unintentional file deletions.

How To Auto Delete Old Files On Windows 10 And 11:

These are the ways through which you can auto delete old files on Windows 10 & 11.

  1. Using Storage Sense:

The easiest process that you can try, if you are a beginner or less tech-savvy user, is to use the Storage Sense feature on Windows computers. This procedure is simple and very easy. You are capable of managing most temporary or downloaded files which have been living under the hood for ages inside the PC.

It is the process through which you can configure Storage Sense:

For Windows 11:

  • If you are a Windows 11 user, you need to navigate to Settings by hitting the Windows Key + I. Then, you should tap on System and Storage.
  • After that, your job is to enable the Storage Sense toggle.
  • Then, your task is to tap on this to configure Storage Sense. Next, your task is to choose the cleanup duration for the Recycle Bin, Storage Sense, & Downloads Folder.
  • You can set the following settings:

Run Storage Sense: Every week

Delete files in recycle bin: Thirty days

Delete files in Downloads folder: Sixty days

Thus, it can delete old files automatically on your computer depending on the timeline which you have set.

Whether you are willing to run the Storage Sense manually, you have to hit the Run Storage Sense Now button. It helps to clear out all the older or temporary files from the Windows PC.

For Windows 10:

  • As a Windows user, you need to press Windows Key + I to launch the Settings app. Then, your task is to go to the System page.
  • Thereafter, you need to move to the Storage section. Now, you have to enable the Storage Sense feature.
  • Next, your task is to tap on the Configure Storage Sense to make adjustments, or you can tap on the Run It Now link.
  • Then, configuring settings is possible as you want.

Similar to Windows 11, whether you are willing to manually run Storage Sense, your task should be to hit the Clean Now button.

  1. Deleted Old Files Or Folders With The Command Prompt:

The Command Prompt is capable of working with simple text-based commands, letting you perform various admin functions & fix different troubleshooting problems on Windows.

Let’s check the below section in order to fix the storage problems through the ForFiles command on Windows:

  • Your first task is to move to the Start menu search bar. Then, you need to type in ‘cmd’. Now, you have to run the CMD as an administrator.
  • In order to delete files which you have not modified in thirty days, you need to type in the following command. After typing the command, you should press Enter:

ForFiles /p “C:\path\to\folder”/s /d -30 /c “cmd /c del /q @file”

  • Hence, “C:\path\to\folder” and /d -30 refer to the folder path from where you are willing to delete files and the specific time when you wish to delete your file. You need to replace these with the settings that are suitable for you.
  • Once you hit the commands, you will see your files are removed.
ForFiles command breakdown:
  • /p — used to indicate the pathname to start searching.
  • /s — it is used for instructing ForFiles to search inside subdirectories.
  • /d — it is used to specify the last modified date for a file.
  • /c — it helps to instruct the ForFiles tool to execute the command. Remember that this one has to be wrapped in double quotes. Hence, “cmd /c del @file” is the default.
  • /q — It lets you delete folders without requiring confirmation.

However, in order to learn more about these switches, your job is to use the ForFiles /? Command.

These are some of the variables that you can use in the command string:
  • @file – it can return the file’s name.
  • @fname – is capable of returning a file name without extension.
  • @ext – can return only the file’s extension.
  • @path – is capable of returning the file’s full path.
  • @relpath – can return the file’s relative path.
  • @isdir – is capable of returning “TRUE” when you see a directory file type, and “FALSE” for files.
  • @fsize – is able to return the file size in bytes.
  • @fdate – is capable of returning the file’s last modified date.
  • @ftime – is able to return the file’s last modified time.
  1. Use Task Scheduler On Windows:

You should know that Task Scheduler is basically a simple Windows tool allowing you to automate your repetitive Windows tasks. Once you set up the task, the app will be able to handle the activity which you have said it to do. Regarding auto-deleting your files or folders, you can use the ForFiles command, which makes the task of deleting your older files or folders a lot easier.

The process you need to follow to automate the deletion is:
  • Your first task is to navigate to the Start menu search bar. Then, you need to choose the best match after typing in ‘task scheduler’.
  • Now, you need to right-click on the Task Scheduler Library. Then, you should choose the option New Folder.
  • You can enter any name and then tap on OK.
  • Next, your task is to right-click on the folder that was created recently. Then, you should choose the Create Task option.
  • Once you see the Name box, you have to put your name for the task.
  • Then, go to the Security options section in the General tab, where you have to choose the Run whether the user is logged on or not option.
  • Ensure that you do not select the Do not store password checkbox.
  • After tapping on the Triggers tab, your job is to choose the New button.
  • Then, you need to use the Begin The Task Setting to choose On A Schedule Option.
  • Now, your job is to set up the timing of every activity you wish to run under the Settings section. Then, you have to tap on OK.
  • Once you go to the Actions tab, your job is to hit the New button. Then, you need to choose the Start a program option from the Actions drop-down menu.
  • Once you see the Program/script box, you have to type in the following command:
ForFiles

Just like this, you have to type in this command in the Add arguments box:

/p “C:\path\to\folder”/s /d -30 /c “cmd /c del /q @file”

  • Hence, you have to tweak the “C:\path\to\folder” to the folder’s path where the files exist. Then, you have to replace “/d -30” with the actual number you want to choose. Therefore, your command will be like this:

/p “%userprofile%\Users\[Your Username]\Downloads” /s /d -30 /c “cmd /c del /q @file”

  • After that, you have to tap on OK. At last, you need to check these checkboxes from the Settings tab. Now, you have to tap on OK.
  • Now, you need to allow the task to be run on demand.
  • Then, you have to run it as soon as possible, once a scheduled start is missed.
  • However, you need to restart all of them if the task fails.
  1. Delete Files Older Than X Days with File Explorer:

This process will let you know how you can delete files older than X days using File Explorer. These are the steps which you need to follow.

Step 1: First, you need to open File Explorer by pressing the Win + E keys.

Step 2: Then, you need to head toward the folder where your files exist. For instance, you can go to the “Downloads” folder.

Step 3: Next, your job is to tap on the Date Modified Dropdowns. After that, your task is to choose a date range according to your requirements. You can see all files in the date range.

Step 4: Now, your task is to select the files which you want to delete. Then, you have to hit the Delete button on the top bar.

  1. Delete Files Older Than X Days With PowerShell:

Do you wish to delete multiple files from different folders & clean up by deleting older than specific days? If this is the case, you obviously want to use PowerShell to delete files which are older than X days. You need to follow these steps to delete files with it:

Step 1: Your first task is to left-click on the Windows main menu button. After that, your job is to look for Windows PowerShell. Then, you need to right-click the result. Now, you should choose Run as administrator.

Step 2: It opens the Windows PowerShell window. Then, you have to type in Get-ChildItem –Path “C:\path\to\folder” -Recurse | Where-Object {($_.LastWriteTime -lt (Get-Date).AddDays(-X))} |

Remove-Item to delete files which have not been modified in the last few days. Then, you need to tap on Enter. You have to also change the path location: “C:\path\to\folder” with the location of the folder you want to delete. Then, your job is to change -X in order to choose files with the date that is modified last in the above command.

Finally, you need to tap on OK after finalising the changes. And the task does not take too much time. Therefore, you can delete your files automatically within the specified time. If you are willing to change your decision, then delete the new folder made by you simply to reverse the setting.

  1. Using Microsoft PC Manager:

A new tool for Windows 10 and 11 was introduced by Microsoft in 2022, and it is known as Microsoft PC Manager. With the help of the easy-to-use tool, you are able to clean temporary files & manage memory usage. The app includes an option in order to delete temporary files automatically. It helps you to keep the computer free from unnecessary clutter. Follow the below section to know how to do so:

  • Your first task is to download the Microsoft PC Manager app if it’s not downloaded already. Then, you need to open the application.
  • Now, your job is to tap on the Gear/Cog icon. Then, you have to choose the Settings option.
  • Finally, you need to enable the toggle that you can see beside the “PC Manager will automatically boost your PC”.

Because of some bug, the PC Manager could not auto-delete the files. Whenever it happens, you need to clear out the data manually. In order to do so, your job is to tap on the Boost button. Then, you can see the temporary files are deleted instantly from your computer with memory usage.

  1. Delete Files Older Than N Days Using Script:

VBScripts help to delete files that are older than N number of days on a particular folder path. And the VBScripts are available to the Spiceworks forum users. We have given here a simple script:

On Error Resume Next

Set oFileSys = WScript.CreateObject(“Scripting.FileSystemObject”)

sRoot = “C:\Path To Old Files”                                    ‘Path root to look for files

today = Date

nMaxFileAge = 3                                                         ‘Files older than this (in days) will be deleted

DeleteFiles(sRoot)

Function DeleteFiles(ByVal sFolder)

Set oFolder = oFileSys.GetFolder(sFolder)

Set aFiles = oFolder.Files

Set aSubFolders = oFolder.SubFolders

For Each file in aFiles

dFileCreated = FormatDateTime(file.DateCreated, “2”)

If DateDiff(“d”, dFileCreated, today) > nMaxFileAge Then

file.Delete(True)

End If

Next

For Each folder in aSubFolders

DeleteFiles(folder.Path)

Next

End Function

Hence, you get to know from the script that it takes into consideration the “Date Created” property of items rather than “Date Last Modified”. Whether you wish to delete files which have not been modified in the last N days, your task is to change this line in the script:

dFileCreated = FormatDateTime(file.DateCreated, “2”)

to

dFileCreated = FormatDateTime(file.DateLastModified, “2”)

It helps to clear files older than 3 days. Your job in this case is to modify the folder path. Then, you need to max file age parameters in the script as you need. After that, you need to save this file with a .vbs extension & thereafter, your task is to run it. Remember that the script works recursively on the specified folder & sub-folders.

How To Create A Batch File:

You may find creating a batch file too technical or a bit difficult. But there is nothing to worry about as you don’t need to know its meaning.

Hence, your first task will be opening Notepad. Then, you need to copy the following text line and paste this:

forfiles -p “C:\Test” -s -m *.* /D -5 /C “cmd /c del @path”

You will not understand the line, but after going through the explanation, you can know what it indicates. Basically, it asks Windows to delete the files in the C:\Test folder as well as the sub-folders which are older than 5 days.

Test:

Before getting into more details about the command, remember that you have to save the file first. Then, you need to perform a test run. So, first, you have to generate a folder at the root of the C drive on the PC and the folder name is Test. After that, your job is to tap on File – Save. Now, as a batch file, you need to save the file. In order to do so, your job is to type in a name, which is followed by .bat. Next, you need to change the Save as type dropdown to All Files.

Save:

Saving the file is possible in any location on the hard drive you prefer. You have to generate a few dummy files in the Test folder. After that, your job is to double click on the Delete.bat file so that it can run. But still, you will not see anything deleted because the command includes /D -5. The term refers to files which are 5 days or older. When you need to delete any file, regardless of when it was created, you have to change the -5 to -0. Otherwise, your task is removing the /D -5 part altogether. Once you run this, you will see all files deleted.

You have to change the directory to something other than C:\Test to customise the command. It is the first thing which you need to do. It is as easy as copying the path from Windows Explorer for the directory you are willing. Then, you need to paste this into the command in Notepad.

Parameters:

Then, you will see the -s parameter, which can be viewed after the directory path. It means that the command must look into all subfolders. If you are unwilling to delete files from subfolders, you have to remove the -s parameter.

After that, you have to go to -m followed by *.* It indicates that the command has to evaluate every type of file. Whether you are willing to delete a particular file type in a folder, such as JPG images or PDF files, your task is to change *.* to *.pdf or *.jpeg. It can remove only those files.

The /D -X part lets you know how old the files should be to qualify for deletion. You are capable of keeping this with a value greater than 1. Besides, you can set the value to 0, or remove this altogether. And it is everything you should know about the command.

Run:

When you run this command, these are some things which you should note first. You should know that once you delete files, these will be deleted permanently rather than going to the Recycle Bin. Therefore, you need to be aware when you use this. Secondly, the command deletes files only instead of folders.

As it is a batch file, you were able to add the command’s many versions in the same file. For instance, you can make a batch file which will delete all DOCX files that are older than 180 days, PDF files that are older than 60 days & TXT files regardless of how old these are.

Now, you need to create your batch file and save it. Then, you should start scheduling to run on a re-occurring basis.

The Bottom Line:

Always remember that it is seldom useful to keep unnecessary files on your computer. While these consume memory space, these can also clog the file organisation. In addition, they are able to hamper the performance of your computer. You need to set up auto-delete instructions using any process that you prefer. It allows your computer to get rid of the additional baggage.

Before you want to auto-remove files or folders from the PC, remember that this process is a part of cleaning up your Windows. You should know that there are several other crucial hacks like terminating pointless background methods, removing unused apps, & tweaking settings to those which are relevant most to your situation. Therefore, you have to ensure that you are following the best principles to run your Windows as smoothly as you can.

Frequently Asked Questions

How do you delete files older than x days Linux?

Whether you are willing to delete files that are older than X days in Linux, you need to use the command “find /path/* -mtime +X -exec rm -rf {} \;.”. Using the command allows you to find the files. Then, you are able to delete the required file quickly.

Can you recover automatically deleted files on Windows 11?

Deleted files can be recovered automatically on Windows 11. However, if you are willing to recover deleted files on Windows 11, you can take assistance from a reliable third-party data recovery tool.

  • First, you have to launch the recovery software. Then, you need to scan the computer.
  • After that, your job is to preview the deleted files on Windows 11.
  • At last, your task is to recover the files which you want.

How do you remove 30 days old files in UNIX?

First, you have to know the command. After that, it is possible to remove thirty days old files in UNIX. The command which you need to type in is that: find/path/to/the/directory/ -type f -name ‘*’ -mtime +30 -exec rm {} \. After that, you will be able to remove the unwanted files.

read more
Internet SecurityInternet

Zero-Click Exploit

Zero-Click Exploit

You might have heard about the zero-day attacks before. These cyberattacks don’t require user intervention as a trigger. When the code hits your device, the attack will be executed automatically. You should know that these are nasty attacks. Therefore, everyone must be aware of this. These attacks use sophisticated tactics and can cause devastating consequences where the victim does not even know what happened in the background. People use these terms, ‘zero-click attacks’ and ‘zero-click exploits’ interchangeably. We call them interaction-less or fully remote attacks also. This article will let you know about zero-click attacks, how these attacks work, how to protect yourself, etc.

What is Zero-Click Exploit Malware?

It is a type of attack that takes advantage of software vulnerabilities without user interaction. The exploit may install malware Or perform malicious interaction on the device of the user by exploiting the vulnerability.

Traditionally, spying software works  by convincing people first so that they tap on a compromised link or file to install itself on mobile, tablet, or PC. But in this case, the victim doesn’t need to click on the link, as the software will be installed on the device without the need of clicking on the link. Therefore, it can be said that zero-click malware or no-click malware are more harmful.

These attacks include low interactions indicating lesser traces of any malicious activity. In addition, vulnerabilities that cybercriminals exploit for zero-click attacks are quite rare. The basic version of zero-click attack leaves hardly any traces due to which detecting them is hard. The same features that make software more protected and secured, can make these attacks harder to identify. While these attacks have been done around for years, the use of mobiles has increased the issue more. Let’s know how it works.

How does a Zero-Click Attack Work?

This hacking process exploits flaws in your device. It uses a data verification loophole for working its way into the system. In most cases, the software uses data verification procedures to keep cyber breaches away. Sophisticated hackers are able to exploit these vulnerabilities for the execution of cyber-attacks.

The process of working a hypothetical zero-click attack is as follows:

  • Bad actors try to detect vulnerability within a mail or messaging application.
  • They send a meticulously crafted message to the specific device to exploit the vulnerability. Attackers generally use specially formed data. For instance, they use a pixel or a hidden text message, allowing them to enter the compromising code onto the device. It may be a video conferencing session, voicemail, an authentication request, or a phone call. Any of the above may act as a vector for exploiting vulnerability in any app which can process data & evaluate it. With malware, spyware, trojans, etc., attackers can infect the targeted device remotely using the vulnerability.
  • As soon as hackers infect the device, they access the device’s contents and gain complete control over this. Attackers are able to send messages on behalf of users by impersonating them.
  • When the victim understands that someone has hacked them, it is too late because the attack has been done. Users can not find any trace of the attacker’s compromising message.
  • It is hard to pin down the specifics of this type of attack.

Pegasus Spyware and Other Popular Zero-Click Exploits:

While these attacks have become popular recently, they have been present for a long time. So, now they have built a wide range of attacking surfaces. These are a few famous zero-click hacks in recent times:

  • Pegasus Spyware: Researchers at CitizenLab found a zero-click exploit in Apple’s iPhone in September. This malware enabled hackers to spy on their victims. This spyware was invented by the Israeli company NSO. With the help of this, cyberattackers install the Pegasus malware in the target’s iPhone via a PDF file. They created the file for the execution purpose of malicious code automatically.
  • WhatsApp Flaw: In 2019, WhatsApp Messenger served as an entrance for cyber attackers. They try to install spyware into different victim’s devices. The vulnerability was identified as the “buffer flow vulnerability” in VoIP. The standard form of the term is Voice over Internet protocol. When attackers call the target’s smartphone ( iOS or Android) via a WhatsApp call, it becomes activated.
  • Apple Mail App Flaws: ZecOps, a cyber security organization, found zero-click attacks within Apple’s Mail App in April. The company later provided a write-up to inform people that cyber attackers send crafted emails to Mail users and make users’ devices vulnerable.

Examples of zero-click malware:

You should know that zero-click vulnerabilities can affect different devices – no matter whether it’s Apple or Android. These are the high-profile instances of zero-click exploits:

  • Apple zero-click, forced entry, 2021: A Bahraini human rights activist found their iPhones hacked in 2021 by strong spyware sold to nation-states. Later researchers at Citizen Lab, an internet watchdog based at the University of Toronto, discovered the attack. The smartphone of the activist, the iPhone 12 Pro, was analysed, and the researchers found proof of a zero-click attack. The attack has taken advantage of a previously unknown security vulnerability in Apple’s iMessage.
  • WhatsApp breach, 2019: A missed call triggered the infamous breach and exploited a flaw in WhatsApp’s source code framework. The attacker uses a zero-day exploit to load spyware in the data that both devices exchange due to the missed call. After loading, the spyware has enabled itself as a background resource.
  • Jeff Bezos, 2018: Mohammed bin Salman, Saudi Arabia’s crown prince, sent a WhatsApp message to Amazon CEO Jeff Bezos in 2018. The message contains a video that promotes Saudi Arabia’s telecom market. According to the reports, the video file included a piece of code. Therefore, the sender could extract information from Bezos’s iPhone for months.
  • Project Raven, 2016: It is the UAE’s offensive cyber operations unit. Emirati security officials and former US intelligence operators work there as contractors. According to the reports, a tool named karma was used for taking advantage of a flaw in iMessage. The tool used crafted text messages to attack the iPhones of diplomats, foreign leaders, activists, etc. It is intended to obtain images, emails, text messages, & location information.

Types of Zero Click Exploits:

The smartphone is the main target of harmful attacks. Different communications apps like SMS, phone, messaging, & social media apps are used by these devices. It can offer a broad range of attacking surfaces for hackers who are finding an exploitable vulnerability.

There are a few groups which are popular for identifying zero-click exploits. The NSO Group has detected and produced exploits for many zero-click vulnerabilities in iPhones & Android devices. The vulnerabilities are exploited for delivering the Pegasus spyware that is sold to governments to use in different fields like law enforcement, intelligence collection, and tracking journalists, activists, etc.

Although the NSO Group is a famous purveyor of spyware exploiting vulnerabilities, there are a few other groups that have the same capability. Other cyber threat actors can identify as well as weaponize the vulnerabilities.

How to Protect Yourself from Zero-Click Exploits:

Evading detection by the user is the whole purpose of these exploits. Due to the absence of user interaction, the target does not get a chance to detect the threat. But it never indicates that protecting against such attacks is impossible. Rather than giving a response to an attack in progress, mitigating this can need proactive, preventative actions, such as:

Update Apps & Devices: These exploits take benefits of unpatched vulnerabilities in device apps & OSs. Try to update your apps and devices to decrease vulnerability to these attacks.

Install Anti-Spyware & Anti-Malware Solutions: The exploits can deploy spyware & other malware to devices. With the help of anti-spyware and anti-malware solutions, you are able to identify & remediate these infections. It helps to mitigate the effect of a successful zero-click exploit.

Avoid Unsafe Applications: Exploitable vulnerabilities might be inside the apps that you download from third-party app stores or other sites. Remember that you should install apps only from reliable app stores to reduce the risk level.

Conclusion:

Undoubtedly you can say that the zero-click attacks are scary. State actors use zero-click vulnerabilities to go after high-profile targets. However, it is always better to have an eye on the suspicious activity on the devices.

Frequently Asked Questions

  1. Is zero-day exploit a virus?

Zero-day malware is called a zero-day virus. It is an old unknown PC virus for which particular antivirus software signatures are still unavailable.

  1. Which zero-day exploit is famous?

Stuxnet was a very popular instance of a zero-day attack.

  1. Is Pegasus Zero-click?

Zero-click attacks help spyware such as Pegasus to gain control over a device without  user interaction.

read more
Do It YourselfInternet

How to Translate a Page in Firefox: 5 Easy Tips

How to Translate a Page in Firefox

Something happens that while browsing the internet, you might end up with a specific website which is in a different language. A website can support many languages and cater to a global audience. People who want to translate the page need to hit a button or flag icon and view the content in their desired language. A few websites are not optimized properly or don’t support the option of many languages. Hence, it is essential to translate a web page into Firefox. Let us know how to translate a page in firefox.

You can try to translate the website’s content manually. Using the Google Chrome browser, you can easily translate entire web pages. But what if you use a famous browser such as Mozilla Firefox? This browser includes a default translation feature letting you translate web pages into your preferred language. You may translate the entire page or the chosen text and select languages you must translate from and to. It is possible to access the web more easily using the feature. To learn how to translate a Page in Firefox, check the entire article.

How Does Firefox Translations Work?

You may be familiar with the Interpreter mode in Google Assistant, but you will feel excited to learn the working process of translation tools. Cloud-based services will send data to centralized data centers when you want to translate any language. In these centers, GPU clusters deploy big language models so that it can handle the translations.

But it doesn’t happen with Firefox Translations because they locally deploy all essential language Machine Learning tools. These also automatically translate websites directly into the browser and can give you complete privacy. Therefore, you can translate websites without giving away personal data to third parties in the procedure. Firefox Translations let you fill out a web form in your language. Additionally, you can have it translated dynamically to the page’s language. Moreover, it flags low-confidence translations in red to make you aware about potential translation errors.

Firefox Translations are compatible with eight major languages, which are:

  • Spanish
  • Estonian
  • English
  • German
  • Czech
  • Bulgarian
  • Portuguese
  • Italian

Additional languages are in the works, including Russian, Persian (Farsi), Icelandic, Norwegian Nynorsk, and Norwegian Bokmål.

How to Install and Use Firefox Translations:

The procedure to install Firefox Translations and use them to translate websites in Firefox is as follows:-

  • Your first job is to open the Firefox browser.
  • Then, you need to move to the Firefox Browser add-ons page.
  • Now, you have to tap on Extensions.
  • After that, your task is to use the search box to find Firefox Translations at the page top.
  • Next, you need to tap on Firefox Translations from the available options. Otherwise, it is possible to navigate directly to the Firefox Translations page.
  • After that, you need to tap on Add to Firefox.
  • Next, you should review the information in the permissions pop-up. Thereafter, you should tap on Add.
  • Now, you will get to see the add-on on the address bar near the Bookmarks icon.

How To Translate A Page In Firefox with a translation extension?

 While there does not exist any default translation tool in Firefox like Google chrome, the browser is compatible with many translation extensions. And these extensions let you achieve the same purpose. ‘Google Translator for Firefox’ and ‘To Google Translate’ are the most famous translation extensions. Google Translate powers both of these.

As per your wish, you can download any of these two translation extensions. After that, you need to install this to translate webpages in the browser. Once you install any extensions, you will get to see a new context menu item inside the Firefox menu. Sometimes, you may not like the interface or extension’s performance. In that case, your task is to visit the Firefox Add-Ons page by installing another translation extension. Then, you need to search the ‘Find add-ons’ search bar.

Use the ‘Google Translator for Firefox’ extension:

 As soon as you download the extension, you will get to see a Red T icon appearing on the Firefox toolbar. If you are willing to use the tool, you need to choose the text portion or paragraph to translate. After that, you have to hit the Red T icon. Alternatively, it is possible to tap on the icon and choose the “Translate this text with Google Translate” option. Once the translation procedure starts, the Red T will turn into Green T.

After the end of the process, you will get to see that the Green T icon is reverting back to the Red T icon. Next, you will see the translated text replacing the selected text. Hit the Red T icon if you are willing to translate the whole web page. Then, you should choose the ‘Translate the full page’ option. This tool will identify the source language automatically. It is possible to specify the translation language in the options.

Use the ‘To Google Translate’ extension:

Once you complete downloading this extension, a new option – ‘To Google Translate,’ will appear in the context menu. In this case, your task is to tap on the option you want to translate & choose the ‘Translate’ option for sending this to Google Translate. Alternatively, selecting the ‘Listen’ option can send the text to Google TTS so that it can listen to the words’ pronunciation.

Use Add-on:

This browser comes with many translator add-ons on its Add-on site. You need to find a translator and choose any as per your choice. Ensure that you see the reviews and ratings before making your decision.

Follow the below-mentioned steps to learn how to translate a page on Firefox using Add-Ons.

  • First, you should launch the browser on the computer.
  • Then, you need to head toward the Firefox add-ons page to find Google Translate.
  • After that, you have to tap on Install. Now, you should go through the steps allowing you to install the add-on to your browser.
  • When you go to the address bar, you need to enter the link to the webpage you are willing to translate.
  • Now, you have to move to the Translate icon. Then, you will get to see the letter T at the top right-hand corner and tap on it.
  • You need to choose the Translate page option with Google Translate so that you can open another tab with a translation for that webpage.
  • Changing language is possible when you want. For instance, it has given you the result of the Dutch to English translation, whereas you need Dutch to French. In these cases, changes can be done easily. You can use the Firefox translate page add-on to meet your requirements.

The Bottom Line:

You can use the Google Translate feature for translation procedures because it is compatible with up to 109 languages. And people prefer it over the Add-Ons. Hope, you have learnt how to translate a page In Firefox. Still, if you have any queries or doubts, let us know via comments.

Frequently Asked Questions

  •  What is the shortcut for translating in Firefox?

Shift + enter works as a binded translate button. Otherwise, you can right-click on the extension icon at the address bar.

  • How do you turn on Google Translate in Firefox?

Your first job is to tap on the text section and tap on the Translate icon adjacent to this. It lets you text, translate or listen to this in your language.

  • How do you right-click translate in Firefox?

Your job is to choose the specific text on any page. Then, you need to tap on this and choose the option: “Translate Now” to open another new tab using Google Translate.

read more
InternetSoftwareTechnology News

What is AAE File Extension?

What is AAE File Extension?

Several Apple users can see AAE file after sharing edited images from one device to such a device which is running a different OS-based device. Have you encountered this problem also? Do you want to know what is a .aae file and which step you should take? Then, check this article.

 What is an AAE file extension?

AAE files refers to the record of all edits made to a picture by a person in the iOS version of Apple Photos. People can use this to share edits from iOS to macOS. Besides, reverting the pictures to the original form is possible when necessary. These files remain stored alongside the pictures whose edits they contain.

What Does AAE Stand For?

According to some people, these originated with the Apple Aperture photo management application on Mac. For a non-destructive editing system, it used XML sidecar files. Hence, you need to know about the term which stands for “Apple Aperture Edits,” “Apple Aperture Extension,” etc. Apple introduced the files first in iOS 8 and Mac OS X 10.10 Yosemite in 2014. They announced the discontinuation of Apple Aperture & iPhotodflr, the new photos app.

More Information:

Photos app makes these files in iOS 8 and later and macOS 10.10 and later. These files save edits that are created in Photos. Therefore, original pictures of the user aren’t overwritten when edited.

If you open an edited .JPG file in the Photos app, it will indicate the linked AAE file of the JPG & apply edits it contains. Data of the AAE file is saved in the XML format. It indicates that you can open the files & see them using a text editor like Apple TextEdit or Microsoft Notepad.

Photos app makes a unique XML file with an AAE file extension every time you will edit an image. This extension contains information on the edits made to an image to allow original pictures to retain without any changes. Moreover, you will be able to undone the edits at any time.

The iPhone stores these files alongside the images. Therefore, for instance, if you share the images from an iPhone to Windows, you can see a file called “IMG_0026.AAE” and it will match another file called “IMG_0026.JPG.”

Can you delete AAE files in Windows?

While importing images edited with the help of the Photos app to Windows or the old version of mac OS, you can see AAE files accompanying the photos. If you use Windows, you will see the .aae extension hidden by default. But the names of AAE files remain the same as the JPG files whose edits they contain. Once you share images into Windows, deleting pictures’ AAE files is possible without erasing the connected pictures.

How Do You Open an AAE File in Windows?

This one is an XML formatted file, so you can open it on Windows or Android. Although it does not function in Windows, the file can still be viewed. Check this below-mentioned procedure to learn how to open an AAE file in windows 10:-

  • Your first task is to tap on the “AAE” file.
  • Now, choose “Open with” from the dropdown menu.
  • After that, your job is to select a text editor to open the file. Use Notepad or Microsoft Word in such cases.

Although users open the files in a text editor or on Windows or Android devices, applying changes to the corresponding JPEG file is impossible.

AAE File Format:

These are saved as XML files, human-readable file format, to disc. Therefore, you can open this in text editors like Apple TextEdit on macOS and Microsoft Notepad on Windows OS. You can use Notepad++ to open AAE files.

Opening an edited JPG file in the Photo app will read the change log from the respective .aae file. Next, it will apply edits to the image before showcasing this to the user.

Do you Need to Save AAE Files?

People planning to keep iPhone photos permanently on a platform that is incompatible with the Apple Photos app, such as Windows or Linux, should not save these files.

Conclusion:

Do you want to open the files later on a Mac, iPhone, or iPad? If so, then you need to keep these AAE files with the original photos in the same directory. The Photos app can read them.

Frequently Asked Questions:

Can you Delete AAE Files From iPhone?

Remember that these files are essential if you want to apply any change to the original images on your iPhone. Deleting the files allows the corresponding edited picture to return to its actual condition. As these files are not so big, they will not consume too much space. However, if you want to save space, you can convert AAE files to JPEG. Then, you should delete the AAE file.

How Do You Open an AAE File on iPhone?

These files can be analyzed automatically on Apple devices that run on the latest versions of iOS or macOS. There is no need to open the files. You can use a text editor program. The similar thing is applicable to Windows, Linux, or Android devices.

What is the AAE file?

It is a unique file type used by Apple Photos to keep track of changes you make to the images.

read more
Do It YourselfInternetSoftwareTechnology News

How to Fix File Explorer Not Responding Windows 10

How to Fix File Explorer Not Responding Windows 10

Windows Explorer is the basic way through which you can navigate into your System. With the help of Explorer, you are capable of seeing, accessing, & managing all files on your device. But sometimes, the explorer does not respond, or it gets frozen or won’t open. Therefore, you will encounter several issues when you try to use your PC. When it doesn’t respond, you will no longer be able to interact with the app’s interface. Let’s see how to fix file explorer not responding windows 10 problem.

What Is File Explorer?

File Explorer, known as Windows Explorer is a default application in Microsoft Windows operating system. The graphical user interface enables users to access & manage drives, folders and files.

What causes Windows Explorer not to respond to errors?

No specific reason exists which could be the origin of the disturbing problem. Depending on user reports, it can be said that several causes can lead to this error.

  • Ensure that your File Explorer history is cleared. The history of File Explorer can be clogged, resulting in Windows Explorer behaving incorrectly. Try to clear the history. We have mentioned later how to do this in the solution section.
  • If there is any change to display settings like the font size, the issue can appear. Have you changed the settings recently or allowed an app to change them? Then, remember that reverting is the most effective way to do so.
  • If you use an outdated Windows 10 version, it can cause you the problem. Therefore, you must update the windows. The new update always comes with new bugs, which sometimes irritates you. It can patch up multiple existing problems and security holes. Ensure that you update to the latest release of Windows 10 if you run its older version.
  • File Explorer cannot work properly when your System drive runs out of space. Hence, it is essential to create some space to make windows explorer functional.

Solutions to resolve File Explorer not responding windows 10:

Solution 1. Restart File Explorer in Task Manager:

  • Your first job is tapping Ctrl + Shift + Esc to start the Task Manager.
  • After that, you need to tap on Windows Explorer in Task Manager. Then, you should select the End task.
  • Next, your task is tapping File on the upper left corner. Now, you should select Run new task.
  • Now, you have to input explorer.exe in the box. You should tap on Enter thereafter.

Thus, windows explorer can restart. Finally, check if the file explorer is not responding Windows 10 problem has been fixed or not.

Solution 2. Manually Restart the Explorer.exe Process via Command Prompt:

 According to some people, it is possible to restart file explorer through Command Prompt commands. If you are unable to launch file explorer normally or facing the windows explorer not working issue, restarting the explorer.exe process is possible with some easy commands.

  • You should go to the Windows 10 Cortana box and input cmd in it. Then, you have to tap on the most suitable match to open the Command Prompt window.
  • Next, input taskkill /f /im explorer.exe in the CMD window. Then, you need to tap on Enter. Once you apply the command, you can end the explorer.exe process. Then, a blank screen will appear behind the Command Prompt window.
  • You should type start explorer.exe in Windows for starting the procedure again. Therefore, tap on Enter.

Now, you can see desktop icons, Taskbar, etc.

Solution 3. Run System File Checker Scan:

It is a default tool to scan for corruption in Windows system files and restore corrupted files. Sometimes, your drive’s corrupted files can be behind the problem. Several people say that performing System File Checker scans allows them to fix the problem. You should try the scan to see if the process works.

  • Enter cmd into the Cortana search box of Windows 10. Then, you need to look for the most suitable match and tap on it. Then, you should select Run as Administrator.
  • Now, your task is to input sfc /scannow and tap on Enter.
  • Once the scan completes, try to restart the PC to check if the problem has been fixed.

Solution 4. Clear File Explorer History:

⅘ th of the users encountering the problem said that clearing its history can help you to fix the issue. If you have tried the above fixes and can’t resolve the issue, you must try this.

  • Your first job is to type Control in the Cortana search box of Windows 10. Thereafter, tap on the Control Panel from the Best Match result.
  • Now, your job is to look for File Explorer Options from the interface. Then, you need to tap on it.
  • Next, tap on Clear. After that, you have to tap on OK so that you can clear File Explorer history.
  • Finally, you should again try to open file explorer.

Solution 5. Change Display Settings:

The display setting usually doesn’t have any relation with the file explorer not responding Windows 10 problem. However, it can affect your PC if not configured to the recommended sizes of text, apps, etc. In this it needs to be mentioned that the screen’s unaccepted size & text can crash the file explorer.

  • Your first task is to hit the Windows Start button and select the settings. After that, select System while the interface of Windows settings will appear.
  • If you are on the Display Panel, you should try to change the text size to 100% or reset the size to the Recommended Point.
  • Finally, you need to check to see if File Explorer is accessible.

Solution 6. Extend System Partition If It Is Full:

 You can encounter an error when the system drive doesn’t have sufficient space. Hence, using third-party software is possible to extend the partition. You can use any famous partition manager that can offer better performance than the Windows default Disk Management and using which you are capable of extending partitions, formatting partitions, resizing partitions, checking file systems, converting MBR to GPT without data loss, etc. Additionally, changing cluster size, copying the disk, and converting NTFS to FAT are possible.

Solution 7. Create a New User Account:

 You should create a new user account to deal with the problem. As soon as you create a new account and log into this, you will see the Windows 10 File Explorer working normally. People with one user account on their computers need to follow Microsoft’s instructions that let them generate another new local user account. Now, check if file explorer is working or not.

If you use a new account, it allows you to remove the currently used files in Quick Access. If you fix this issue following this process, you may try to move all data from the old account to your new account. But there exists an issue that you might have to reinstall a few applications for a new account.

Solution 8. Keep Windows 10 updated to the Latest Version:

 Ensure that your Windows is running its latest version. If not, we recommend you upgrade this to the latest version. Microsoft can resolve popular problems like file explorer not responding Windows 10 via updates.

  • Your first task is to tap on the Windows Start menu and select Settings.
  • After that, you need to select Update & Security once you get the Windows setting interface.
  • Tap on Windows Update. Next, you should hit the Check for updates button for installing the latest updates.

Solution 9. Restore Windows 10 to an Earlier Date:

 Is the System Restore feature active on your PC? If so, you have to restore Windows 10 to a previous date when it was offering smooth performance. You must follow these steps to restore your operating system to an earlier date when Windows Explorer usually works.

  • Go to the Cortana search box of Windows 10 and type create a system restore in it. Then, you are required to select the best match for opening System properties.
  • Tap on System Restore in the System Protection section. Disabling the System Restore greys out the System Restore button.
  • At last, your task is to follow the instructions on the screen. Then, you should choose a restore point for the System’s restoration to an earlier date when it works accurately.

The bottom line:

These nine solutions can help you to resolve the file explorer not responding Windows 10 issue. You need to try each method individually to check if the problem is resolved or not.

 Frequently Asked Questions

What do you do when Windows Explorer is not responding?

You can try to clear the history of file explorer to deal with the problem. Hence, your task is to open the Control Panel. After that, your task is to set the view by large icons. Now, tap on File Explorer Options from the interface. Hit the Clear button. Then, tap on OK to clear Windows Explorer history. Finally, you should try to open file explorer again.

How do you fix File Explorer problems in Windows 10?

 These are some methods that you can try to deal with the problem, and these are as follows—

  • Restart File Explorer in Task Manager
  • Manually Restart the Explorer.exe Process via Command Prompt
  • Run System File Checker Scan
  • Clear File Explorer History
  • Change Display Settings
  • Extend System Partition If It Is Full
  • Create a New User Account

What to do when File Explorer stops working?

 If it happens, you need to restart windows expo via Task Manager. Now, your task is to hit Ctrl + Shift + Esc so that you can start Task Manager. Then, you should look for File Explorer in the Task Manager and select End task. Next, you need to tap on File in the upper left corner. Then, your job is to select the option Run new task. Now, you have to type explorer.exe in the box. Restart this immediately by hitting Enter.


read more
AppsDo It YourselfInternetTechnology News

How to Fix Hot, Stuck or Dead Pixels on Your Screen

How to Fix Hot, Stuck or Dead Pixels on Your Screen

Millions of pixels comprise all display devices. The pixels are responsible for changing colors as per the projected image. But it can die or get stuck sometimes, and you will see a dark spot on your display. People wrongfully call a stuck pixel a hot pixel, also. Basically, you can see hot pixels only in digital cameras when any electrical charge leaks into the sensor wells of the camera. If it comes to talk about a dead pixels, all the sub-pixels remain permanently off.

As a result, the pixel looks black. It may happen due to a broken transistor. Are you seeing a colored or white pixel? Then you can fix it. But if you are seeing a black pixel, then the chance of getting fixed is low.

How to Fix Hot, Dead or Stuck Pixels on Your Screen

Let’s see how to fix a dead pixel on your monitor or smartphone.

What are Dead or Stuck Pixels?

A Dead or stuck pixel refers to a fixed spot on display. These are pretty harmless and not permanent. Compatibility problems with software apps, technical errors, or manufacturing defects can cause the problem. Generally, a stuck pixel is green, red, or blue. On the other hand, a dead pixel is black.

How are dead/stuck pixels an issue for the users?

Sometimes stuck or dead pixels remain in a corner, and we think they won’t grab our attention, but it does. Therefore, they can irritate you and take away your focus. In addition, these can point to a more serious issue like monitor failure.

What causes dead pixels?

A manufacturing defect is the most common problem. In addition, any physical damage to the display device may damage your laptop’s one or more pixels.

Will dead pixels go away or spread?

These don’t usually spread. If these do spread, you should replace the screen. Otherwise, you can hire a specialist. You can see the portions permanently malfunctioned, resulting in these not going away with time.

How to Test New Screens for Stuck or Dead Pixels

Testing a new monitor for a bad pixel is essential, and it could be done by running your screen through a palette of basic colors. Moreover, you need to run the screen black & white in full-screen mode with the help of the EIZO Monitor Test.

  1. EIZO Monitor Test:

With the help of this online tool, you can find stuck pixels and eventually fix them. It includes a wide range of options and makes all of these available in a single test window. However, as soon as you learn a basic idea about this, you can use it easily.

If you are willing to test the screen, you should check all those boxes which you need to include in your test. It is recommended to go with the default setting, where you need to check all boxes. When you test many monitors, opening the test is possible on an extra monitor. Once you are ready, you should tap on Start test so that you can launch the full-screen test window.

Now, you can see the first test pattern. Every display has an explainer in the bottom right detailing what you need to find. After that, a menu will be available, allowing you to move from one test to the next on the left. After moving through the black & white screens and solid colors like green, blue, and red, you need to check the screen. If you want to exit, you should hit the ESC key. Otherwise, you can tap on the exit symbol in the top right corner. If you find a bad pixel, it is recommended to use UDPixel or JScreenFix to flash it.

  1. Online Monitor Test:

Performing the thorough test not only helps you to identify bad pixels but also lets you test your monitor quality. Most browsers don’t support Flash. However, you can make it a try and use it with the executable version to make this functional.

Selecting between three different modes is possible to test the screen. Once you run the executable, you can see the screen differently.

Your task is to take the mouse to the test window’s top portion. Then, you can see a menu appearing. After that, you can see an info window which you can turn off with a button in the menu’s top right corner. Now, you should tap on the Homogenuity test point. Then, you must move through the three colors and black & white.

How to Fix Dead or Stuck Pixels:

It is not possible to fix a dead pixel. However, if you want to fix a stuck pixel, you can try this process mentioned below-

  • Your first task is to detect dead or stuck pixels and to do so, you need to see your monitor in different color palettes.
  • After that, to fix that pixel, you should use a third-party tool that flashes the pixel with many colors. Using UDPixel (Windows) or LCD (online) is recommended.
  • Finally, you should try a manual process where you must use a damp cloth to rub the stuck pixel, or you can use a pointy. In this case, make sure that you are using a soft item, like the rubber/eraser at the pencil’s end.

Tools that you can use to Fix Hot, Dead or Stuck Pixels on Your Screen:

  • JScreenFix
  • Pixel Doctor Pro
  • Aurelitec PixelHealer
  • Rizonesoft Pixel Repair
  • Dead pixel
  • Filehorse Pixel Repair

What to Do If You Can’t Fix Your Stuck or Dead Pixel?

If you make all the attempts to remove the bad pixel and nothing works, you should make peace with it. An ugly pixel will not break the screen, and soon you will forget about this matter. But when the defect affects more than one pixel, you should replace your monitor. You should check the warranty. Sometimes, the marketplace from where you bought the product covers dead pixels.

The Bottom Line:

If you want to detect any stuck pixel, you can take help from a few online monitoring tests or third-party apps & tools. You can see some ways mentioned in this article, along with some effective tools that you can try. If the tools don’t work, you should follow the manual guide. But when nothing works, you may need to take your device to a hardware engineer.

Frequently Asked Questions:

Do stuck pixels go away?

No. However, these pixels are temporary. You may need to attempt a few effective ways to remove them.

Can all stuck pixels be fixed?

These pixels are seen in colors except black or white. A few methods can help you to fix the problem. But if the pixel is dead, you can’t fix this. However, if you fix a stuck pixel somehow, you should know that the fix is not guaranteed.

Can hot pixels be fixed?

You should apply pressure on the screen where you have seen the stuck pixel. Ensure that you don’t apply pressure anywhere else because it can increase the production of more stuck pixels. When you apply pressure, you should power on the PC and screen. Then, you need to remove the pressure. We hope that then you will not get to see the stuck pixel anymore.

read more
1 2 3 5
Page 1 of 5