
If you power on your Windows PC, you can encounter several hidden system services and processes. How the windows will appear on the screen depends on these processes. Besides, these determine the way of accessing your local network & connected devices, signing into Windows, etc. Your PC will not work without them. lockapp.exe is one of these unusual processes you could encounter in Windows 10. It is the reason for drawing part of the lock screen, which you view before signing in.
What is LockApp.exe on Windows?
LockApp.exe is a crucial Windows file that overlays a graphical interface over the locked screen while your PC becomes idle for a long time. Before logging in, you can view the overlay screen. When you check Task Manager, the file can be seen running in the background. This file shows a beautiful background picture with the date & time when the screen is locked. Let’s dig into this article to learn about LockApp.exe.
What Does LockApp.exe Do?
It can make a beautiful graphical user interface used to overlay over the locked screen in Windows 10. Elements offered by the graphical user interface of LockApp.exe are as follows:
- A background image
- Date and time
- Quick notifications
- Preferences set by you to show on screen
- Controls to shut down or restart
- Network internet access status
Remember that you can execute this only when you are signed into your system and your PC is idle for a long time. Additionally, tap on Windows + L to manually execute this to lock the screen. Remember that the file process remains suspended the rest of the time while the PC is active.
How Much System Resources Does LockApp.exe Use?
You may wonder if it uses so many resources from your system or not. Sometimes you can find it running in the background, because of which the PC can be awake for a long time. It can consume only 12 MB of memory in the idle stage of the computer when the file’s process remains active.
If it’s not active, consumption goes down significantly. It indicates that your pc needs only 48 KB of memory when you work on a computer and when no lock screen is active. So, it can be said that LockApp.exe is a lightweight application.
Where is LockApp.exe located and what is its File Size?
People using Windows 10 can find this file in the “C:\Windows\SystemApps\Microsoft.LockApp_cw5n1h2txyewy ” location.
Then, you should tap on the file to check out the properties for further details. Around 3.41 MB is the file size.
Can LockApp.exe Be A Virus?
This one is a legitimate program and safe to use. Windows users did not complain & Microsoft Corporation has signed this digitally. There exist no suspicious activities linked with LockApp.exe.
As it is an executable file, hackers are capable of imitating the file to attack the system. You can check easily if this one is a virus or not. These are the steps you should follow to check this.
- First, your task is to tap on Ctrl + Shift + Esc keys together to launch Taskbar.
- After that, you have to navigate to the Details tab, where you can see all running files in the list. Then, you need to find LockApp.exe.
- Now, you have to right-click on the file to select the Open the file location option.
- Once you see this in C:\Windows\SystemApps\Microsoft.LockApp_cw5n1h2txyewy, ensure that it is safe.
If you find the location different, it may be spyware or a virus. That’s why it is recommended to use an antivirus program and run a full system scan. With the help of Windows Defender, you can perform a full system scan. These are the steps you should follow:
- First, your job is to tap on the Windows + R together and type “ms-settings:windowsdefender”.
- Next, you should hit Enter.
- After that, your task is to choose the Virus & threat protection option.
- At last, go for “Scan options” and choose the Advanced scan option.
Common Errors Regarding LockApp.exe –
Here, we are going to mention some common Errors Regarding LockApp.exe:
- exe – Bad Image.
- exe Application Error.
- exe could not be found.
- exe could not be installed.
- exe could not be launched. Class not registered.
- exe could not be started.
- exe failed to initialize properly.
- exe has encountered a problem and needs to close. We are sorry for the inconvenience.
- exe is not a valid Win32 application.
- exe is not running.
- Cannot find LockApp.exe.
- Error starting program: LockApp.exe.
- Faulting Application Path: LockApp.exe.
- The file LockApp.exe is missing or corrupt.
- Windows failed to start – LockApp.exe.
If you are willing to troubleshoot the error, it becomes essential to find the source of the file. In most cases, the error occurs during startup. So users can face a runtime error when they use Microsoft® Windows® Operating System. Hence, the reason may be poor programming on behalf of Microsoft Corporation, conflicts with other software or 3rd-party plug-ins, or outdated hardware. The error also occurs when you delete them accidentally or a malware corrupts them. Therefore, you need to confirm that your antivirus is updated and scanned daily.
Is the LockApp.exe Process Safe?
Till now, there is no complain of viruses or
other malware which fakes themselves as the LockApp.exe process. It is possible if the location of the process is C:\Windows or C:\Windows\System32 folder. Usually, malicious programs tend to imitate legitimate system processes to blend in.
So, go to the Task Manager and start checking this by following the steps.
- Your first job is to hit the Start button, and then you need to select the Task Manager.
- After that, you have to head toward the Details tab. Tap on the LockApp.exe process to select the Open file location.
- Next, the File Explorer window will open. Then, check if the location of the process is: C:\Windows\SystemApps\Microsoft.LockApp_cw5n1h2txyewy.
- If you find the process in another folder, it may happen that malware is running on your computer. We advise you to run a system scan to detect malware with the help of Windows Defender or other antivirus software.
How to fix the lock screen in Windows 10?
The lock screen is directly linked with the LockApp.exe process. Therefore, it may happen that some system files are corrupted. You can follow these two ways to fix the lock screen in Windows 10.
Install Windows updates:
Installing pending Windows updates will fix the problems by replacing old corrupted files with new ones.
- If you are willing to update the operating system, you should head toward Start Menu -> Settings -> UpdateSecurity -> Windows Update.
- Then, tap on Check for updates on the right. You can find your system scanning for pending updates.
- If you find any updates, it will start downloading and installing them automatically. You should reboot the PC when asked to and see whether the lock screen has been fixed or not.
Scan for corrupted system files:
Windows 10 usually has a default tool to troubleshoot system files that may have been corrupted. With the help of the System File Checker (SFC), it can repair corrupted system files that are redundantly available on the computer.
- If you are willing to perform the scan, you must open Windows PowerShell with administrative privileges. After that, you need to run this command: sfc /scannow
- You should wait some time to run the command completely and scan the PC.
- As soon as it is completed, you need to restart the PC. Finally, check if the lock screen starts behaving normally or not.
Restore computer back to the latest restore point:
You should follow these steps to start System Restore (Windows XP, Vista, 7, 8, and 10):
- Your task is to press the Windows Start button.
- As soon as you see the search box, your task is to type “System Restore” and hit “ENTER”.
- Now, look for System Restore in the search results.
- After that, your task is to enter the administrator password once prompted.
- You should now follow steps displayed in the System Restore Wizard to select a relevant restore point.
- Finally, your task is to restore the PC to that backup picture.
Uninstall Microsoft Office Access 2010 (or related software) and reinstall:
By following the steps or instructions of Windows XP, Vista, 7, 8, and 10, it is possible to uninstall Microsoft Office Access 2010 software and later try to reinstall this.
- Your first job is pressing the Windows Start button.
- Once you go to the search box, you are required to type “Uninstall” and hit “ENTER”.
- When you see the search results, you need to look for the “Add or Remove Programs” option. Once you find this, you need to tap on it.
- After that, you have to look for the entry for Microsoft Office Access 2010 14 and tap on the “Uninstall” option.
- Now, your job is to uninstall this by following the prompts.
- Once you uninstall the software completely, your task will be restarting the PC. Then, try to reinstall Microsoft Office Access 2010 software.
How to Disable lockapp.exe on Windows 10?
The process is not as important as dwm.exe and other critical processes. When you try to disable this, it will direct you in the login prompt.
- If you are willing to disable the process, tap on a new Windows Registry entry. You need to tap on the Start menu to do this and choose Run.
- Then, you have to type regedit in the Run dialog box. After that, you need to choose the option: OK.
- You can use the registry editor to find the HKEY_LOCAL_MACHINE\SOFTWARE\Policies\Microsoft\Windows\Personalization key. If you can’t find it in this location, tap on the Windows key to create this. After that, you should choose New > Key. As soon as you create the key, tap on the white pane on the right. Then, you should choose the New > DWORD (32-bit) value from the list. Next, you have to name the new value NoLockScreen.
- Tap twice the new value. After that, your task is to type 1 in the Value data box. Then, you should choose OK to save.
- As soon as it is saved, the lock screen overlay will get disabled and LockApp.exe will not be activated. You will see the sign-in prompt when you lock your PC again or sign in —— the overlay will not appear.
How to Configure the Lock Screen?
It is possible to configure the lock screen that permits you to include certain notifications, like the number of unread emails in your inbox.
- If your job is configuring the screen, you should use Windows Settings.
- After that, you need to tap on the Start menu and choose Settings to begin.
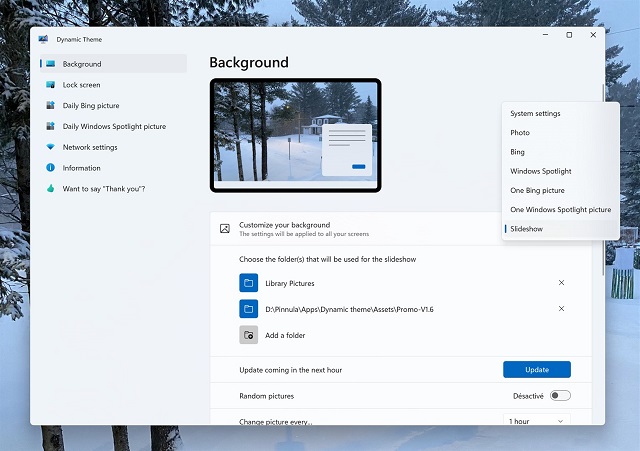
- When you open the Settings menu, choose Personalization > Lock screen. Then, your task is to change the lock screen background. Then, see “quick status” notifications like your calendar, inbox, news app, etc., to add other apps.
The bottom line:
In this article, we have covered everything that you need to know about LockApp.exe, such as what is lockapp.exe on Windows 10, how to check if the file is safe, how to disable this to save CPU & GPU usage, etc. However, if you don’t have a shortage of CPU usage, there is no need to disable it because it is a vital part of the graphical interface of Windows 10.
Frequently Asked Questions
What is the LockApp exe process?
It is a Windows system component that displays the lock screen.
Why is LockApp exe using GPU?
It can happen if you set the Lockscreen to keep changing the wallpaper or keep the PC awake for a long time as you have not configured the monitor or PC sleep time.
Why does Lock Screen Keep consuming resources when the PC is idle?
It is essential to look into GPU Software. Then, select Windows to let it change settings instead of the driver doing that to reduce the usage. The reason is that rather than the driver, windows will decide everything.


