close

Internet

Do It YourselfInternetSoftwareTechnology News

How to Enable TPM 2.0?

How to Enable TPM 2.0

Several users who have downloaded Microsoft’s PC Health Check app encountered the “The PC can’t run Windows 10” error message. This app is available on the new Windows page after the new OS version was announced. It happens especially when TPM 2.0 is not enabled in the BIOS.

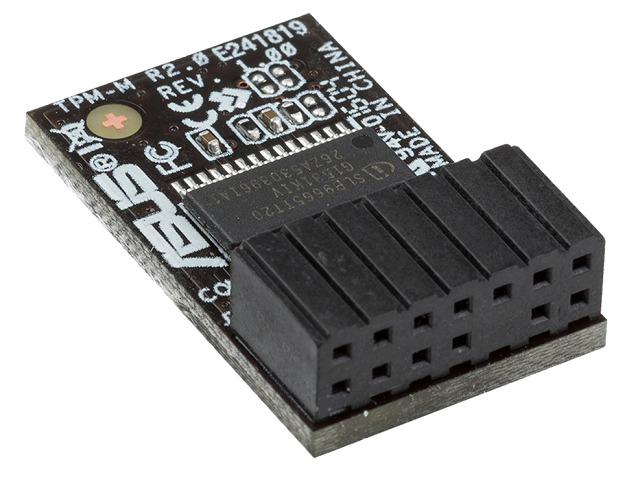
Remember that the TPM 2.0 chip, which can be found on the PC’s motherboard, is necessary to run Windows 11. It is a security chip used to handle the task of encryption for your fingerprint, other biometric data, and other things like Windows BitLocker. In most computers, it is already enabled, and people can find this in most modern systems which they bought in the last few years.

After the launch of windows 11, TPM 2.0 has become a key feature. It was present in computers for a long time but gets important when Microsoft says that it must be in the PCs to install Windows 11. Modern motherboards usually come with TPM, but it remains disabled sometimes. Don’t you know how to enable tpm 2.0 in Windows?  Then, just go through this article.

What is a TPM?

It is a security technology that can improve the pc security against software vulnerabilities.

Why will you Enable TPM 2.0 of Motherboard in Windows?

Usually, people enable it so that their PC can support the Windows 11 upgrade. TPM stands for Trusted Platform Module, indicating a small chip installed on the motherboard to offer an additional security layer to the PC when it’s booting up. If someone has hacked your pc or broken th security, this module prevents the PC from booting. Firefox, Outlook, Chrome, Thunderbird, and many apps use this feature to handle the encryption. If you turn on this feature, you can get several advantages. Thus, you can make your PC suitable if you want to install Windows 11 OS.

How to Enable TPM 2.0 and Secure Boot to pass PC Health Check:

You must enable Secure Boot in the mobo BIOS for a PC health check. Ensure that you use a TPM 2.0 chip. Let’s know how to enable tpm 2.0 on your PC.

Check for TPM using the Windows Security App:

You need to confirm that you have a TPM 2.0 chip on the computer. It is possible to do this manually via the Windows 10 settings. It informs you if it is possible to continue with the Windows 11 install method.

Step 1: Your first job is to open Windows 10 settings by tapping on Windows Key and I on the keyboard. After that, head toward Update and Security.

Step 2: Go to the Update and Security section to tap on Windows Security, followed by Device Security and Security Processor Details. If a Security Processor section does not appear on display, there is a chance that your TPM 2.0 chip is disabled or unavailable. A spec lower than 2.0 does not allow your device to run Windows 11.

How to Enable TPM 2.0 in BIOS:

When you are willing to check the status of the current rig, you should move to the BIOS. Although BIOSs are made differently, these may have a few similar features. AMD and Intel have different terminology.

Intel = PTT

AMD = FTPM

STEP 1) Enter the BIOS:

If you use the system’s BIOS regularly, it can be a trial which takes about keypress timing. Hence, you should restart the operating system. Whether you don’t know which key you need to hit to access the BIOS, it starts flashing up on display for some seconds. The rule says that you should hit the DEL or F2 key.

Hit the key a few times as the display appears. If you get successful, it will direct you to the PC’s BIOS screen.

STEP 2) Switch Your BIOS into ADVANCED Mode:

People usually boot into an EASY mode in most bios because it is the place where it causes serious problems. You can head toward ADVANCED Mode. Then, tap on any button to switch the mode. In this case, you should try to hit F2.

STEP 3) Inside the MISCELLANEOUS Option, Enable TPM 2.0:

For an Intel board, you should find the PTT option. It indicates Intel Platform Trust Technology or Intel’s TPM. But for AMD, it is different. You may find it disabled. Hence, you should tap on this to turn it on from the drop-down option.

SAVE & EXIT your BIOS. After that, reboot this. Alternatively, you can hit F10.

Enable Secure Boot:

You should ensure that you keep Secure Boot enabled, like enabling TPM 2.0. Otherwise, it will not be possible to complete the installation of Windows 11.

STEP 1) Enter the Bios:

Once you restart, your job is to start again. After that, you should use the same process to enter the bios – usually F2 or DELETE.

STEP 2) Select Advanced Mode:

After booting into an EASY mode in most bios, you can head toward ADVANCED Mode. Tap on something to switch the mode again. Try to tap on F2 in this case.

STEP 3) Select Boot Options in Bios:

You can see the option on an AMD motherboard under Security instead of Boot Options. For the Intel board, it is available in the right place where you need to go.

STEP 4) Choose Secure Boot from the options:

Head toward the Secure Boot tab and choose it.

STEP 5) Enable Secure Boot:

Tap on Secure Boot. Then, you should change this to Enabled from Disabled. After that, you should press F10 or choose Save & Exit. Finally, you should reboot your computer. It is possible now to pass the PC Health Check.

How to Enable TPM / TPM 2.0 in Windows 11, 10, 8, 7?

Before enabling TPM 2.0 on your motherboard, ensure that it is in disable mode. Hence, you should follow the steps to check the status of TPM on the PC.

  • Your first task is to hit the ‘Win’ + ‘R’ keys on your keyboard so that you can open the Run dialog box. Next, you should type ‘tpm.msc’ and hit the ‘OK’ button.
  • If you view ‘Compatible TPM cannot be found’ in the Trusted Platform Protocol Management window, ensure that the feature remains disabled on the motherboard. Therefore, you should enable it.

Enabling the feature of a Gigabyte motherboard has two main options: AMD motherboards and Intel motherboards. Usually, for both cases, you need to follow about the same steps.

Method 1) Enable TPM for AMD Motherboard:

You should follow the steps to enable it.

  • Your first job is rebooting the PC. After that, you must put the BIOS of the Gigabyte motherboard. Now, you need to hit the ‘F2’, ‘F12’, ‘Delete,’ or any button you want to tap to enter the BIOS.
  • As soon as you enter the BIOS, you will hit the ‘Peripherals’ or ‘Settings’ tab.
  • You need to find the ‘AMD CPU fTPM’ option inside the Peripherals or Settings. You can see ‘Disabled’ in front of this. After that, you should tap on the option.
  • Next, select the ‘Enabled’ option in the pop-up box.
  • After that, the option ‘Enabled’ can be seen in front of the AMD CPU fTPM option.
  • You should hit the ‘Save & Exit’ tab.
  • Your job is to tap on the ‘Save & Exit Setup’ option.
  • Confirm what you’ve selected by tapping on the ‘Yes’ option. Then, you should try restarting the PC.

We have discussed how to enable tpm 2.0 Gigabyte AMD motherboard in Windows. Now, let’s dig into method two.

Method 2) Enable PTT for Intel:

If you have Intel motherboards, you can see the mention of the TPM feature as PTT or Intel Platform Trust Technology. You should go through the steps for enabling the PTT of this motherboard.

  • You should restart the PC first. Then, you need to hit the ‘F2’, ‘Delete,’ ‘F12’, or other buttons to enter the motherboard’s bios. Then, enter the BIOS.
  • After that, you should hit the ‘Peripherals’ or ‘Settings’ tab in the BIOS.
  • Then, your job is to find the ‘Intel Platform Trust Technology (PTT)’ option in Peripherals or Settings. Then, ‘Disabled’ can be seen in the front. Once you see it, tap on the option.
  • Next, you should select ‘Enabled’ in the pop-up window.
  • After that, the option ‘Enabled’ is available in front of the Intel Platform Trust Technology (PTT) option. In this case, your job is to hit the ‘F10’ key on the keyboard.
  • Hit the ‘Yes’ button if you are willing to save the settings. Then, you should restart the PC.

Following the above mentioned steps, it is possible to enable the PTT of the motherboard in Windows.

Method 3) Verify TPM is Enabled:

You should undergo the process to confirm that the feature is activated in Windows. These are the steps you must follow to perform the procedure.

  • You should first open the Run dialog box by hitting the ‘Win’ + ‘R’ keys on the keyboard. Then, you should hit the ‘OK’ button after typing ‘tpm.msc’ in the dialog box.
  • Go to the Trusted Platform Protocol Management window. Then, suppose you view under ‘Status’ that ‘The TPM is ready for use’ & under ‘TPM Manufacturer Information’ that ‘2.0’ is the Specification Version. It indicates that the PC is ready to run the operating system.
  • Finally, you can say that the PC can support Windows 11 upgrades.

How to enable TPM on Dell?

If you are willing to enable the feature on the PC in bios, these are the steps you should follow.

  • First, your task is to restart the PC.
  • Once you see the Dell logo, you need to hit F2.
  • After entering the BIOS, you should indicate the section corresponding to the brand of the PC for more instructions.

In this regard, you should know that you might need to head toward BIOS using a mouse, but it relies on the PC model. If not, use the up or down and left or right arrow keys to go here & there. You need to choose options by using the Enter key.

The menu options can be different because it is based on the pc model.

Latitude, OptiPlex, Precision, Vostro, and select XPS:

  • Your job is to expand this Security section.
  • Then, you need to choose TPM 2.0 Security.
  • Choose TPM On.
  • After that, you have to choose Apply.
  • Finally, you should choose Exit.

Alienware:

  • First, your task is to choose Security.
  • Then, you must set the Firmware TPM to enabled.
  • Next, you should choose Exit.
  • Now, choose Save Changes.

OR

  • Your job is choosing Security.
  • Enable the Firmware TPM.
  • Now, save this by hitting F10 and Exit.

Inspiron:

Step 1: You should choose Security.

Step 2: Switch On the toggle located below Intel Platform Trust Technology.

If your PC has the Aptio Setup Utility, you should go through these steps. Head toward the upper right corner to check if the pc uses this. You should first choose Firmware TPM. Then, your task is to choose Enabled. It is essential to use the up or down arrows and then hit the Enter key.

Step 3: You must choose Apply Changes. If your PC has the Aptio Setup Utility, follow these steps.

  • First, you need to hit the F10 key.
  • Next, you should save by choosing Yes and exit. Hit the Enter key.

Step 4: Now, you need to choose the Exit option .

You can see the PC restarting to the Windows desktop.

Conclusion:

In this article, we have elaborated on how to enable TPM 2.0 easily. After following the methods, you should not face any issues. Try the solutions to enable the feature.

Frequently Asked Questions

  1. How do I enable TPM 2.0 in Win10?

Hence, your job is to head toward the System Utilities display and choose System Configuration. Then, go to BIOS/Platform Configuration (RBSU), then to Server Security and Trusted Platform Module options. You should check if the “Current TPM Type” keeps the feature turned on.

  1. How do you enable TPM 2.0 ASrock BIOS?

These are the steps you should follow to learn how to enable tpm 2.0 asrock bios.

  • Your job is to continuously hit ‘Del’ or ‘F2’ on the PC startup to enter bios.
  • After that, you should go to the ‘Advance’ Tab and tap on “CPU Configuration.”
  • Now, your task is to tap on the option “Security.”
  • Next, you should tap on the “Intel Platform Trust Technology” option.
  • Set this to the ‘Enable’ option.
  • Head toward the Exit tab. Now, you should choose “Save changes and exit.”
  1. How do you enable TPM 2.0 in Intel BIOS Asus?

Steps that you need to follow to learn how to enable tpm 2.0 in Bios Asus are:-

  • You should hit “Del” to enter bios once you see the ASUS or ROG logo.
  • After that, you should navigate to the Advanced\AMD fTPM configuration page. Then, you need to switch the “TPM Device Selection” option to “Firmware TPM.”
  • Finally, you need to save the changes by hitting F10 and after that you need to reboot the PC.


read more
AppsDo It YourselfInternetSoftwareTechnology News

What is an Aspx File?

What is an Aspx File?

Recently, we have been experiencing filename extensions that leave us scratching our heads. For example, files like HEIC, XAPK, and standard FLAC files can turn up; therefore, you might not know what to do with them.  A perfect example of this is the ASPX file, where you might not know what an ASPX file is used for. But it can irritate you as Windows does not know what to do with them by default. So Microsoft made the file format. However, it is possible to open the .aspx files.

But it isn’t necessary to do this if you work in IT on web servers or web development. You should know that .pdf, .jpg, and other file types can sometimes appear as them. Let’s dive into the article to learn what is a .aspx file and how do I open it.

What is an ASPX file?

ASPX, Active Server Pages, is a file format that web servers use. It is created using Microsoft ASP.NET, an open-source development framework. Web developers use it to make dynamic web pages using the .NET and C# programming languages.

It iterates on the ASP, a technology that precedes it. But it never uses Microsoft’s .NET language. Rather than that, you can find the File written in other frameworks. For example, it is known as a .NET Web Form. Besides, it is possible to determine if a web page is written in ASPX while a ‘.aspx’ suffix is applied to the URL.

These files can contain different scripts or other open-source files browsers receive from web servers. In addition, these are web service components that can offer dynamic elements on a page. If you are an end user, you cannot see or interact with these file types during the online experience. But when they do it, you can experience an error with the web service’s configuration. Let’s know more details about what is an aspx file extension.

More Information:

These pages are known as “.NET Web forms.” It is possible to recognize these pages in a web browser using the URL in the address field ending in .aspx.

Microsoft developed and released it in 2002 to succeed Active Server Pages (ASP). Web developers use this web app framework to create dynamic sites and apps.

Common ASPX File Names:

Default.aspx is a default webpage. It is loaded if a client browser requests a web server directory on a Microsoft IIS-based server. In this case, the server, which is Microsoft IIS-based, must use ASP.NET.

For instance, if a client requests HTTP:/​/​www.sampledomain.com/​, the server will load the following URL HTTP:/​/​www.sampledomain.com/​Default.aspx unless you configure it to load another one.

How Do You Convert .ASPX to HTML?

The HTML ones are static. Therefore, if you convert this type to HTML, you might lose all the dynamic elements of the page. If you are willing to convert it, load the page in your browser and tap on it. After that, you should tap on the View Page Source and save that to the local HDD. You may try to load this. It will appear on your page, but nothing will work.

Programs to Open ASPX File on Different Devices:

Programs depend on which type of device you use. Therefore, we have given names of the supported programs for different devices.

Windows:

  • File Viewer Plus
  • Microsoft Visual Studio 2019
  • ES-Computing EditPlus
  • Adobe Dreamweaver 2020
  • Any Web browser

Mac:

  • Adobe Dreamweaver 2020
  • Any Web browser

Linux:

  • Any Web browser

Android:

  • File Viewer for Android

 .ASPX File Format:

ASP.NET web forms depend on the event-driven model to interact with the web app. In this case, the browser submits a web form to the server as an end user. In return, the server returns a full markup page or HTML page. Besides, the ASP.NET component model can provide an object model for these pages. The model describes:

Thre are server side counterparts of all HTML elements or tags, like <form> and <input>.

Server controls are used to develop the most challenging user interface, like the Calendar or the Gridview control. These use the ASP.NET Code Behind model to create pages.

In-Line Code:

It is a sample code that can offer all the functionality for user implementation. This code displays a sample ASP.NET page with inline code:

<%@ Language=C# %>

<HTML>

<script runat=”server” language=”C#”>

void MyButton_OnClick(Object sender, EventArgs e)

{

MyLabel.Text = MyTextbox.Text.ToString();

}

</script>

<body>

<form id=”MyForm” runat=”server”>

<asp:textbox id=”MyTextbox” text=”Hello World” runat=”server”></asp:textbox>

<asp:button id=”MyButton” text=”Echo Input” OnClick=”MyButton_OnClick” runat=”server”></asp:button>

<asp:label id=”MyLabel” runat=”server”></asp:label>

</form>

</body>

</HTML>

Code-Behind:

You can write the code and store it in separate class files for clean separation of HTML from presentation logic. As a result, the presentation layer becomes independent of the executable code. It is the code-behind for presentation purposes.

<%@ Language=”C#” Inherits=”MyStuff.MyClass” %>

<HTML>

<body>

<form id=”MyForm” runat=”server”>

<asp:textbox id=”MyTextBox” text=”Hello World” runat=”server”></asp:textbox>

<asp:button id=”MyButton” text=”Echo Input” Onclick=”MyButton_Click” runat=”server”></asp:button>

<asp:label id=”MyLabel” runat=”server” />

</form>

</body>

</HTML>

The genuine logic’s C# implementation for the presentation layer is as follows:

using System;

using System.Web;

using System.Web.UI;

using System.Web.UI.WebControls;

namespace MyStuff

{

public class MyClass: Page

{

protected System.Web.UI.WebControls.Label MyLabel;

protected System.Web.UI.WebControls.Button MyButton;

protected System.Web.UI.WebControls.TextBox MyTextBox;

public void MyButton_Click(Object sender, EventArgs e)

{

MyLabel.Text = MyTextBox.Text.ToString();

}

}

}

How do you open an ASPX file as a PDF?

If you want to open it as a PDF, you should first open it with the standard app on the computer. Next, navigate to File and then Print. You should, after that, choose “Microsoft XPS Document Writer” as your printer. After that, tap on “OK” or “Print.” Now, you should select a destination for the XPS file and tap on the “Save” option.

How to open an ASPX file:

While downloading any file from the internet to your system, you will see the download in a .aspx format though you were expecting other formats like PDF. In this case, renaming this can work for you. Besides, you may change the type to the one you expect to have, like .pdf.

If the File you want to open is in the correct format, several options are available. Microsoft initially wanted it to be available in its open-source integrated developer environment (IDE) Visual Studio Code. However, there are other programs, both free and paid. So, you may use an alternate.

Open ASPX files with Notepad++:

It is a free source code editor. As it is compatible with many languages, it becomes a perfect replacement for Notepad. This editor can support even CGI format. While the code is in C++ programming language, it depends on the editing component Scintilla. In addition, it can provide a higher execution speed and smaller program size for using Win32 API and STL.

Rename the ASPX File:

If you find your Windows unable to open this, try to rename it. Renaming it to PDF allows you to open and view it. Here are the steps you should follow to rename it.

Before renaming this, set up the PC to see the file extensions. Then, go through these steps to do so.

  • First, your job is to tap on the “Windows” + “R” key on the keyboard to bring up the Run box.
  • After that, write “control folder” in the text field.
  • Hit the “OK” button or tap on the “Enter” key on the keyboard to bring a “File Explorer Options” window.
  • Move to the “View” tab.
  • Next, tap on the “Uncheck” where the box asks, “Hide extensions for known file types.”
  • Then, hit the “Apply” button.
  • Now, hit the “OK” button.
  • Thus, it is possible to view the file extension on the PC.

Let’s know how to rename it to PDF:

  • First, find the .aspx File on the pc and tap on it.
  • After that, select the “Rename” option from the context menu.
  • Next, change the file extension to PDF.
  • Now, the prompt appears to confirm your action, and tap on “Yes.”
  • It helps you to change this to PDF. Then, it is finally possible to see and read the PDF. But renaming it can make your content corrupted. Besides, you might not see the content in PDF format.

Open ASPX File with Adobe Reader:

Using Adobe Reader to open it is a simple way to see it. In this case, ensure that you have successfully installed the software on your laptop or computer. Then, follow these steps to learn how to open it.

  • Tap on the “Start” menu on the pc.
  • After that, you should tap the “View by” option on the window top.
  • Next, you should select “Small icons” and tap on “Default Programs.”
  • Then, you should tap “Associate a file type or protocol with a program” and find the “.aspx” protocol.
  • Now, your job is to tap on “Change program” and select “More apps.”
  • Head toward the “Adobe Reader” program.
  • Finally, you should hit the “OK” button to switch the program.

Thus, once you implement the steps, you can set this with Adobe Reader to see it. This software is also compatible with other formats.

Convert the .aspx into PDF File:

You can use browsers, including Google Chrome, Firefox, etc., to see and open it on your PC because it is an Internet media-type document. If you can use the web browser to see the File, go through these steps.

  • Tap on the one which is in the extension format.
  • After that, tap on Open within the menu bar.
  • Choose Google Chrome below the Open with context menu.
  • Next, you should tap on Google Chrome.
  • Now it becomes easier to open it locally in the browser. Select other browsers such as Microsoft Edge, and Firefox, if you want.
  • Finally, you can view it in any web browser supported by Windows 10. However, if you wish to see it on the computer, it is essential to convert it into pdf format. After that, you can see the contents of it.

What if Google Chrome is not available?

  • If this web browser is unavailable in the menu option, tap on the “Choose another app” option.
  • After that, you should browse it under the “Program” file.
  • Choose the “Google Chrome” folder. Thus, you can select the app to see this type.

How to open the .aspx File if you use windows 7?

If you use Windows 7 and are willing to know how to open it, go through these steps.

  • First, look for it on Windows 7.
  • Then, you should tap twice on it. Hence, an error pops up asking, “Windows can’t open this file.”
  • Afterward, you should choose the “Select a program from a list of installed programs” option.
  • Hit the “OK” button.
  • Then, browse to select “Google Chrome” from the list.

If you are willing to convert it to pdf, these are the steps you should follow.

  • Open it in Chrome. Then, tap on the Ctrl + P key to open the Print page pop-up window.
  • Navigate to the Destination drop-down and choose the “Save as PDF” option.
  • Once you select the Save as PDF option, hit the Save button marked in blue color. Thus, you can convert it into a pdf.
  • You will see this converted into a pdf as soon as you perform these steps.
  • Thus, it is possible to open this on the computer and see its content.

Use online converters:

You can use the online converters’ help to convert these to pdf. The process may take some time, but you can download a PDF. These are a few online converters.

If you want to convert it into a pdf with online converters, try to upload it first. Then, hit the Convert to PDF button. In this case, its size is a dependable factor. Based on that, it will be converted into a PDF. Next, a download button appears. Tap on it. Now, you can see the downloaded PDF that you can open on Windows 10.

Other .ASPX files:

Suppose you see a URL ending with .aspx in a browser bar. It indicates that the page is run as part of an ASP.NET framework. Besides, you can not open it yourself because the browser has to do it automatically. The web server running ASP.NET usually processes the code inside the File. Instead, use Microsoft’s free Visual Studio to open and edit. It is possible to open it up with the help of a normal text editor.

Still Can’t Open It?

Ensure you must not confuse other names with the names of the .aspx file extensions. For instance, ASX files appear to have connections to them. However, they might be Alpha Five Library Temporary Index files supporting the context of the Alpha Anywhere platform. The same occurs for ASCX also.

Conclusion:

You cannot open these on Windows PC. But the given tricks allow you to open and read them. You can open it using Google Chrome and save it as a PDF. This one is the most effective way to open it. You can open this even in the future. It is all you can learn from this article what an aspx file pdf is.

Frequently Asked Question:

  • How do you open ASPX files on Android?

Open it first, as usual, and head toward File. Then, go to “Print” and select print as a PDF.

  • How do you open an ASPX file on a Mac?

Microsoft comes with a Mac version of its Visual Studio software to open it on Mac. You only need to download Visual Studio and install it on the company’s website.

  • How do you create an ASPX file using inline code instead of code behind?

You should create a new web page using inline code in Visual Studio. Ensure that the Place code remains unchecked.

read more
InternetTechnology News

5G Vs LTE: What the Difference is?

5G Vs LTE: What the Difference is?

The term “G” means generation. Therefore, you can easily understand that 5G is the most recent generation of cell phone network technology. While buying a mobile or willing to switch carriers, you can come across the terms LTE and the earlier.

These are phone networks, but much confusion about the technology exists. If you’re unsure whether you require more Long Term Evolution coverage or anything else, go through the article 5G Vs LTE. We have explained the differences in detail.

What is LTE?

LTE means “Long Term Evolution.” It is a marketing term used to signify progression toward true 4G. Regarding 4G Long Term Evolution networks, understand that these are weaker than true 4G. But this mobile network is better than simple 3G. Its International Standard is defined and frequently updated loosely.

In simple words, this network is an upgraded 3G. It can send data to 4G LTE phones at a rate lower than 100 Mbps. Besides, it has played a significant role in making the current 5th Generation standard, known as 5G New Radio. So if you want to manage 5th Generation data sessions (5G networks or non-standalone 5G), it needs a 4G LTE control plane.

The third-generation partnership project has invented and marketed the network as a 4G Long Term Evolution network. Besides, its download speed ranges from 50 to 100 Mbps. You can consider the data rate for its 4-generation. The network can provide a downlink of 300 Mbps and an uplink of 75 Mbps.

The network uses a multiuser form of the orthogonal frequency-division multiplexing (OFDM) modulation system for its downlink signal. We know it as orthogonal frequency-division multiple accesses (OFDMA). Single-carrier FDMA helps to transmit the uplink signal by reducing the transmit power required by the mobile terminal.

It is compatible with around 750 devices per base station. Besides, it can support an average of 250 devices per sector. In addition, the radio frequency is up to 6 GHz, and its bandwidth is around 20 MHz. Therefore, the latency comes in at about 50 milliseconds.

Companies have attained 4G speeds but are unwilling to advertise it. Customers think of it as an advanced version of 4G, not what it is. The quickest 4G options are 5Ge, 4G LTE-A, and 4G LTE+.

How does LTE Work?

The network helps to move big data packets to an internet protocol system (IPS). Previously, it used Code-division multiple access (CDMA) and the Global System for Mobile Communications (GSM) to move data. But these can move small data amounts only. So it can transfer more data and help to streamline your service.

You can use it to remove speed bumps on the road. Thus, it enables you to traffic to move faster. Lower transfer latency indicates fast data moving. It can do all the things possible with mobile devices, which slower speeds of earlier-generation cellular networks were unable to accomplish easily.

How Fast is LTE?

The range is between 3G’s average 3 Mbps and 4G’s 100 Mbps. This range can offer a vast range of potential speeds. On average, the download speeds can range between 12-30 Mbps, with quick speeds available in major towns.

What is 5G?

It is the new standard laid out by the ITU. The network can offer quicker speeds, lower latency, greater network capacity, and more reliability. Thus, you can connect with everyone virtually. In addition, it helps to leverage new technologies and expand into new frequency spectrums. This network standard needs at least 1 Gbps with one millisecond of latency.

Three types of networks are available: low-band, mid-band, and high-band. These are available with different speeds and latency rates. Like 4G, we couldn’t say that all fifth-generation networks are true 5G. The rollout began in early 2019 and might take many years to implement completely.

It can offer access to Virtual Reality and AR with more uniform and quicker data rates. This network can get a peak data rate of around 10 Gbps. In addition, it can expand new spectrums like mmWave.

Besides, you can get 10-year battery life for low-power devices. Moreover, the network can offer 100% area coverage for every device. It allows you to make ultra-low latency applications through multi-access computing (MEC).

In addition, it comes with a bandwidth of around 20 GHz. This network is compatible with about 1 million connected devices per square Kilometer. Besides, its ultra-low latency is less than ten milliseconds. It comes with a huge network capacity. Moreover, it can provide a minimum speed of around 1 to 20 Gbps.

According to the researchers, we can realize the complete impact of the network across the globe by 2035. It can provide advantages to many companies.

How does 5G work?

It offers new features, including network slicing, orthogonal frequency-division multiplexing (OFDM), massive multiple-input, and multiple outputs. Besides, the network can introduce another new standard, 5G New Radio (NR). It can replace the Long Term Evolution network because, using its capabilities, the NR will build off. Thus, it will provide new advantages. For example, it can offer increased energy savings for connected devices and enhanced connectivity.

The network operates on a new high-frequency spectrum — millimeter wave (mmWave). It ranges between 30 to 300 GHz, whereas 4G LTE’s wavelengths remain under 6 GHz. Therefore, the network needs new small cell base stations for the mmWave spectrum to function.

How Fast is 5G?

This network can increase download speeds. Thus, it helps to change how devices remain connected entirely. It offers a maximum of 20 Gbps and a minimum of 1 Gbps. But speeds can vary with different flavors.

Low-band networks are quicker than 4G. While moving up the spectrum, speeds get quicker. But you may find the range of the signal decreasing. If you connect to the high end of the fifth generation, you will get closer to actual fifth-generation speeds.

What advantages does 5G bring?

As we have mentioned earlier, the network can offer quicker speed for more spectrum availability. Thus, you can get more advanced radio technology. In addition, Els Baert said that it could offer much lower latency than 4G. He is the director of marketing and communications at NetComm.

The network lets you download and upload data much quicker than older technologies. It offers speeds between 1 and 10Gbps download speeds and one-millisecond latency. But it can provide minimum average download speeds of 50 Mbps and latency of 10ms. Of course, it depends on network coverage, the device you have connected to, and the number of people connected in your vicinity.

Due to the higher speeds, the network stands separate from others. The high frequencies come with very large bandwidths. Therefore, you can keep everyone connected in busy environments like stadiums. But if you want to complete it efficiently, it will rely on huge MIMO (multiple-input, multiple-output) and beamforming.

The base stations of the network can support 100 antennas. What is unique about the higher mmWave frequencies is that you can block them easily. Therefore, many antennas can cause greater interference. Beamforming helps to recognize the optimum route for every connected user. It can decrease interference. Thus, it helps to improve the chances of blocked signals reaching their intended recipient.

What is Gigabit Long Term Evolution network, and how does it work?

Gigabit Long Term Evolution network is a new technology that represents a vital stepping stone between 4th and fifth-generation standards. It is how you can get it. AT&T can label its 4G technology as 5G Evolution. In addition, it has pushed out its logos onto mobiles that are incompatible with the network.

Difference between 5G Vs LTE:

The major difference between 5G Vs LTE is that this technology appears after the 4G Long Term Evolution network to increase the speed. The fifth-generation network comes with a radio frequency of 30 to 300 GHz, whereas the Long Term Evolution network offers up to 6 GHz radio frequency. It is based on 4G technology.

  • Fifth-generation comes with a radio frequency ranging from 30 GHz to 300 GHz. , But the Long Term Evolution network comes with a radio frequency of up to 6 GHz.
  • 5G is the fifth generation, but the other one is the fourth generation.
  • Fifth-generation can provide a speed of around 1 Gbps to 20 Gbps. But the other network can provide a speed rate of 50 Mbps to 100 Mbps.
  • The bandwidth of the fifth-generation network is around 30 GHz, whereas the other network has a bandwidth of 20 MHz.
  • Latency of fifth-generation is very low because it is less than ten milliseconds. But the latency of other networks is slightly longer at around 50 milliseconds.

The data rate for the fifth-generation network is about 10 Gbps. But the other network can provide a downlink of 300 Mbps and an uplink of about 75 Mbps. So the fifth-generation network allows you to connect to 1 million devices per square Kilometer. On the other hand, the other network enables you to connect to 750 devices per base station and around 250 devices per sector.

LTE Vs 5G: What is the future?

If you have good Long Term Evolution network coverage, you will not get many benefits from switching to a fifth-generation phone. According to Baert, you must have a top-quality connection with a decent speed as an average phone owner. The reason is that the service matters, after all, in the end, not the technology. But multiple people can get it with a 4G Long Term Evolution network. Moreover, many high-end users want higher speeds and lower latency.

For the fifth-generation network, the future can be driverless cars, wireless VR gaming, remote control robots, etc. But it will take time for the fifth generation to provide advantages for most people.

Apple had not released a 5G-capable iPhone until 2020. However, people have got many Android mobiles supporting fifth-generation networks. But it will not make much difference in your daily life if you live in an area getting early fifth-generation coverage. Now, the rollout of fifth-generation networks is gaining speed. Verizon, AT&T, T-Mobile, and Sprint have started offering fifth-generation networks in major towns. This list is increasing day by day.

However, we can say that we will need a phone supporting a fifth-generation network in the future. But many people can face trouble choosing between a 4G LTE iPhone or a fifth-generation Android. The good news is that it will complement 4G and Long Term Evolution network coverage. As a result, these will work together, ensuring you can get an improved connection.

Conclusion:

We use 4G LTE networks widely worldwide. But the fifth-generation network is new in the market. Moreover, it comes with a more advanced version. Therefore, it can soon become the global standard.

Frequently Asked Questions:

  • Is LTE better than 5G?

It is possible to move huge data amounts using a fifth-generation network more efficiently. Therefore, you can download movies, shows, or video chat quickly.

  • Why 5G instead of LTE?

The 5GE symbol indicates that your mobile is using advanced LTE technology. It is available on other carriers and is slower than the 10-gigabyte speeds.

  • What are the disadvantages of 5G?

This network has limited global coverage. Besides, it is available in specific locations only. Therefore, cities can benefit from this network only. Furthermore, the expenses to set up tower stations are high than in other networks.

read more
Internet

5GE Vs. 5G Explained

5GE Vs 5G

The more time goes by; the world becomes more connected. In 1991, people experienced 2G. After that, 3G appeared in 2001, and 4G in 2009. Now, we are stepping into the fifth generation era, meaning lower latency with the fast network. It helps to increase the overall experience with anything you do on the internet. Mobile manufacturers and the government are pushing for the widespread fifth generation to use it to enjoy the technology benefits. But did you know a few telecom providers are even promoting fifth-generation Evolution? Let’s check out the details of 5GE vs 5G.

What is 5GE Mobile Internet?

5GE means ‘5G Evolution,’ It began with AT&T. In 2018, the U.S. telecommunications company started to promote the term back to keep it separated from its competitors in the fifth generation race. According to AT&T, you can reach a 400 Mbps network speed.

This technology was marketed as an actual “evolution,” stepping up from the old 4G technology. As a result, multiple AT&T subscribers were led to believe that it is possible to upgrade from 4G to fifth-generation without switching to a new phone, and it can support fifth-generation networks without paying additional bills.

AT&T claimed that these are available in more than 400 markets. Besides, the upgraded LTE technology was also

available nationwide by the first half of 2019 to over 200 million customers.

What Devices Get 5GE?

AT&T claimed that more than 20 devices are available compatible with technologies underpinning fifth-generation Evolution. However, although it tolerates repeating, it doesn’t indicate that a few mobiles will be compatible with the entire fifth-generation network on the carrier when it launches.

Apple’s recent iPhones, including the iPhone X.S., XS Max, and X.R., started to showcase its logo with the release of iOS 12.2. Qualcomm’s X24 LTE modem, including the Galaxy S9 and Note 9 series, is available in the company also. Very recently, the Galaxy S10 family has joined their ranks.

How Fast is AT&T’s Technology than others?

People dissect the technology to verify AT&T’s marketing claims. It is an enhanced version of 4G supported by the, and most mobile network providers already indicate 4G LTE or LTE Advanced. So this looks like fifth-generation Evolution is Mm “evolutionary” and is 4G LTE.

It is slower than the actual fifth-generation network, and there is no surprise in it. The average speed of a fifth-generation network is near about 50Mbps, whereas 1-10Gbps is at its maximum. So it is superior to the Evolution model. But for 4G LTE, 30Mbps is the average speed, whereas the maximum speed is 300 Mbps.

When 4G can support an average speed of 15Mbps and a maximum speed of 100Mbps, the maximum speed for 3G reaches 3Mbps. In 2019, an AT&T executive clarified that they labeled its 4G LTE service as fifth-generation Evolution to inform us that these were in an enhanced experience market. While fifth-generation software or fifth-generation devices show up, you can see a network upgrade enabling customers to move to the fifth generation. Since then, AT&T did not allow the fifth generation Evolution advertisements to avoid more confusion.

How Do You Know Which You use?

Before checking to use any of these, ensure that you must have a 5 G-enabled phone. You should know that all mobiles are not compatible with the fifth generation.l network

Apple’s iPhone 12 range is compatible with the technology. Besides, it supports most Android-powered brands, like Samsung’s Galaxy Note, Galaxy S, and Galaxy Tab series. A few manufacturers are providing specific fifth-generation models for new mobiles. It allows consumers to stick with existing 4G tech in areas without fifth-generation networking. In addition, you can use devices that are a little cheaper than their fifth-generation counterparts.

Try to have a fifth-generation mobile plan to activate the technology. In this case, checking the mobile carrier’s fifth-generation coverage is vital.

The nPerf network coverage map displays that the fifth-generation technology of AT&T has covered about 18 percent of the U.S. recently. On the other hand, T-Mobile can cover 40 percent of the country, followed by Verizon with about 11 % nationwide coverage.

Towns receiving the most comprehensive fifth-generation coverage are— Los Angeles, Miami, New York, and Philadelphia.

In addition, the U.K. has four major telecommunications providers— EE, O2, Three, and Vodafone.

These offer fifth-generation coverage in about 40 major cities, including London, Birmingham, Liverpool, Manchester, and Bristol.

As soon as you complete all the above steps, your job is to peep into the top left corner of the mobile display to find out which technology you are using. You can see the name beside the name of your cellular network provider.

What is 5G?

You can experience quicker connection speeds and improved performance for entire networks. A few carriers with AT&T, Verizon, Sprint, and T-Mobile. These work to roll out the mobile networks.

You can get the actual ones anywhere from 10 to 100 times quicker than LTE networks. AT&T is working on this technology, but it is not similar to the other network being advertised.

The Power of the technology:

The network can boost the speed of the internet dramatically. In addition, it is possible to connect more devices to the network with the technology, strengthening IoT capacity.

When you have Greater IoT, it indicates that greater exchange of information between users will lead to the development of smart cities. Therefore, IoT is a major essential tech development that can shape people’s lives today.

AT&T’s campaign can be deceptive, but it will not change the factor that the network is here to stay. Recent trends mean that the network’s penetration might reach half of the world’s population within five years.

We cannot stop the next-generation technology—all we need to upgrade ourselves and embrace the network for a more efficient future.

But Verizon has limited its service in chosen cities now. On the other hand, AT&T has started to provide 5G+ through mmWave spectrum and the Nighthawk “Mobile 5G device”. Besides, AT&T and T-Mobile provide advanced 4G LTE.

The network can provide peak speeds 10 – 20 times quicker than 4G. Besides, as per Verizon, you can not detect lag times due to the very low latency. Therefore, this network offers the potential to change the experience on the mobile, car, etc., with gigabit speeds and extremely low latency. For instance, the network can bring a quantum leap in A.I. and augmented reality. In addition, it provides a new level of telemedicine, “no-latency” gaming on mobile devices, true self-driving cars, etc. Moreover, it enables a few consumers to switch to the network in the home from standard T.V. cable service.

Price:

The price plan is available from no added cost (T-mobile) to $10/month without the steep cost of a new device or necessary add-ons. It is for customers with Verizon’s unlimited data plan.

5GE Vs 5G:

Speed— 5GE Vs. 5G:

Fifth-generation Evolution comes with 30 Mbps average download speeds and 1 Gbps peak download speeds. Besides, it can offer less than 5 ms latency.

On the other hand, the other one provides a maximum of 500 Mbps download speed. In addition, its peak download speed is 20 Gbps. Moreover, this specific network has less than 1 ms latency.

Common 4G speeds are between 20-30 Mbps, and the download speeds were noticed on different fifth-generation networks far outperform fifth-generation Evolution in the June 2020 fifth-generation User Experience report. The speed range remains between 50 Mbps and 500 Mbps. But for the other one, the faster speeds indicate that you will browse the web and download. As a result, you can experience smooth live streams.

Compatibility—  5GE Vs 5G:

Fifth-generation Evolution is suitable for your existing phone and is available in more areas. But the other one is compatible with the latest devices.

The device itself also differs between these two networks. For example, you may need various hardware for one to be fifth-generation compatible, which indicates that you can not get these network benefits for a device if it is not a real mobile. Hence, it doesn’t matter if your device is in range of this network.

You should use a mobile supporting the type of network you use. However, if your device is compatible with fifth-generation Evolution, it doesn’t support the other one. If necessary, check out AT&T’s fifth-generation mobiles.

Availability— 5GE Vs. 5G:

The network is still in its infancy. There are many areas where the fifth-generation networks are popping up. However, fewer people will get access compared to 4G, which will be around several years longer.

5G Vs 5GE— which one is better?

Generally, the fifth-generation network is where we should go. But as it is not everywhere and you need to invest more money to get a new mobile, it is better to go with fifth-generation Evolution, where most people are forced to sit.

You will get this type of service because it is just 4G LTE+. Although it underperforms compared to other networks, it still offers some benefits. AT&T’s network-based devices can perform better compared to lower-end mobiles. Therefore, if you have a mobile supporting the network, it must improve speeds that work merely older LTE networks. However, neither can provide you with this network’s performance level.

Why are AT&T misleading customers?

They said that technology is an evolution instead of a single event. So the company wants people to know that they use an upgraded LTE network with faster speeds. But using the terminology is a confusing way of doing it. Actually, it is a marketing trick. They want to fool customers into thinking they got connected to a faster network.

When will AT&T have a real fifth-generation network?

The company has begun to roll out services in 12 cities, including Atlanta, Charlotte, N.C., Dallas, Houston, Indianapolis, Jacksonville, Fla., Louisville, Ky., Oklahoma City, New Orleans, Raleigh, N.C., San Antonio, and Waco, Texas.

In addition, the company also plans to expand the network coverage to different cities. Las Vegas, Los Angeles, Nashville, Orlando, San Diego, San Francisco, and San Jose are the names of cities where it will offer extra coverage during the first half of 2019.

A “5G+” icon denotes these networks. Keep in mind that, even with the company’s networks, devices must incorporate the technology chips to use them. In addition, the company is confused about rolling out another network feature, LTE-LAA; it is a second upgraded version of LTE that can offer 1 gigabit per second highest speed.

The National Advertising Review Board asked that the company discontinue the network’s marketing claims. Hence, the reason for that is it can mislead consumers. But the company said they would not remove the icon from mobiles as it is not considered advertising.

When will the iPhone work with fifth-generation networks?

Apple plans to release iPhones supporting the network in 2020 with the 2020 iPhone 12 lineup. In addition, carriers have started to roll out the networks also. But it can take a few years to get off the ground and spread across the United States.

Are other carriers using misleading fifth-generation branding?

T-Mobile has not supported AT&T’s decision to call its LTE networks. Besides, Sprint has said it is “blatantly misleading.”

Conclusion:

The article on 5GE vs 5G gives you sufficient details to differentiate these two. For example, Verizon has taken out ads in The New York Times and other major newspapers. However, Verizon, Sprint, and T-Mobile don’t plan to introduce similarly confusing branding before rolling out of the network.

Frequently Asked Questions:

  • Is the fifth generation Evolution network better than the fifth generation?

50Mbps is an average speed of a fifth-generation network, whereas 1-10Gbps is at its maximum. But for the other one, the average speed is 30Mbps, and 300 Mbps is the maximum speed.

In 2019, this carrier changed an indicator on a few Android mobiles and iPhones. Their motive is to offer a look to the mobiles like those connecting to the fifth-generation networks. Due to using the label “5G E,” the mobiles appear to have connected to a fifth-generation cell tower.

  • Is fifth-generation Evolution worse than LTE?

You can use these to describe standard dictating things like speed over a mobile network. One network is quicker and newer than the other network. Fifth-generation Evolution is an improvement of the network going above the LTE network.

read more
AppsDo It YourselfInternetTechnology News

Windows 11 Tips and Tricks

Windows 11 Tips and Tricks

In the last few years, you may have tried many things and discovered innovative ways to get things done from home, like your job, homework, connecting with dear ones, etc. Nowadays, technology has progressed a lot, but still, there are many things to improve when it comes to communicating and collaborating. However, windows 11 tips and tricks can quickly fix the issue.

We have given here many windows 11 tips and tricks, letting you know that you can make most of the updated version. These new updates can offer a simple user experience that can quickly become familiar with it.

Top Windows 11 Tips and Tricks:

Get Started:

When you enable your Windows to back up your apps, Get Started will take you to a list of the apps on your old device. It allows you to select what you prefer to load on your new device. In this case, it is better to restore all of your old version photos, docs, and files to the upgraded one rather than beginning it ultimately. These prompts enable you to select what to migrate to the computer. Hence, the Get Started app can apply the preferences and settings. In addition, it allows you to transfer apps and programs.

Start and Taskbar:

These are available in the front and center. You can make these things possible with fewer clicks and swipes. First, your task is to head towards Start and find anything. After that, a centralized search allows you to find the web and computer from one place. Next, you need to look for browsers, tabs, and folders. Finally, it lets you find new visual elements and sounds, smooth animations, new buttons, toggles, and fonts. With the help of the new layout and navigation, you can make complex things easier.

Snap Assist and Desktop Groups:

These are useful in arranging the apps on the desktop. For example, if you have already opened multiple windows, you can drag these to the edge of the screen to turn on Snap Assist. It helps snap them into an arranged grid, making most of the display space. As soon as you have completed upgrading to the new version, it will remember the way you have placed the apps, whether you use external or many displays.

While plugging the computer back in, you will get everything back into its position. Desktop Groups allow you to switch between many desktops quickly. For example, suppose one may have apps including Word, Microsoft Edge, and Teams opened, whereas another may have PowerPoint, OneNote, and a music player. The new version has four standard pre-configured layouts and two extra ones for displays. In addition, it offers effective screen resolutions of 1920×1080 or higher.

Widgets:

Do you want to find things quickly that matter to you most, like to-do lists, upcoming meetings, and news? In this case, you will need one place to get things done quickly. Now, you can enjoy the Widgets in the new version’s Taskbar. Your job is to tap or swipe from the display’s left side first. Then, instead of looking for it in separate apps, tabs, and pages, it lets you see the content you curate. In addition, you can get personalized content, including reminders, stocks, sports scores, social media, and local weather. If necessary, you have to take the help of the Interests page under Manage Interests to find topics and publishers.

Microsoft Store:

The Microsoft Store is now available with a new design. It also offers different apps, shows, and movies, from casual gaming to professional editing. In addition, windows and developers combined work to provide you with more content. This new Microsoft Store features tools including Preview and Search that assist in searching for what you want.

With the help of these tools, including Dark Web monitoring, automatic price comparisons, and vertical tabs, it becomes easier to stay safe online and save money while shopping. Besides, these help to keep you organized and focused. In addition, Microsoft Edge lets you know if your password-protected on the browser matches with those available in the list of leaked credentials. After that, it will prompt you to update your password. In this case, Password Monitor helps to scan for matches. For example, you have joined a bank recently and set up your online account, and it allows you to create a secure password to keep the account secured.

While checking out, Microsoft Edge helps save more money by applying coupons to the order. In addition, using the Sleeping tabs, you can keep the focus on current projects.

Chat Support from Microsoft Teams:

It is possible to attach the computer with any of your contacts. You can chat and do audio & video calling from iOS, Android, PC, or Mac. It enables you to stay on the call for up to a day. Therefore, you do not even need to drop and dial back in. It is one of the great windows 11 tips and tricks.

Touch, Voice, and Pen Inputs:

The digital pen, touchscreen, and voice typing feature help work more quickly than previously. For example, you can record your voice with your mobile and playback it to transcribe your words into text. In addition, your computer may have a microphone that can process your speech immediately using voice typing – text transcription.

In addition, it lets you detect inflection and rhythm for adding essential punctuation. The new version makes writing or drawing possible. Besides, it allows you to annotate PDFs. Moreover, it enables you to take the help of a digital pen to make the most of both worlds. It is possible to personalize the new Pen menu with favorite apps for quick access.

Conclusion:

Smartphones have become very handy nowadays for their touchscreens. But taking notes is not so simple. If the new version PC has a touchscreen, you can take notes instantly with a digital pen. In addition, the windows 11 tips and tricks allow you to use natural gestures like multi-finger gestures to navigate quickly.

Frequently Asked Questions:

  • What cool things can it do?

These are a few hidden features of the updated version:

  • Multitasking features.
  • Background apps permission.
  • Clipboard history features.
  • Better security.
  • Manage volume for individual apps opened on a desktop.


  • Does it improve performance?

Compared to the earlier version, it can hold some potential to improve the PC speed.

  • What does it do differently?

It comes with a new design containing a centered Start menu and Taskbar. Besides, it brings a Mac-like interface to the OS. In addition, it comes in a clean design with rounded corners and pastel shades.

read more
SoftwareInternetTechnology News

How to Delete Win Setup Files in Windows

How to Delete Win Setup Files in Windows

While upgrading the Operating System to a new version, you can find a Windows.old folder saving Win setup files in their system drive. Unfortunately, these old files consume a lot of space on their disk, where a few can run out of disk space. As a result, it becomes vital to know how to delete win setup files in windows.

The previous files will remain on the disk whenever you update your computer to a new version from the earlier one. These files help to roll back the PC to an earlier installation.

What Are Windows Setup Files?

The windows setup files are available on the PC during the up-gradation of Windows or performing a clean installation. Unfortunately, most people do not know about them as they don’t clear after the installation. However, you can find them on your hard drive.

Do You Need Windows Setup Files?

As more than 1.3 billion people are running the current edition of Windows, it has become a common question for all. The truth is that these are not useful for your computer except for consuming space, and there are not helpful even if you install them again.

Where are Win Setup Files?

While entering into the main hard drive, especially the C drive, you can find the “Windows.old” folder in your file explorer. It contains the temporary installation files and all the files from your earlier installation of Windows. If you are willing not to keep anything there, you can delete it. Whether you are looking for other installation files, these are in hidden folders like “$WINDOWS.~BT.”

Is it safe to Delete Windows Setup Files?

Win setup files are system log files. As these are a vital part of your System, you can not delete them.

Should you delete Windows Setup Files?

The Windows.old folder, where the system files and information of previous Windows installations are available, remains on the disk for ten days after installation. When the time comes, your System will clean up automatically.

If you have plenty of space on your disk, you don’t have to delete them. Besides, you can erase these manually while facing a low disk space issue.

How to Go Back to the Previous System?

First, your job is to head towards Settings and open it. After that, select Update & Security and Recovery options, respectively. Finally, tap on the Get Started option below the Go back to the previous Windows 10.

How to Delete Win Setup Files in Windows 10:

We have given here a few ways to erase the files.

Using Disk Cleanup:

  • Your first task is to tap on Win + S to open the Windows search bar.
  • Next, write cleanup into the textbox.
  • After that, you should tap on Disk Cleanup from the search result. Now, select Run as administrator.
  • Next, choose the system drive in the Disk Cleanup: Drive Selection window. Generally, you have to select C: by default.
  • Hit the OK button and wait after that for the calculating process.
  • Tap on the Cleanup system files button available at the bottom left.
  • You can check the earlier Windows installation(s) from the list and hit OK.
  • Hit the Delete Files button while the System asks you: Are you sure you want to eliminate these files permanently.

How to Delete Win setup files in Windows Using the Windows Settings:

  • Tap on Win + I to open the Settings window.
  • Now, you need to choose System in this interface.
  • Next, your task is to move to the Storage option in the left sidebar.
  • Select This PC (C:) option available below Local storage.
  • After that, your job is to select Temporary files under Storage usage.
  • You should check the earlier version of Windows under Remove temporary files.
  • Hit the Remove files button and wait till it finishes.

How to delete Win setup files in Windows Using Command Prompt:

  • Please navigate to the Windows search and open it. Then, write cmd.
  • After that, you should tap on Command Prompt and select Run as administrator.
  • Type RD /S /Q %SystemDrive%\windows.old and hit Enter.
  • It would help if you now waited till the command completes. If you are willing, you can execute the command step by step and hit Enter after each:

cd C:\

attrib -r -a -s -h C:\Windows.old /S /D

takeown /f Windows.old /a /r

rd /s /q Windows.old

Command Prompt

If necessary, take the help of the Command Prompt tool to recover lost files. Whether you want to remove Windows .old Folder with the help of Command Prompt at Boot, the method is as follows:-

Steps:

Step 1: Head towards Command Prompt and open it at Boot with the help of Advanced Startup Options in Windows 10.

Step 2: You should now verify the Windows 10 Drive Letter at Boot.

The Windows 10 drive letter will not always C: at Boot as it can change sometimes. Therefore, ensure that you verify the drive letter before applying the command.

  • When you are in the command prompt section, you should write diskpart and hit Enter.
  • Write list volume after that and hit Enter.
  • Find the drive letter from the listed volumes and verify your Windows 10 drive.
  • At last, write exit and hit the Enter key.

Step 3: Your job now is to execute the delete the Windows .old folder command as follows:

RD /S /Q “D:\Windows .old”

The original drive letter of the earlier windows version is D as it sizes 47GB. There is another volume, but it can not store the system folders for its small size.

Step 4: Shut down the command prompt. Next, tap on Continue to reboot the PC to Windows 10.

You can see the Windows .old folder deleted immediately.

Using CCleaner:

Take the help of third-party tools like CC Cleaner if you cannot fix the issue. For example, with the help of the CCleaner tool, you can clean your device within a few minutes, like clear browsing history and cache memory, and free up your disk space. In addition, you can run an antivirus scan before using it.

These are the steps you should go through to fix the issue.

  • Hit Windows + I keys at a time to open Settings.
  • After that, you should tap on Update & Security.
  • Next, tap on Windows Security in the left pane.
  • Choose the Virus & threat protection option available under the Protection areas section.
  • Now, you can see all threats available in the list. Next, tap on Start Actions under Current threats if you are willing to take action against the threats.

Whether you find no threats in your System, your System will display the No actions needed alert. As soon as the scanning process ends, the Windows Defender will remove malware programs and viruses. After completing the virus scan, you run CCleaner to clean up disk space by clearing them from the windows 10 PC.

Further Steps:

  • Go to the CCleaner download page and open it in the web browser.
  • Your task is to scroll down to the FREE option. Then, tap on “Download” after that.
  • When the download is complete, your job is to open the setup file. Then, follow the instructions shown on display to install CCleaner.
  • You should now open the program and tap on Run CCleaner.
  • Tap on Custom Clean from the left pane and move to the Windows tab. You need to know that the tool can eliminate all system files from windows by default, and for Applications, it will deface only the programs installed manually.
  • You have to check the files and folders section below System. Clear files if you are willing to do any.
  • Tap on Run Cleaner.
  • Finally, your task is to tap on Continue for confirmation. Now, wait till the cleaning method is not finished.

How to Restore Windows PC:

Sometimes, you may not prefer the newly updated version of windows, and hence, you have to roll back to the previous version.

  • Head towards Settings and Update & Security.
  • Choose the Recovery option from the left pane. Next, tap on the Get started option in the right pane.
  • You can see some options available in the Reset this PC Window. Select any of these as you want.

Keep my files option can keep the files but remove apps and settings.

The remove everything option can remove all folders, apps, and settings.

  • At last, go through the on-screen instructions to finish the reset process.

Conclusion:

How to delete Win setup files in Windows? You have got the question answered now in this article. We have given four ways as solutions. Try each solution to fix and let us know which one is the simplest. You may have run out of storage on your System. If something happens to you, use the essential tools to free up your hard drive with ease.

Frequently Asked Questions:

  • Why is setup exe running?

While opening the Task Manager, you can see the “setup.exe” process running. It indicates that a few installation software packages are somehow running in your System. Run MSCONFIG. EXE from a command prompt to check if you can begin it during Boot. With the program’s help, it is possible to disable it from starting.

  • Can you delete setup files after installing games?

It is possible to deface the setup file after installing the software.

  • Do you need to keep setup files after installation?

Delete the old installation programs if you have already added programs to the PC. These sit dormant after running the installer folders unless you are willing to reinstall the program you downloaded.

read more
InternetTechnology News

ERR Empty Response Error: How to Fix Err_empty_response

ERR Empty Response Error: How to Fix Err_empty_response

If you are trying to reach any website or browse the internet but not responding or sending data to your request, you can experience the “err_empty_response” error. Facing the ERR Empty Response error means that your device is having a network connection issue. However, other factors can cause the problem.

It may happen that the extensions installed already are preventing you from watching online pages. In this case, you need to ensure that you must update your drivers, clear the browser data, and reset the network settings. We have given a lot of approaches to let you know how to fix the issue.

What is the Err_empty_response Error in Chrome?

The ERR Empty Response error is common why it can appear on any website. If it happens, your browser can not view the requested URL. The Err_empty_response error message that appears while the webpage you are willing to view doesn’t respond or doesn’t send any data.

What causes the ERR Empty Response Error?

Several reasons are there why the error happens. There may exist issues related to network connection, issues with temporary files, and running programs causing damage to the Chrome browser like defective extensions.

These are a few reasons why you need to buy the issue.

  • A bad network connection
  • Overloaded browser cache
  • Problematic Temp files
  • Running programs (faulty extensions)

How do you fix the ERR Empty Response Error in your browser?

These are a few ways to let you know how you can solve the problem.

  1. Use Command Prompt:

  • First, your job is to tap on the Windows Key + X to open the Power User Menu. Next, you need to choose the Command Prompt (Admin).
  • As soon as the Command Prompt opens, your job is to put the following commands:

ipconfig /release

ipconfig /all

ipconfig /flushdns

ipconfig /renew

netsh int ip set

DNS

netsh Winsock reset

  • When you execute all commands, you should turn off the Command Prompt and reboot the PC. When the computer or laptop reboots, you must begin the web browser and check if the problem is fixed.
  1. Try another browser:

Are you searching for a browser not affected by the ERR Empty Response problem? Then, we advise you to go with Opera. Its primary focus is on user privacy and security and providing a high level of customization. The browser can work very fast compared to other resource-hungry browsers as it can use less RAM and CPU. In the browser, you can find a built-in AdBlocker helping to increase the speed of the page loading speed.

There exists a free and unlimited integrated VPN enabling you to protect your privacy at all times. You may try it yourself by downloading it for free. If the messages are bothering you, use the Opera browser now for stabler results.

  1. Use the Incognito mode:

  • Your first job is to hit the Menu button in the top right corner.
  • After that, your task is to tap on the New incognito window. Use Ctrl + Shift + N shortcut if necessary.
  • If you find the website working in Incognito mode, the problem may happen due to a third-party extension.
  1. Disable extensions:

  • Hit the Menu button, and after that, select More tools. Next, your task is to choose Extensions.
  • After that, you have to tap on the Enabled checkbox to turn off the desired extension.
  • You need to repeat the step for all installed extensions.
  • Your job is to reboot Chrome and check if the problem is fixed.

If you get rid of the issue anymore, you have to turn on extensions one by one till you are not finding the one causing the issue.

  1. Disable VPN software:

As per the user reports, these issues can appear when your VPN software runs on the PC. If you are willing to protect your privacy online, it is a great solution. However, these tools can sometimes cause errors. If your device already has any VPN software, ensure that you have turned off or removed it and check if it resolves.

  1. Clear browsing data:

  • Your first task is to hit the Menu button in the top right corner, and after that, you should select the option Settings.
  • Next, your job is to scroll to the bottom of the page. Select the option Show advanced settings.
  • Head towards the Privacy section, and after that, hit the Clear browsing data button.
  • It would be best to choose the beginning of time option after going to the Obliterate the following items from the section.
  • You have to look at the Cookies and other site and plugin data, Cached images and files, and Hosted app data.
  • Hit the Clear browsing data button.
  • Finally, try to reboot your Chrome browser and check if the issue gets solved.
  1. Delete Temporary Files:

If you have stored any files in Windows’ “Temp” folder, it can cause the “ERR_EMPTY_RESPONSE” problem.

  • In this case, your task is to hold the Windows key and “R” together to open the run dialog box. Then, you can tap on the Start menu and choose the option “Run” from the contextual menu. Now, you can see the Run dialogue box appearing.
  • Write the word “temp” in the Run box window and tap on “OK” or Enter. Hence, you can log in to Windows with your administrator account to access the Temp folder.
  • As soon as you tap on Ctrl + A, you can choose all files. Then, you need to tap on them and choose the “Delete” option from the contextual menu.
  • Finally, you should check if the issue exists now in Google Chrome.
  1. Clear Google Chrome DNS cache:

  • First, you have to open the browser and type chrome://net-internals/#dns in the address bar.
  • After that, you should hit the Clear host cache button.
  • Reboot the browser and then check if the issue fixes.
  1. Change DNS To Google DNS:

Google comes with a public Domain Name System, DNS, indicating that it has servers that it can manage. You can take the help of any internet host to use the Google DNS to fix domain names. Try to use it if you are willing to have a more secure and faster connection. Ensure that you have changed it manually.

  • Hence, your first task is to tap on the Start and select the “Network Connections” option. Next, you can move to the “Settings” option and then choose the “Network and Internet” option.
  • Tap on the “Change Adapter Options” once you have selected the option “Ethernet” or your connection type.
  • After that, your job is to tap on the option “Properties” from the menu while tapping the internet connection.
  • It would help if you opened the “Internet Protocol Version 4 (TCP/IPv4)” option. Then, you need to head towards the “Properties” option and open it.
  • Go to the drop-down menu and select “Use the Following DNS Server Addresses” from there.
  • Enter 8.8.8.8 for the “Preferred DNS Server” option.
  • Your task is to enter 8.8.4.4 for the “Alternate DNS Server” option.
  • At last, you need to check if the issue has disappeared after rebooting the PC.
  1. Disable Computer Antivirus:

While using antivirus software can block a few websites or all. Due to the presence of third-party antivirus software, the error may appear. Therefore, ensure that the software you have installed is not the source of the problem. We advise you to disable it temporarily to check if it remains. You should check if disabling or deleting the antivirus software can solve the issue. Then, you can use another antivirus program or install a new one again. Besides, whether you use a VPN client, ensure that you have disabled it.

  1. Run malware scan for any virus:

You have to perform a Full Malware Scan for your PC.

  • First, your task is to head toward the start menu.
  • After that, your job is to search for the ‘Microsoft Security Essentials’ option or move to it.
  • Please tap on the option and open it.
  • Choose the ‘Full ‘option if you are willing to run a full scan of your PC
  • Tap the “Scan Now” option to scan the PC.
  • Next, you have to wait for a while to scan it.

As soon as you finish, you need to close the tab.

You can take the help of the Microsoft Security Essentials to scan the PC for malware/viruses. It will help you to solve the Chrome code problem.

  1. Update the device drivers:

The ERR Empty Response problem can appear if you use a wrong or outdated device driver. Try to update the drivers to check if the issue resolves. Use the Device Manager on the PC to update the network adapter driver. Go through the steps to know further.

  • Your first job is to tap on the Windows Key+R to launch the Run dialog box on the keyboard.
  • As soon as the box appears, you must enter “devmgmt.msc” (no quotes). After that, your job is to tap on “Enter.”
  • Next, your job is to expand the contents of the ‘Network adapters category.
  • Tap on the network adapter and select Update Driver from the options.

Manually:

Head towards the hardware manufacturers’ websites first to update the drivers manually. After that, your task is to look for the recent drivers for your devices.

In this case, ensure that you have chosen the driver that can support your correct model number of hardware and version of Windows.

Automatically:

Some people don’t have sufficient time, patience, or PC skills to update the drivers manually. Hence, it is better to do it automatically using third-party software, and it can help you to update the system drivers automatically.

  1. Disable Windows Firewall Settings:

  • If you are willing to disable Windows Firewall Settings, first head towards the Start Menu.
  • Then, move to the Control Panel.
  • After that, your task is to tap on Windows Firewall.
  • Hit the “Turn Windows Firewall on or off “feature.
  • Tap the “Turn off Windows Firewall (not recommended)” option.
  • Finally, your job is to hit the ‘OK ‘button.

Turning off the windows firewall settings helps to solve the issue.

  1. Check your network connection:

Issues with network connections can cause the issue. First, you should check if the PC has a connection to the internet. Besides,.you have to confirm if the router, modem, and other network devices are in good condition. If you find any issues with the network connection, contact the Internet Service Provider or network device manufacturer for help.

  1. Use a VPN:

If you face an interrupted website, it can cause you a problem. Hence, your job is to use a VPN to bypass the interruption.

Two methods are there to set up a VPN on the PC— manually and automatically.

Option 1 — Manual process to download virtual private network:

The method needs special pc skills and patience to set up a VPN connection. Hence, a VPN server is essential to connect. Therefore, if you are willing to change your connection settings step by step.

Option 2 — Automatic way to download virtual private network:

Although you’re a computer newbie, it is a fast way to get all the job done with just a couple of mouse clicks. Use a VPN service to set up a VPN connection.

The bottom line:

The err_empty_response error appears on the display while Chrome has a hard time. Sometimes, another app can create ERR Empty Response problem. In the article, we have given the top fifteen methods letting you know how to fix the problem. We hope these solutions will help you.

Frequently Asked Questions:

  • What does Err_empty_response mean?

You get to see the error message on your device’s display while browsing the internet, and the website you want to access is not responding.

  • Is the error a hosting or browser issue?

The problem can appear from the browser’s Internet settings, hosting, etc. Therefore, it is better to know the methods to solve the problem.

  • Will the error go away on its own?

No, the error message will not go on its own, and therefore, it is present from one user to another. For example, the problem appears in Google Chrome.

read more
AppsInternetInternet Security

What is Gstatic & What is Gstatic.com Used for?

What is Gstatic & What is Gstatic.com Used for?

If you are surfing the web daily, you can face gstatic.com appearing on display. Multiple people don’t know what it is and think of it as a virus or malware. In this article, we have covered all details about it.

What is Gstatic?

Gstatic is a service that Google uses to hold static content and decrease bandwidth usage. Google LLC uses this http://Gstatic.com reliable domain to boost network speed for users.

What is gstatic.com?, How does Google use it?

gstatic.com is a web domain that Google uses to access its driver where Google hosts images, javascript, CSS, and other contents. It helps the content load more quickly from the content delivery network or CDN.

The domain helps to boost network performance, decrease bandwidth usage. Besides, it allows you to load Gmail, Google Maps, and other Google services. You can store different static data such as JS libraries, stylesheets, etc. The domain can verify the connectivity to the web, especially for Chrome browser and Android devices.

It comes with a few Subdomains:

fonts.gstatic.com – It sends requests to the Google Fonts API, and these consist of resource-specific domains like fonts.googleapis.com or fonts.gstatic.com

maps.gstatic.com – The domain allows you to embed Google Maps images on the web page, and you don’t need JavaScript or any dynamic page loading.

csi.gstatic.com – The domain helps to improve the performance of other sites.

These are a few other examples of subdomains

accounts.gstatic.com

connectivity.gstatic.com

csi.gstatic.com

fonts.gstatic.com

metric.gstatic.com

mail.gstatic.com

maps.gstatic.com

ssl.gstatic.com

Browser hijackers and other cybercriminals use a counterfeit version of the domain to install unnecessary applications and adware. The programs do not disclose details about apps bundled with them. We advise you to install third-party software only from trustworthy sources. Running a scan can also help you check if there is any virus.

Adware-type software or browser hijackers offer unwanted pop-ups installed on the devices without the user’s consent. For example, the adware can offer coupons, banners, pop-ups, and other intrusive advertisements.

You may find the ads disturbing as these can redirect you to untrustworthy sites. Besides, these can run scripts that can download PUAs or potentially unwanted applications and install them. It can cause harm and create issues like high-risk infections.

The browser hijacker software can change browser settings and options like search engine, new tab URL, and homepage. As a result, people can encounter redirects to untrustworthy websites. Besides, it can store IP addresses, keystrokes, search queries, geo-locations, URLs of visited websites, etc., including personal or sensitive details. The software can leak information to third parties, and they misuse the details to make revenue. Thus, you can experience different privacy safety issues.

Is it a Virus?

It is a legitimate Google service used to decrease bandwidth usage and enhance network performance. The service doesn’t have any relation to harmful activities. Therefore, if you find any unnecessary pop-ups appearing, you can scan them for viruses and malware.

What are Gstatic Images?

These indicate the images that you can find on https://encrypted-tbn0.gstatic.com/ representing the cached version of all the images stored on Google’s servers. They boost the delivery of image results.

Can you remove it?

Many people think that it is malware, but it isn’t. You can remove the service by following the procedure given below in the article.

www.gstatic.com/generate_204 Error?

You can see the URL: http://www.gstatic.com/generate_204 opening up automatically in a new tab. The page is blank with “Untitled” as its title.

If you face a misconfigured network and unstable connection, it can trigger the problem. It is because the browser thinks that it can sign in to the Captive portal. Here, the new WiFi users should enter the sign-in details for security purposes.

What is Connectivity.gstatic.com?

It is a subdomain of gstatic.com used by Chrome and Android devices. The function of the domain is to check if you have internet access to your connected network. If not, the browser can load the captive portal login web page or enable you to access the internet.

Should you Block Connectivity.gstatic.com?

You should not block the subdomain. It may not create significant problems, but the subdomain helps check internet access. Therefore, we advise you not to mess with it.

csi.gstatic.com Keeps Loading:

While opening a website on the Chrome browser, you can see a message Waiting for csi.gstatic.com available in the bottom left corner. The Page displayed doesn’t load, and you see the csi.gtsatic.com URL continuously. If there exists any problem, you can solve it by following the processes.

  1. Allow and Delete Cookies for the Page:

If something gets blocked, you can allow the cookies by tapping on the little lock next to the URL. If you are willing, try to delete cookies for that specific domain. After that, your task is to refresh the page and check if it loads.

  1. Change DNS Settings on the device:

Try to change Domain Name System (DNS) settings to fix the problem.

Uninstall from Windows:

If you’re willing to eliminate the potentially unwanted programs from Windows OSs, you should follow the steps.

For Windows 11:

First, tap on the Start icon and choose the Apps and Features option.

A window will open where you need to look for the app you are willing to uninstall. As soon as you find the app, tap on the three vertical dots. Now, choose the Uninstall option.

For Windows 10/8 :

  • When the windows search box appears, you need to enter the Control Panel. After that, tap on “Enter” or the search result.
  • Choose to Uninstall a program available below Programs.
  • Look for the entry of the suspicious program available in the list.
  • Tap on the app and then choose Uninstall.
  • When the option User Account Control appears, tap on Yes.
  • Finally, you should wait until the uninstallation method is not finished and tap on OK.

Windows 7/XP user:

  • Your job is to tap on the Windows Start and then go to the Control Panel available on the right pane. People who use Windows XP need to tap on Add/Remove Programs.
  • When you open the Control Panel, you should choose Programs and Uninstall a program afterward.
  • Choose the unwanted app by tapping on it once.
  • Tap on the Uninstall/Change option available at the top.
  • Choose the Yes option available in the confirmation prompt.
  • Hit the OK button as soon as the removal process is completed.

Delete from macOS:

If you are willing to delete it from Mac, you should go through the steps.

Remove Items from the Applications Folder:

  • Go to the menu bar, and then you should choose Go > Applications.
  • Open the Applications folder and find all related entries.
  • Tap on the app and then drag to the option Trash. If you want, right-click and select the option Move to Trash.

If you want to delete an unwanted app, ensure that you should access the Application Support, LaunchAgents, and LaunchDaemons folders.

  • After that, your task is to delete relevant files.
  • Choose the option Go and then Go to Folder.
  • Tap on /Library/Application Support and hit the option Go. Next, you may tap Enter option.
  • While opening the Application Support folder, you should find dubious entries and remove them afterward.
  • You should enter /Library/LaunchAgents and /Library/LaunchDaemons folders similarly and terminate all .plist files.

Remove from Microsoft Edge:

Delete Unwanted Extensions from MS Edge:

  • Choose Menu, i.e., three horizontal dots available at the top-right of the browser window. After that, you should choose the Extensions option.
  • Select the extension from the list and then hit the Gear icon.
  • At last, you should tap on Uninstall at the bottom.

Clear Cookies and Other Browser Data:

  • Tap the Menu, i.e., three horizontal dots at the top-right of the browser window. Next, you should choose Privacy & security.
  • Select the option Choose what to clear below the Clear browsing data.
  • Apart from the passwords, you can choose everything. After that, tap on the option Clear.

Restore New Tab and Homepage Settings:

  • Your job is to hit the menu icon and select Settings after that.
  • Next, your task is to look for the On startup section.
  • Finally, tap on Disable if there is any suspicious domain.

Reset MS Edge:

  • If something doesn’t work, you should tap on Ctrl + Shift + Esc to open the Task Manager.
  • Hit the More details arrow available at the bottom of the window.
  • After that, choose the Details tab.
  • Scroll the Page down and find each entry with the Microsoft Edge name. Tap on every item and choose the option End Task to stop MS Edge from running.

Take the help of an advanced Edge reset method if you cannot fix the issue following the procedure. Ensure that you have backed up your information before proceeding.

  • Your first task is to look for the folder available on the PC: C:\\Users\\%username%\\AppData\\Local\\Packages\\Microsoft.MicrosoftEdge_8wekyb3d8bbwe.
  • Tap on Ctrl + A available on the keyboard to choose all folders.
  • Hit the option, and after that, you should choose Delete.
  • Next, tap on the Start button and choose Windows PowerShell (Admin).
  • As soon as the new window opens, your job is to copy the command and paste it. After pasting the command, you need to tap Enter. The command is as follows—

Get-AppXPackage -AllUsers -Name Microsoft.MicrosoftEdge | Foreach {Add-AppxPackage -DisableDevelopmentMode -Register “$($_.InstallLocation)\\AppXManifest.xml” -Verbose

Instructions for Chromium-Based Edge:

Delete extensions from MS Edge (Chromium):

  • Navigate to the Edge and open it. After that, your job is to tap on select Settings and Extensions, respectively.
  • Tap on Remove to delete unwanted extensions.

Clear Cache and Site Data:

  • Tap on the Menu option and head towards the Settings.
  • Choose the Privacy and services option.
  • After that, your task is to select Choose what to clear option available below Clear browsing data.
  • Choose All times available below the Time range.
  • Finally, your task is to choose the option Clear now.

Reset Chromium-based MS Edge:

  • Your first job is to hit Menu, and after that, choose Settings.
  • Next, select Reset settings available on the left side of the display.
  • Now, you have to choose the Restore settings to their default values.
  • Finally, tap on Reset for confirmation.

Remove from Mozilla Firefox (FF):

Try to reset the browser by following the steps manually.

Remove Dangerous Extensions:

  • First, your task is to head towards the Mozilla Firefox browser and open it. Then, your job is to tap on the Menu, three horizontal lines available at the window’s top-right.
  • Next, choose Add-ons.
  • Finally, you should choose the unwanted plugin and then tap on Remove.

Reset the Homepage:

  • Tap on the three horizontal lines you can see at the top right corner for opening the Menu.
  • Next, your task is to select Options.
  • If you are willing, you can put the preferred site under Home options. Then, you can open it whenever you open Mozilla Firefox.

Clear Cookies and Site Data:

  • Tap on the Menu and select Options.
  • Head towards the Privacy & Security section.
  • After that, your job is to scroll the page down to find Cookies and Site Data.
  • Tap on the Clear Data.
  • Finally, your job is to choose the Cookies, Site Data, and Cached Web Content. After that, you need to hit Clear.

Reset Mozilla Firefox:

If you can’t solve the issue by resetting the browser, you must follow the steps.

  • Head towards the Mozilla browser and tap on Menu.
  • Move to the Help and select Troubleshooting Information.
  • Tap Refresh Firefox available below the Give Firefox a tune-up section.
  • As soon as you can see the pop-up on the screen, tap on the Refresh Firefox to confirm the action.

Remove from Google Chrome:

Delete Malicious Extensions from Google Chrome:

  • Your first task is to move to Google Chrome and open it. Tap on the Menu option, three vertical dots at the top-right corner. After that, choose More Tools and Extensions, respectively.
  • You can see all the installed extensions in the newly opened window.
  • Finally, tap on Remove to uninstall the suspicious plugins related to the unwanted program.

Clear Cache and Web Data from Chrome:

  • You have to tap on the “Menu” option and choose Settings.
  • Choose the option Clear browsing data available below the Privacy and security.
  • Next, you should choose Browsing history, cookies, and Cached images and files.
  • Finally, tap on the Clear data.

Change Your Homepage:

  • Your job is to tap on the menu option and then select Settings.
  • Next, find a suspicious site if there is any in the On startup section.
  • Next, tap on the option “Open” a specific set of pages. Now, hit three dots to find the Remove option.

Reset Google Chrome:

Try to reset Google Chrome to eliminate the unnecessary components when the above steps are not helpful.

  • You should first tap on Menu and choose Settings.
  • Scroll the Page of Settings down and tap Advanced.
  • You should scroll down to find the Reset and clean up section.
  • Tap on the Restore settings to the actual defaults.
  • Finally, click on the Reset settings for confirmation.

How to Perform a System Scan?

If you are willing to check if the PC is safe from viruses, you need to run a full system scan. Running a scan will help your device isolate and eradicate malware from the PC.

  • Your first job is to tap on “Windows” + “I” to open Settings.
  • After that, your task is to tap on the “Update & Security” and choose “Windows Security” from the left pane.
  • Now, you should choose the “Virus and Threat Protection” option. Then, hit the “Scan Options” button.
  • Tap on the “Full Scan” option and hit the “Scan Now” button.
  • After tapping on the button, the defender can scan the PC to ensure that your device is safe from viruses.

The Bottom Line:

Gstatic is something you can find in your browsing history or anywhere else. I hope after reading this article; now you know what it is.

Frequently Asked Questions:

  • What exactly is this gstatic Page?

It resembles a Google static code page to create an HTTP 204 No Content response.

  • How do you turn it off?

Look for the app you are willing to uninstall in the opened window. After finding the app, you should tap on the three vertical dots and choose Uninstall. Then, if necessary, you can perform a scan on the pc to check for malware infections or remaining unnecessary components.

  • Is it a tracker?

As per Whotracks.me, the service tracks around 39.6% of internet traffic, its tracking share is increasing each month. But there is nothing to take tension as it delivers content only, and the service will not track personal activity.

read more
AppsDo It YourselfInternetSoftware

Chrome OS Flex: Upgrade Your Computer

Chrome OS Flex: Upgrade Your Computer

Chrome OS Flex is called the second generation of CloudReady. If you don’t know about OS Flex, check Neverware, acquired by Google two years ago. Neverware is a New York-based company that developed CloudReady, and it enabled the old PC versions for running the Chrome OS and extending the lifetime.

CloudReady was made upon an open-source Chromium OS base, and this one is compatible with Linux. The project is taken over by Google. But Google released the operating system or CloudReady 2.0 based on Chrome OS.

The operating system is compatible with Google Assistant and other Google services. In recent times, the OS allows you to access for free to Education and Enterprise users. If you are a general user, you can install the operating system on old Windows PCs and MacBooks. The OS Flex build offers a great experience to the users, but it is based on the Chrome OS 100.

What is Chrome OS Flex?

OS Flex is a web-based OS announced by Google very recently. It offers quick access to web apps and virtualization. This new upgrade comes with the same code base and releases cadence. However, it offers a few basic benefits over its predecessor.

Requisites to install os flex web-based operating system:

  • You should first have a USB pen drive with 8GB or more storage.
  • The PC must come with an Intel or AMDx86-64 processor.
  • 4GB is the minimum RAM that is necessary on the device.
  • The device’s internal storage needs to be 16GB or more.
  • Make sure that you have checked the system compatibility before installing Google web-based operating system.

Flash the web-based OS on a USB drive:

  • You should first install your Chromebook Recovery Utility Chrome extension.
  • It allows you to flash the web-based OS build on your USB drive.
  • Next, you are required to open your Chromebook recovery utility. Then, you should connect the USB drive and tap on the option “Get Started”.
  • Choose a model you want from a list.
  • You can see a drop-down menu appearing as soon as you choose a manufacturer.
  • After that, you should select the “Google Chrome OS Flex” option. As soon as a drop-down menu appears, you should choose ‘OS Flex’ from it. Next, you have to tap on the Continue option.
  • Choose the USB thumb drive and thereafter hit the Continue option.
  • After tapping on ‘Create now’, you can see a Chromebook recovery Utility available.

Chrome OS Flex: Ways to install on Windows, Laptop, or MacBook: 

  • When you have completed the flashing process, you should reboot the computer. Then, you should tap on the boot key. Hit the boot key continuously until you see the boot selection page.
  • Use the arrow keys to choose the USB drive on the boot selection page. Next, you are required to hit the Enter option.
  • You can see now ‘Welcome to Cloudready 2.0 screen’ appearing. After that, hit the ‘Get Started’ option. Go through the instructions on display and then login into the Google account.
  • Your job is to explore the operating system and install this on the hard drive.
  • After that, your task is to open the Quick Settings panel and tap on the Sign Out option.
  • You should tap on the ‘Install CloudReady’ option available on the bottom-left corner.
  • After that, you are required to tap on Install CloudReady 2.0 option and tap on it again. Then, tap on the ‘Install’ option.
  • Finally, you can see the operating system available on the device.

Benefits of Chrome OS Flex installation:

You can install the software on the computer and Macs to protect these. After installing this, your system will work fast and automatically update itself in the background. You can manage these from the cloud.

Quick modern work experience:

Installing the OS helps to boot quickly, update the background, and reduce your device downtime. You can quickly access the VDI and web apps using an intuitive, clutter-free, and reliable experience.

Quick deployment and simple management:

Use the USB or network deployment to deploy it across the fleet with policies and a user’s settings. If necessary, you can use the Google Admin console to adjust updates and configure device policies remotely.

Proactive security:

It blocks the sandboxing technology and executables for which you are not required to use antivirus software. The IT controls do not allow data loss on lost or stolen devices.

Make the most of existing hardware:

You need to refresh the old devices using a modern OS. Then, you should boost the lifespan to decrease e-waste.

How does it operating system work?

If you are willing to experience the OS, you should use a USB drive on the PC or Mac. Setting up the web-based OS merely takes some minutes to be finished.

Steps:

  •  You need to generate a bootable Chrome OS Flex USB drive for installation.
  •  As soon as the method of creation is completed, then you should install the operating system on Windows or Mac to exchange the operating system.
  • Finally, you need to deploy the operating system to more devices through a USB drive or network deployment.

When to consider in Chrome OS Flex web-based operating system:

If you want to know about Chrome OS or accelerate cloud-first OS deployment, then the OS can make this simpler than ever.

You can use recent computing with cloud-based management. Just install the operating system and experience its benefits for Macs or PCs.

Use the modern operating system to decrease e-waste and increase the lifespan by transforming the existing devices.

You may deploy a cloud-first OS on the purpose-built hardware for kiosks or digital signage.

Adjust & protect the Chrome OS Flex fleet with Chrome Enterprise Upgrade:

With the help of Chrome Enterprise Upgrade, you can unlock the default business capabilities of the OS. You should use the Chrome Enterprise Upgrade for managing these alongside Chromebooks.

Advanced security:

It allows you to disable devices remotely and turn on the sign-in restrictions. Thus, you can keep the information protected in the right hands.

Control updates:

Use this to roll the updates out slowly or automatically with an additional option for the long-term support channel.

Granular device controls:

It helps to turn on the single sign-on and identity-free login. Besides, it is useful in configuring printers and WiFi networks.

Reporting and insights:

It can pull 7-day active metrics, OS versions, and crash reports.

Conclusion:

Google has created Chrome OS Flex that is simple to use and download. Users can have this for free on their computers or laptops, and they merely should have a USB drive and a compatible system to run this platform.


read more
AppsGadgetsInternetTechnology News

How to Fix a Corrupted SD Card?

How to Fix a Corrupted SD Card

It may happen that you are using your SD card, and it fails suddenly without warning. In most cases, SD cards display tell-tale signs of corruption/damage before they stop working. Whether you can recognize the signs, you can backup your data in time. Then, you can fix the problem. This article lets you know how to fix a corrupted SD card.

How to Fix a Corrupted SD Card:

These are some Ways to fix a corrupted or damaged SD card.

  1. Try another USB Port or change Adapter or Card Reader:

It is one of the most straightforward processes that you can try. That’s why you need to try this method first, and then you are required to move on to other fixes to solve the issue.

Whether you are using a laptop with a default SD card reader, buying a USB card reader is advised. You should try different types of USB ports, and it will be better if you use these more than one computers.

  1. Try CHKDSK Command for Checking Memory Card Issues:

A command-line utility exists in all types of windows, allowing you to check a volume’s file system and file system metadata. We know the utility as CHKDSK, and the command is simpler to use than you think.

If you are willing to solve issues related to a corrupted SD card with the help of a CHKDSK command, you should perform the steps.

  • Your first job is to write “cmd” in the search box that you can see available on the taskbar. After that, you are required to choose Run as administrator.
  • Next, you need to put the command given below, and after entering the command, you should tap Enter. Ensure that you have replaced X with the letter assigned to your SD card.

chkdsk X: /f

Here, this /f parameter says the utility to fix your memory card.

  • Now, you should wait for a while till the CHKDSK process is not finished. This method can take some hours, but it relies on the size of your SD card.

You can use all the methods given in this article to fix a corrupted SD card. These help to fix all types of SD cards.

  1. Use SD Card Data Recovery Software:

When your SD card becomes corrupted and damaged, it may happen that you have lost your essential files. If you want to get these back, you must use SD card data recovery software. There are plenty of data recovery software available online.

Most of the online data recovery software is compatible with all SD card types, such as SD, SD High Capacity (SDHC), and SD Extended Capacity (SDXC). It helps to recover documents, images, videos, etc., quickly. In addition, the recovery solution allows you to preview recoverable files before recovery.

That enables you to recover up to 500 MB. In addition, the tool features a few helpful data protection and backup features, which help to learn to keep your SD card secured against future data loss.

If you are willing to recover files with the help of the data recovery software, then perform the steps—

  • In this case, you should first download the software and install this after that.
  • Next, you need to attach your SD card to the PC, and then you should launch the tool.
  • Now, you have to choose your SD card, and after that, tap on the Search for lost data.
  • You are required to check files that you have recovered.
  • Then, you should tap on the Recover button at the bottom.
  • You should now specify your destination for recovery. Then, tap on OK to start the recovery process of the files.
  1. Use Card on Another Computer:

It may happen that the SD card that you use is working correctly. Therefore, problems that you experience are caused by the PC. In this case, you need to use the card on other PCs or devices to rule out the chance.

Hence, if necessary, you can take help from any of your friends, so they will allow you to use their PC. In addition, you may go to a public library and use any PC. Thus, you can verify your problems to check if it is occurring on other devices.

Want to diagnose a microSD card? If you have a mobile where a microSD card slot is available, you can use the device as an easy-to-use test device. You can verify the card’s functionality without a PC if you want. However, you need to be careful because your device may need to format your SD card. Therefore, you should ensure that you are not erasing this accidentally.

  1. Assign a New Drive Letter:

Multiple SD card issues are there, which you can solve by assigning a new drive letter to the SD card. These errors usually have something to do with conflicting drive letters.

If you are willing to assign an updated drive letter to an SD card, you must perform the steps.

  • You should first navigate the search box and write “disk management” there. You can see the box on the taskbar. Then, you should choose the Create and format hard disk partitions.
  • Next, you need to tap on the SD card. Then, you should choose the ‘Change Drive Letter and Paths…’ option.
  • Now, you have to tap on the ‘Change…’ button.
  • After that, you should choose a new drive letter and then hit OK.
  • Lastly, you should tap on OK again to turn off the Change Drive Letter and Paths window.

Conclusion:

This article lets you know how to fix a corrupted SD card. First, make sure that the memory card you have should support your mobile device. Try always not to lose data. That’s why you should follow the right processes to fix the corrupted SD Card problems. If you cannot solve the problem through these methods, then use some online SD card recovery services. Finally, ensure that you have chosen the correct memory card to strike a balance between a memory card and your device.

Frequently Asked Questions: 

  • Can a corrupted SD card be reused?

Yes, you can use this unless physical damage is the reason behind corruption. Then, after fixing the corruption problem, you can reuse the SD card.

  • Why does an SD card get corrupted?

A few common reasons for SD card error are—  improper use, malware, accumulated bad sectors, manufacturing defects, and physical damage.

  • Is it possible to recover photos from a damaged SD card?

Yes, it is possible to recover images from a corrupted SD card. But it relies on the condition of your card.

read more
1 2 3 4 5
Page 2 of 5