close

Gadgets

GadgetsTechnology News

Blink Vs Arlo: Which Smart Home Security System is Best?

Blink Vs Arlo: Which Smart Home Security System is Best?

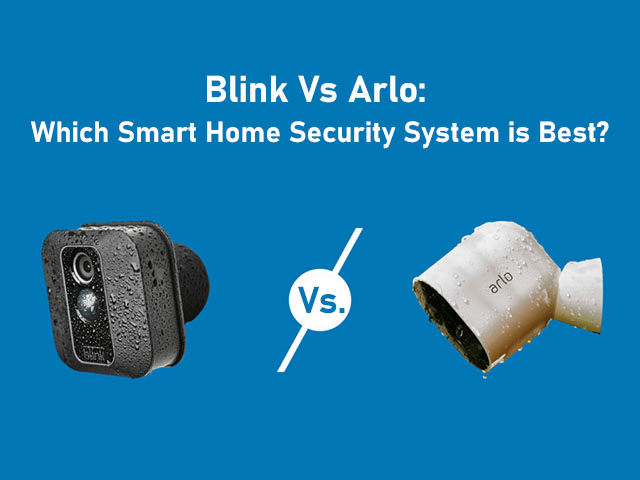
Nowadays, Arlo (by Netgear) and Blink (by Amazon)— both of these are reigning in the market as the most popular smart security camera brands. Let us discuss best  things between Blink Vs Arlo, and choose the best for our home need. When you look at the cameras of each version, you will find that the cameras of Arlo are a kind of souped-up versions of Blink cameras. Both of these brands produce high-definition, wire-free security cameras with customizable settings as well as smart specifications. However, when it comes to Arlo, you will get intelligent features a little bit more. But you need to spend more money on it. At the same time, the other one offers affordable alternatives. This article gives details about these two brands, similarities and differences between these two, etc. Let’s check it out.

What is Blink?

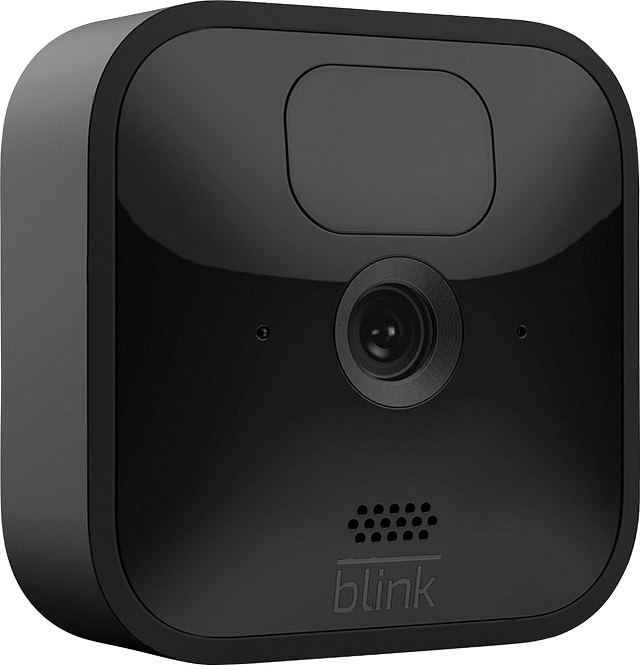
It is a home security brand that Amazon-owned. This brand provides affordable, and easy-to-fit both indoor and outdoor surveillance cameras.  Using motion-sensing cameras, users will be able to cover their entire home. Besides, they can access both footage or a live feed with the help of the smartphone application. You need to use regular batteries to power the cameras. It was first released as a Kickstarter project in 2016. However, compared to Blink, it provides a wide range of devices and incredible features.

On the other hand, Blink quickly grabbed the users’ minds as a go-to in the home security space. These cameras have become highly demanding due to their low costs and easy-to-set-up facility. Later, Amazon acquired this company which has headquarters in Andover, Mass. Whereas the headquarter of Arlo technology is in San Jose, Calif.

About Blink:

BlinkDo you want to install and monitor cameras yourself? Then, choose the budget-friendly cameras of this brand. Here, we have given a few advantages and drawbacks of the company. It will help you to differentiate between these two brands.

Advantages

Affordable: The latest mini camera of the brand is available at just $34.99. It is an inexpensive way of increasing the security of your home.

High-Quality Video: Along with excellent image quality, the cameras offer HD quality footage day and night.

Wireless Connectivity: You can operate the outdoor camera of this brand on a Wi-Fi system. As soon as you install the app on your smartphone, you will be able to control the specifications of your home security. Besides, you will get sound notifications and motion alerts on your phone. Now, you can easily monitor your entire home using these cameras. Moreover, with the help of these cameras, you will be able to keep your eyes on your children when you are in the office.

Long Battery Life: These cameras are available with rechargeable batteries. These batteries can last up to two years.

Disadvantages:

Limited Storage Options: The brand offers two primary cameras: the XT2 indoor/outdoor security camera and the Indoor camera. In both of these cases, you will not get any extra storage except the free two hours. However, the new Mini camera needs one of two subscription storage plans for storing footage. These plans are – Basic Plan and Plus Plan. The Basic Plan runs $3/month or $30/year. The other one, Plus Plan, runs $10/month or $100/year. In both cases, you can get 60 days of rolling video storage. This basic Plan is compatible with one Mini camera. At the same time, the Plus plan is consistent with an unlimited number of Mini cameras.

Few equipment Choices: It has launched the latest version of the Mini camera.  However, users still will not be able to get good equipment options.

No Professional Monitoring Choices: It doesn’t offer any professional monitoring option to the customers. All responsibility for monitoring depends on the user.

What is Arlo?

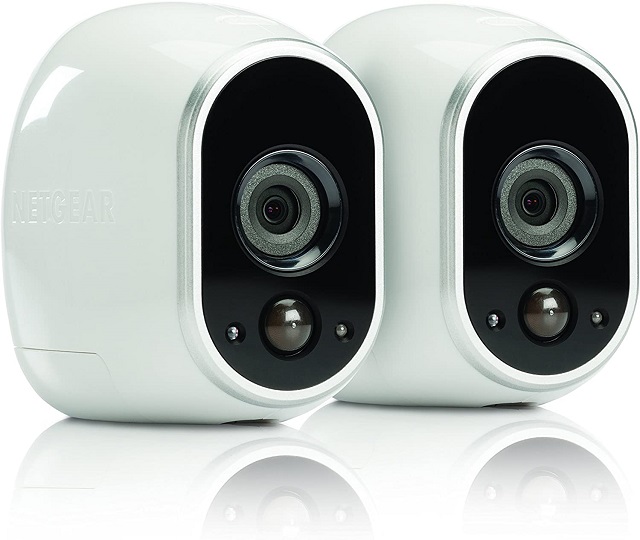
It is an old player who Netgear establishes in the smart home niche. Besides, It is famous for its feature-packed smart home security devices. It comes with a motion-sensing camera system that you can install with ease. The company headquarters is in San Jose, Calif. It was established in 2014 and is a part of Netgear. Later in 2018, it got separated from Netgear. In this article, we are going to discuss Blink vs Arlo in detail. Let’s check it out.

Arlo

About Arlo:

You can get budget-friendly products from this brand also. If you can install and monitor your cameras yourself, then go for this brand. However, you can get multiple models and storage plans. These features make the brand an ideal choice. However, there are some disadvantages of this brand also that you need to consider.

Advantages:

High-quality images: Cameras like the pro and the ultra version come with HD video and night vision. Besides, a few cameras feature color night vision. It enables the user to see what is happening inside your home day and night.

Camera Security: It doesn’t matter whether you need 1, 10, or 20 cameras; you can monitor every corner of your home with the help of a smart integration system. You can get high-quality Resolution while monitoring that makes the brand exceptional. Besides, the cameras support the SmartThings hub app. Therefore, you can monitor your home using the cameras in real-time.

911 Emergency Features: Now, you can dial 911 directly with the help of its storage plans. You can call this number if you see anything suspicious on the live feed of the camera.

Storage Plan Options: These cameras allow you to store up to seven days of footage. You don’t need to pay for this. However, for saving footage to the cloud storage for more days, there are some plans. In these plans, you can get additional smart features. You can get

Data storage for thirty days is available in both Premier and Elite plans. Besides, these offer motion detection in selected zones, more advanced alerts, along the 911 emergency feature. In the Elite Plan, you will get higher resolution video quality, i.e. 4k video resolution.

The cost is $4.99/month for each camera. For up to five cameras, the price becomes $14.99/month. On the other hand, the premier plan comes with a $2.99/month cost per camera. For this case, the price is $9.99/month for up to 5 cameras.

The Array of Product Offerings:

When you choose home security products, you find multiple different choices. Examples of the options you get are as follows:- indoor and outdoor cameras, a baby monitor, doorbells, security lights, etc. 

Disadvantages:

No Professional Monitoring: You can’t get any professional monitoring options here. Compared to professional monitoring, self-monitoring is relatively less costly. Trained professionals can help you in this case.

Mediocre Battery Life: You may need to change the battery more frequently than other brands in this case.

Blink vs Arlo:

Price of Blink:

When it comes to Blink, the cost of a single indoor camera system is £79.99/$79.99. It is around AU$145. If you want, you can add extra cameras for the price of £69.99/$69.99. The cost of each camera will be around AU$125. However, you can purchase a five-camera system at a £289.99/$279.99 price point. Blink XT2  comes with a weatherproof design. The price of each camera system is £99.99/$99.99, which is around AU$180. You can get extra cameras also if necessary, which are available at £89.99/$89.99 each. The price is around AU$165. The brand offers you a five-camera system which is available for £399.99/$379.99.

It is around AU$725. You need to know that the XT2 version replaced the standard XT in the United States. Both of these versions are pretty similar, but you will get some additional benefits in the XT2. It offers two-way audio and better battery life. The Mini version costs $34.99, whereas the indoor camera’s price is  $79.99. Besides, the outdoor version of the camera is $99.99. These cameras contain a wireless hub that is known as Sync Module. You can add up to ten cameras in every module. In this case, you don’t need to pay any monthly fee.

Price of Arlo:

If it comes to Arlo, you can get a single camera system at £129/ $124/ AU$287 price. You can buy low-cost entry-level cameras of this brand for both inside and outside usages. If you want to add additional cameras, then pay $74 / £80. The brand offers a three-camera kit of a basic entry-level camera. It costs £278.99/$199, which is around AU$500).

However, Cameras of higher quality and pro versions are equipped with extra features and are very expensive. These also provide security lights, doorbells, a special baby monitoring camera, etc. This brand offers a wireless base station. It helps to keep your cameras connected. The basic Plan of the brand is free. You can use the free Plan, but it merely connects up to 5 cameras. This brand offers multiple choices.

These are Arlo Q, Baby, Go, Essential, Pro 2, Pro 3, Pro 3 Floodlight, Ultra 2, etc. The price of these cameras are $79.99, $185.77, $429.99, $128.00, $199.99, $369.99, $227.99, and $499.99 respectively. You can connect up to 15 cameras at a time using the base station. For this, you need to get a Premier subscription, i.e., £6.49/$9.99/AU$12.99 per month.

Getting an Elite subscription can also make your job done that needs £9.99/$14.99/AU$18.99 per month. This subscription is for up to 20 cameras. When you get the subscriptions, you will get additional features. However, those who have only one camera can get the basic smart Plan. In this Plan, you can get additional features. For this, you need to pay £1.99/$2.99/AU$3.99 per month.

Cloud Storage Subscription:

Do you want to use cloud storage for the cameras of the Arlo brand? Then, you have to get a subscription to a monthly Smart Plan. It allows you to get access to all the most innovative features, such as object detection.

You need to subscribe to the Smart Elite Plan to get the 4K resolution for your cameras.

On the other hand, you need to pay $3 every month for a single camera for 60 days.

The price of the cloud storage subscription of this brand starts at the same price as the other one. People who have many cameras need to pay  $10 per month to get access to unlimited cameras in the same location.

For more than five cameras, you should choose the subscription plan of this brand. However, compared to the other one, you won’t get smart features. It comes with a Basic and Plus plan. The first one can support one camera at a time which is $2.99/mo. OR $30/year. You can choose the other Plan also as it supports unlimited cameras. It is available for sixty days and costs $10/mo. OR $100/year.

 Types of Camera and Equipment:

Blink tries to offer simple indoor and outdoor cameras as well as other optional accessories. On the other hand, the other one comes with a range of various cameras.

The indoor cameras from the brand blink are equipped with motion and temperature sensors. Moreover, these models come with built-in microphones.

Besides, it enables the user to record HD video at 720p. The cameras feature outdoor, XT camera, infrared night vision, weatherproof (IP65) quality, etc. You can now easily record HD video at up to 1080p. However, by default, it records at 720p. The XT2 version offers two-way audio. It helps the user to communicate with other people.

The cameras contain two AA lithium batteries. These batteries come with estimated two-year battery life.

When it comes to the Netgear Arlo cameras, you can also find motion sensors that are considered ‘weatherproof.’ It features infrared night vision and records HD video at 720p. Every camera of the brand comes with 4 Lithium CR123 batteries. The Pro version of the tool features two-way audio, a 100-decibel siren, a wider viewing angle, USB drive support for local backups, along a rechargeable battery. It comes with a plug-in option also. The Pro version’s price of a single camera system is £239.99/$249.99/AU439, which is very expensive. The latest Ultra version of this brand offers 4K recording, enhanced night vision, zooming, tracking, etc. You need to pay £449.99/$399.99/AU$449 to get a single-camera option.

Arlo Vs Blink Home Automation:

First one comes with multiple smart home integrations. What makes this brand’s cameras exceptional is that they integrate with Apple HomeKit. These can also be connected with smart speaker standards Alexa and Google.

On the other hand, Second one contains its Home Monitoring app where you can get customizable settings. However, it comes with a limited third-party smart home integration. In this case, the cameras are not compatible with Google or Apple HomeKit, or SmartThings. These support Alexa and IFTTT.

Installation:

Cameras of both brands come with an easy installation process.  It is because both of these brands produce wire-free cameras. You only need to download the required app. Then, you have to sync the cameras using the hub. After that, you can put these at any place you want.

People who don’t need battery-powered cameras can also choose the hard-wired models of these two brands. These can connect with Wi-Fi easily. That’s why these are still known as “wireless.” You can get power cords available in these wireless cameras. Before using these, you need to plug them into the wall.

Blink Vs Arlo: Smart Home Features:

As Amazon set up Blink, it supports Alexa. It indicates that the users will get the advantage of producing rules for hooking their smart home devices together.

Arlo supports Alexa, Google Home, and Samsung SmartThings. Therefore, you will get more versatile options and choices. As a result, you can integrate your security camera system even more efficiently. It provides its own Security Light and doorbell. You can use them within a specified security network.

App Features:

For Android or iOS, you need the Blink Home Monitor app while using this brand. You can customize your camera settings using the application. Therefore, the sensitivity of the motion sensor can be determined easily. You need to select the clip length before recording and set them up as default. It notifies you every time motion is detected. Therefore, you can easily see the video clip anytime on your smartphone. It also enables you to select to tune in to the live feed.

However, users will not be able to record live watching videos. After every one minute, it throws up a prompt to confirm whether the user is watching the live video or not. You can record a maximum clip of sixty seconds. It offers a total of 7200 seconds of video storage space. If the storage becomes full, the new videos will take place at the old one’s location.

When it comes to Arlo, you need the app of this brand for both Android or iOS. With its help, you can check the battery level, change video settings, and set up notifications. It also enables you to review your recorded clips. You can choose the free basic Plan. It offers you seven days of cloud recordings, but the storage size is merely 1 GB.

To get the smart features of the brand, you need to select the subscription plans. For example, you can get features like more sophisticated alerts, person, package, vehicle, animal detection, etc. This brand also allows you to set the specific zones where you don’t want to see them. In the Premier plan, you can get a 30-day cloud recording feature. On the other hand, the Elite Plan lasts up to sixty days.

Emergency Connections

You can connect cameras of Arlo with the SmartThings hub, Wi-Fi, or cellular connectivity. The other one relies on a Wi-Fi connection.

Setup & Usability:

The setup process of these two is similar. Here, we have given the steps that you need to follow to set up the cameras.

First of all, you have to unbox the camera.

Then, connect it with the Wi-Fi network you have.

After that, you have to install the app on your phone. Then, pair both these two with each other.

Next, you need to install them in the place you want.

You can find a Sync Module that is available with the Blink cam. It works similarly to a bit of mini-hub. The module has a connection to the Wi-Fi network. It ensures that the camera can communicate with the application.

Power Consumption:

Whereas the XT2 comes with two non-rechargeable AA lithium batteries, the Arlo ultra is equipped with only a single rechargeable battery. The brand contains a magnetic charging cable that helps to charge quickly.

Both brands offer decent video streaming features. It allows the user to stream on-demand line footage directly to your phone. Compared to the Blink cameras, the Arlo ones are pretty efficient. It permits the user to share and record the live streaming from the mobile application with ease.

Night Vision:

Cameras of both brands come with infrared night vision LEDs. It is one of the most necessary specifications. The normal human eye is unable to detect infrared LEDs. The difference between Blink vs Arlo is that the Arlo Ultra cameras feature color night vision rather than using black and white images.

You can set the activity zone using these cameras. With the help of this feature, you can focus on hotspot areas. It helps to decrease false notifications when it detects the motion inside the activity zone.

When it comes to automatic tracking, the Arlo ultra version leads the race. It can zoom in, focus, and track moving items with ease. The cameras of the brand come with a bright spotlight. These spotlights get activated as soon as the camera detects any movement. You can activate a siren on your mobile app using it as a remote.

Two-Way Audio

This two-way built-in audio recording feature is available in both outdoor security cameras. With the help of this, you can talk to your visitors. However, you will not be able to use this feature in the XT2 version. It is because the maximum video footage range of the camera is only 60 seconds. Besides, the app receives push notifications when the recording is finished.

Input Connections:

The backside of the Blink cameras features the same connections. The indoor and XT2 versions come with a spot that helps to connect to the mount. Besides, the indoor camera comes with a micro USB port on its backside. However, you can’t get it available in the XT2 version. The camera uses the USB input, which is available in the Sync Module, for pairing with the Sync.

The Arlo cameras come in two inputs— a magnetic disk and a threaded insert. The first one helps connect the charging cable, whereas the other can screw in a hardware mount.

Video Storage:

Cameras of both these brands offer Cloud-based storage to store videos. The extra benefit you can get from Arlo is the local storage. It allows you to use the storage while pairing it with an SD card.

Blink offers up to 120 minutes of free video storage facility. However, it doesn’t provide any subscription option for additional storage or local backup. The other one offers the users a free storage plan for up to seven days of video storage.

You need to know that the Ultra and Pro 3 versions of the other one are not offering the feature. The Smart version comes with an Elite plan that costs $6 per month. In this Plan, you can get 30-day video history, rolling, etc. The same feature is available in the Smart Premier version, which is available at $12 / mo. This brand wins the race ultimately while comparing video storage. To get additional storage, you can choose the paid subscriptions.

Video Quality

If you are comparing these two based on video quality, then you must go ahead with Arlo. It offers more contrast, whereas the other one features a black and white night mode. If you want to get the best picture quality, you must buy the Ultra and the Pro 3 version. Each version of this brand offers indoor/outdoor cameras with color night mode, digital zoom, along very crisp picture quality. You won’t get any 4K video resolution camera from the other one. If you are looking for cameras with 1080p Resolution, go with the Blink XT2 and the Arlo Pro 2. Each of these two offers strong indoor/outdoor cams as well as excellent picture quality.

Mounting Styles:

Cameras of Blink come with a flat bottom and wireless power. Therefore, users can keep it on any type of flat surface. The product comes with a surface mount. It helps to mount the camera to a wall.

A few different types of the mount are available in this case. You need to attach the suitable base of this 2-piece system to a vertical substrate. Use two screws to get the job done. There is a secondary arm at the back part of the camera, along with a ball socket. This socket is connected to the rigid base.

When it comes to Arlo, you can find three various types of mounting styles. Compared to the other one, you can keep it freestanding on its base. If you want, you can use the mounts for mounting it on a wall.

Mount 1— Total Round: This mount comes with a flat disc back with a rounded circle portion. The back of the disk can be attached magnetically to the camera. You can get this style of mount available in the Pro and Pro 2 versions.

Mount 2— Corner Round: The primary purpose of designing these cameras is to mount them on the CORNER side. As a result, the camera can pivot easily.

In the Ultra and the Pro 3 versions, you can get this style mount. It is the wire indoor Arlo Q security camera that doesn’t come in a magnetic mount design.

Mount 3Hardware Mount: There is a hardware mount that you can use with the Arlo cameras. This kind of mount is available, especially on the Arlo Q camera. It also supports the Pro, Pro 2, Go, as well as light versions.

Similarities: Blink Vs Arlo

When it comes to home security systems, these two brands are very famous. However, you may find similarities in the functions of both of these cameras. Let’s have a look at the similarities between these two brands.

Wireless:

Nowadays, Wireless connectivity is becoming a trend. That’s why both these brands produce wireless devices. Therefore, these devices don’t require the help of chords for installation, operation, and charging.

Easy to Install:

For installing this, there is no need to use chords. As a result, it is easy for the users to install the devices of both brands. Without the assistance of any professional, you can fix the whole thing. Just go through the manual adequately given with the package before installation.

Compatible with Alexa:

Cameras of both brands support Alexa that is the virtual assistant AI technology. Besides, these devices are compatible with mobile apps. Therefore, you can easily control your home security. However, cameras of Blink are not compatible with Google Assistant.

Both Indoor and Outdoor Options:

Do you want to have strict surveillance inside and outside your home? If yes, then choose any of these two home security brand cameras. These can make your job done smartly.

HD Video Quality:

The overall camera quality depends on this factor to a great extent. Cameras of both brands come with high-resolution video recordings. You can get 1080p Resolution while choosing the Blink cameras. The other one offers both 720p as well as HD resolutions.

Quality Images:

You can get high-quality images when using cameras of these two brands. These cameras feature HD-quality video along with night vision features.

Affordability:

These two brand cameras provide you budget-friendly camera options. However, Blink is the one that gives you more reasonable choices. While buying many cameras at one time, both brands offer you exciting discounts.

Self-Monitoring Only:

These two brands don’t offer professional monitoring. You need to monitor yourself whether you are willing to buy any of these two.

No Contracts: 

There is no necessity to sign an agreement before using the cameras of the two brands. Just pay the money, and the job is done. The extra money that you may need to pay is for an optional upgraded storage plan.

Blink Vs Arlo: Which One is Right for You?

Blink offers a budget-friendly camera system that is equipped with superior batteries. This feature makes the brand unique to those customers who are looking for especially home security cameras. As a homeowner, you can easily install both of these two cameras. However, Arlo is more sophisticated than others. It offers a wide range of devices, software smarts, and greater smart home integration. To get all the benefits of this brand, you have to get a monthly subscription. It is ideal for those who want to buy a camera of a broader range of control. 

Final Thoughts:

These two brands usually come with distinct features. However, both of these can keep your home secure from thieves. In today’s world, having a robust monitoring system is very important in the home. This article has gathered all the essential information to let you know about the difference between them. Check out the entire article properly and pick the best security camera.

Frequently asked questions: 

  • Can Blink continuously record?

No. These cameras are unable to record continuously. However, if you want, you can leave it armed for some time. 

  • Can Blink cameras be hacked?

Similar to most wireless technology, these cameras are susceptible to hacking. However, Amazon recently offers firmware updates. It will help you to keep the devices protected and secured.

  • Can Arlo cameras be hacked?

Yes, there are hacking risks. The Pro 2 version of the brand is one of the wire-free cameras that requires a base station for operating. This model uses the home’s Wi-Fi network to function. In case your home Wi-Fi network is hacked, the camera will also get hacked.

  • Can you use Blink without a subscription?

Yes, you can use it without a subscription plan or free trial. The system will be able to send merely motion alerts.

  • Do Blink cameras record without Wi-Fi?

You can’t operate these cameras without an active Wi-Fi connection or having an online Sync Module. If you don’t have an internet connection, then it will turn into offline mode.

read more
Gadgets

Fire Stick vs Roku- Who is on Top in 2021

Fire stick vs Roku- Who is On Top in 2021

Before discussing Fire stick vs Roku, we have outlined the features and function of these two. Let’s check out.

Are you in need of a cheapest and easiest way for stream videos from Amazon Prime, Netflix, YouTube, Hulu, Disney Plus, HBO on to your TV? Then, two options are there that you can choose: Roku and Amazon Fire TV.

People usually know Roku as the most famous streaming services for a long time. But nowadays, Amazon’s Fire TV system is gaining fame in the market. According to CNET, both streaming platforms work efficiently. Most of the devices of these two platforms have got a rating of an 8.0 or higher.

What is Fire Stick

It is a media streaming device. With the help of this, you can watch the video, play music, install apps, etc. The device is built on the Android platform. It allows you to install apps on this device. Besides, you can play games and enjoy your favourite tunes.

Features: 

User interface: Compared to the interface of Chromecast, it is a little bit busier. The interface is visually intuitive also. On the excellent video service, Amazon has put a heavy emphasis. This superb video service comes with an expansive library. Besides, Amazon offers you both Prime content and original content. You can get an F-list movie from Prime Video.

Fire Stick

Setup

If you want to set up the device, follow these under given methods.

First, you need to add power to the device. To do this, you have to take the adaptor and plug it into the TV Stick. After hitting one end to the device, your job is to promote the other side into a power outlet. It can make you sure that you have switched on the device successfully.

Next, you need to attach it with the HDMI port of your TV. After that, you have to plug the device into the port directly. However, you can use an HDMI extender if you don’t want any direct connection with the screen.

Now, your job is to choose the channel. Here, you need to turn on your tv and go to the same track. For example, you need to go to the media like HDMI1, HDMI3, etc. Then, you can see a loading screen. It will show the “Fire TV Stick” logo.

After that, you need to include the batteries into the remote. As soon as you complete the method, it gets paired with the device. In case you find that the remote is not paired, you have to press the Home Button. Hold the button for around ten sections. Wait until you see the “discovery mode”. As soon as you will see the mode, ensure that the pairing process is completed.

Next, you can see a few instructions appearing on the screen. Follow the process to connect the device with the Wi-Fi network.

At last, you have to register the device you have. The instructions will be available on-screen. It will guide you through registering your device.

Remote Control: 

The device comes with remote control. It is equipped with control buttons. With the help of these buttons, you can manage the volume easily. It allows you to keep it in mute mode. Besides, the control buttons enable you to return to the previous page, move forward to the next track, etc.

Moreover, if you want, you can activate voice command. Alexa helps the device in sync. You can pair the device with any other devices. If you want to get a completely hands-free experience, then the device is the right choice. The fire stick remote controlling ability with Alexa differs the device from Roku.

TV Compatibility: The device can support any high-definition television easily. In this case, it has a high-speed HDMI input and high-speed internet connection.

Storage: You can store information details in the 8 GB capacity. If you buy any content from Amazon, you will get the Cloud storage for free. Moreover, you can use external devices for connecting the device with fire tv stick. You can use this as additional storage through OTG Cable.

Parental Controls: This feature remains activated in this device. It helps you to prevent any unwanted content.

Voice Command: The device comes with Alexa Voice Remote feature. With the help of this, you can search for music, movies, shows, etc. Besides, it enables you to launch apps. You can manage the soundbar with the help of voice command recognition. For example, you only need to say “Alexa, find movies by Charlie Chaplin.”

Streaming and Picture Quality: The 4K Ultra HD streaming quality allows you to watch videos at 720p, 1080p, & 2160p. The picture quality can reach up to 60 fps. Here, fps stands for frames per second. You can get vibrant colours, outstanding picture clarity, and awesome HDR10, HDR10+, and HLG quality in this range.

Audio Quality: This streaming device allows you to use Dolby Audio. Thus, you will get a crystal clear sound.

Mobile App: It offers a mobile app that comes with a voice search feature. But the feature is not available in all countries. You can get playback controls and easy keyboard entry. In addition, you can access both games and apps quickly.

Content Programming: The device enables Amazon Prime members to get access to the latest movies. You can easily watch shows, movies from the Amazon Originals. Along with this, you will be able to see the contents in premium channels like Cinemax, HBO, STARZ, and SHOWTIME. If you’re a new user of the device, then you can start using a free trial. Later you need to pay monthly or annual subscription fees.

Additional Accessibility: People having visual impairment can easily get the benefits of the features. The VoiceView screen reader is helpful in this case.

Warranty: This streaming device offers a limited 1-year warranty and service. However, if you are a citizen of USA, you will be able to get an optional 2- and a 3-year warranty for extra.

What is Roku? 

This streaming device doesn’t so much suffer from the biased user interface. People don’t use it for browsing. Before turning it on, you need to decide which content you are going to watch. The UI system of the device is very easy to read. It comes with most of the primary streaming services. Besides, it also features AirPlay 2 support & Windows and Android screen mirroring. But the drawback is that it has a lack of Dolby Vision HDR.

fire stick vs Roku

Set Up:

It is very easy to set this device up. Just follow the method to do it properly.

First of all, your job is to attach the box or device with the TV. In this case, you can turn the device on also.

After that, you need to choose a language.

Now, what you have to do is to set up network access— wired or wireless. When you take help of Wi-Fi, you get to see all available networks. After that, you need to select your network from the available list. Then, you have to put the Wi-Fi password to use the network.

Next, what you need to do is to put the code number you have. As soon as you enter the number, this product will get activated. You can use any one of these— PC, Laptop, Tablet, or Smartphone. Then, go to the Roku.com/Link and open it. Follow the instructions to enter the code.

Now, build a strong password, and user Id. Then, you need to put your address information, a credit card or PayPal account number. You don’t need to give any charge to use these devices. The main job of the payment details is requested for making the payment process quick and easy. However, you need to pay extra fees for a subscription if necessary.

Those who have a Roku TV can include some extra items while setting up the method. For example, you can add verification of an antenna, cable TV connection and channel scanning.

At last, you get to see the Home Menu on the screen. It will allow you to get access to devise operation as well as the channels/apps selection.

User interface: User interface: The device is one of the simplest UI available in the market. You can browse titles with the help of this. However, it happens that without having to open the app, you can’t explore any piece of content. The interface of the device seems like it is a smart TV. With the help of this device, you can get access to apps easily. As a result, it allows you to watch anything you want to see.

Remote Control: In this case, you will find the same buttons that are available in Firestick. With the help of the shortcut buttons, you can switch one channel to another. However, in the field of remote control, it is not up to the mark. Firestick is better in this case because of its voice control capabilities.

TV Compatibility: It supports HD TVs (up to 1080p), 4K UHD TVs (up to 2160p). Besides, the 4K UHD HDR TVs are compatible with HRD10.

Storage: The device comes with limited storage, i.e. 256 MB and 512 MB memory.

Parental Controls: Usually, it doesn’t come with any parental controls. But if you want, you can make a 4-digit PIN. You need to do it before including any new channel to the player. However, you should remember that you should not use the PIN to prevent the playing of such contents on the Roku that are inappropriate for children.

Voice Command: Sometimes, the device is compatible with voice search. It is the free Roku mobile app that helps it to do so. You can get the app for stick models. However, it is not available for the Express and Premier series.

Streaming and Picture Quality: The Roku stick’s 4K Ultra HD quality allows you to watch smooth videos. But to get this high quality, you require a 4K Ultra HD TV. Moreover, you need a stable and high-speed internet connection. You need to check whether you are using the right HDMI port or not.

Audio Quality: It comes with an excellent audio function. This feature makes the device compatible with digital stereo over HDMI, DTS Digital Surround, and Dolby Audio.

Mobile App: You can download the free mobile app easily. What you need to do is only to use your phone to control the device. The device allows you to enjoy songs with your friends, cast phone’s photos, recorded videos, etc.

Content Programming: This streaming device allows you to access more than 450,000 movies and TV programs.

Additional Accessibility: It comes with similar support like the Firestick. The Audio Guide feature of the product is helpful in this case.

Warranty: The device offers you a 2-year warranty.

What Are Streaming Devices?

This one is a physical media device which helps you to offer apps and content. In this case, you need to connect the TV with the Internet. These allow you to watch movies, play hit songs, and so on. You can get streaming technology in several forms. However, these can be built-in gaming devices.

The new versions of Xbox and PlayStation come with this technology. Although you can take the help of separate streaming devices— Amazon Firestick or Roku stick for viewing content. You only have to plug them into your TVs HDMI port. These devices enable you to watch movies, TV shows, news, live events, and so on.

A few examples of famous streaming devices are Amazon Firestick, Fire TV, Roku, NVIDIA Shield, MECOOL KM3, Tivo Stream 4K, and several Android TV Boxes.

Why Use a Streaming Device?

When you use a streaming device, you can access your favourite movies, news, TV shows, Live TV, Podcasts, music, etc. Most importantly, you don’t need to download anything. This device allows you to keep all of these movies, shows in your drive directly. Therefore, you can save plenty of storage space on your device.

Besides, there is another benefit which users can get, i.e. Real-time access. It allows you to watch or hear media right away. But it depends on the internet speed. In this case, you don’t need to wait to download the file. Besides, these devices allow you to save different content and apps.

Now you can watch several shows and movies whenever you want because you can use these devices anywhere. But you need to have a TV and WIFI connection. The streaming devices are ideal for those users who are travelling for business. You can use them even in the hotels. Here you will get apps for Movies and TV Shows, Music that can easily make your streaming device into a personal media hub.

Why do you need to use a VPN with the streaming device? 

You should always use a VPN whenever you install any third-party application. It helps you to secure your identity. You will not be able to set up a VPN application on the Roku device. However, you can install it on the Amazon Firestick. If you want to protect your device using a VPN, you need to take a router. It will help to set the VPN.

Fire stick vs Roku: Key differences

Here we are going to discuss fire stick vs Roku. Let’s check it out.

If you’re pondering about the Amazon Fire TV stick, you need to consider Amazon Video streaming service and Alexa voice assistant. Both of these two are defining features of the amazon fire tv. Roku can access Amazon Video. But on the Amazon streaming hardware, the streaming service can be brought front and centre. It is beneficial for the Amazon Prime subscriber.

On the other hand, the Roku device is platform-agnostic. It means that the device doesn’t depend on the streaming service. This device helps to make all of the streaming services available on the hardware. Moreover, Roku Channel is entirely a free and ad-supported streaming service. It is ideal for those cord-cutters and folks who are in need of extra options for watching something.

Besides, this one comes with a better search function. This feature helps you to scan more subscription services. In addition, this device comes with a built-in feature. The function of the feature helps in tracking when the movies, shows come to the streaming device. You can use this built-in feature to watch something new.

Plenty of options are available in the Roku devices— high-end  Ultra, mid-range  Premiere and  Express, and Roku Streaming Stick+. Compared to the premiere version, the last one can stream videos at 4K/HDR with longer range. . However, this version doesn’t come with Dolby Vision. If you want to get this feature, choose the Roku Ultra, however, if you are looking for a device to play games, select Shield Nvidia or Apple TV. Don’t use any of these— Amazon or Roku.

Which one is easier to use?

Compared to the other one, Roku is easier to use. It can take you to the home menu directly. You can see all the downloaded apps there. Besides, it helps the app store to make it visible immediately. Most of the people prefer to use this one because of its simple interface.

But it doesn’t mean that the interface of fire TV is hard to use. In this case, you need to give effort while finding something. You can get different apps for Netflix, PlayStation Vue, Sling TV, etc. Moreover, the device allows you to turn it on quickly. You can get different apps for Netflix, PlayStation Vue, Sling TV, etc.

Furthermore, the device will enable you to have the content right up front. That means you will be able to turn it on quickly. Along with this, you can download apps like Amazon Fire TV VPNs.

However, each member of these two streaming devices come with remote control features. This feature is not available in Chromecast and Chromecast Ultra. Both of these have a traditional control scheme feature. Each of these has built-in microphones.

Fire stick vs Roku- Which one has more content?

If we want to elaborate Roku vs fire stick as per the content available, it is quite impossible to say which one has more content. You need to count up each video on these two platforms, which isn’t so easy. Besides, you should know how many streaming services and videos are available on each platform. Thus, you can make an estimate.

Each of these two devices allows you to access services such as Netflix, Amazon Prime, Hulu, Sling TV, HBO Go/Now and YouTube. However, Roku gives you extra access to their Channel that we have mentioned earlier. This device comes with more channels compared to the other platforms. People consider the Roku as a ‘channel’ full of videos that you can find on YouTube. Also, it has a complete playlist of old Western films. But Amazon doesn’t come with this feature.

Besides, you can find contents easily on the Roku compared to the Amazon Fire TV. With the help of these devices, you can scan a lot of streaming services. Moreover, the search scan of it enables you to list a vast number of streaming devices according to prices. At the same time, the subscribed options will show at the front place. The device helps you to save money for longer periods. However, Amazon also has an outstanding searching feature.

Fire stick vs Roku- Which one is cheaper? 

Now we are going to discuss amazon fire stick vs Roku as per the cost. Both Roku Express and Amazon Fire TV Stick are available in the market at $29. If you want to get a 4K streaming device, choose Roku Premiere or Amazon Fire TV Stick 4K. Each of these devices supports 4K/HDR video quality. You can also get the total content library on both devices.

Want to get the best playback experience? Then, you need to choose the top-tier players. Roku-Ultra and Amazon Fire TV Cube with Alexa are beneficial in this case. Roku-Ultra is available at $99. Whereas the other one, you can get at $79.

Fire stick vs Roku- Which one is better? 

It entirely relies on the streaming device that you are going to buy. Go with the primary Roku streaming device if you want to buy for someone who is not so technical. However, a few people prefer to use Alexa devices. For them, you need to go for the Amazon Fire TV family of devices.

Best for 4K TVs: Roku Streaming Stick Plus

In this case, the battle is between Roku Streaming Stick Plus and Amazon Fire TV Stick 4K. But according to the users, Roku wins the race. If we elaborate fire tv stick vs Roku streaming stick plus, then we can say that this streaming device has similar benefits — interface and search. It offers more options for renting or buying 4K movies.

But for the Fire Tv, you won’t get any of these— Vudu and Google Play Movies and TV apps. Even Apple’s TV, a third-party app, doesn’t permit you to buy movies directly from the app. It is a major drawback of this streaming device.

Fire TV Stick 4K is compatible with the Dolby Vision HDR format, whereas the Roku doesn’t have such compatibility. Perhaps, this compatibility is vital for you. But it is when you find that your TV performs significantly better with DV rather than standard HDR. However, this ability of Fire Tv Stick 4K cannot beat the strength of the Roku.

Best for voice: Fire TV + Alexa

Do you want to use voice control for finding the movies, or shows? If yes, then you need to go with Fire TV. It can give you fantastic voice control when you watch movies, shows, etc. All Fire TV come with voice capability.

It is a built-in feature available in the remote. Most of the cases, these devices come with voice remotes. But you cannot get this feature available in the cheap models. For example, this feature is unavailable in Express Plus and Roku Premiere.

This voice system helps you to search any app or to control the playback via voice. Besides, you can launch apps and control the playback speed. It enables you to do both fast-forward, and pause the tune via voice. Also, the Fire TV allows you to control smart-home devices, know weather conditions, answer questions, etc. You can hear Alexa’s voice talking back via TV’s speakers.

Moreover, it becomes more advantageous when you have an Alexa speaker. For example, if you have the Echo Dot, you don’t need any remote. It allows you to have a hands-free experience. Here, you only need to give commands to Alexa. For example, you need to say “Alexa, watch Roma” as soon as you say that it will launch Netflix. Then, it will play a movie.

You can use the Roku players. It works similarly to Alexa, and Google Home speakers work. But you won’t get the same benefit from it like them. Sometimes, Netflix may not work. You need to say “Roku” after your every command. People who have Google Home speakers, and willing to use it to control TV, should not use Fire TV.

Best for private listening via headphones: Roku

This streaming device offers cool features in its higher-end players. Besides, it comes with a built-in headphone jack available in the remote. This one is a built-in feature for the high models. You only need to plug the headphones into the clicker. As soon as you will do it, the audio on the soundbar will get muted automatically. Then, you can easily hear the sound through your headphones.

All the latest models— Streaming Stick Plus Headphone Edition, Ultra LT and the Roku Ultra— comes with a headphone jack remote. Moreover, each Roku device comes with private listening function. This function allows you to listen to your contents privately using the free Roku app. The function of it is similar to the Ultra. You just activate the app and connect the headphones to the phone.

People who are looking for private listening functions should go for fire TV. It allows you to pair Bluetooth headphones. But if you use it too much, you can face issues like lip-sync error. In this case, the volume control is very useful.

Best for TV and device control: Fire TV (Fire TV Cube)

In both cases, you can find remote control buttons. These buttons help to control your TV.

The setup process is also very simple in both cases. You can use the clicker of Roku streamers instead of the remote of your TV. The streamer can recognise your TV automatically. Thus, it helps to program the remote wirelessly. However, Fire TV is still beneficial in this case. It is because this one is cheaper and more capable.

It is the Express Plus and the Roku Streaming Stick which come with TV control remotes. For the case of Roku, there are only TV power and TV volume up/down buttons available. You can get these buttons in the other one also. But that one contains a mute button which makes it unique. With the help of Roku’s remotes, you can control the TV merely. That’s why, if you want to control soundbars, Fire TV is the better option. With the help of this, you can control AV receivers also.

On the other hand, if you have an HDMI soundbar, you can manage the volume and power buttons of Roku to control it. But in this case, you need to confirm that your TV supports HDMI CEC. However, people prefer to choose Fire Tv. It is because the remotes of these devices allow you to control almost any bar.

Also, Roku doesn’t come with anything such as Fire TV Cube. However, it is a combination of all capabilities of Fire TV Stick 4K and Echo Dot. This device comes with the ability to control the entertainment systems using voice.

Conclusion:

Hopefully, you have got enough details about Fire stick vs. Roku. Above all, we can say that people should use Roku streaming devices because Roku is easy to use compared to a fire stick. That’s why you can set it as your default recommendation. It is the right choice for those who are new to streaming space.

Frequently Asked Questions:

  • Do you need a subscription for Amazon Firestick?

No, there isn’t any prime subscription. You only need to have an Amazon account to use the device. However, if you want, you can buy content. Also, you can use music streaming apps like Netflix. You can get these available in the Amazon app store.

  • Does Amazon Fire Stick replace cable?

There is no need of using any replace the cable to use the streaming device. However, Amazon Fire Stick is not a cable box. The device has apps that can support internet content.

  • Can you plug an antenna into a Roku?

The Roku TVs feature an ATSC tuner that gives you access to all digital “over-the-air” broadcast television. The HDTV antenna helps you in this case to provide access to those channels. This antenna has a direct connection to the Live TV input on your Roku TV.

  • Is Roku compatible with amazon prime?

Yes, it allows you to see Amazon Prime shows, movies, etc. on it. Usually, Amazon Prime Video app is not available on this device. However, you can download it and then access within a few minutes.

  • How do I connect my Roku to my wireless?

First of all, you need to tap on the Home button. You can get it on the remote.

Then, you need to choose the Settings option. After that, you need to click on Network in the on-screen menu.

Next, your job is to choose the Set Up Connection.

Now, you have to choose the Wireless option. However, you will get to see both Wired and Wireless options.

After that, wait for a while until you can find your Network.

At last, you need to put the network password. Then, wait for some time until you will get the connection confirmation.

  • What is a better fire stick or Roku?

According to reviews, Roku is the winner. It gives you extra options for renting or buying 4K movies.

  • What channels are free with the Firestick?

The channels that are free with it are as follows:-

  • Prime Video.
  • Netflix.
  • Apple TV.
  • Disney+
  • Britbox
  • Hayu
  • Boxnation


  • Difference between fire stick and tv

Compared to the Fire TV, the other one comes with a more slender shape. It makes the fire stick ideal for portable streaming. As a result, you can get access to your entertainment whenever you want. On the other hand, if you purchase the Fire TV bundle, you will get an Alexa Voice Remote.

  • How does amazon fire stick work?

Usually, a USB port connects the device and HDMI TV. Besides, it contains a Bluetooth remote. You only need to plug in the device. As soon as you plug it in, it will take you to the setup process. Then, you need to log in to your account. After that, you can access music and videos through the Amazon account. Moreover, it allows you to see uploaded images to your Amazon Cloud service.

The device gives you access to multiple apps and games. For example, it enables you to use it to use Netflix apps. Besides, you can open YouTube also. Moreover, you can get services like HBO Now, ESPN, and Hulu at a cost.


read more
Gadgets

Clip Tray or Clipboard on Android Mobile

Clip Tray and Clipboard on Android Mobile

Clip Tray is a small taskbar application. This one helps to maintain the history of all Clipboard operations. As a result, it enables you to recover an old or previously copied element. You can also use that element again as per your needs.

Those who are LG Android phone users face difficulties in finding the clip tray. It is known as the Clipboard. The clipboard allows the user to access the stored contents at any time. Besides, this enables you to copy images or texts. After copying them, you can keep these in it. Next, you can paste it wherever you need.

In this article, we have elaborated on finding the clip tray in an LG Android phone and how the user of LG phones will be able to transfer data onto Facebook.

Clip Tray Option

You can long-press on any text. It is an alternative method that you can follow for clearing the tray files. After the long-press, you have to choose more options. This option is available in three dots on the right. After that, you have to select the option named ‘clip tray.’ You can choose the copies from the options of the tray and then clear them out.

Clipper – Clipboard Manager

Do you need a more manageable clipboard? Then, you can download the App Clipper. You can get this Clipboard Manager from the Google Playstore. This app doesn’t take the help of a built-in clipboard. Instead of this, it stores the data in its own space. This Manager saves all copied data automatically. Later on, it allows you to access the history of it. Then, you can arrange the clippings whenever you want. You can copy, paste, view, edit as well as share the copied content.  Therefore, you will be able to share anything on Facebook through the clipboard App.

Copy Clip Tray Data to Facebook

Do you want to copy the data to Facebook or another social media App? Then, you need first to open the app. Next, your task is to press on blank text space for a while. After that, you have to tap on the paste option to paste the data wherever you want.

Where to find the clip tray icon on the mobile phone?

Usually, this is available on the Keyboard of android smartphones. There are mainly two ways to approach it.

Method #1

As soon as you open the message, you can see a keyboard is popping out. On this Keyboard, you will find an arrow.

” :arrow_right: “. It is available in the top row of the Keyboard. Then, you need to click on the :arrow_right: icon.

Now, you will find a menu appearing that contains a few icons. The clipboard icon is one of these icons. At last, you need to click on the icon. As soon as you do it, you can copy and save any text or image.

Method Two

Now, you need to press and hold the text box clipboard option.

Then, click on the clipboard option so that you can save the text as well as images.

Clip Tray or Clipboard option in Microsoft word

You can save any copied Or cut item in the Clipboard and use it as per your need. If you want, you can paste the copy of the document into another Document.

How to copy and cut text on word

First, you have to select the text to copy. To do so, you need to tap on the ctrl and C buttons simultaneously. Then you will get the copied text in the Clipboard.

The clipboard option is available at the top right portion of the home menu. You can find this option under the format painter.

When you tap on the Clipboard, you will see a dialog box. It is available on the right of the page. You can see the copied text appearing in the dialog box.

Now, paste the copy anywhere you want. It will

remain until you close the word. As soon as you close this down, it will remove the saved text from the Clipboard.

Clip Tray

Where to find a clip tray on your Smartphone:

Are you using an LG android phone? If yes, then you don’t have access to the clipboard option. The reason is that these phones don’t come with this type of facility. But there is a way by following which you can get access to it. To do this, you need to press and hold the blank text box area. After that, you need to tap on the paste option again.

You can paste any one item at the moment.

There doesn’t exist any way of deleting it. On the flip side, if the user wants to copy or cut another item, It will remove the first item, and it will overwrite the new item over the first item. You can delete it only by passing a blank item.

There are a few clipboard apps available in the play store. These work similarly to the built-in clip trays. These apps use their own spaces for saving copied or cut items temporarily.

Suggestion:

Such an app is point_left. This clipboard app can be very useful for LG android device users. Using this app, users will be able to save many items at the same time and paste the saved item whenever they want.

How to access the Clipboard on android:

Here, we have given the procedures to access the Clipboard on android.

Method 1: Pasting the Most Recent Copied Item

First of all, you need to open an application where you can type. You can choose any note-taking app, texting app, Google Docs, or similar apps.

Then, your job is to press and hold that typing area. Now, wait for a few seconds. After a while, you will get to see a menu.

At last, you have to click on the ‘Paste’ on the menu. It will paste the last copied item.

Method 2: Using the Gboard Clipboard Manager

To follow this procedure, you need to install the Gboard from the Play Store first. As Gboard is a great keyboard app, it will work as a clipboard manager. With the help of this, you will see all those things that have been copied in the last few hours.

However, if you don’t have a Gboard, you need to install it. A few Android models like the Pixel have installed Gboard. You need to confirm that you have set the Gboard as the default keyboard. Otherwise, you won’t be able to use the clipboard manager.

Now, you need to open the app for typing. You can use the note-taking app, texting app, Google Docs, or these kinds of apps.

After that, click on the typing area. It springs open the Gboard Keyboard.

Next, click on the clipboard icon. You can get this available in the row which is above the letters on the Keyboard.

In case you can’t see the Clipboard, click on the three dots. You can get these dots near the top-right corner of the Keyboard. Then, click on the Clipboard to choose it. Sometimes, the Clipboard remains turned off. In that case, you need to click on the turn it on option.

Then, you need to click on a clipboard option for pasting it into a current typing area. Press and hold the text you need to keep saved to the Clipboard for more than an hour.

After that, you have to click on the pin. If you want to delete any clipboard entry, then press on it.

At last, you need to click on the trash bin icon.

Method 3: Using Clipper

First, you need to install the Clipboard Manager from the Play Store. It is a free and highly-rated Android clipboard manager. This Manager’s function is to save all those things that you will copy to a specific location. Besides, it comes with a paid version that allows you to store unlimited data. However, most of the users prefer to use the free version. While downloading this app, you need to confirm that the app has a blue-and-white clipboard icon.

Now, you need to open the Clipboard Manager. After downloading, you can get it on the home screen or in the app drawer.

Next, your job is to set up the process of the Clipboard Manager for the first time. Before using the Manager, you should go through a quick introductory lesson. It lets you know how to use the app. Then, you will get to see the “Advertising” page appearing. Here, you have to select the types of ads which you are willing to watch.

For setting up the preferences: choose the option named ‘Show personalized ads.’ Do this only when you agree that the Clipboard Manager will use your personal data for exhibiting the relevant ads.

If you want to get an ad-free version, then you need to pay for it. In that case, you need to click on the option named Upgrade to Clipper Plus.

Now, select whether to send crash reports to the developer while the following screen appears. As soon as you choose this, you can use Clipboard Manager.

How to  Customize Clipper

Next, you need to click on the three dots, which are available at the top-right corner. Tap on these for controlling your Clipboard Manager settings. At here, you can switch ON or OFF the Clipper and customize the user interface.

You can open the Clipboard Manager whenever you want to see your Clipboard. In this case, you only need to hit the blue-and-white clipboard icon, which is available in the app list. Otherwise, you can swipe down from the top of the screen, and after that, you can choose the Clipboard Manager from the notification panel.

Now, you have to arrange the copied items. It is the Snippets tab that stores all the copied items. In case you are unable to see the tab, hit the menu at the top-left. Then you will get to see every copied item.

Click on the plus option on the menu for organizing copied items. Then, hit the three dots for adding a clip from Snippets to a new location. Now, you need to choose the Move option and then click on the new tab’s name.

If you want to access other menu options( Pin, Delete, Edit, and Share ), click on the three dots. This is available on the right of a copied item.

How to delete copy text from the clip-tray in an android device?

In the clip tray, you will be able to save a lot of items. But you should delete these items also to clear the outrush. To delete saved items, then check the following steps.

The clip tray is accessible from the Keyboard in google search and the message option.

You need to press and hold the search bar on Google. After that, you will get to see two options appearing— paste and Clipboard. Now, your job is to click on the clipboard option.

You will get to see a dustbin icon when you open the Clipboard. Then, tap on the icon.

You can easily choose the files that you want to delete. Just click on the items one by one if you want to delete them individually. Tap on the select all options when you want to delete all the items at a time.

Click on the done option after selecting the items. Thus, you can delete all the selected items.

How to copy two different documents in the Clipboard of your android phone and save them in one place on a Samsung device?

 Sometimes, you may need to share different things with one person. For instance, you want to apply for a job to a person. For this, your CV with a cover letter and portfolio are required. Now, what will you do? Will you copy and paste the items one by one?

It is pretty tricky as well as irritating also. In this case, the Clipboard will come to your help.

You need to copy the CV from google docs and copy the cover letter’s link address. If you have saved it in word format, your task is to copy the file.

Then, you need to go to the site where you need to share the portfolio. Just copy the link.

After that, you have to open the platform where you want to share it. Then, it would be best if you opened the Keyboard. Next, your job is to click on the clipboard option. It is available in the bottom row of the Keyboard.

At last, you can see the copied item. Just click on the file and send it.

Clipper app

It is an app that we use to manage functions that are conducted by a built-in clip tray. From the play store, you can download it. This app offers its storage and allows the user to copy and save data. This Clipper app will enable you to see the copied and cut items from this app’s history whenever you want.

How to disable clip tray:

If you are a user of LG Android phones, then the Clip Tray feature will save multiple items in the phone’s Clipboard. But a few password managers, such as LastPass, copy the password to the Clipboard automatically. As soon as the managers copy the passwords, these remain stored in plaintext in the Tray list. In this list, other users can see the passwords. You can enable or disable the Clip Tray feature with the program’s help using any of these methods.

Option A: At first, you need to comment out the part of the /system/etc/permission/com.lge.software.cliptray.xml file.

Option B: Then, you need to remove the /data/data/com.lge.systemservice/databases/clipdata.db as well as /data/data/com.lge.systemservice/databases/clipdata.db-journal files. Next, you have to replace these with folders.

According to the users, Option A prevents taking screenshots. In case it happens, then you can follow the Option B method.

Security issue

There exists a security issue on LG Devices. For example, you may find these issues on G2, Gpad, etc. You can find a modified clipboard on Lg sets. But you will not be able to clear the Clipboard, even after restarting. It is one of the significant security issues. It would help if you removed the Clipboard manually after every time you would use a password.

Frequently Asked Questions:

  • How do I view my Clipboard in Chrome?

It is a hidden feature in chrome. You can see this feature as a flag. If you want to see it, first open a new tab. Then, you have to paste chrome://flags into the Omnibox of chrome. After that, your job is to tap on the Enter key. At last, you have to search the “Clipboard” option in the available search box.

  • How do you open the Clipboard?

First, you need to select the available keyboard icon. As soon as you see the Keyboard, choose the “>” symbol. It is available at the top of the screen. Now, hit the clipboard icon to open the

Clip Tray Android.

  • How to open the Clipboard in Excel?

First of all, your job is to find the “Clipboard” area of the ribbon. It is available on the far-left end. Then, press on the small arrow that you can find to the right of the word “Clipboard.” Now, you can get the clipboard option available on the left side of the Excel spreadsheet.

read more
Gadgets

Best AM Radio- Portable Radio for You

Best AM Radio- Portable Radio for You

An AM radio enables you to use it whenever you want – whether for emergency purposes or just for listing your preferable local stations. AM radio stations are also known as “Medium Wave” stations. They are standard broadcast stations those who are used to transmitting broadcast radio signals for the public listening. You can get updates on Music, local news, and weather with a radio.

What is an AM RADIO?

AM means Amplitude Modulation. The sound quality of these ones is more inferior to the FM. These ones are very low quality signals. You can send these over long distances; mainly, during night. During night time the AM signals can travel more distance with high intensity due to “skywave propagation”. The lower band frequency of AM signals makes a large wavelength. The frequency band range is from 550 to 1720 kHz, and the full audio spectrum is up to 20 kHz. But the upper modulating frequency of this range is up to 5 kHz.  AM receiver or an AM radio is nothing but an electronic gadget that detects amplitude variation in the radio waves that are transmitted at a particular frequency. Further the receiver amplifies the signal voltage and feed it to the speaker or to a headphone.

This complete guide will let you know all the details that you may require while choosing the best AM radio for your personal use. Here, we have enlisted the top 10 electronic equipment and specification of each gadget.

Best AM Radio Review- 2021

  1. Sangean LB-100 Ultra Rugged Compact AM / FM Radio

Sangean LB-100 Ultra Rugged Compact AM -FM RadioDescription: This Sangean LB-100 is very reliable. It offers an excellent sound quality compared to other models in this list. This robust model is made up of durable ABS plastic. It is perfect for those who want to use it on construction sites and other outdoor work.

The 5-inch driver of this best AM/FM radio offers a full and crisp sound. Sangean LB-100 is ideal for use in noisy situations. The digital LCD of the product permits super precise tuning. There is an antenna that is flexible but not extendable.

Awesome Features:

Build quality: This Sangean LB-100  comes with a durable ABS plastic construction. The impact-resistant material makes the product perfect to use in building sites. This one is water-resistant. Therefore, you can use it on rainy days.

Speaker: It comes with a 5-inch water-resistant speaker that can give you high-quality sound.

LCD Display: The LCD is easily readable. It can show you both the station and the time. The dimensions of the LCD screen are 2.24″ x 0.98″.

Useful Functions: There are twelve Memory Presets, i.e., for 6 AM and 6 FM stations. There are five easy touch memory preset buttons with the help of which you can access your favorite AM/FM stations.

Pros: 

  • Five preset buttons
  • Easily readable LCD
  • water-resistant speaker

Cons: 

  • Unable to pick up a local channel
  1. Sony ICF-P26

Best AM Radio Sony ICF-P26
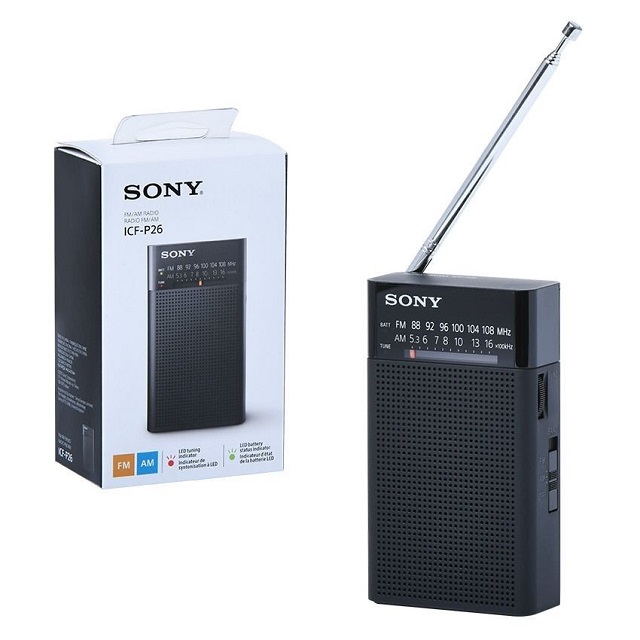
Description: This best portable radio comes in a sleek black plastic casing. The 12×7 cm dimensions of the product make it ideal for sticking in a pocket. You can operate this unit dialing an Analog tuner; you can pick any of your favorite station from the different stations availabe. It comes with 100-hour battery life. The Sony ICF-P26 allows you to use it for personal listening with the help of a 3.5mm headphone jack.

Sony ICF-P26 comes with a high-quality loudspeaker. The fully extended antenna and perfect reception make the product superb to listen to on the move.

Awesome Features:

Battery: This Sony ICF-P26 comes in a compact design. The vertical size of the product is perfectly fit for those places where space is at a premium. It comes with a modern LED battery status indicator. This product comes with two AA batteries. Therefore, you can listen to it through the built-in speaker and the dedicated headphone socket and enjoy the high quality sound.

Speaker: Sony ICF-P26 is equipped with a built-in speaker and headphone jack with Telescoping antenna.

Additional features: There is a carrying strap that offers extra convenience. It has both an LED tuning indicator & an LED battery status indicator. The dimensions of the product is 4.69 x 2.74 x 1.50 inches. (W X H X D)

Pros: 

  • LED tuning indicator
  • Headphone jack telescoping antenna

Cons: 

  • Only after a few usages, the volume gets lower
  1. Panasonic RF-2400D

Best AM Radio Panasonic RF-2400D
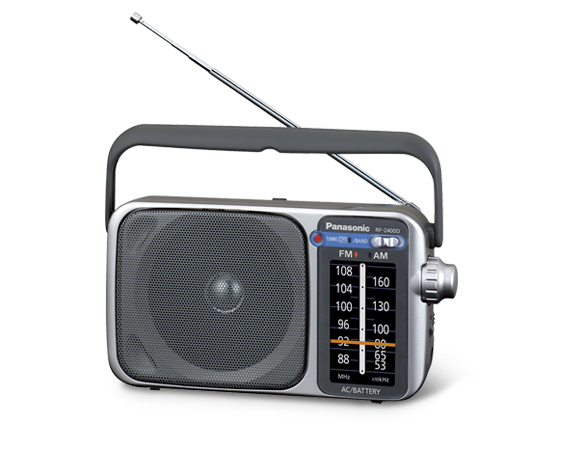
Description: The product uses both 4x AA batteries and mains power to run. You don’t have to carry it around a bulky power brick. The AM reception of the product is excellent.

Panasonic RF-2400D can deliver you excellent sound and performance. If you want a portable one, then it is a perfect option for you. It is an excellent radio with good reception indoor

Awesome Features:

Included Accessories: The Sony ICF-P26 comes with large and easy-to-read radio dial. Besides, it has a separate scale for AM and FM tuning. It contains a built-in LED indicator that is helpful in low-light tuning.

Antenna: The product comes with a ferrite rod AM antenna, a telescoping FM antenna, along with a 4″ Dynamic speaker. These are beneficial in delivering crisp and high-quality sound. There is a 3.5mm port that supports Mono earphones. You can use the AC cable or 4 AA batteries to power the product.

Pros: 

  • Offers high-quality sound
  • 4 AA batteries

Cons: 

  • No FM station is available
  • A little bit costly
  1. Retekess V115

Best AM Radio Retekess V115
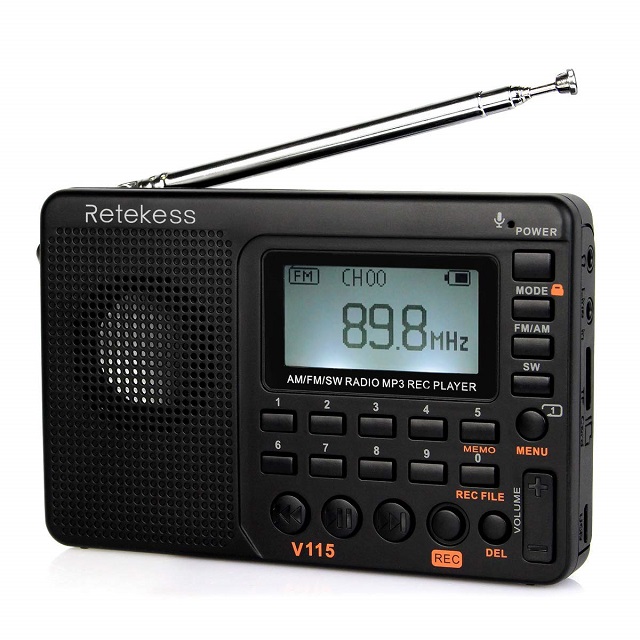
Description:  The frequency of FM is 87-108 MHz and of AM is 522-1710KHz (9K), 520-1710KHz (10K). Retekess V115 comes with a Micro SD/TF card of 32GB and a 1000mAh BL-5C lithium battery. The audio format is MP3.

The dimension of the product is 120 x 80 x 20 mm or 4.7 x 3.1 x 0.8 inch. And the weight of the product is 160g or 0.35lb. It includes a Retekess V115 portable radio, a BL-5C battery, a USB charging cable, a Hand strip with a bracket, and a Multilingual manual.

Awesome Features:

Portable: This one comes with a compact design. Retekess V115 can fit easily in a man’s shirt pocket but doesn’t come with any alarm feature. It is equipped with a sleep timer.

V115 Transistor: It offers radio bass sound along with a MIC recording and in-line. This one comes with a three recording mode— simple 64kbps, quality 96kbps, and super 128kbps.

Tuning and |Storage: You can use the automatic search option that helps you to search and store the radio stations automatically. There are a long press and the fast forward button, which allows you to jump to the next station.

Pros: 

  • Three recording mode
  • Compact design
  • The sleep timer is available.

Cons: 

  • Neither clock not tuning knob is available


  1. Sangean Toughbox

sangean toughbox
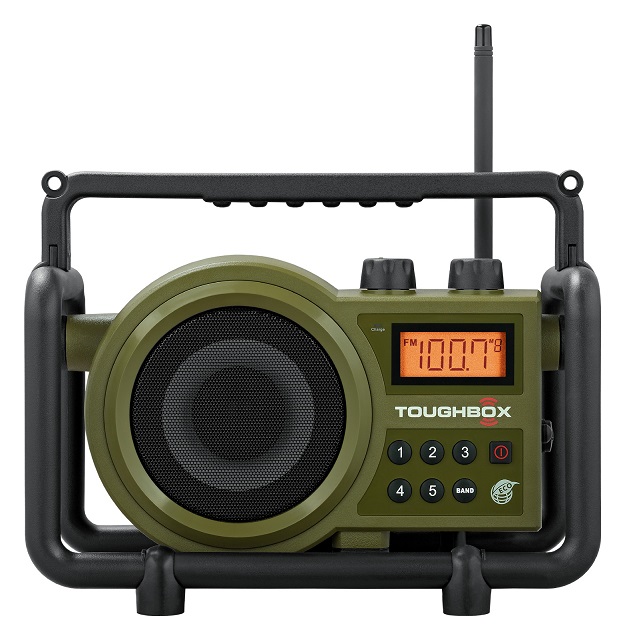
Description: This Ultra-Rugged Digital Rechargeable product is very durable and long-term usable. It comes with a rain/dust/shock-resistant design. It offers superior sound quality.

The tuner used in this case is Digital PLL FM and AM. Besides, it has a speaker of 5.25-inch Full Range. In addition, it is resistant to JIS4 Standard. It comes with a Rechargeable Battery, a charging LED indicator, Alkaline and AC Power Memory.

There are a total of ten preset stations (5 FM, 5 AM). The inputs used in this case are Aux-In for MP3, CD player, and iPod/iPhone. It comes with an Amber Backlit LCD. The length of the cable is 2.7 Meters.

Awesome Features:

Digital Tuning: Sangean Toughbox comes with a flexible pivoting antenna. The digital PLL tuner can offer better reception. This one is the best and compact job-site radio in the whole industry.

Dust and Shock-Resistant: The robust design and water, dust, and shock resisting ability make Sangean Toughbox exceptional. It is suitable for any outdoor job site conditions. It comes with a ruggedly designed rotary tuner along with volume control.

Water-Resistant Speaker: It comes with a 5-inch water-resistant speaker that can provide you a high-quality full-range sound. It can offer enough audio quality in noisy environments.

ABS Construction: It comes with an ABS plastic construction that is durable enough. The impact-resistant material makes the product ideal for use on building sites.

Batteries: There are four rechargeable or alkaline C batteries. While your plug-in the product with the AC power’s help, it will charge the rechargeable C batteries. There remains a 2.7-meter-long rubber cable that you can roll up on the back of the unit. It helps to avoid tripping also.

Pros: 

  • Water-resistant speaker
  • ABS construction
  • Rechargeable C batteries

Cons: 

  • The battery compartment is unable to hold the battery tightly.
  1. SEMIER AM/FM Portable Radio

SEMIER AM-FM Portable Radio
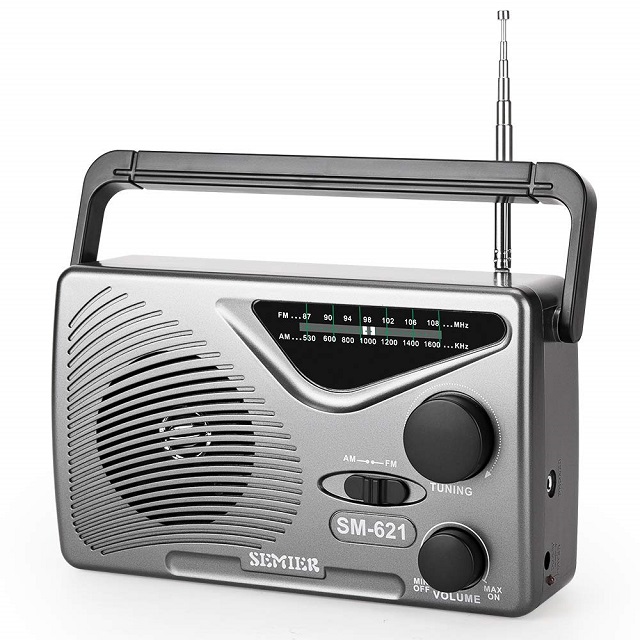
Description: It comes with a 6-month Seller Warranty. The product’s package dimensions are 21.8 x 12.8 x 11.7 cm, and its weight is 671 Grams. The hardware interface is 3.5 mm Audio.

Awesome Features:

Perfect for outdoor places: Semier AM/FM Portable Radio comes with an AM/FM Analogue Tuner, a handy carrying handle, and a telescopic antenna. It works on batteries and makes the product perfect for use at home, park, beach, picnics, gym, or playroom.

Large Speaker: Semier AM/FM Portable Radio is equipped with a large built-in speaker that can provide you high-quality sound.

Battery: The product contains an AC operated, or DC Operated two pieces Size “D”/UM -1 dry Battery. In case any power interruptions occur, the AM/FM transistor radio uses dry batteries and runs on them.

Headphone Jack: The 3.5 mm mono headphone input jack of the product is very advantageous.

Pros: 

  • 5 mm Headphone jack
  • Offers superior sound quality

Cons: 

  • The volume controller is absent.
  1. Sangean WR-11SE

Sangean WR-11SE
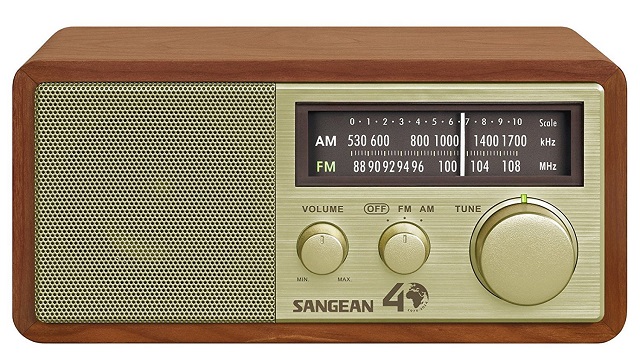
Description: This Hi-Fi Tabletop product is a perfect one that comes with vintage styling. It comes with an Analog AM/FM tuner. Sangean WR-11SE allows you to control your preferred station with ease.

There exists a high-quality 7W speaker along with a 3″ full-range driver. This best tabletop radio provides you superior sound quality. Besides, it comes in Walnut color.

Awesome Features:

Solid Cabinet: There is a Solid MDF Cabinet that comes with a fantastic Real Walnut Veneer Finish. It offers you a precise Rotary Vernier Tuning along with a Volume Control.

Auxiliary Input: There is an auxiliary input that is used for additional audio sources. For example, you can use MP3 Player or iPod/iPhone as other sources.

Rear Connections: The Sangean WR-11SE  needs rear connections that feature AC-In, DC-In, Aux-In, REC Out, Headphone, FM F Type Antenna Terminal, and so on.

Speaker: It contains a 6.5 Watt Full Range Speaker of 3 inches size. This one has Enlarged Magnet and Deep Bass. The tuned cabinet is beneficial in improving Sound Quality.

Pros: 

  • Enlarged Magnet
  • Uses iPod/iPhone as extra sources
  • Rotary Vernier Tuning

Cons: 

  • Display light is very bright
  1. Kaito KA500

Kaito KA500
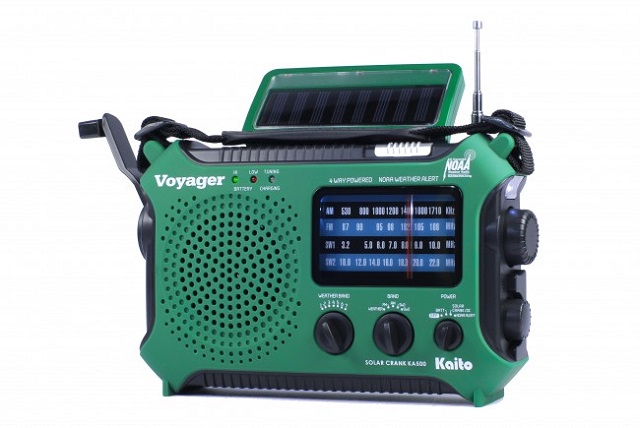
Description: The FM and AM frequencies are 88 – 108 MHz and 530-1710 kHz, respectively. Kaito KA500 is a 6-way powered emergency radio. But the product doesn’t come with three AA batteries.

It offers a USB mobile phone charger. It comes with LED Flashlight along with Red LED SOS beacon light and a 5-LED reading lamp.

Awesome Features:

Suitable for Emergencies: If you are looking for such a model that is perfect for emergencies and disasters, then this one is the best option. The Kaito KA500 has all the features that you want in emergencies. It comes with a High-quality AC type brushless generator.

Solar Panel: It comes with a solar panel that will power Kaito KA500 automatically. Besides, it helps to charge the built-in batteries. The solar panel is designed in a way so that you can maximize the sunlight’s rays.

Broadcast Coverage: The Comprehensive broadcast coverage includes AM, FM, SW1, and SW2 along with all seven pre-programmed national weather channels.

Pros: 

  • Rechargeable battery pack
  • Suitable for use in emergencies

Cons: 

  • Poor battery service
  1. PRUNUS J-288

PRUNUS J-288

Description: Prunus J-288 is equipped with a 1200mAh Li-ion rechargeable battery. Here, the built-in upgraded power-saving unit is used. It comes with an LCD screen. You can use it for up to 10 hours. When you charge it, the indicator becomes red. After getting charged, the indicator turns green.

The digital tuning radio can save 99 AM (522-1620KHZ) stations automatically. In most cases, it saves 98 FM(87-108MHZ) stations. This product comes with sufficient space for storing all your stations.

Awesome Features:

Excellent Reception: What makes this Prunus J-288 perfect is its 56cm ultra-long antenna. The antenna is three times longer than other models. It can boost the signal stability without static.

Stereo speaker: You can wear the headphones along with a built-in 3.5mm jack socket. You can now enjoy your favorite songs in the TF card mode, Bluetooth mode, aux input mode, the USB flash drive mode, or radio mode. This model offers a clear bass audio experience and immersive surrounding stereo sound.

Bluetooth: It comes with an upgraded 4.0 Bluetooth technology that helps to increase the transmission speed. The feature can reconnect to the paired device automatically. You can use it as a hands-free telephone receiver. Now, you don’t need to worry about missing an important call.

Sleep Timer: You can set the shutdown time in advance. To do it, you need to press the “CLOCK” key. Now, you can listen to those stations that you want. You will not face any problem while turning off the battery-operated radio even when you fall asleep.

Pros: 

  • Li-ion rechargeable battery
  • Sleep timer
  • Upgraded 4.0 Bluetooth technology

Cons: 

  • Unable to hold charge for a long time
  1. C Crane CC Skywave AM, FM, Shortwave

Best AM Radio C Crane CC Skywave
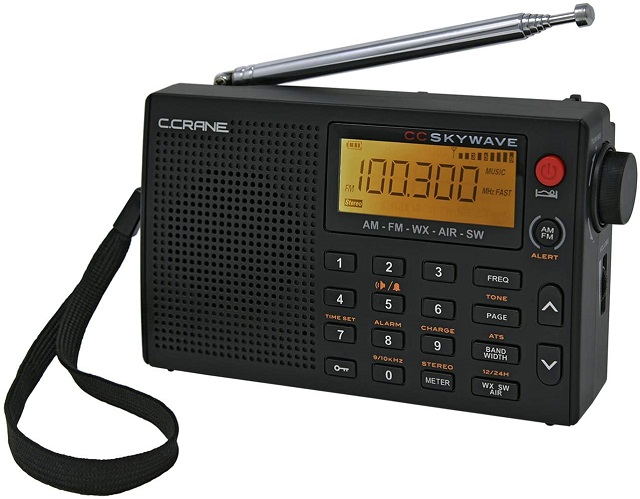
Description: The C Crane CC Skywave comes with an intuitive layout that makes it easy to use. This one features an AM reception. It is powerful enough to decrease signal interference.

The Aviation/Airband of the product enables you to listen in on nearby traffic controllers. It has a small speaker that offers you excellent sound quality. C Crane CC Skywave comes with a perfect size to stash in an interior crevice. The dimensions of the product are 4.75″ W x 3″ H x 1.1″. And, the weight of it is 5.5 oz.

Awesome Features:

Lightweight: The C Crane CC Skywave weighs very light that permits the user to carry it easily wherever they want.

Clock: It comes with a clock that has an alarming feature.

Included Features: This one features Lighted LCD Display, Rotary Volume Knob, a Stereo Headphone Jack, and a Sleep Timer. Besides, there are Earbuds, Carry Case, and a Fold-out Back stand. The manufacturers offer one year warranty on the purchase of the product. You can power the battery using an optional AC adapter.

Pros: 

  • Lightweight
  • Portable
  • 400 Memory Presets

Cons: 

  • Poor construction
  • The battery doesn’t last long

How an AM Radio Differs from Other Radio-

What makes them different is in the process of modulation or the alteration of the carrier wave. It helps to vary the amplitude or overall strength of the signal. On the other hand, the FM helps to change the frequency of the carrier signal.

How to Resolve AM Radio Reception Problems

Sometimes, you may face difficulties while receiving AM signals due to faulty radio equipment or interference. You can follow these steps to fix your AM radio reception. Remember that if you are not an expert, then there is no need to fix the equipment yourself. You can take the help of a technician in this case.

Step 1: First, you need to check if you are in a radio station coverage area. Then, find out the name of your place or your postcode.

Step 2: The faulty radio equipment will make you stop from receiving the radio. That’s why the buyers must check the radio equipment while buying.

Step 3: Sometimes, electrical equipment in your home may cause radio reception issues. Here we will mention a few radio reception issues that may cause due to home appliances and how to detect the problems.

For kettles, toasters, and refrigerators: 

In this case, you need to switch on and off all the appliances. But make sure that the radio is on.

Electric motors such as power tools, electric shavers, hairdryers:

When your radio is in ON mode, you can use the product. You have to listen for a whine or buzz from the radio.

For Products having thermostats like hot water systems, refrigerators, and spa baths:

You need to listen for a normal harsh buzz that you can get from the radio.

LED lights: 

You have to switch the lights on and off while the radio is ON mode.

However, if you face issues because of your equipment, then what you need to do is:-

  • You can move the equipment away if the issue is because of the other gadgets
  • If the fault is with your radio then fixing it can also make your job done.
  • Else, you can buy a new one, also.

Step 4: Check External Reasons for the Issue.

An external electrical source may cause radio reception issues. In this case, you should try to isolate the source first. To do this, you need to turn off the power of your house. Then, you should request your neighbors also to do the same.

Power Lines: This problem arises during hot, windy, and dry weather. Hence, you need to listen for a harsh and buzz from the radio. The problem occurs when dew falls on those lines.

Street Lights: Check whether the interference is happening when street lights are turn on.

Nearby Transmitters: You should listen to the voices rather than the radio program. You can take the electricity provider’s help if you face reception issues for power lines or street lights.

How to Boost AM Radio Signal?

The radios you can carry from one place to another are directional. Hence, you have to point the back or front side of the receiver. Point it towards the AM Radio Station that you have chosen. Then, you need to add the AM Radio Antenna. It helps to boost the signal as well as the range of any portable or home receiver. Hence, the best solution for you is to relocate the radio.

How to Reduce Noise on a Radio?

First, you have to keep all the sensitive equipment in a Faraday cage. However, you can keep them at least in a metal box.

After that, you can use a simple radio scanner. It helps you to search for your frequency source. Next, you need to isolate the power lines. Use high-end filtering devices; in this case.

Now, you need to use the proper grounding and make sure that you have kept the length of the wire short.

Then, make the radio pathway clean, with solid connections. Now, you have to pay attention to your antennas to check in which directions they are pointed. You need to notice it while you face any RFI issues, and so on. It can help you to pinpoint the proper location. With the help of this, you can easily get rid of the noise issue.

AM Radio Fine-Tuning Tips

Along with tuning the antenna to the desired station, pointing the antenna towards the station is the second most essential thing. Usually, the AM Radios come with a ferrite rod, which is located towards the top of the radio. But every model doesn’t come with a rod. The antenna, a large coil of wire, i.e., a signal magnet, can pick up the signal and surround the noise perfectly. You can get it available in the back of the radio.

The portable ones become directional and allow you to point it towards the radio station when you place the antenna at the backside of the radio. It helps to boost the signal. Hence, you also need to turn the antenna to the desired station after placing it. Thus, you can get an unbeatable reception.

AM Radio Buying Guide:

A few things are there that you should consider before buying the best AM radio for your personal use. 

Portable vs. Tabletop; Which is Best:

The portable ones are usually small and lightweight. As a result, they are suitable for hiking or camping trips. And they come with some additional features. For example, those models come with built-in LED flashlights and give access to all the weather channels.

On the other hand, the tabletop ones are designed in such a way so that it is being kept in one place like a stereo system. This type’s sound quality is better as these ones come with larger and more complex speaker setups. Here, you can find a lot of preset stations and digital tuning.

Analog vs. digital Tuner; Which One to Select:

Nowadays, you can find many radio stations that transmit digital signals along with standard analog signals. Those who have a digital tuner can only pick up digital signals. And those models that come with analog tuners can pick up only analog signals. That’s why it depends upon you entirely, which option you will prefer.

Power Source:

The tabletop ones must need a connection with a power outlet. On the other hand, the portable ones can draw power from a variety of sources. For example, the portable one use standard alkaline batteries, built-in rechargeable battery packs, solar panels, AC adaptors, hand cranks as power sources.

Weather Channels:

Usually, the portable ones can catch the National Oceanic and Atmospheric Administration (NOAA) weather channels. It helps you to know all the latest news and updates related to weather. This type of model helps you when you camp or hike in spots without cell reception or 4G.

Digital display:

Multiple AM radios come with digital displays that can show you the frequency. Sometimes these models exhibit the station names also.

Antenna:

If you are using a pull-out antenna, it will help you to get a better signal. It is helpful when you are facing difficulties in receiving your favourite station.

Alarm Clock:

A few models feature a built-in alarm clock. In this case, your preferred station starts playing an alarm when you set it. Many people use it as a wake-up alarm.

Benefits of AM Radio:

These are simple electronic gadget compared to others. Compared to FM, these have a narrower bandwidth and wider coverage.

Conclusion: 

We have given you the top 10 AM Radios that are suitable for tight budgets. You can get a higher-quality driver just by expending a few extra dollars. You need to consider the portability factor also. These products are the best options for those who want to use radio on-the-go outdoors. You can use a bigger one that comes with a larger driver. These can offer better sound quality.

Frequently Asked Questions:

  • What is the Radio?

It is a way by which you can send electromagnetic signals over a long distance. This one helps you to communicate from one place to another. You can use radio signals for locking and unlocking the car doors from a distance. It allows it to send sound through Frequency Modulation (FM) or Amplitude Modulation (AM). It is used in radio, television broadcasting, cell phones, two-way radios, wireless networking, and satellite communication systems.

  • How AM/FM Radio Works

The amplitude of the carrier wave is mainly used for encoding the original sound. On the other hand, the frequency of the carrier wave is mainly modulated for encoding the sound. There presents a radio receiver. It helps to extract the original program sound that comes from the modulated radio signal. After that, it recreates or replicates the sound in a loudspeaker.

  • What is the best AM radio for the reception?

The best AM radios for the reception are as follows:-

  1. Sony ICF-P26
  2. Panasonic RF-2400D
  3. Sangean LB-100 Ultra Rugged Compact
  4. Sangean WR-11 Wood Cabinet Table Top Analog
  5. PowerBear Portable
  • What is the best AM radio receiver?

The best AM radios are:-

  • Kaito KA500 Solar-Powered 5-Way.
  • Sangean LB-100 Ultra Rugged Compact.
  • Midland WR400 Deluxe NOAA Emergency Weather Alert.
  • Studebaker SB2000RB Portable.
  • Sangean WR-11BK Wood Cabinet Table Top.
  • Vondior Battery Operated Portable Pocket.
  • How can I boost my AM radio signal?

If you want to get a better AM reception, then use an external antenna. For example, you can use a loop antenna. In this case, you only need to place it near the window with its rear-facing outside. Or you can switch off any nearby electrical appliances to boost the signal strength.

  • Will AM radio go away?

For many years, people refuse to use these. Many of these are going out of business each year. At the end of 2015, there were only 4,684 left. But still, these ones are very useful.


read more
Gadgets

CB Radio- How to Choose the Best One

CB Radio- How to Choose the Best One

In the field of Private Radio Service, the Citizen Band Radio Service, as well as know as CB Radio, because it is widely called, is indeed a form of radio communication. CB is meant for both customer and company use, like the other modes of PRS, including GMRS, FRS MURS, also Low Power Radio Service. It’s also planned to be used without professional qualifications being required. Its use does not, indeed, compete with other radio users

The CB operation runs with Am mode as well as single sideBand format on 40 shared channels. Single sideband provides lesser noise and wider coverage than AM mode and therefore is usually used on CB radios with higher ends. 2  modes are available for single-sideband which includes lower sideband and upper sideband. While in single sideband mode, you only can interact with the other single-sideband CB radios.

Know More about Citizen Band Radio

To use a CB radio, there is really no minimum age limit. In truth, yes. CB can be used by almost anybody. Whether you are a foreign nation, an agent of a government official, or a national government entity or the FCC has given you a desist order or cease, as well as the order will still be in force, you are allowed to run a CB station under the FCC rules.

No particular person or entity is allocated to the CB channels & frequencies. For the most part, with all 40 channels & frequencies approved by the FCC for CB, you may run a CB radio, although there are several caveats.

CB is meant just for short-range, local communication, however, by skipping or bouncing the signal off of the ionosphere, there will be a way to greatly expand the range. Such a process is called ‘shooting skip.’ Several hundreds of miles of CB users could skip a signal. The FCC forbids attempting to connect with CB stations across 250 km away; furthermore, based on tropospheric factors, signals may skip normally, so accidentally transmitting or receiving CB messages around the nation and even across the globe is not uncommon.

Any standard protocol is needed since the 40 CB networks are shared with many other users. Users should never chat constantly for more than five minutes with some other station and should wait 1 minute until beginning another conversation. The FCC network is provided to have a license and a calling sign throughout the early days of CB.

Benefits And Uses Of CB Radio

For years, CB Radio has always been around, emerging first in 1945 and developed also by FCC. Throughout the 1970s, as pop culture romanticized that affordable mode of contact, Citizen Band Radio hit a height. And over years, Citizen Band Radio has also seen numerous applications, including survivalists to off-roaders and even beyond. In many sectors, it still remains a valuable instrument to this day.

  1. Help In Emergency

The FCC designates Channel 9 also as an emergency channel. This ensures you may switch your radio to station 9 to request assistance when you’re on the road or even get into an incident, or witness an accident, or have some kind of emergencies to report. Not only is Channel 9 feature useful for truck drivers on the lane, but for many other careers and hobbies. A Citizen Band Radio software, for instance, could be a lifesaving mechanism for travelers and hikers if they ever get hurt alone in the woods.

  1. Gives You Traffic Reports

Traffic alerts are one of the most common advantages of a CB radio when on the lane. Whenever it comes to exchanging knowledge about traffic conditions, injuries, etc., being able to link within such a 15-mile radius could be very valuable. For truck drivers utilizing the Citizen Band Radio, there are also some specific codes.

“Brake checks” will, for instance, warn that there can be a slowdown or traffic on the lane. “Bear reports” can indicate that perhaps the police are approaching, particularly if anyone has been checked over. For truck drivers, these would be valuable things to remember so that they might remain vigilant and conscious. Although some of this data can be generated by mobile phones, it is not as updated as Citizen Band Radio. That is the elegance of the two being merged!

  1. Hand Free And Enjoyable

When you have a CB radio app, there are several fun activities you can do! You could not only chat with the other truck drivers, normally on station 19, you also can get details on what’s going on around you in the city. Although it’s not the least fun thing to ever consider your surroundings, it will allow you to be safe yet alert.

Undoubtedly, there is a form of Citizen Band Radio contact named skip that used to be illegal and is now legal, which allows you further time to have fun. You will also bounce a radio signal through any of the levels of the atmosphere, as well as the signal can be taken even further than the radio usually reaches. The much more intense end of a Citizen Band Radio is 30 miles out. However, you might actually have a chat with someone else on opposite sides of a country if you miss chatting.

  1. Uses of CB Radio

The capacity to communicate even if there are no mobile towers or Wi-Fi networks then it is one of the most notable advantages of CB radios. Your Citizen Band Radio also operates if you’re trapped in a remote area with no signal.

In different places, try and change the CB set. To be understood well, the microphone boost must be set to the limit. In addition, To decrease radio noise from various outlets, click on the automatic noise volume control setting when you’re in a crowded area. However, To minimize noise, you can even turn on the squelch switch, and this will restrict the ability to hear all channels and CBS in the range.

Importance of CB Radio

As CB radios are used during floods and crises and can save lives, getting a Citizen Band Radio can be really important. In order to connect when equipment is compromised or non-existent, police, firefighters, emergency workers, and so many other uses are available. 

Types of CB Radio 

  1. Mobile CB Radio

The most prevalent kind of CB radio you can see is a mobile Citizen Band Radio. Basically, this is a tiny box with a ton of buttons and a microphone connected from the front, generally placed underneath the dashboard or fixed on the board. There are several different sizes of typical mobile units and a variety of great features. You would most probably just end up with a phone or even all-in-handset radio if you are buying a radio for your car.

You would want to inspect the car to assess the antenna location before you settle on a Citizen Band Radio. Make sure that you have enough room to install the chosen Citizen Band Radio. The underneath of the dashboard or ground mounting offers the best choice, usually. Ensure your leg movements or the passengers are not obstructed by the position you pick to install your radio.

Often, make sure that the position you pick to install a mounting bracket is sturdy enough to take the radio’s strength. The gadgets of today have a smaller size, making this question irrelevant, however better safe than to be sorry. Often, bear in mind that an additional speaker can be needed to hear conversations distinctly, based on where the radio is installed. 

  1. Citizen Band Radio Handset

Handset radios are configured to also have the handset constructed with all the buttons. Such types of units also have a significantly wider footprint than a typical CB transmitter to fit the control into the handset. Handset CB radios are also designed specifically to have one-handed consumer access.

Their small size and easy installation put them apart sufficiently to shape the own group from many other handheld radios. The handset Citizen Band Radio may be a smart option for small vehicles or demanding installation applications. Such a form of radio also has a small adapter box that is simple to mount underneath or via the dash and attaches to the transmitter, energy & internal speaker. A CB radio handset plugs into an adapter box and therefore is filled with user-friendly characteristics.

  1. CB Radio Handheld

Handheld radios are usually similar to walkie-talkies. For car usage, many versions come with either a cigarette cord. Battery-powered battery packs and the option to charge rechargeable AA batteries on the radio are included in certain versions.

That’s also definitely the only place to go when you’re using a Citizen Band Radio on hand, and they’re often found in cars. By eliminating the rubber antennas & adding an adapter, you can add a magnetic or corrected CB antenna to any hand-holding CB.

Bear in mind that you’ll have the transmitter cable connected to the top of the device as well as a cigarette cord connected, generally from the side of the unit inserted into the lighter, while you use a portable CB radio in the car. It allows the handheld CB difficult to work with all of the wires attached. 

  1. Citizen Band Radio Base Station

A base station relates to a CB radio with the power supply installed in which can be specifically wired to 110V. Such a form of radio is designed also as a home unit for use inside. The distinctive benefit of a base device is the incorporation of the power source into the cabinet to builds a cleaner footprint. A decent base antenna installed up to very high is suggested for maximum efficiency.

Top 5 Best CB Radios 

  1. Citizen Band Radio Cobra 29 LX 40 Channel-

Citizen Band Radio Cobra 29 LX 40 Channel
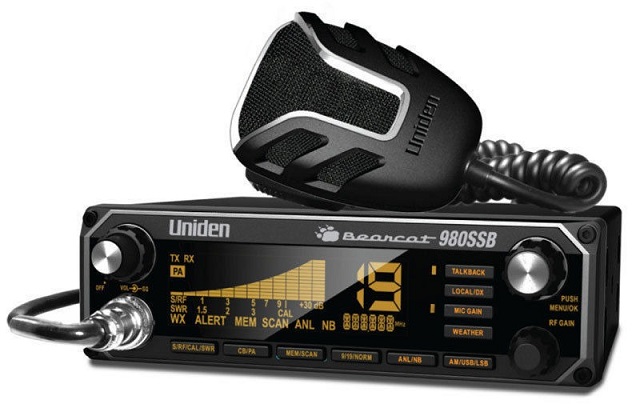
This Cobra Radio is amongst the most creative designs ever manufactured in the category, including its excellent range of 13 miles. it has all of the 40 Citizen Band Radio channels, even when an active channel scanner greatly reduces users ’ preferences to rapidly tune into the channels of one’s choice. In addition, with any unusual climatic conditions, a Cobra contains ten weather stations for listening as well as alerts you before any disaster occurs.

You can also see the transmitter level, power consumption, time, and also frequency level with the multi-color screen, whereas the speaker provides several of the catchiest songs throughout the category. The Cobra can double also as a PA system as just an additional bump in usability, only if you have an individually bought PA speaker. 

  1. 980SSB Uniden Bearcat Citizen Band Radio

980SSB Uniden Bearcat CB RadioThe 980SSB CB radio, also with an easy-to-read, eight-color monitor, is perfect whether you’re searching for anything really small. It arrives with highly qualified automobile fixing brackets and is also fully great for daily vehicles. It has noise-cancellation, 40 available stations,  weather warnings, and up to almost six miles of use, to block away blaring vehicles on the highways.

Throughout all light levels, the color monitor provides for better visibility and it can also be brightened up or darkened when appropriate. If you see the 980SSB for large models of vehicles, the additional microphone cable which is quite long comes in handy. The bearcat transmits among five to eight watts in AM & 10 to 12 watts of SSB maximum promoting SSB, which could be raised to 15 to 20 watts with just a little bit of good tuning.

  1. 1001LWX Midland CB Radio

1001LWX Midland CB RadioThe 1001LWX  Midland 40-channel handheld CB radio is a perfect pick for your budget, providing a unique mix of cost and functionality. It is suitable for truck drivers because of its small size, although the simple feature set makes it great for anyone else, including beginners to experienced users of Citizen Band Radio. Together with 4 watts of power output for about 5 miles of coverage, all 40 regular Citizen Band Radio channels are also available.

Even though Midland constantly checks local weather channels and delivers emergency warnings and weather reports, a channel locking device lets you adhere to the channel of your choosing. You have full power regarding RF gains to increase transmission, including an automatic noise controller which also allows enhancing a poor signal.

A Citizen Band Radio often doubles as a mass notification device and if you have PA speakers bought individually, it will be very easy to switch among all modes as only a switch is flipped. 

  1. Galaxy-DX-959 Galaxy Audio

Galaxy-DX-959 Galaxy Audio
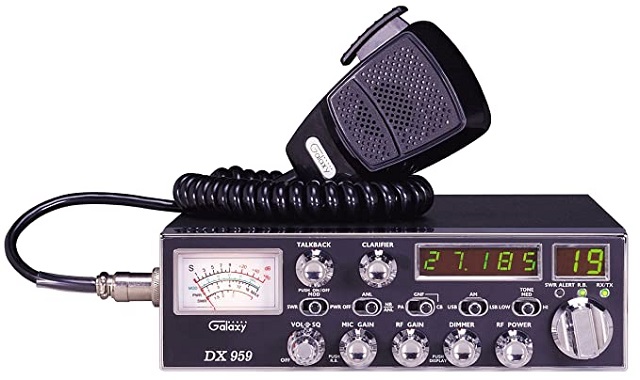
While it’s pricey, a variety of features, as well as robust hardware, are available also on Galaxy-DX-959 CB radio. Also with the option to use both AM & SSB mode, the menus function’s driver-friendly interface makes it easy to create groups when traveling. For more ease during night hours, the convenience LED back display is handy and that there is a darkening choice to help prevent distractions.

The main monitor allows you to know which station you are actually on, as well as a five-digit intensity indicator is attached to the second display. The addition of a  Galaxy Noise Detector allows improving the reach of the message, giving extra points to the already outstanding clear sound heard clear and loud when listening to CB radios. Also, there is an adjustable talkback option that enables you to change the sound and voice boost.

  1. PRO520XL Uniden Pro Series

PRO520XL Uniden Pro Series CB Radio
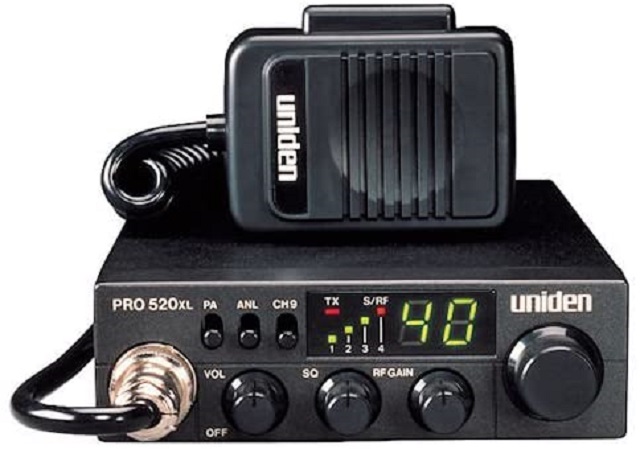
An extreme-duty CB radio which is suitable for truck drivers including those on the move is indeed the PRO520 XL  Uniden Pro series. It is capable of receiving energy at 4 watts, provides RF gain control, as well as facilitates service over 40 channels. The radio is lightweight, however robust, another of the key selling points, meaning you wouldn’t have to be scared to use it for off-road & commercial uses. There is even an additional speakers jack, meaning a PA speaker can be attached to answer people outside the cars.

CB Radio Buying Guide 

  1. Price

After 1945, the very same simple technology has been used for CB Radios, but the price even less than the other modes of mobile phones. Currently, at less than $100, you will have some of the best handheld CB radio in the market.

  1. Licensing

CB Radios wouldn’t need any special licenses from the FCC to operate, unlike General Cell Radio Service, ham radio, and many others. Qualified producers of Citizen Band Radio already have produced their goods to FCC requirements, all you’ll have to do is connect them up and enjoy them.

  1. Size

The most powerful CB radios made up too much space underneath the dash back when it was in the’70s. Now they are becoming very lightweight with advancements in technology and arrives in versions as small as an ordinary phone.

  1. Features

Like all other gadgets, from over the past several decades, CB radios also evolved significantly. There are certain kinds of features that boost the efficiency of speakers and mics, as well as expand the selection of antennas.

  1. Community

Whenever it comes to finding a circle of friends to connect with, many people focus on social media, however, CB radio stations have their own common audiences. To talk, truck drivers, road riders, bike groups, and many others all depend on CB radios.

Conclusion

Many people nowadays assume that CB radios are worthless and no one wants to buy them, but the actual truth is that CB radios are among the most convenient and beneficial for everyone. They have numerous uses and help you with any kind of difficulty, as mentioned above. If you get to know about them or start using them, the versatility of CB radios would amaze you. The price is not very high and it is really affordable. CB radios do everything that a phone does not do.

Frequently Asked Questions

Q: What is the point of having a CB radio?

A: During floods and crises, CB radios are used and can save lives. In order to connect when equipment is damaged or non-existent, officers, first personnel, volunteer responders, and many others use CB radios to communicate.


Q: Do you need a license for a CB radio?

A: It is not necessary to have a license in order to operate  CB radios. No individual person or entity is allocated to CB channels and frequencies. For the most part, on all 40 channels and frequencies designated by the FCC for CB, you may run a Citizen Band Radio, although certain caveats do remain.


Q: What are the most popular Citizen Band Radio channels?

A: Channel 19 is the most widely used Citizen Band Radio channel on highways for truck drivers, to the extent where certain radios now have a dedicated button to automatically pull up channel 19. Other networks utilized regionally, for this reason, include 10, 17, and 21 in most areas of the U.S.


Q: Is a CB radio worth it?

A: CB radios are not the go-to networking equipment of earlier generations, but they are also a really handy tool to have out on the road. Let’s just presume you have a poor trailer tire, another driver may be able to tip you off on the CB until it really begins burning and catches fire like a tar kettle.


Q: Can CB radios talk to walkie talkies?

A: Often, using a portable walkie talkie, you can not speak to a CB radio. You may, however, gain transmission, but the other end-user of a CB can not understand you as you attempt to connect with a CB using a walkie talkie. The CB is designed to interact with CB radios.


Q: What is the difference between a Citizen Band Radio and a marine radio?

A: Marine and CB radios are not the same and are used for two functions that are identical yet distinct. During major incidents, such as natural disasters and traffic problems, CB radios are also used. For boating purposes, marine radios (VHF) are used and are usually needed on all boats prior to leaving shore.


Q: How far does CB radios reach?

A: Depending on the landscape, CB radios vary from around 3 miles (4.8 km) to 20 miles (32 km) for a line of sight contact; however, different conditions of radio transmission can permit communication over far larger distances intermittently.

read more
Gadgets

CB Antenna- Best Buying Guide in 2021

CB Antenna- Best Buying Guide in 2021

The antenna is a simple metallic device that is capable of sending and receiving radio frequency signals. At the transmission end, it works as a transducer that converts electrical pulses into radio signals. And at the receiver side, it picks up the radio signals transmitted from a radio station and recasts them as an electrical signal. The CB antenna is nothing but a mono-pole or dipole antenna used by a citizen band radio set to receive the radio frequency signals from the radio station.

The length of the antenna is directly proportional to the wavelength. Since we could not match with an Aerial of the actual length needed; We are using impedance matching methods to build the antennas shorter as much as possible. With this technique, we can build them shorter than 1/8 or ¼ of the wavelength.

Types of Antennas

Fiberglass:

The range of the Aerials starts from 2′ up to 7′.  Can use a fiberglass rod to build this model. The coil in of these models remains at the top of the devices. The range of the device is from 2-7 miles. Although, the range of transmitting and receiving signals rely on the mounting location of the device. The range of the device is as follows:-

2′ Length: 2 to 3 miles.

3′ Length: 3 to 4 miles.

4′ Length: 4 to 6 miles.

5′ Length: 5 to 7 miles.

These lengths of aerials are the best ones for 4×4 and off-road drivers. These are robust and durable enough. You can mount it anywhere. Among the fiberglass Models,  the fire stick FS is known high-performing one.

Pros:

  • Super durable.

Cons:

  • It doesn’t come with a superior range.

Magnetic

The working process of this model can be understood easily by its name. These models use a magnet base. By doing so, it keeps the Aerial securely to the vehicle. These models are equipped with all such specifications that you will find in coax, magnetic mount, and whip Aerial.

The coil is placed in the magnetic/plastic base. It is available at the bottom part of the device. The maximum range it can cover is near about 3 to 7 miles. The range of transmitting and receiving signals depends on the conditions as well as the mounting location. The range of the magnets is as follows-

3′ Magnet : 3 to 4 Miles.

5′ Magnet: 5 to 7 Miles.

Do you have a vehicle that comes with a metal roof design? Then, use a tall magnet mount antenna on the roof. However, only the central mounting location and the device’s height can offer you the best performance. Along with this, you can easily install this device. You neither need to invest your efforts in drilling into the vehicle nor need to adapt special mounting techniques to install this device. All you need to do is placing in a place.

Pros:

  • Excellent performance.
  • Easy to install.

Trucker

Mostly the semi-trucks use this. The center-loaded Aerials come with a thick stainless steel lower Shaft. It makes up the bottom quarter to third of the antenna. At the same time, the coil remains above the Shaft, in a plastic housing. The remainder of the device is made up of a long, thin steel whip. The approx range of this device is 7-10 miles. Depending on the mounting location, the range of transmitting and receiving varies.

Compared to the ordinarily mounted antennas, the center load models can offer the ultimate performance. These models can range in height between 45″ and 60″. If you want to use a device mainly on-road, you should go for this kind of model.

Although compared to the fiberglass models, these are expensive. Besides, it can damage these models very quickly if they come closer to heat.

When you install a CB Aerial on an RV, boat, or any vehicle with no metal chassis, you must need a no-ground plane CB antenna kit.

A traditional model will require the vehicle’s metal chassis to transmit the radio’s signal. If you don’t have a good ground connection, you will get poor performance.

Pros:

  • Superb performance.
  • Expensive.

Single

This type of model gives the best performance while mounted near the center of the vehicle. If you mount it to one side, dead sides can occur. It may happen if you don’t mount this at too high. During this time, vehicles block the Aerial. As a result, it becomes unable to transmit and receive signals.

Dual

These are used in pickup trucks. However, these are not ideal for off-road usages. A few things are there that you have to consider before installing them.

102 Inch Whip Aerial- Who Needs It?

This 102″ whip antenna can offer you the best performance. However, this model doesn’t have any coil. It is because the 102” comes with a perfect 1/4 CB wavelength. Using this, you will get a minimum ten miles range or more than that. This model can give you high-end performance. However, compared to the center load models and magnet mount ones, it is less expensive.

102 Inches indicate 8.5 feet. Therefore, if the users mount it to the bumper, this device can stick above the roofline.

Pros:

  • Budget-friendly.
  • Outstanding performance.

Purpose of Antenna Coils

The loading coil is an inductor. Suppose remains are inserted into an electric circuit. It helps to enhance the inductance. In the 19th century, inductors were mainly used for preventing signal distortion in telegraph transmission wires (long-distance ones). Not only this, but also this has been used in radio antennas. Using this coil between the Aerial and the feed-line helps create an electrical antenna resonant at the operating frequency.

Radio Antenna

People use antenna coil in radios. For radio waves, mainly the Monopole and dipole radio Aerials work as resonators.

This type of aerial takes power from the transmitter and then applies this to the device with the transmission line’s help. As soon as it is used, the current & voltage of the signal waves gets excited.

The Aerial you will use should have a one-quarter length of the radio wavelength. When it comes to resonance, the Aerial will work as a pure resistance. From the transmitter, it absorbs all the power that is applied to it.

However, sometimes the length of the Aerial needs to be shorter than the resonant length. It is known as the electrically short antenna. Antennas that come in short lengths compared to the quarter wavelength usually represent capacitive reactance. Here, a few amounts of applied power get reflected into the transmission line. After that, it travels back to the transmitter. In this case, two currents run in opposite directions and at the same frequency. The high current heat the wire, and thus, it helps to waste energy. As a result, it can make the transmitter overheated.

Antenna Accessories

Here we are going to mention the accessories of the Aerial. Let’s check it out.

  • Mobile Signal Booster.
  • Dish Antenna Accessories.
  • Adapter.
  • Trainer Kits.
  • Mounts.
  • Cable.
  • Mast.
  • Clamp.

How Does a CB Radio Antenna Work?

There are two reasons behind designing the citizens band (CB) radio antenna. First, It helps you to capture the radio-frequency signals. Then the receivers convert it to electrical signals. As soon as it takes the signals from the transmitter, it converts these into radio-frequency signals. Secondly, its job is to transmit or relay radio-frequency signals. It can offer better results when the antenna’s length becomes equal to the transmitted radio-frequency wavelength.

If you want to determine the exact aerial length, use this formula:

Wavelength (in feet) = 984 / frequency (in megahertz)

Usually, the CB part of the spectrum begins at 25.01 megahertz. That’s why a proper length of a full wavelength will be more than 39.34 feet long. People prefer to use such devices that are available in the fractions: 1/2, 5/8, 1/4, and ⅛. All of these are average lengths for antennas. 1/4 Aerial that is under 10 feet is a basic “whip.” These are available on cars and trucks.

The disadvantage is that 40 channels are available on modern CB transceivers. Each of these has a different frequency. It’s not possible to have a separate Aerial for every frequently at all. That’s why the manufacturers choose a frequency that is in the middle of the spread. They engineer the lengths of antennas from the middle of CB’s 40 channel frequency range. However, you need to adjust the Standing Wave Ratio (SWR) of the device and cable. You need to tune these till the SWR is acceptable.

Each Aerial and Aerial feed-line come with a characteristic impedance. When the situation is appropriate, the impedances of both line and Aerial will be the same. Then, it will convert the electrical energy of the device to radio energy. After that, it will get radiated into the atmosphere.

How to Tune CB Aerial

But sometimes, when the impedances don’t become equal, a few electrical energy parts don’t get converted to radio energy. However, it will get reflected. When it reflects down the feed-line, it causes standing waves of electrical energy. The SWR or the standing wave ratio is defined as the ratio of the highest and lowest voltage on the line. A system that is properly matched should have a 1:1 ratio.

If you want to tune any Aerial, use the SWR meter. It needs to be attached between the transmitter and Aerial feed-line. Here, you need to use a button on the meter for generating a signal on several channels.

However, you can key the microphone on the CB transceiver. It will allow you to create a signal when you check the SWR reading. In case the SWR remains under 1.5:1, then it’s good. But if the SWR exceeds the limit of 1.5:1, then check the meter on various frequencies.

The ratio remains high, usually on high and low channels. Sometimes, you may see that the ratio is greater on lower channels. During that time, you need to lengthen the Aerial. To do this, you need to move it to the base. When the ratio becomes greater on high channels, you need to shorten the length. It would be best if you remembered that the antenna’s impedance could be affected by the antenna’s electrical ground, the structure around the device, and other antennas that remain near the CB antenna.

 Top 5 Best CB Antenna for Your Vehicle  

FireStik FG3648-B Three foot No-ground plane CB antenna kit (Black) 

FireStik FG3648-B Three foot No-ground plane Aerial kit (Black)
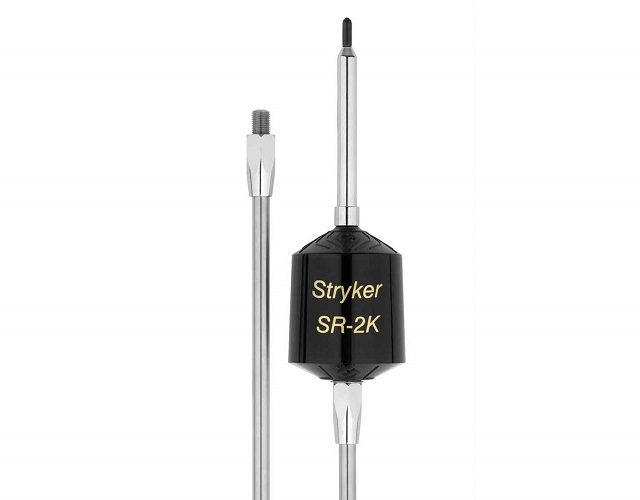
Description: The primary purpose of this product’s design is to solve the problems that you may face during the lack of a ground plane.

Mainly the ground plane problems are represented through the SWR (High standing wave ratio) and poor performance. In this case, the isolated ground plane reduces the issues on a metal base vehicle that doesn’t have a good ground plane.

The Firestik kit comes with such Aerials interchanged for maintaining the central band position while using these with the tuned coaxial feed-line.

You can use this Aerial with a Firestik NGP cable. The product comes with a “no tools required” tunable tip.

It has functioned for quick and straightforward SWR adjustments. One hundred watts is the rated wattage of the kit.

Features: 

Coaxial feed-line: There exists a 17-foot superior quality coaxial cable. A multi-wire stranded center conductor is used here. It helps to prevent breakage. In this case, the coaxial feed-line works as a tuned circuit. This circuit produces the required counterpoise. If you need a longer cable length, then you can add the standard RG-58 A/U cable. Add this cable between the radio and the system cable. As the circuit is tuned, you can’t reduce the length except making any non-repairable damage.

Mount & spring: Stainless steel m, 3-way, 90-degree angle mount is used here. The steel spring comes with machined brass ends. It can work as a coupling between the antenna and the feed-line.

Additional features: This kit comes with a FREE microphone hanger.

Pros:

  • 3-way, 90-degree angle.
  • 17-foot high-quality quality coaxial cable.
  • Great performance.
  • Five years limited warranty.

Cons:

  • Poor customer service.

Tram 3700 Trucker CB Antenna, Standard Packaging

Tram 3700 Trucker CB Antenna, Standard Packaging
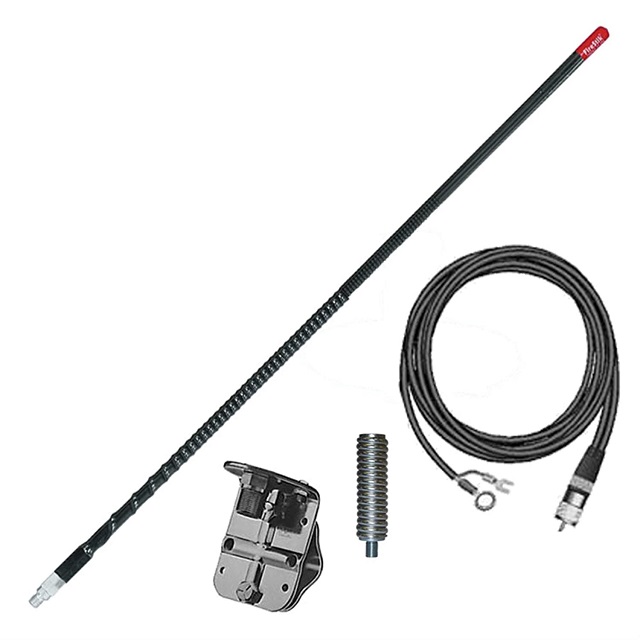
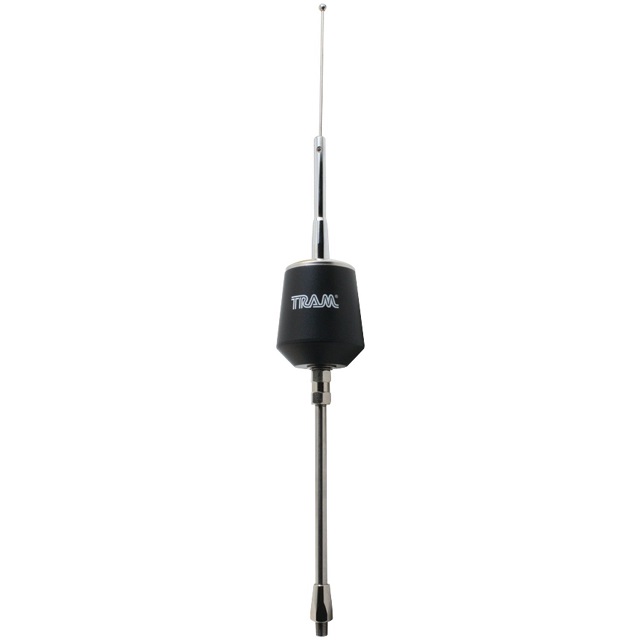
Description: The Tram 3700 Trucker comes in 49 x 5 x 2 inches dimensions, and the weight of it is 1.05 pounds. The Aerial can transmit and receive signals better than any center-loaded mirror mount model.

It provides 3,700 watts of power. It can be handled using a center-loaded heavy-duty coil, 6 in. stainless steel tapered whip, along with a thermoplastic round coil holder.

Features: 

Noise reduction: The device comes with a Thermoplastic Round Coil Holder. It helps to reduce extremely low noise.

Transmit signals: It can transmit signals and receive far better than the Center Loaded Mirror Mount model.

Pros:

  • Equipped with heavy-duty coil.
  • Excellent signal transmitting ability.

Cons:

  • Not long-lasting.

Wilson 305-492 T2000 Series Black Mobile CB Trucker Antenna with 5-Inch Shaft 

Wilson 305-492 T2000 Series Black Mobile Trucker with 5-Inch Shaft
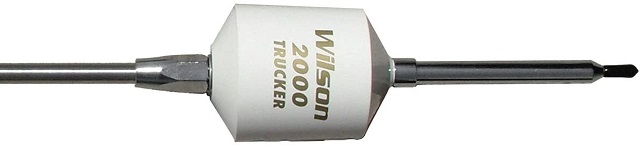
Description: The Wilson 305-492 T2000 series comes with a 5-inch shaft which is available in black color. It contains a 49-inch stainless whip. Besides, the model has a standard 3/8×24 chromed brass ferrule.

The Larger coiled housing enables the device to handle more power. It comes with a low-loss air wound coil.

This coil design required 10-gauge silver plated wire. Besides, high-impact engineered thermoplastic is used to configure the black coil.

Features: 

Frequency range: The range of the frequency of the product is 26MHz to 30MHz. Besides, it has a static reducing weather cap.

Shaft and Whip: The device comes with a 5″ Shaft and 49″ Stainless Steel Whip.

Pros:

  • The low-loss air wound coil.
  • Easy to install.

Cons:

  • A few users reported that after a few months of usages, it stopped working.

Stryker SR-2K Center Load Trucker CB Antenna

Stryker SR-2K Center Load Trucker CB Antenna
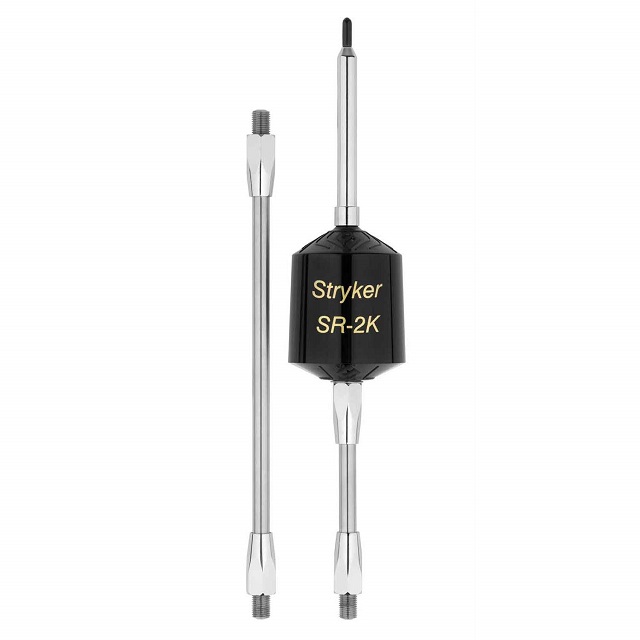
Description: Now, you can get an excellent performance using this high efficiency and superior quality device. The model comes in two shaft lengths— 5″ & 10″. It indicates that the Stryker SR-2K Center Load Trucker kit comes with two models in the same package. In case the 5″ Shaft doesn’t come to your use, you can use the longer one. However, the installation process is not the same in both cases. If you require a best-performing center-loaded antenna, then this model can fulfill your needs. It comes with a 2-year warranty. The power handling capability (3600 watts) makes the product exceptional and demanding.

Features: 

Performance: This product is rated at 3600 Watts. It makes the device perfect for 26 MHZ – 30 MHz.

Additional features: This product includes 5″ & 10″ shaft, and 3/8″ x 24 thread.

Coil: It comes with a low-loss coil. It helps the user to adjust the screws in such a way for making the SWR Tuning painless.

Pros:

  •  5″ & 10″ shaft length.
  • Two years warranty.
  • Durable enough.

Cons:

  • The coaxial cable needed to be purchase separately.

Cobra 29NW Professional CB Radio Antenna 

Cobra CB
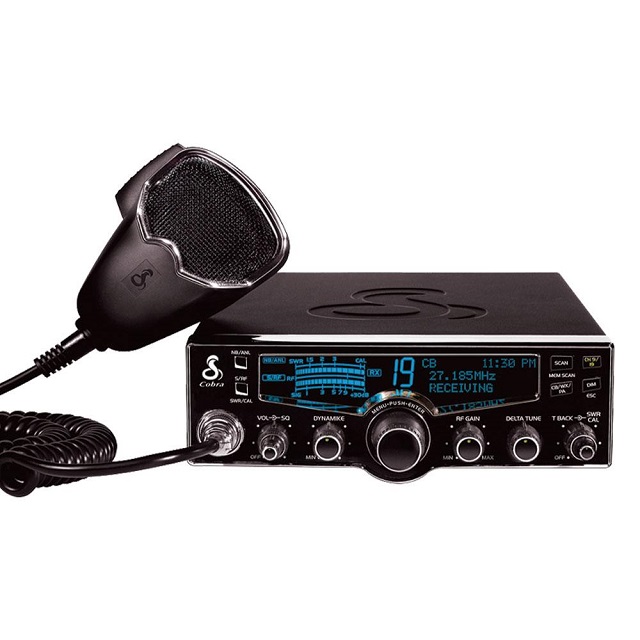
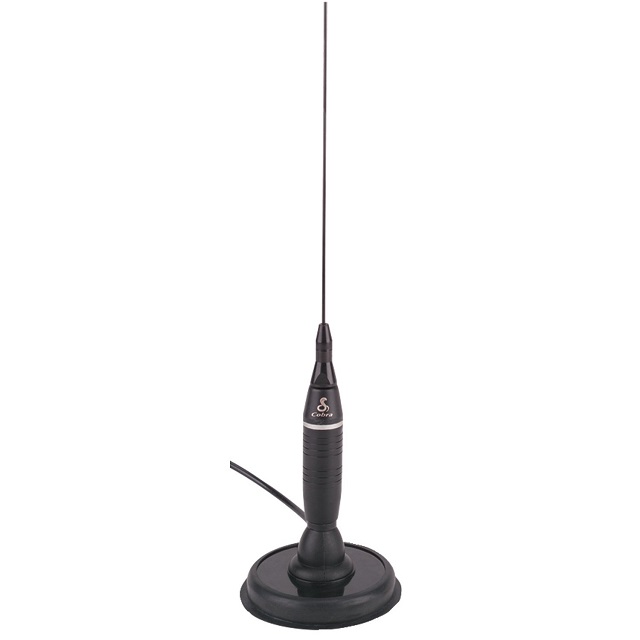
Description: Now, you can get the full coverage of the radio stations using this device. It can scan the range of 40 channels. Cobra 29NW supports Heavy-Duty Dynamic Microphone, CB Radio, Cobra CB Radio, Cobra, Cobra Electronics, Car CB Radio, Car, Heavy-Duty Dynamic Microphone, etc.

Cobra 29NW comes with an adjustable dynamic boost which boosts the sensitivity of the microphone. It helps to increase voice clarity. It comes with instant channel 9/19 that allows the user to get instant access to emergency channels 9 and 19 (informational channel).

Features: 

Emergency Radio – The device offers reliable communication. It doesn’t depend on any satellite or cellular network.

SWR Calibration – You need to make sure that the Aerial system works at full strength. It offers the highest performance for communication on the road.

Indicator: It comes with a warning indication function. Red light gets illuminated if there is any necessity of checking the Aerial.

40 Channel Access – You can navigate the 40 channels to get complete coverage of CB stations.

Pros:

  •  40 channels navigation.
  • Red light indicator.
  • Emergency radio.

Cons

  •  A few users face difficulties installing it.

 Best Buying Guide 

How to pick the suitable Aerial

Are you planning to use a non-magnetic mount Aerial? If yes, then you have to choose the amount to keep it securely in your vehicle.

Mount the coil above the roof/coil location at base or center or top

Base loaded: This type of product comes with a coil wrapping that remains around the bottom part. Usually, the magnetic mount and room models are base-loaded. These models offer easy mounting and allow you to use thicker coils. The coil provides a higher Watt capacity. But it has a disadvantage which is that it comes with fewer effective mounting positions. Because the coil remains above your vehicle, on the other hand, the benefit is that these don’t cause too much damage when struck. These models can handle higher power outputs.

Center-Loaded CB Antennas:

In this case, the coil is placed above the base, at the top portion of the thick shaft base. This device remains covered with plastic housing. The rest of the device is a long whip. You can see this type of model in multiple professional trucking CBS. Compared to the base-loaded models, these are more efficient. But these are less efficient than the top-loaded models.

Top-Loaded CB Antennas

The best mobile CB antenna is known as a top-loaded antenna. Fiberglass is used to configure this model. The tin wire wrapping coil remains around the device. A protective shield used to cover wire wrap of the Aerial. These are very cheap and effective options. It also comes with more mounting options due to the position of the coil. As a result, the coil can clear your vehicle body from multiple mounting positions.

These don’t have so much Watt capacity. However, these are efficient enough to handle the four Watts limitation standards. This one is used on cars, trucks, tractor-trailers, and RVs.

Tuning

Tuning the Aerial helps to optimize your system’s performance. Besides, it also assists in decreasing the potential so that it won’t damage the radio. The CB radios can operate from one to forty channels. In this case, a single Aerial won’t offer the ideally tuned reception for all these. Usually, users choose the middle ground and adjust it at the mid-point for getting its best reception. You can use the Standing Wave Ratio (SWR) meter as a measurement instrument for tuning. These meters help to troubleshoot your equipment. It also helps find a poorly grounded mount, a bad coax, or a weak or non-functioning ground plane.

 Things To Consider Before Buying 

There are a few factors you will have to look at before buying the best suitable device. We have mentioned those factors for you here. Let’s have a  look at these factors.

Antenna Length:

The product’s length or range is always one of the most critical factors you must consider first. ¼ wavelength is the ideal range. It indicates 8.5 feet or 102 inches. Where and how you will use the Aerials are also dependable factors that determine its length. The types of this device given above can help you in this case.

Antenna Type:

First, you need to determine the type of product that you require. Each type has its individual benefits and drawbacks. You should assess the features at first. Then, decide whether it hits your needs or not.

Mount Location:

A CB antenna can be mounted anywhere on the car. However, a few other places are there that can offer more robust signals. Always try to set up the device at the top of the vehicle. If you do so, it will offer a clearer signal. If you want to get the best performance, make sure that half of the device remains over the roof-line.

Installation Quality:

A good device allows you to set it up with ease. Besides, You can set up the Magnet mount models easily. However, the advanced technology makes other types of devices easier to install.

Durability:

Superior constructional components used makes the device’s long-term usable. If you choose a suitable model, then it can be last for a long time.

Power Handling:

The signal will get more precise when the Aerial can handle more power/wattage. Location is a very important factor in obtaining signals. Besides, the power inherent in the device is also an essential factor. However, a few people prefer to use a dual Aerial setup. It allows the user to produce additional power and helps to improve the range.

Frequency Bandwidth:

These devices enable you to communicate with others over a few channels. You will receive more channels when the frequency of bandwidth is higher.

Radio Power/SSB:

SSB stands for single-side band modulation. It indicates the amplitude modulation refinement. However, In simple words, the capacity of the Aerial for handling bandwidth and power is indicated here.

Conclusion:

You may face difficulties while choosing the best model. We hope our article will help you to select the best model. However, the FireStik 4-Foot Tunable Tip CB model can be the best choice for you. On the other hand, the Tram Center-Load CB Antenna Kit is ideal for those who are on a tight budget.

 Frequently Asked Questions: 

  • Is a longer CB antenna better?

Yes. You should always choose a longer optimal CB Antenna. Tall antennas generally work better and get a more extended range than short antennas. If the Aerial comes with a higher length, then it can offer better performance. The exact length of the Aerial for CB radios should be 102 inches. That means near about eight and ½ feet. This length is similar to ¼ of a wavelength.

  • What is the most powerful CB antenna?

Little Wil is one of the most powerful magnet CB antenna.  In addition, The big 3.5-inch 10-oz magnet allows it to withstand the standard driving conditions. Besides, it comes with a 36 inches long whip. In addition, it can handle up to 300W power.

  • How tall should a CB antenna be?

It should be 60 feet. Usually, it is always better to place these Aerial above the ground as much as possible. Placing these gadgets at a high distance allows them to offer better performance. Besides, You should try to install the vertical device at 5 – 10 feet above the roof-line. Try to install these devices away from the obstructions and the power lines. As per the FCC, the maximum limit of Aerial height should be 60 feet.

read more
Do It Yourself

Remove Scratches from Glasses- Easy Fix

Remove Scratches from Glasses- Easy Fix

You may feel annoyed if there is a scratch on your lenses. No matter whether the scratch is minor or major – it can distract your concentration from doing any task. Scratches on lenses can make things hard to see. But these scratches are imminent. So, you need to think about how you can prevent your glasses from getting scratched. Here are few tips to remove scratches from glasses.

Best Ways to Avoid Scratching Your Glasses

Always Use Hard Cases: 

You should use hard cases to store your spectacles. Keep them always in a hard case when you don’t wear them. Thus, you can avoid the risk of breaking the frames of your glasses. Besides, it will minimize the risk of bending your glasses. You must not keep the specs facing down on your table. Don’t keep them in the bag, or the pocket. Also, you should not hang the specs from the shirt collar.

Try to Put on Your Specs Most of the Time:

To avoid scratching, you can try to wear the specs for most of the time. But what to do when you are not wearing them? You can use a chain around the stems. These can help the glasses to dangle from the neck. Thus, your lenses will only touch your soft shirt, and you will get rid of this issue.

Don’t Leave Your Specs Anywhere:

Most people leave their specs in their car. As a result, the hot temperature of the car can damage the coating of lenses. For example, it can damage both anti-reflective and scratch-resistant coating. That’s why you must not leave the glasses in your car. The damage can cause glass lenses to crack. Even, the extreme heat can wrap the shape of the lenses.

Use Microfiber Cloth:

You should clean the specs correctly. Use optometrist-approved lenses cleaning spray and microfiber cloth to keep the specs cleaned. Besides, you should clean your specs very carefully. Most importantly, don’t use any paper cloths for cleaning the surface of your specs. The microfiber cloths help to remove dust, debris, etc. But when the specs need deep cleaning, you should use lukewarm water. Use the water to rinse the debris, dust off from the glasses. Next, you need to use dish washing liquid and rub on the lenses. After applying the liquid, your job is to take a dry microfiber cloth and wipe the lenses.

Store the Specs Properly:

You should always use hard cases as we have said earlier. It will help to avoid the risk of having scratches on the glasses. However, if you don’t have any cases, then use microfiber bags. These also allow you to store your specs carefully. If you want to put off your specs at night, then you can use a glass stand. Keep the stand next to your bed and put the specs on it. Don’t leave your specs in the bathroom or on your dressing table. These kinds of carelessness can lead to having spots on the specs.

Handle with Care:

When you remove your specs, handle these carefully. Remove the specs with your both hands. After that, you need to hold it by the temples. Don’t hold the rims around the lenses. By following the procedure, you can protect the specs from extra dust and skin oils. In case you need to place them on a hard surface; you need to fold and place the specs by keeping the temple down. Placing them down in this way can protect the lenses from remaining towards the ceiling.

You must not use your finger or shirt to smudge a scratch on the specs. However, you can consult with the eye specialist for getting advice regarding how you can protect your specs from getting scratched.

Why Do Eye-Glasses Get Scratch Easily

Here, we have given a few reasons due to which eyeglasses get scratches.

Usually, lenses are not glasses. Nowadays, the glasses consist of sophisticated plastic. Besides, these kinds of materials are ideal for everyday use. Also, plastic offers more safety compared to the glasses. However, there will be less risk of having cracks on the surface than the glasses. Since the plastic ones get scratches easily.

Most of the time, dust, lint cling to the plastic material. If dirt or debris are accumulated on the specs and rub it on that time, it can cause scratches. That’s why those products that have gritty textures will not be able to solve this issue.

Many people think that they can use tissue and fabrics to clean their glasses. But these are much harsher than they think. You must not use a shirt, facial tissues, towels, or toilet paper because these can cause lint on the specs.

You should not use household cleaners because of their abrasive property. For example, Windex, a household cleaner, can strip the protective coating of lenses. Therefore, it can lead to damage to your specs.

Wearing Scratched Glasses- Issues

If you see that there are small scratches on it, then don’t worry. It won’t affect your vision too much. But if there remains major scratch, then you may face visual disturbances and headaches.

When Do You Need to Replace Your Specs? 

According to the doctors, if a person faces problems while performing their regular activities due to the visual distortion and things seem to be a blur, it’s time to change the old specs. Mainly these problems seem while driving.

Otherwise, if you are getting a headache or other visual disturbances, then you need to replace it as soon as possible.

Can You Get Benefited From An Eye Specialist If Your Specs Have Already Been Scratched? 

If you want to repair them, then no. It’s not possible. Even a minor scratch can’t be fixed with the help of a professional. You need to go for replacement in this case. And make sure that while choosing the new, you have asked the provider to add a scratch-resistant coating to the specs.

How to Remove Scratches from Glasses

Here, we have a few tips following how to get scratches out of glasses. Let’s check out.

We have already told you that you can get headache by using scratched specs. But it’s quite impossible to protect your glasses throughout the lifetime. By chance, it can fall from your hand. Or it may happen that you have kept the specs in your pocket without the case. It can also cause scratches on spec. Here we have given some tips that will let you know how to get scratches out of glasses.

Remove Scratches from Glasses Using Toothpaste:

Toothpaste is the most common and essential thing of daily life that every person has in his/her home. Therefore, you can effortlessly  remove scratches from glasses by using toothpaste. In this case, you first need to take a little non-abrasive toothpaste. Put the toothpaste on the cotton wool, and then you need to rub it circularly. Do this process for a few seconds. After that, you need to rinse the specs in cold water. Then pat it gently with the help of a dry and clean cloth. In case you see that the scratches are remaining, repeat the process.

It is a quick, inexpensive way that is effective for minor scratches. But for deeper scratches, you have to repeat the method a few times. RDA stands for Radioactive Dentin Abrasiveness. It measures the abrasiveness of any item.

A paste having below 70-80 is known as low abrasiveness. To follow this method, you don’t need to buy expensive toothpaste. Non-abrasive and non-gel ones can easily do your job. If you are looking for low abrasive toothpaste, try to ignore the advanced products. For example, you need to avoid whitening or plaque removal.

However, there are a few kinds of toothpaste that you can use:- Arm & Hammer Dental Care Sensitive (48 RDA), Weleda Children’s Tooth Gel (45 RDA), Rembrandt Mint (63 RDA), Colgate 2-in-1 Fresh Mint (70 RDA), Colgate Sensitive Max Strength(83 RDA), Colgate Total (70 RDA), Colgate Regular (68 RDA), and Sensodyne (79 RDA).

How Remove Scratches from Glasses Using Baking Soda

Sometimes, you are confused to determine whether the toothpaste is abrasive or not. At that moment, what you can do is avoid those. Thus, you can minimize the risk of damaging your specs. Using Baking soda, you can remove scratches from glasses easily. It is a useful and cost-effective solution that you can find in your kitchen easily.

Usually, baking soda that comes with an abrasion rating of 7 RDA. It is very safe for your specs. So, you can use it without any tension. If you want to remove the scratches by following the procedure, you need to take one spoon of baking soda. After that, you need to mix it with water. Then, what you need to do is stir it until it forms a glue-like thick paste.

Now, you have to apply the paste to the lenses using a soft cotton cloth or ball. Make sure that you are rubbing the paste in a circular motion. You need to do this process for around thirty seconds continuously.

After doing that, you need to wipe the soda away. You need to use a clean, damp cloth in this case. Then, keep the lenses to get dry. If you still see scratches, repeat the method. For hard scratches, this way is time-saving and useful too.

How to Get Scratches Out of Glasses  Metal Polish

For plastic frames, you can go for another method. And that is you can use brass, silver or metal polish to remove the scratches. In this process, you need to select a low abrasive metal polish. Then, take a little amount of polish and apply it at every scratch portion. You need to rub this polish on the scratches for a few seconds with a soft cotton cloth.

Always remember that this process is time-consuming. It takes time while polishing out any item. When you clean the specs thoroughly, you can take a cotton bud, and then rub alcohol on it to give the specs a clean look. But this process is not applicable for lenses. It can damage the coatings. The drawbacks of this procedure are: This method is time-consuming and costly too.

Remove Scratches Using Car Cleaning Wax

These kinds of wax are used mainly for polishing vehicles. However, this is an excellent option for removing scratches from both plastic lenses and glasses. Usually, people prefer to use high brands like Turtle Wax or Meguiar’s. Here, we have elaborated how to use Car Cleaning Wax to remove scratches on specs. Let’s check out.

First, you need to wipe off the dust, debris properly from the glasses. Use a microfibre cleaning cloth to do it. After cleaning the glasses, start the process.

Then, you need to apply the vehicle wax on the scratched area with a soft cotton cloth. After that, you need to rub the wax in circular motions. You need to repeat the step if there is major scratch.

Next, your job is to rinse away the glasses using room temperature water.

Now, you have to dry the lenses. A clean, dry microfiber cloth can be beneficial in this case. Repeat the methods if still there remain scratches.

How to Get Scratches Out of Glasses Glass Etching Cream

For this process, you can use any glass etching cream that has hydrofluoric acid. First, you have to wear disposable gloves. These will help you to protect your hands. Then, you need to take a cotton swab. Then, apply a thick coat of this cream on the lenses’ surface.

You must not rub the cream on the lenses. After applying the thick layer of the cream, you need to wait for a while and allow this cream to sit for five minutes. Next, you need to rinse the glasses.

Lastly, you need to use a cotton cloth to wipe off the lenses. Then you will get to see that the cream is getting peeled off. But you should avoid this process for removing scratches from glass lenses. However, this method is a little bit risky and expensive too. In case you left the cream to settle for more than five minutes, it can damage the lenses.

It is basically a temporary quick-fix method. But if the scratches are deep and stubborn, this process is not going to be worked. Moreover, there remain huge possibilities of damaging the lenses. Besides, the harsh chemicals can damage the coatings.

Try a Scratch Filler Kit

Multiple scratch filler kits are available in the market that helps to repair scratches. Usually, these kits come with a glass polishing compound, clothes and tools. These can make your job done easily. Ensure that you have gone through the instructions carefully. If you don’t do it properly, then it can damage your lenses.

How to Avoid Scratching of Glasses

  • Never use paper towels, tissues, or shirts that you are wearing for smudging the lenses. Cleaning with these materials can cause minor scratches on the lenses. Always use soft cotton clothes, especially those that you get with the specs when you buy them.
  • Try to avoid cleaning your lenses and frames with those solutions that contain acetone. Acetone that is known as nail polish remover can damage both plastic and glass lenses. These kinds of products remain on the surface of lenses for an extended period and damage the lenses.
  • It is often advised to use and spread toothpaste over the lenses. Then, you need to rub the toothpaste to remove scratches. It can work sometimes. But you need to make sure that you are using non-gel and non-abrasive toothpaste. Besides, you need to check whether it is non-whitening or not.

What to Do:

  • Make sure that you have washed your hands properly. By doing so, you can ensure that you are not transferring germs to your specs.
  • You can use warm water to wash your scratched lenses. Then wipe the lenses with a microfiber cloth.

Frequently Asked Questions:

  • How to remove scratches from glasses?

Plenty of ways are there that you can follow to remove scratches from glasses:

  • Toothpaste
  • Scratch filler kits
  • Metal polish cleaner
  • Baking soda

But you should use these methods on minor scratches. However, in case your lenses have any deep cracks, then you should go to a professional.

  • How to remove scratches from prescription glasses?

For many years, most eyeglass wearers have used baking soda to solve this problem. You need to make a thick paste by mixing the baking soda with the water. After that,  apply it on the scratched area. Then take a soft cotton cloth and rub gently. In addition,  rinse the glasses in water and wait until the glasses get dried.

  • How to remove scratches from eyeglasses?

You can follow the toothpaste, baking soda, or metal polish method given above. You can try the car wax method to remove surface scratches. On the other hand, if you have plastic or polycarbonate lenses, then use glass etching cream. It will help you to remove the scratches effortlessly.

You can try the combination of vinegar and dry mustard also. In this case, you only need to make a paste of these two items. Then, take the paste and rub it on the scratches. After completing the method, make sure that you rinse the glasses correctly. It is because mustard can cause irritation to the eyes.

Baby oil can also be used. You need to apply a little drop of baby oil on the scratched portion. Then, your job is to buff the lense with the help of a clean cloth. Do it until the scratches become invisible.

  • How to remove scratches from glasses lenses?

First, you need to put little non-abrasive toothpaste on any cotton wool. Then, what you will do is rub the lenses circularly. After that, you need to remove the scratches slowly. However, if you want, you can use baking soda as an alternative. In that case, you only need to make a thick paste by mixing water and baking soda.

  • Does toothpaste really remove scratches?

Yes, you can use toothpaste to remove scratches from lenses. You only need to use a soft cloth along with a smear of non-abrasive and non-gel based toothpaste. Thus, you can remove scratches.

  • How do you get scratches out of drinking glasses?

You need to use baking soda to get the scratches out of drinking glasses. In this case, you need to mix both water and soda at the same ratio. Take the mix in a bowl. You need to stir the mix until a pudding-like paste comes. Then, you need to rub the mix on the scratched portion. You need to wipe away the remaining soda using a clear, and damp cloth.

  • How do you remove scratches from plastic eyeglass lenses?

You need to put a little regular toothpaste on a cotton cloth. Make sure that the cloth is clean and soft. You need to rub the toothpaste on the plastic lenses. Do it for 10-20 seconds in a circular motion. Now, you need to take a dampen cloth. Finally, rub the soft cloth over the lenses and remove scratches from plastic eyeglass lenses. However, you can follow the baking soda methods too.

read more
Gadgets

How to Detect Hidden Camera with Mobile Phone

How to Detect Hidden Camera with Mobile Phone

Are you going to stay in a hotel? If yes, then it’s a very worrying matter for you to check whether there is any hidden or not. Because, it’s essential for your safety purpose. Sometimes, you are unable to find the hidden cameras directly. So, be careful. But, you can get excellent technology in the market like USB hubs and bug detectors. With the latest technology, you are able to do this. In this article, we are going to define how to detect a hidden camera with a mobile phone.

How to detect hidden camera with a mobile phone

Usually, you can detect a hidden camera with your phone by scanning the network.

When you will stay at any hotel, you will get access to that local network. An app named Fing can help you in this case. Whether you have Android phones or iPhones, you can use it in your phone. The app is free to use. While using the app, you don’t need to sign in repeatedly to get extra features.

Steps to Follow
  • First, you need to disconnect all the devices that you are using at that moment.
  • After disconnecting all, connect your phone to the network where the Fing app exits.
  • Next, go to the app Fing and open it. If you’re an Android user, then click on the “Refresh” button. It is available at the top-right of the app’s screen.
  • Then, you need to permit the app to do the necessary steps given below.
  • It will start scanning the network at first.
  • Wait for a while till it doesn’t complete the scanning work.
  • As soon as the app has completed the scanning process, you can see a list of found devices. You can see the names there that are turned on. You can note the names down. And then, search for its existence nearby.
  • If the name exists, find the name of the device from the list of found devices. In case you will find something unusual or unable to locate the actual source, note down the IP address. And then, scan for open ports.
  • Here, you need to follow these steps to know how to detect a hidden camera with mobile phone.
  • First, you have to click on the “Network” button that you can get at the bottom of the screen.
  • After that, you need to click on the “Find Open Ports” option.
  • Then, you have to click on the IP address that was put down before. And then, click on the “Find Open Ports” option.
  • Next, the Fing app will find the name from the dialog box. It will help you to know which ports are on.
  • However, lastly, you can directly write the IP address in the browser to know the details of it.

How to detect hidden cameras & listening devices

These steps will let you know how to detect a hidden camera with a mobile phone.

You have to move the entire room to an RF detector. You can see different frequencies while using an RF detector. It lets you know where the microphones and hidden cameras are.

Hidden camera detector

A hidden camera detector is a professional device. The main focus of the detector is to find the actual location of the camcorders.

Hidden camera detector app

If you are an Android user, then using Glint Finder will be beneficial for you. For iPhone users, Spy Hidden Camera Detector can be advantageous. Besides, you can use normal flashlights for scanning. But before using Glint Finder, you should remember that it only supports Android 2.3 and up. It is free to use. It is compatible with the magnetometer sensor of any device along with the camera.

To know how to detect a hidden camera with a mobile phone using a hidden camera detector app, you can follow these steps.

  • First, you need to go to Glint Finder’s Play Store page. Then, tap on the ‘Install’ option.
  • As soon as you install the app, click to open it.
  • Then, click on the ‘Allow’ option to permit the app to use your camera.
  • Next, click on the ‘Allow’ option again for the second time. It grants access to your device’s location.
  • Then, click on the GNETOMETER SCANNING option.
  • After that, you have to move your phone around the suspected areas. If there is any listening device near to your phone, you can see it on your screen.
  • Then, go to the app’s main screen and click on the ‘DETECT INFRARED SCANNING’ option.
  • After that, tap on the “I AGREE” option.
  • Thus, you can easily find hidden cameras with the help of the hidden detector app.

How to find hidden cameras

Step 1: Entering into the room, split the room into quadrants. Then, check every section of your room to find the hidden camera, if any.

Step 2: Pay attention to items like clocks, smoke detectors, or coffee pots. You should check televisions, clocks, phones, hairdryers, coffee pots, etc.

How to detect hidden cameras

To know how to detect a hidden camera with a mobile phonelook at these steps.

  • You can take the help of your Android or iPhone.
  • Using flashlights on the smartphone is an excellent way to detect hidden cameras.
  • Use detector apps to detect the hidden cameras

Conclusion:

In this article, we have given brief details by following which you can know how to detect a hidden camera with a mobile phone. We hope it will help you the most.

Frequently asked questions

  • How do you scan for hidden cameras?

If the hidden camera is on and using the same network that you are using, then your phone must get to see the device’s name. If you have an Android or iPhone, you can use the Fing app. However, for the computer, you should use Nmap instead of using Fing. These apps can scan the WiFi local network and therefore help you to detect the hidden camera.

  • What is the working process of a hidden camera detector work?

When you use a professional hidden detector, it allows you to find the camera in two ways. It can find the hidden camera with the help of a flashlight or smartphone. Or it can detect RF broadcasts from a wireless camera.

  • Is there any app that can assist you in finding hidden cameras?

Multiple apps are there in the market that you can use to find the hidden cameras. If you want to use a Hidden Camera Detector app for your iPhone, it will cost $4.99. However, people who have bought it didn’t give good reviews. If you’re an Android user, you can use free apps like Glint Finder.


read more
Do It Yourself

Restricted Call: How to Block It in Android and iPhone

Restricted Call: How to Block It in Android and iPhone

A restricted call indicates the type of calls that we are unable to trace. If you are an Android or iPhone user, you must see the restricted calls appearing on your phone. These Calls are incoming calls, not outgoing. It is tough to find out the real number of a restricted call. That’s why we usually block the number on our phone. If you want to know how to find a restricted call, then go through this article accurately.

Restricted Call: How to Block It in Android and iPhone

The process to find a restricted phone number:

Usually, sometimes we receive restricted incoming calls that appear on our phones. Then, we block the number so that the number won’t appear on our phone for the next time.

If thou want, you can block the phone call’s origin only by dialing *67 before that specific number. You can restrict your call also when you don’t want someone to trace your call.

What will you do if you are facing the same issues? Here, we give some methods by following which you can find out the number of restricted calls.

Restricted Call Blocking

  1. Check your phone records: You can know the details of the restricted call by checking your phone number’s records at the end of the month. When you see your phone records, you can see all the incoming and outgoing calls. You can get your phone records from the cell phone providers. They have the full list of incoming and outgoing calls. You need to note down the exact time and date of the restricted call at the time of receiving calls. At the end of the month, thou can check the time and date with the phone records.
  1. Block restricted numbers: We usually block a number when we find it restricted. As soon as you block the number, the caller can’t call you. Therefore, they are unable to call after that. But overall, it is an effective way to get rid of the unwanted spam callers.
  1. Ask the caller: In case you have answered any restricted call, you can ask the identity of the caller. Sometimes, you can know about the caller by asking it. However, it doesn’t work all the time. But there remains a chance of getting the information about the caller
  1. Ask family members: Thou can ask your friends and family members to check the number whether they have also got such calls from the same number or not. You can take suggestions from a people who have already faced this situation.
  1. Ask the police to track the number: In case the number is harassing you, you can ask the police to take the necessary step. You need to give all the details i.e. number of the restricted call, time and date, entire phone record. They can easily track the number by using the advanced technology. Therefore, you can get real information about the number.

Process To Block A Number On iPhone:

Many procedures are there that let you know about the method of blocking a number on iPhone devices. If thou want to block any number on your iPhone, then follow the steps. But before this, you need to update your iPhone.

1) With the help of call history

Step 1: At first, thou have to open the Phone app.

Step 2: After going to the phone icon, you have to tap on the ‘?’ symbol. You can see this blue symbol next to the restricted call.

Step 3: At last, you need to select the ‘Block’ option to block the particular number.

2) Use Do Not Disturb

Step 1:  First of all, thou have to open the settings option. Then, you need to click the option ‘Do Not Disturb.’

Step 2: Then, you have to click on the

‘Allow Call From.’

Step 3:

Next, select those numbers you want to allow, like your family members, close friends, etc.

Step 4:

When you set the ‘Do Not Disturb’ mode, ‘ you need to check the other options available in that page whether their settings are accurate or not.

Step 5:

At last, you have to turn on the option ‘Do Not Disturb’ available at the top of the page.

Procedure To Block A Number On Android

If you want to know about the method of blocking a number on an Android phone, go through the steps properly.

Step 1: First, open the Phone icon.

Step 2: Then, you have to tap on the restricted call. After that, click on the ‘?’ details.

Step 3: At last, select the number that you want to block or don’t allow to call you.

Conclusion: This article let’s you know about the restricted calls, how to know about them, and how to block the restrict calls on Android and iPhones. We hope you must get benefits after going through this article.

Restricted Call- Frequently Asked Questions:

  • Should I receive restricted phone calls?

Nowadays, people usually don’t answer unknown numbers.  However, if you think that you may get any necessary call from unknown number, then you can pick up the call.

  • Can I trace a restricted call?

If you are getting harassed by any number, then you want to trace it. Usually, any private numbers, and restricted calls are traceable. If the number is unknown, unavailable, or out of the area, then you can’t trace the number due to lack of essential information.

  • Can I call back a restricted number?

When we will call the last incoming or outgoing phone number, it comes automatically into your phone. But if you are using a landline, you need to dial 69 to call the last number. Or you can dial *#69 on a cellphone to call back a restricted number or any usual number.

  • What does Restricted implement on an incoming call?

It implies that the caller doesn’t want to let you know his number. As a result, you cannot find out the number of the caller.

read more
Do It Yourself

How to Pair Apple Watch- A Complete Guide

How to Pair Apple Watch- A Complete Guide

Apple Inc. has produced this Apple SmartWatch. With the help of it, people can get fitness tracking, other essential benefits. But for this, you need to know how to pair Apple Watch with Apple devices. In this article, we will unpack the details of how you can pair an Apple Watch to a new phone, how you can unpair it, and so on. Let’s look at the details underneath.

How to Pair Apple Watch to new phone

  • After buying the Apple Watch, your first job is to power the iPhone and Apple Watch.
  • After that, download the band. You only have to tap the button and hold it for some time.
  • Next, what you have to do is to wear the Apple Watch in your wrist. You should look Whether it fits in your wrist or not.
  • Then, press and hold the button again and switch on the Watch. As soon as thou see an Apple logo on display, you need to remove your hand from the side button.
  • Then, you can see a pairing option on your new iPhone. Click on the continue button. You get to see a pattern of blue particles come in front of the screen on the new Apple Watch. Then, you need to keep the iPhone near the Apple Watch. As soon as you will do this job, you can pair these two devices.
  • Next, what you require to do is to click the setup option on your phone. You need to follow the methods appropriately to complete the setup procedure. While doing this, you can transfer the backup details from the old model of your Apple Watch to the latest one.

How to pair Apple Watch manually:

Are you unable to use the game of the iPhone device that you want to pair with your Apple Watch? Then, you can do it manually.

  • You can see an option available at the bottom part of the screen of the Apple Watch.

Next, you get to see the pattern of blue particles on the screen. You need to click the ‘i’ option quickly. By tapping on the alternative, you can get information about the manual process. Then, you can see a code containing six characters.

  • After getting the code, you have to enter it in the new Apple device. Then, wait for some time until both of these get paired. After pairing, you can go for the setup program.

How to unpair Apple Watch from an iPhone

When you unpair the Apple Watch,  what you have to do is keep a backup of your Apple Watch. Then, you can remove your new Apple Watch from your phone. As a result, you can get all the details available in the new Apple Watch.

  • First of all, you have to go to the Apple Watch application that you have downloaded on your device.
  • After that, you are required to go to the My Watch tab option.
  • Then, you can see an option named as Apple Watch at the upper part of the display. You need to click on it then.
  • After going to the next slide, you get to see the ‘i’ option. You can see it beside the Apple Watch option.
  • At last, click on the Unpair Apple Watch option. Then, you will get two options for either keeping it or removing it. And then it will ask you to put an AppleID password. Now, thou need to wait for a minute. After some time, you can see your Apple Watch unpaired from the factory settings.

The process of backing up your Apple Watch

You can transfer the data from your old Apple Watch to a new one. But it depends on the setup process that thou are going to use for pairing.

 Choosing the Automatic Setup process

Here, we are defining the process of automatic set up. Let’s have a look at this method.

  • First of all, you should look at whether you have done the unpairing method or not.
  • If you have not done yet from the old device, do it quickly.
  • After that, you are required to fix the new iPhone model from the iCloud.
  • Then, completing the entire setup procedure, you need to go to the Apple Watch app. After going to the Apple Watch option, click on it.
  • And then open it to fix the Apple Watch to get the backup details. But you have to check whether you can store the details to iCloud or not as you may lose the essential backup information.

The process of switching the Apple Watch’s LTE account to the new iPhone

Have you bought an LTE Apple Watch? Then, you must have a cellular plan for your Apple Watch. It is because it can help you to attach the Apple Watch to the iPhone account. While doing this process, you don’t need to transfer the cellular plan to the new iPhone device you bought. Here, we have given some steps by following which you get to know how to pair an Apple Watch LTE account to a new iPhone.

We can assure you that you must get benefit by following this process.

  • First, go to the current carrier to delete the previous Apple Watch plan. But make sure that you are not deleting the current iPhone plan.
  • Then, look at the guidelines of the recent carrier to fix the latest plan.
  • After that, what thou have to do is to fix the Apple Watch. For this, you need to follow the instructions that you will get from the new carrier.
  • At last, add the new iPhone account to the Apple Watch.

Frequently Asked Questions:

  • How can you pair an Apple Watch with a new iPhone?

If you want to pair both an Apple Watch and a new iPhone, you need to keep them close. You need to check whether the airplane mode in your iPhone is off or not. But at first, keep the WiFi and Bluetooth turned on. Then go to the Control Center and switch the Airplane Mode off. At last, restart the Apple Watch and the iPhone.

  • Can I pair an Apple Watch without an update?

You can’t pair Apple Watch without updating. While updating the software, make sure it is fully charged. And at the time of updating software, keep the iPhone off.

  • What will I do if the Apple Watch gets stuck while pairing?

First, go to the Apple Watch app and then open the software update option. Then, remove all the updated files. After that, you have to restart your Apple Watch and iPhone.

read more
1 4 5 6 7 8 15
Page 6 of 15