close

Technology News

AppsDo It YourselfInternetTechnology News

Windows 11 Tips and Tricks

Windows 11 Tips and Tricks

In the last few years, you may have tried many things and discovered innovative ways to get things done from home, like your job, homework, connecting with dear ones, etc. Nowadays, technology has progressed a lot, but still, there are many things to improve when it comes to communicating and collaborating. However, windows 11 tips and tricks can quickly fix the issue.

We have given here many windows 11 tips and tricks, letting you know that you can make most of the updated version. These new updates can offer a simple user experience that can quickly become familiar with it.

Top Windows 11 Tips and Tricks:

Get Started:

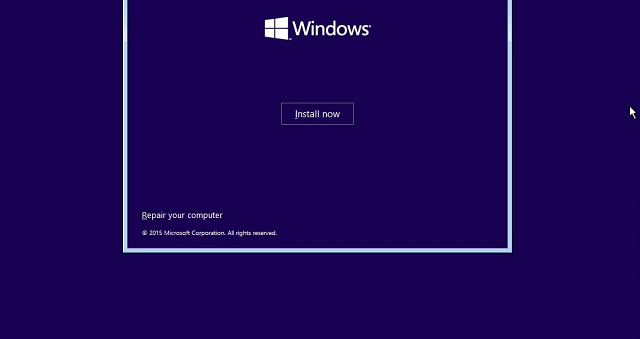
When you enable your Windows to back up your apps, Get Started will take you to a list of the apps on your old device. It allows you to select what you prefer to load on your new device. In this case, it is better to restore all of your old version photos, docs, and files to the upgraded one rather than beginning it ultimately. These prompts enable you to select what to migrate to the computer. Hence, the Get Started app can apply the preferences and settings. In addition, it allows you to transfer apps and programs.

Start and Taskbar:

These are available in the front and center. You can make these things possible with fewer clicks and swipes. First, your task is to head towards Start and find anything. After that, a centralized search allows you to find the web and computer from one place. Next, you need to look for browsers, tabs, and folders. Finally, it lets you find new visual elements and sounds, smooth animations, new buttons, toggles, and fonts. With the help of the new layout and navigation, you can make complex things easier.

Snap Assist and Desktop Groups:

These are useful in arranging the apps on the desktop. For example, if you have already opened multiple windows, you can drag these to the edge of the screen to turn on Snap Assist. It helps snap them into an arranged grid, making most of the display space. As soon as you have completed upgrading to the new version, it will remember the way you have placed the apps, whether you use external or many displays.

While plugging the computer back in, you will get everything back into its position. Desktop Groups allow you to switch between many desktops quickly. For example, suppose one may have apps including Word, Microsoft Edge, and Teams opened, whereas another may have PowerPoint, OneNote, and a music player. The new version has four standard pre-configured layouts and two extra ones for displays. In addition, it offers effective screen resolutions of 1920×1080 or higher.

Widgets:

Do you want to find things quickly that matter to you most, like to-do lists, upcoming meetings, and news? In this case, you will need one place to get things done quickly. Now, you can enjoy the Widgets in the new version’s Taskbar. Your job is to tap or swipe from the display’s left side first. Then, instead of looking for it in separate apps, tabs, and pages, it lets you see the content you curate. In addition, you can get personalized content, including reminders, stocks, sports scores, social media, and local weather. If necessary, you have to take the help of the Interests page under Manage Interests to find topics and publishers.

Microsoft Store:

The Microsoft Store is now available with a new design. It also offers different apps, shows, and movies, from casual gaming to professional editing. In addition, windows and developers combined work to provide you with more content. This new Microsoft Store features tools including Preview and Search that assist in searching for what you want.

With the help of these tools, including Dark Web monitoring, automatic price comparisons, and vertical tabs, it becomes easier to stay safe online and save money while shopping. Besides, these help to keep you organized and focused. In addition, Microsoft Edge lets you know if your password-protected on the browser matches with those available in the list of leaked credentials. After that, it will prompt you to update your password. In this case, Password Monitor helps to scan for matches. For example, you have joined a bank recently and set up your online account, and it allows you to create a secure password to keep the account secured.

While checking out, Microsoft Edge helps save more money by applying coupons to the order. In addition, using the Sleeping tabs, you can keep the focus on current projects.

Chat Support from Microsoft Teams:

It is possible to attach the computer with any of your contacts. You can chat and do audio & video calling from iOS, Android, PC, or Mac. It enables you to stay on the call for up to a day. Therefore, you do not even need to drop and dial back in. It is one of the great windows 11 tips and tricks.

Touch, Voice, and Pen Inputs:

The digital pen, touchscreen, and voice typing feature help work more quickly than previously. For example, you can record your voice with your mobile and playback it to transcribe your words into text. In addition, your computer may have a microphone that can process your speech immediately using voice typing – text transcription.

In addition, it lets you detect inflection and rhythm for adding essential punctuation. The new version makes writing or drawing possible. Besides, it allows you to annotate PDFs. Moreover, it enables you to take the help of a digital pen to make the most of both worlds. It is possible to personalize the new Pen menu with favorite apps for quick access.

Conclusion:

Smartphones have become very handy nowadays for their touchscreens. But taking notes is not so simple. If the new version PC has a touchscreen, you can take notes instantly with a digital pen. In addition, the windows 11 tips and tricks allow you to use natural gestures like multi-finger gestures to navigate quickly.

Frequently Asked Questions:

  • What cool things can it do?

These are a few hidden features of the updated version:

  • Multitasking features.
  • Background apps permission.
  • Clipboard history features.
  • Better security.
  • Manage volume for individual apps opened on a desktop.


  • Does it improve performance?

Compared to the earlier version, it can hold some potential to improve the PC speed.

  • What does it do differently?

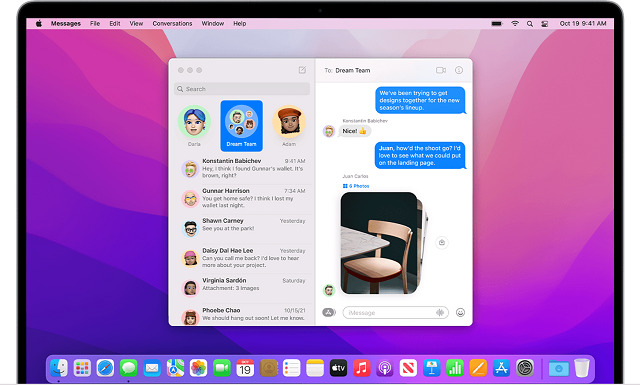
It comes with a new design containing a centered Start menu and Taskbar. Besides, it brings a Mac-like interface to the OS. In addition, it comes in a clean design with rounded corners and pastel shades.

read more
InternetSoftwareTechnology News

How to Delete Win Setup Files in Windows

How to Delete Win Setup Files in Windows

While upgrading the Operating System to a new version, you can find a Windows.old folder saving Win setup files in their system drive. Unfortunately, these old files consume a lot of space on their disk, where a few can run out of disk space. As a result, it becomes vital to know how to delete win setup files in windows.

The previous files will remain on the disk whenever you update your computer to a new version from the earlier one. These files help to roll back the PC to an earlier installation.

What Are Windows Setup Files?

The windows setup files are available on the PC during the up-gradation of Windows or performing a clean installation. Unfortunately, most people do not know about them as they don’t clear after the installation. However, you can find them on your hard drive.

Do You Need Windows Setup Files?

As more than 1.3 billion people are running the current edition of Windows, it has become a common question for all. The truth is that these are not useful for your computer except for consuming space, and there are not helpful even if you install them again.

Where are Win Setup Files?

While entering into the main hard drive, especially the C drive, you can find the “Windows.old” folder in your file explorer. It contains the temporary installation files and all the files from your earlier installation of Windows. If you are willing not to keep anything there, you can delete it. Whether you are looking for other installation files, these are in hidden folders like “$WINDOWS.~BT.”

Is it safe to Delete Windows Setup Files?

Win setup files are system log files. As these are a vital part of your System, you can not delete them.

Should you delete Windows Setup Files?

The Windows.old folder, where the system files and information of previous Windows installations are available, remains on the disk for ten days after installation. When the time comes, your System will clean up automatically.

If you have plenty of space on your disk, you don’t have to delete them. Besides, you can erase these manually while facing a low disk space issue.

How to Go Back to the Previous System?

First, your job is to head towards Settings and open it. After that, select Update & Security and Recovery options, respectively. Finally, tap on the Get Started option below the Go back to the previous Windows 10.

How to Delete Win Setup Files in Windows 10:

We have given here a few ways to erase the files.

Using Disk Cleanup:

  • Your first task is to tap on Win + S to open the Windows search bar.
  • Next, write cleanup into the textbox.
  • After that, you should tap on Disk Cleanup from the search result. Now, select Run as administrator.
  • Next, choose the system drive in the Disk Cleanup: Drive Selection window. Generally, you have to select C: by default.
  • Hit the OK button and wait after that for the calculating process.
  • Tap on the Cleanup system files button available at the bottom left.
  • You can check the earlier Windows installation(s) from the list and hit OK.
  • Hit the Delete Files button while the System asks you: Are you sure you want to eliminate these files permanently.

How to Delete Win setup files in Windows Using the Windows Settings:

  • Tap on Win + I to open the Settings window.
  • Now, you need to choose System in this interface.
  • Next, your task is to move to the Storage option in the left sidebar.
  • Select This PC (C:) option available below Local storage.
  • After that, your job is to select Temporary files under Storage usage.
  • You should check the earlier version of Windows under Remove temporary files.
  • Hit the Remove files button and wait till it finishes.

How to delete Win setup files in Windows Using Command Prompt:

  • Please navigate to the Windows search and open it. Then, write cmd.
  • After that, you should tap on Command Prompt and select Run as administrator.
  • Type RD /S /Q %SystemDrive%\windows.old and hit Enter.
  • It would help if you now waited till the command completes. If you are willing, you can execute the command step by step and hit Enter after each:

cd C:\

attrib -r -a -s -h C:\Windows.old /S /D

takeown /f Windows.old /a /r

rd /s /q Windows.old

Command Prompt

If necessary, take the help of the Command Prompt tool to recover lost files. Whether you want to remove Windows .old Folder with the help of Command Prompt at Boot, the method is as follows:-

Steps:

Step 1: Head towards Command Prompt and open it at Boot with the help of Advanced Startup Options in Windows 10.

Step 2: You should now verify the Windows 10 Drive Letter at Boot.

The Windows 10 drive letter will not always C: at Boot as it can change sometimes. Therefore, ensure that you verify the drive letter before applying the command.

  • When you are in the command prompt section, you should write diskpart and hit Enter.
  • Write list volume after that and hit Enter.
  • Find the drive letter from the listed volumes and verify your Windows 10 drive.
  • At last, write exit and hit the Enter key.

Step 3: Your job now is to execute the delete the Windows .old folder command as follows:

RD /S /Q “D:\Windows .old”

The original drive letter of the earlier windows version is D as it sizes 47GB. There is another volume, but it can not store the system folders for its small size.

Step 4: Shut down the command prompt. Next, tap on Continue to reboot the PC to Windows 10.

You can see the Windows .old folder deleted immediately.

Using CCleaner:

Take the help of third-party tools like CC Cleaner if you cannot fix the issue. For example, with the help of the CCleaner tool, you can clean your device within a few minutes, like clear browsing history and cache memory, and free up your disk space. In addition, you can run an antivirus scan before using it.

These are the steps you should go through to fix the issue.

  • Hit Windows + I keys at a time to open Settings.
  • After that, you should tap on Update & Security.
  • Next, tap on Windows Security in the left pane.
  • Choose the Virus & threat protection option available under the Protection areas section.
  • Now, you can see all threats available in the list. Next, tap on Start Actions under Current threats if you are willing to take action against the threats.

Whether you find no threats in your System, your System will display the No actions needed alert. As soon as the scanning process ends, the Windows Defender will remove malware programs and viruses. After completing the virus scan, you run CCleaner to clean up disk space by clearing them from the windows 10 PC.

Further Steps:

  • Go to the CCleaner download page and open it in the web browser.
  • Your task is to scroll down to the FREE option. Then, tap on “Download” after that.
  • When the download is complete, your job is to open the setup file. Then, follow the instructions shown on display to install CCleaner.
  • You should now open the program and tap on Run CCleaner.
  • Tap on Custom Clean from the left pane and move to the Windows tab. You need to know that the tool can eliminate all system files from windows by default, and for Applications, it will deface only the programs installed manually.
  • You have to check the files and folders section below System. Clear files if you are willing to do any.
  • Tap on Run Cleaner.
  • Finally, your task is to tap on Continue for confirmation. Now, wait till the cleaning method is not finished.

How to Restore Windows PC:

Sometimes, you may not prefer the newly updated version of windows, and hence, you have to roll back to the previous version.

  • Head towards Settings and Update & Security.
  • Choose the Recovery option from the left pane. Next, tap on the Get started option in the right pane.
  • You can see some options available in the Reset this PC Window. Select any of these as you want.

Keep my files option can keep the files but remove apps and settings.

The remove everything option can remove all folders, apps, and settings.

  • At last, go through the on-screen instructions to finish the reset process.

Conclusion:

How to delete Win setup files in Windows? You have got the question answered now in this article. We have given four ways as solutions. Try each solution to fix and let us know which one is the simplest. You may have run out of storage on your System. If something happens to you, use the essential tools to free up your hard drive with ease.

Frequently Asked Questions:

  • Why is setup exe running?

While opening the Task Manager, you can see the “setup.exe” process running. It indicates that a few installation software packages are somehow running in your System. Run MSCONFIG. EXE from a command prompt to check if you can begin it during Boot. With the program’s help, it is possible to disable it from starting.

  • Can you delete setup files after installing games?

It is possible to deface the setup file after installing the software.

  • Do you need to keep setup files after installation?

Delete the old installation programs if you have already added programs to the PC. These sit dormant after running the installer folders unless you are willing to reinstall the program you downloaded.

read more
InternetTechnology News

ERR Empty Response Error: How to Fix Err_empty_response

ERR Empty Response Error: How to Fix Err_empty_response

If you are trying to reach any website or browse the internet but not responding or sending data to your request, you can experience the “err_empty_response” error. Facing the ERR Empty Response error means that your device is having a network connection issue. However, other factors can cause the problem.

It may happen that the extensions installed already are preventing you from watching online pages. In this case, you need to ensure that you must update your drivers, clear the browser data, and reset the network settings. We have given a lot of approaches to let you know how to fix the issue.

What is the Err_empty_response Error in Chrome?

The ERR Empty Response error is common why it can appear on any website. If it happens, your browser can not view the requested URL. The Err_empty_response error message that appears while the webpage you are willing to view doesn’t respond or doesn’t send any data.

What causes the ERR Empty Response Error?

Several reasons are there why the error happens. There may exist issues related to network connection, issues with temporary files, and running programs causing damage to the Chrome browser like defective extensions.

These are a few reasons why you need to buy the issue.

  • A bad network connection
  • Overloaded browser cache
  • Problematic Temp files
  • Running programs (faulty extensions)

How do you fix the ERR Empty Response Error in your browser?

These are a few ways to let you know how you can solve the problem.

  1. Use Command Prompt:

  • First, your job is to tap on the Windows Key + X to open the Power User Menu. Next, you need to choose the Command Prompt (Admin).
  • As soon as the Command Prompt opens, your job is to put the following commands:

ipconfig /release

ipconfig /all

ipconfig /flushdns

ipconfig /renew

netsh int ip set

DNS

netsh Winsock reset

  • When you execute all commands, you should turn off the Command Prompt and reboot the PC. When the computer or laptop reboots, you must begin the web browser and check if the problem is fixed.
  1. Try another browser:

Are you searching for a browser not affected by the ERR Empty Response problem? Then, we advise you to go with Opera. Its primary focus is on user privacy and security and providing a high level of customization. The browser can work very fast compared to other resource-hungry browsers as it can use less RAM and CPU. In the browser, you can find a built-in AdBlocker helping to increase the speed of the page loading speed.

There exists a free and unlimited integrated VPN enabling you to protect your privacy at all times. You may try it yourself by downloading it for free. If the messages are bothering you, use the Opera browser now for stabler results.

  1. Use the Incognito mode:

  • Your first job is to hit the Menu button in the top right corner.
  • After that, your task is to tap on the New incognito window. Use Ctrl + Shift + N shortcut if necessary.
  • If you find the website working in Incognito mode, the problem may happen due to a third-party extension.
  1. Disable extensions:

  • Hit the Menu button, and after that, select More tools. Next, your task is to choose Extensions.
  • After that, you have to tap on the Enabled checkbox to turn off the desired extension.
  • You need to repeat the step for all installed extensions.
  • Your job is to reboot Chrome and check if the problem is fixed.

If you get rid of the issue anymore, you have to turn on extensions one by one till you are not finding the one causing the issue.

  1. Disable VPN software:

As per the user reports, these issues can appear when your VPN software runs on the PC. If you are willing to protect your privacy online, it is a great solution. However, these tools can sometimes cause errors. If your device already has any VPN software, ensure that you have turned off or removed it and check if it resolves.

  1. Clear browsing data:

  • Your first task is to hit the Menu button in the top right corner, and after that, you should select the option Settings.
  • Next, your job is to scroll to the bottom of the page. Select the option Show advanced settings.
  • Head towards the Privacy section, and after that, hit the Clear browsing data button.
  • It would be best to choose the beginning of time option after going to the Obliterate the following items from the section.
  • You have to look at the Cookies and other site and plugin data, Cached images and files, and Hosted app data.
  • Hit the Clear browsing data button.
  • Finally, try to reboot your Chrome browser and check if the issue gets solved.
  1. Delete Temporary Files:

If you have stored any files in Windows’ “Temp” folder, it can cause the “ERR_EMPTY_RESPONSE” problem.

  • In this case, your task is to hold the Windows key and “R” together to open the run dialog box. Then, you can tap on the Start menu and choose the option “Run” from the contextual menu. Now, you can see the Run dialogue box appearing.
  • Write the word “temp” in the Run box window and tap on “OK” or Enter. Hence, you can log in to Windows with your administrator account to access the Temp folder.
  • As soon as you tap on Ctrl + A, you can choose all files. Then, you need to tap on them and choose the “Delete” option from the contextual menu.
  • Finally, you should check if the issue exists now in Google Chrome.
  1. Clear Google Chrome DNS cache:

  • First, you have to open the browser and type chrome://net-internals/#dns in the address bar.
  • After that, you should hit the Clear host cache button.
  • Reboot the browser and then check if the issue fixes.
  1. Change DNS To Google DNS:

Google comes with a public Domain Name System, DNS, indicating that it has servers that it can manage. You can take the help of any internet host to use the Google DNS to fix domain names. Try to use it if you are willing to have a more secure and faster connection. Ensure that you have changed it manually.

  • Hence, your first task is to tap on the Start and select the “Network Connections” option. Next, you can move to the “Settings” option and then choose the “Network and Internet” option.
  • Tap on the “Change Adapter Options” once you have selected the option “Ethernet” or your connection type.
  • After that, your job is to tap on the option “Properties” from the menu while tapping the internet connection.
  • It would help if you opened the “Internet Protocol Version 4 (TCP/IPv4)” option. Then, you need to head towards the “Properties” option and open it.
  • Go to the drop-down menu and select “Use the Following DNS Server Addresses” from there.
  • Enter 8.8.8.8 for the “Preferred DNS Server” option.
  • Your task is to enter 8.8.4.4 for the “Alternate DNS Server” option.
  • At last, you need to check if the issue has disappeared after rebooting the PC.
  1. Disable Computer Antivirus:

While using antivirus software can block a few websites or all. Due to the presence of third-party antivirus software, the error may appear. Therefore, ensure that the software you have installed is not the source of the problem. We advise you to disable it temporarily to check if it remains. You should check if disabling or deleting the antivirus software can solve the issue. Then, you can use another antivirus program or install a new one again. Besides, whether you use a VPN client, ensure that you have disabled it.

  1. Run malware scan for any virus:

You have to perform a Full Malware Scan for your PC.

  • First, your task is to head toward the start menu.
  • After that, your job is to search for the ‘Microsoft Security Essentials’ option or move to it.
  • Please tap on the option and open it.
  • Choose the ‘Full ‘option if you are willing to run a full scan of your PC
  • Tap the “Scan Now” option to scan the PC.
  • Next, you have to wait for a while to scan it.

As soon as you finish, you need to close the tab.

You can take the help of the Microsoft Security Essentials to scan the PC for malware/viruses. It will help you to solve the Chrome code problem.

  1. Update the device drivers:

The ERR Empty Response problem can appear if you use a wrong or outdated device driver. Try to update the drivers to check if the issue resolves. Use the Device Manager on the PC to update the network adapter driver. Go through the steps to know further.

  • Your first job is to tap on the Windows Key+R to launch the Run dialog box on the keyboard.
  • As soon as the box appears, you must enter “devmgmt.msc” (no quotes). After that, your job is to tap on “Enter.”
  • Next, your job is to expand the contents of the ‘Network adapters category.
  • Tap on the network adapter and select Update Driver from the options.

Manually:

Head towards the hardware manufacturers’ websites first to update the drivers manually. After that, your task is to look for the recent drivers for your devices.

In this case, ensure that you have chosen the driver that can support your correct model number of hardware and version of Windows.

Automatically:

Some people don’t have sufficient time, patience, or PC skills to update the drivers manually. Hence, it is better to do it automatically using third-party software, and it can help you to update the system drivers automatically.

  1. Disable Windows Firewall Settings:

  • If you are willing to disable Windows Firewall Settings, first head towards the Start Menu.
  • Then, move to the Control Panel.
  • After that, your task is to tap on Windows Firewall.
  • Hit the “Turn Windows Firewall on or off “feature.
  • Tap the “Turn off Windows Firewall (not recommended)” option.
  • Finally, your job is to hit the ‘OK ‘button.

Turning off the windows firewall settings helps to solve the issue.

  1. Check your network connection:

Issues with network connections can cause the issue. First, you should check if the PC has a connection to the internet. Besides,.you have to confirm if the router, modem, and other network devices are in good condition. If you find any issues with the network connection, contact the Internet Service Provider or network device manufacturer for help.

  1. Use a VPN:

If you face an interrupted website, it can cause you a problem. Hence, your job is to use a VPN to bypass the interruption.

Two methods are there to set up a VPN on the PC— manually and automatically.

Option 1 — Manual process to download virtual private network:

The method needs special pc skills and patience to set up a VPN connection. Hence, a VPN server is essential to connect. Therefore, if you are willing to change your connection settings step by step.

Option 2 — Automatic way to download virtual private network:

Although you’re a computer newbie, it is a fast way to get all the job done with just a couple of mouse clicks. Use a VPN service to set up a VPN connection.

The bottom line:

The err_empty_response error appears on the display while Chrome has a hard time. Sometimes, another app can create ERR Empty Response problem. In the article, we have given the top fifteen methods letting you know how to fix the problem. We hope these solutions will help you.

Frequently Asked Questions:

  • What does Err_empty_response mean?

You get to see the error message on your device’s display while browsing the internet, and the website you want to access is not responding.

  • Is the error a hosting or browser issue?

The problem can appear from the browser’s Internet settings, hosting, etc. Therefore, it is better to know the methods to solve the problem.

  • Will the error go away on its own?

No, the error message will not go on its own, and therefore, it is present from one user to another. For example, the problem appears in Google Chrome.

read more
Technology News

How to Fix iMessage Not Working on Mac

How to Fix iMessage Not Working on Mac

Are you facing issues while sending or receiving text messages with your iPhone, iPad, or Mac? Have you seen your blue speech bubbles turning green? Are you getting messages in the wrong order? Have you got alerts from iMessage that text hasn’t been delivered? If these are the cases, you might wonder why iMessage not working on Mac.

We have given a few specific problems in this article and then let you know how to fix the issue on your iPhone, iPad, or Mac.

Specific Problems with iMessage:

These are a few messages people see on their iPhones—

  • Activation unsuccessful.
  • An error occurred during activation.
  • Waiting for activation.
  • Could not sign in, please check your network connection.
  • Unable to contact the iMessage server.

The Fix for General Problems in iMessage:

  • You should see if you have deactivated the app in Settings. Then, move to the Messages section.
  • Enable or disable messages again in Settings and then to Messages. If you use FaceTime, you should do the same. After that, your task is to power off the device and power it on again. As soon as you activate your iPhone, return to Messages and turn it back on.
  • You can contact the phone network about the issue.
  • The process needs 24 hours for activation, so you have to wait.

How to fix iMessage not working on Mac:

It is a common query coming with multiple possible solutions. Not a single answer is there, as every Mac comes with different settings and unique app settings. Whether you find the problem dogging yourself, try the solutions.

Reboot Mac:

The most usual problems with iMessage are messages not sending on Mac or iMessage not delivered on Mac when you see chats popping up elsewhere.

We have given here the process to do it.

  • First, your task is to head toward the Mac menu bar and tap on the Apple logo in the top left corner.
  • After that, choose the “Restart” option.
  • You should follow the on-screen prompts to close apps forcefully.
  • Your Mac can restart automatically. In this case, your job is to sign in while seeing the boot screen after the restart.

Check iMessage settings:

Ensure that you have not turned off iMessage on the Mac. If you are willing to check, then you should first launch iMessage. Next, head towards Messages, Preference, and then Accounts, respectively. Make sure that you have marked the “Enable this account” option, or you find your status as Offline.

Force quit iMessage and reopen:

The app gets stuck sometimes, leading to a send and receive a failed error on the device. If you are willing, perform force quit to the app and open it again to check if it works.

Clear Messages Cache:

If necessary, you can clear the cache. However, you should remember that cache is the message history. Therefore, you may have lost all chats across all devices. You can tap on the ‘x’ icon to delete the chat inside the app. Hence, you should go to the icon to the right of a profile picture while hovering over a chat. However, there is a better way to delete the cache in Finder.

  • First, your task is to head towards Finder and open it on your Mac.
  • Tap on Command + Shift + G on Mac’s keyboard.
  • You can see the text entry box where you have to type this: ~/Library/Messages/
  • Next, your task is to delete the files in the folders named chat.db, chat.db-shm, or chat.db-wal.
  • Clear the Mac trash folder if necessary to permanently delete the app’s cache. It is all you have to do.

You can choose a better way to keep the app running is keeping it running in peak condition. In this case, the best app is CleanMyMac X. It has multiple features helping to support the Mac operation at its best. You can ride your unnecessary files and folders system and use the CleanMyMac X to get optimum performance. We have discussed it later in the article.

Check Network settings:

  • First, your job is to ensure that the problem is not with your Network settings.
  • We have given here the process of resetting the Network settings if you can not send messages.
  • Head towards Settings and then to the General option. Now, move to Reset and then Reset Network Settings. You should put your passwords again after doing it.
  • If necessary, you can turn off WiFi Assist. It will switch to a cellular signal while it is more powerful than the local WiFi network. A few users have got success by switching off it. Hence, you need to move to Settings and Mobile Data, respectively. Now, scroll the page down to WiFi Assist and then power off if it is on.

Clean up your macOS:

If you’re willing to clear the cache, choose

CleanMyMac X. Thus, you can delete redundant system junk for making your device quicker.

The Smart Scan feature is the most used service enabling you to remove junk and monitor your Mac for malware and other threats. After that, it helps to optimize the Mac for speed. Thus, you can easily make sure the device operates at peak performance.

A deeper cleanse is there, which you can perform for the device via the Maintenance module in CleanMyMac X.

Re-login into the app:

If you cannot clear chat history or restart the Mac, try to log out and back in, as it can set you on the right path. It allows you to engage with the cloud again, and thus, you will not lose any chats.

  • First, go to the app and open it on your device.
  • After that, your job is to move to the menu bar and choose the “Messages” option.
  • Navigate to the drop-down menu and choose the “Preferences” option.
  • A window appears in front of the display where you have to choose “iMessage” at its top.
  • Select the option “sign out” available beside your Apple ID.
  • As soon as you log out, you have to sign in again with the help of your Apple ID.

Your Mac should have an Internet Connection:

The app needs an active network connection to work. However, you can use WiFi, ethernet, or a personal hotspot as a network connection, and you should have an active and functioning internet connection.

Ensure that your Mac has a connection to the internet. It is possible to test by ensuring web browsers work for browsing the web, using ping, etc.

Re-enable iMessage:

The process of re-enabling the app is as follows:-

  • First, your job is to move to the app on your device and open it then.
  • Head towards the menu bar and then choose the “Messages” option.
  • Move to the drop-down menu and choose the “Preferences” option.
  • Choose the “iMessage” option available at the top part of the window.
  • Your task now is to toggle the check box beside the “enable this account” off below the Apple ID.
  • Next, you have to toggle on the settings.
  • Your task is to quit the app and open it on the device.
  • Make sure that you have re-engaged iMessage on your Mac. Whether you have not restarted Messages, your app may leave in limbo. As a result, you can not send or receive messages.

Check timezone settings:

Your device helps you verify the time and date of messages you have received. If you see that a message is coming from the past, the message is way back in the chat history. Besides, if you find the message coming from the future, your device will stop it from being received.

If you observe that you are not getting messages on your device or the app offers you notifications of new messages, it may happen that your data settings and time have been changed. If you’re willing to check timezone settings, follow the steps.

  • Go to the menu bar, and tap on the Apple logo available in the top left corner.
  • After that, you should choose the “Date & Time” option.
  • Next, your job is to tap on the lock icon at the bottom of the window. Now, you have to put the password.
  • Toggle on the option “set date and time automatically” below the “Date & Time” heading.
  • Tap on the lock option again to secure the device. If you are willing to check the settings two times properly, you need to verify both times and dates before turning off the window.

Mac should have Apple ID / iCloud Enabled:

The app needs an Apple ID, and it is the similar login that the device uses for iCloud. So you have to ensure that your device has the correct Apple ID configured:

  • Head towards the Apple menu and then move to the “System Preferences” option.
  • Now, move to “iCloud” settings, and you should ensure that the device has the correct Apple ID in use.
  • You can use a similar ID on the Mac. Thus, the messages can sync between both devices.

Message Forwarding is active on iPhone:

Ensure that you have successfully turned on the SMS text message forwarding. It enables your device to relay SMS text messages to and from the iPhone through Messages. Whether the feature is not enabled, you can not send SMS text messages from the Mac, indicating that it is impossible to message android users.

The iMessage app Works on iPhone / iPad:

If you prefer to use an iPhone or iPad and a Mac, you should ensure that the iMessage app works on that device.

Have you faced problems like showing waiting for activation error or anything else on your iPhone or iPad? The problem may have a connection with servers being down. Besides, it is not always syncing between your Mac device and iPhone though it works.

Check Keychain Access:

Like other apps, Messages uses Keychain Access to authorize services. We have given here steps to check Keychain Access for iMessage keys. However, you are unable to change something in the keychain access. The steps are as follows:-

  • Your first task is to open the keychain access on the device.
  • Now, you should type “iMessage” in the search field, which is available in the upper right corner of the window.
  • It showcases all the encryption and signing keys that the app has logged for the device. Hence, if nothing appears on display, it is concerned.

How to enable the iMessage app on the device:

Before troubleshooting, your job is to ensure that you have turned on the app on the device properly. If you are willing to enable the app,

Your first task is to navigate to the Messages on the device and open them after that. If you don’t find it available in the dock, try to find it in the Applications list in your Finder.

  • Go to the Messages on your device.
  • Next, your task is to log in there with your Apple ID, and the process asks you to undergo a two-step verification process.
  • It is possible to log in there with your iCloud ID. Now, you can access all the messages. Sometimes, it can display your phone numbers rather than showing contacts.
  • It is possible now to enable the app on your device correctly. However, you may need to fix glitches like iMessage not syncing on the device.

How to Sync iMessage:

As soon as you enable it on the Mac, your job is to ensure that everything is syncing correctly. Syncing issue is the most common.

  • Head towards the Messages section on your device. If you can’t find it available in the dock, it is available in the Applications list in your Finder.
  • Tap on Messages in the menu bar.
  • After that, your job is to open the Preferences section.
  • Next, you have to tap on iMessage.
  • Tap on the box now to activate Messages in iCloud.
  • The changes you have made will save automatically. If you are willing, turn off the window by tapping on the red x.

The messages can sync automatically now. If these are unable to sync, you can open the Preferences section and tap on Sync Now on the iMessage tab. You can sign out and sign in again if it doesn’t work.

How to sign out of iMessage:

Try to sign out of the app, as troubleshooting is a great idea. However, if you are willing to know how to prevent receiving messages on the device, it is an ideal choice.

Whether you want to know the method to log out on your device, your task is to open the Messages section on the device.

  • Tap on the Messages in the menu bar.
  • Head towards Preferences and open it.
  • Tap on the iMessage section.
  • Next, you should tap on Sign Out.
  • Now, you know how to log out of messages on the device. If you are willing to log in back, follow the section to enable the app on the section.

How to Fix iMessage Contact Sync problems:

Want to know, “Why are my contacts showing up as numbers on my Mac?” The method is simple to fix when the contacts are not syncing on the device.

  • Your first task is to hit the Apple icon in the menu bar.
  • Open the section System Preferences.
  • Now, you have to go to your Apple ID and open it.
  • You should check the box below iCloud next to Contacts.
  • If you have checked it already, tap on it to uncheck. Now, wait for a while before tapping it again. Then, you can quit Messages and open the section again to check if you have updated the contact names. Besides, your job is also to ensure that you have enabled the syncing on the iPhone.

Sync Contacts from iPhone:

The contacts are usually available on the iPhone. Therefore, you have to ensure that you have synced them to iCloud from your mobile.

  • Hence, move to Settings first and open it.
  • Click on the name.
  • Next, you have to click on iCloud.
  • You should ensure that you have toggled on the contacts.
  • If you have toggled it on already, you have toggled off it. First, you should ensure that you have chosen the option Keep on My iPhone. After that, your task is to toggle on for a few minutes. If you cannot see the contacts’ names, syncing contacts via iCloud is the problem you are facing. Hence, you need to send the contacts from iPhone to Mac through AirDrop one by one. After that, you have to upload these to iCloud Contacts.

Making iMessage on the Mac Work with Android mobiles:

The app on the device may not find your android mobile. If you are willing to fix the error, you should enable Text Message Forwarding.

  • In this case, navigate to Settings on the iPhone and open it.
  • Next, click on Messages.
  • Now, click on Text Message Forwarding.
  • You should toggle your device to send and get messages.

If you can’t solve the problem by following the steps, your task is to head toward the Messages settings on your iPhone. After that, you have to choose to Send & Receive.

You should ensure that both your email address and mobile number need to have a checkmark.

Keep Mac Updated:

If you want that your device works and syncs appropriately, ensure that your device has all the latest updates.

Double Check the Apple ID:

If you are experiencing issues due to not syncing the app, ensure that you use the similar Apple ID on both devices. However, if you want the syncing to work, it is essential to use the same iMessage login on both Mac and iPhone. In addition, you may learn the way of managing the Apple ID.

Now, you get to know how to connect the app to the device. Problems that you face generally are messages not syncing on your Mac and missing contact names. As soon as you understand how to receive messages on the device, you can find yourself overwhelmed with notifications. We advise you to learn how you should mute messages on the device to get relief from distractions.

Can’t send a group iMessage!:

Whether you are facing issues while sending messages to groups of people, it may happen that one of them does not have an iPhone.

While sending a group message to all your contacts, it will display blue. But if you add a person who doesn’t have iMessage, the color will turn green.

If a person of your contacts is not using an iPhone more, it can break the group iMessage. Do you want to check if it is causing the error? Then, you can begin with a new group message instead of continuing with the old one. However, leaving a conversion also doesn’t allow you to send a group message to an existing thread.

The Fix for can’t send group iMessage:

If you find yourself out of a group message, do the following.

  • First, head towards the Messages app and open it. After that, click on the ground message where you want to reply.
  • When you leave a conversation, you will get an alert message.
  • Whether you cannot join a conversation again, you need to ask one of the remaining participants to add you again.
  • Besides, you may begin a new conversation with all the same participants and go from there.

What to do if you are eager to group message your friends, but all the participants don’t have iPhones? Hence, the best way is to use Whatsapp.

Lost or accidentally deleted Messages:

Sometimes, you may delete important messages, or you find the message disappeared after updating your iPhone. However, if you are willing, you can get them back.

How to retrieve lost or accidentally deleted messages:

These are the five primary processes to get back lost or deleted iMessages.

  • Retrieve from an iCloud backup.
  • Retrieve from the iCloud website.
  • Contact your phone provider.
  • Retrieve from an iTunes backup.
  • Retrieve using a third-party app.

Messages on iPhone not appearing on Mac/iPad:

With the help of the matching Messages apps on iOS and Mac, you can carry the conversions easily across the two platforms. However, the two apps hot failed to sync sometimes. Besides, iMessages cannot appear on the Mac, or vice versa.

Easy Fix for Messages on iPhone not appearing on Mac/ iPad:

  • You should not need to take tension as it is a common issue. Apple can now store in iCloud, which can sync on all devices. Whether you are unwilling to turn on iMessages in iCloud, as it can affect the available storage, you can try the steps.
  • Head towards the Settings, then Messages and Send & Receive options, respectively. Ensure that you have marked all the email addresses with Mobile numbers you are willing to associate. In this case, you have to click on the ‘Use your Apple ID for iMessage’ option available at the top to make the addresses.
  • Your job is to go to the Messages app on the device and open it. Then, tap on Messages in the top menu bar and Preferences after that. Now, tap on Accounts and mark the email addresses once again, and it may ask you to enter more details for some of them.
  • At last, your job is to reboot Messages on every device. We hope that you will find the error fixed.

How to keep all your messages in one messenger:

iMessage is preferable, but chances get divested across different platforms. For example, it is suitable for social services like Facebook Messenger and work platforms like Slack.

With the help of IM+, you can sign in using just about any chat service you like. It allows all the chats to keep in a single central app. Besides, it enables you to send and receive messages on Facebook, Twitter, WhatsApp, Skype, Telegram, Slack, Gmail, and LinkedIn. Moreover, the format is compatible with hotkey switching. Therefore, it is possible to bounce around different services without your fingers.

It offers full customization over notifications and enables you to send and receive videos and GIFs.

iMessage visual effects aren’t working:

Previously in iOS 10, Apple produced a few fun animated effects to enhance your iMessages.

For instance, if you are willing, tap and hold on to a speech bubble enabling you to add a thumbs up or a heart. Besides, if you want, tap the arrow and hold for sending a message which you want to get access to fun effects like Send with Echo, Spotlight, Balloons, Confetti, Love, Lasers, Fireworks, Shooting Stars, and Celebration.

Fix for Visual Effects are not working:

Go through the steps if you are unable to solve visual effects.

Ensure that your recipient has downloaded and installed iOS 10 or iOS 11.

A few effects will not work if your recipient has activated the Reduced Motion on their iPhone. For example, they may have changed the setting to save battery power. Hence, your task is to move to General, Accessibility, Reduce Motion, and Off options. However, these won’t work unless you send them as an iMessage.

The bottom line:

iMessage is the core of iOS, iPadOS, watchOS, macOS, and other Apple ecosystems of platforms. It is a central process helping to exchange messages. Now, it has become a rich platform with app plugins. We have given here many solutions that will let you know how to solve this problem when you see that ‘iMessage not working on Mac.’


read more
Do It YourselfTechnology News

What is Flash Memory? How It Works?

What is Flash Memory? How It Works?

What is Flash memory?

Flash memory is a non-volatile storage memory. It is designed to erase and rewrite or re-program at the byte level easily. It is a special type of floating gate memory. Each memory chip holds plenty of flash memory cell units. It is based on electrically erasable programmable read-only memory called EEPROM. Flash memory is a unique type of EEPROM (Electronically Erasable Programmable Read-Only Memory) designed for high speed and with high density. It typically consists of large erase blocks (Greater than 512 bytes) and with not less than 10 000 writing cycles. It stores a large amount of data in a small area using stacked memory cells. The density of the memory cells is increased significantly to cater to the demand for storing more data in a small area.

The primary limitation of Flash memory is that it can do a relatively smaller number of write cycles in a specific block. In 1980 Toshiba, a Japanese company, invented it. A Flash memory gadget consists of several flash memory chips and a controller chip.

Types of Flash Memory:

There are two types of flash memory. They are:

  • NOR Flash memory (NOR Flash, the correlation between the bit line and the word lines resembles a NOR gate)
  • NAND Flash memory (NAND flash, the correlation between the bit line and the word lines resembles a NAND gate)

They are named after the logic gates they use in writing and rewriting. They use the cell design consisting of metal–oxide–semiconductor field-effect transistor in a floating gate. Both of them differ in many aspects, including circuit level. Microcontrollers also use it for writing and executing firmware. The NAND memory is typically significantly smaller in size. As a result, they may be erased, rewritten, and read in blocks. At the same time, NOR memory allows a single machine word to be erased, rewritten, or read in a location independently.

NAND type memory is used in memory cards, old model solid-state drives, mobile phones, and USB flash drives. NOR memory is also used to store more critical configuration data in various digital products, battery-operated Static RAM. Their purpose is to work as general storage and transfer of data.

How It Works:

Flash Memory Cell
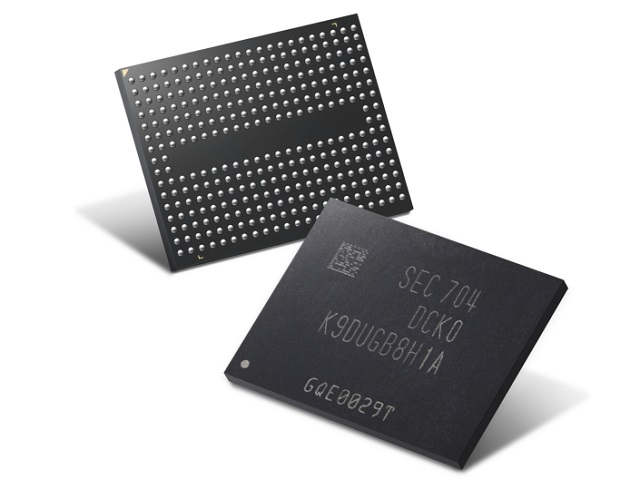
It comes with inbuilt solid-state chips. In addition, each chip has an array of flash memory cells.

Flash memory uses electrical circuits to log data. The current flows through the transistor between each cell source and drain. The transistor regulates the path and functions as an on-off switch or gate.

The transistor allows current to flow across the cell at the ON position, which stores binary code “1”. At the OFF position, the transistor blocks the current flow and stores the value “0”.

Flash Memory is used in computers, handheld Pcs, personal digital assistants, digital audio players, digital cameras, mobile phones, synthesizers, video games, medical and scientific instrumentation, and robots. Its memory latency is significantly less, and it has a fast read access time. On the other hand, it is comparatively slow compared to ROM or RAM. It has high mechanical shock resistance and is therefore used in some portable devices vulnerable to mechanical shock. Flash memories have a significant advantage over other non-flash EEPROM. It has large block sizes.

Flash EEPROM:

Furthermore, their erase cycles are very much slow. Therefore erasing large blocks gives it a good speed advantage while writing bulk data. Comparatively, Flash EEPROM costs much less than the byte programmable EEPROM.

It is significantly employed in non-volatile solid-state storage. Using die stacking of three-dimensional integrated circuits in vertical interconnection, flash memory packages can be raised to the capacity of up to 1 TB. It needs at least 16 vertically connected stacked dies with one integrated flash controller inside the package to get the storage capacity of one tebibyte (240 Bytes)

Early History:

The idea of flash memory was started to develop from the origin of FGMOS or floating gate transistors, which are used in floating gate memory cells. Earlier, the EPROM and EEPROM were included in the floating gate memory. However, it requires a lot of manpower to build a memory cell for each bit of data, which is expensive and more time-consuming.

In 1980 Fujio Masuoka, working at Toshiba, designed a type of floating gate memory that erases the entire section of memory very easily in lesser time. He applied voltage to a wire-connected group of cells in the memory. It leads to the invention of flash memory. The name Flash was recommended by Shoji Ariizumi. In 1984 they invented NOR Flash and then NAND flash in 1987.

Unfortunately, when Masuoka presented it at the annual International Electronics Developers Meeting in 1984, the world of American scientists saw it as a threat. So Toshiba launched the NAND flash memory in 1987. One year later, Intel launched its NOR flash chip memory.

NOR Type Memory:

NOR-type memory has a long write and erase time. However, it provides full address and data buses allowing random access to memory location. Therefore NOR-type memory is suitable for the replacement of ROM Chips. Programs stored in ROM very rarely need to be updated. So it is a better replacement for ROM, which stores such programs in BIOS, the firmware of set-top boxes. It can be used to a maximum of 100,000 erase cycles. Initially, the Compact Flash was based on NOR, and it later moved on to NAND to control the price.

NAND Type Memory:

NAND flash has lesser erase and write time. In addition, it requires less chip area per cell. Therefore it has a higher storage density and lower cost than the NOR flash. However, the disadvantage is that the I/O interface of NAND flash does not possess a random-access external address bus.

Therefore Data must be read on a block-wise basis with block size varying from hundreds to thousands of bits. This makes the NAND flash unsuitable for the replacement of ROM since most of the processors and microcontrollers require byte-level random access. Therefore NAND flash is best suitable for secondary storage devices such as hard disks and optical media. It is best suited for mass storage devices such as SSD and memory cards. They will have multiple inbuilt NAND flash memory chips.

Due to the latest technological advancement, the memory density of NAND flash is highly improved and commercialized.

Charge Trap Flash (CTF):

CTF is a semiconductor memory technology used to create non-volatile NOR and NAND flash memory. It is another type of floating gate MOSFET memory technology. The conventional floating gate technology uses polycrystalline silicon film to store electrons, but the CTF doped the conventional technology using polycrystalline silicon as a floating gate structure and replaced it with silicon nitride film.

CTF replaced Poly-silicon floating gate technology. CTF is sandwiched between blocking gate oxide above and a tunneling oxide below it, with an electrically insulating silicon nitride layer. The silicon nitride layer traps electrons. This CTF technology provides better data retention with zero electron leakage. Conversely, the electrons become more excited with increasing temperatures; therefore, electrons leakage may happen at a higher temp.

Tunneling:

However, Charge Trap Flash still uses a tunneling oxide and blocking layer, which are the two negatives of that technology. The Blocking layer may get damaged due to anode Hot Hole Injection, and the tunnel oxide may get damaged due to the extremely high electric fields. Therefore the oxides must be unsalted against the electrons to prevent the electron leaking, which may lead to data loss. With increasing wear of oxides, the data retention may go down. Furthermore, the degradation of oxides may directly affect the endurance of the memory since the oxides lose their insulating characteristics as they degrade. In 1991, the NEC scientists implemented Flash Memory with the charge trap method.

Later in 1998, NROM flash memory technology was introduced. They replaced the traditional floating gates with a charge trapping layer in conventional flash memory design. In 2002 Vertical NAND technology-based flash memory cells started using 3D charge trap flash technology vertically within the chip. Toshiba introduced 3D V- NAND technology, and the first device implemented 3D V- NAND with 24 layers came to the market in 2013.

3D IC (3D Integrated Circuit) Technology:

This technology loads IC chips vertically into a single 3D IC chip package. Next, Toshiba introduced 3D IC into NAND flash memory. Later in 2010, 3D ICs came into widespread commercial utilization and use of NAND memory in mobile gadgets. Then in 3D V-NAND with eight stacks, 64 layers came to the market.

Flash Memory Working Principle:

Flash memory has an array of memory cells made from floating-gate transistors in which Data is stored. In single-level cell memory devices, each cell stores only one bit of information, whereas in Multi-level cells, including TLC, data can be stored more than one bit per cell. Besides, there are two types of floating gates, namely conductive and non-conductive. In Floating Gate, polysilicon is employed in both conductive and non-conductive.

Floating Gate MOSFET:

MOSFET
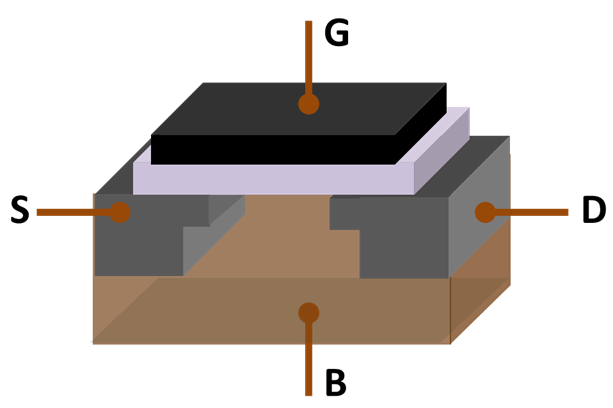
In flash memory, each cell resembles MOSFET (metal-oxide-semiconductor field-effect transistor). However, it varies with the MOSFET transistor gate. MOSFET has only one gate, whereas the other has two gates. Each cell works as an electrical switch in which current flows between source and drain. Further, it is controlled by a floating gate and a control gate. The control gate functions similar to the gate in the MOS transistor. But below the control gate, a floating gate is placed. The floating gate is insulated entirely using an oxide layer. The floating gate is placed between the control gate and the MOSFET channel.

Since the insulating oxide layer electrically isolates the floating gate, the electrons held within them are trapped.

How Data is Stored:

When the floating gate is charged with electrons, the increase in charge screens the electric field from the control gate, increasing the cell’s threshold voltage (VT1).

Therefore, a higher voltage (VT2) must now be applied to the control gate to make the channel conductive. In order to read the binary value from the transistor, an intermediate voltage between the threshold voltages must be applied to the control gate.

If any of the channels conduct at this intermediate voltage, the floating gate must be uncharged (if the floating gate is charged, the intermediate voltage will be less than VT2 conduction will not happen. Further, if the conduction happens, then logical “1” is stored in the gate; if the channel does not conduct at the intermediate voltage, it implies the floating gate is charged, and therefore a logical “0” is stored in the gate. The presence of “0” or “1” is identified by determining where there is current flowing through the memory transistor when the intermediate voltage is asserted on the control gate.

In Multi Level Cell Device:

Data can be stored more than a bit per cell in a multi-level cell device. Therefore the amount of current flow is sensed to identify the level of charge on the floating gate. There is an electrically insulated tunnel oxide layer between the floating gate and the silicon; therefore, the gate floats above the silicon. Moreover, the oxide layer keeps the electrons confined to the floating gate. In the long run, degradation or wear may occur due to the extremely high electric field experienced by the oxide. This high voltage density can break atomic bonds overtime on the relatively thin oxide coating. Thereby it gradually loses its insulating properties and allows the trapped electrons to move freely, resulting in electron leak from the floating gate, which may lead to data loss.

What is Fowler Nordheim Tunneling?

Fowler Nordheim Tunneling is the process of moving free electrons from the control gate and into the floating gate. By doing so, we are changing the characteristics of the cell by increasing the MOSFET’s threshold voltage. In turn, it changes the source current that flows thro’ the transistor for a given gate voltage; it is used to encode the binary value to the cell. Fowler Nordheim Tunneling is a reversible process; therefore, electrons can be added to or removed from the floating gate. Adding or removing the electrons from the floating gate is known as writing and erasing.

 Internal Charge Pumps:

To erase and program, it needs high voltages, but the latest flash chips require a single supply voltage, and they produce high voltages of their own using the on-chip charge pumps. The charge pump is similar to DC to DC converter that uses capacitors to raise the voltage. With simple circuits, the charge pumps can do high erasing voltages. However, the charge pumps may fail in high radiation environments.

NOR Flash:

NOR Flash
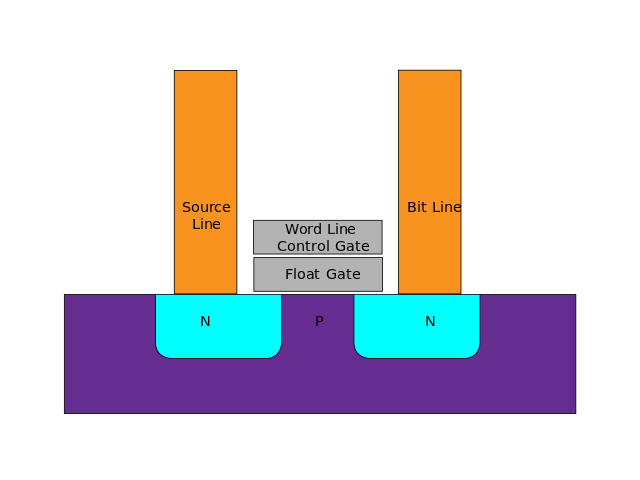
Each cell in the NOR Flash’s one end is directly grounded, and the other end is connected directly to the bit line. This arrangement behaves as the NOR gate. While one of the word lines connected to the control gate is brought high, the relative storage transistor will pull the output bit line low. For embedded applications that require distinct non-volatile memory, the NOR Flash suits best. Their low read latencies allow both direct code execution and data storage in single memory products.

The default state of the single level NOR-Flash cell is logically equal to the binary value 1. Since the current flow through the channel by applying the appropriate voltage to the control gate, the bit line voltage is pulled down. NOR flash memory cell can be programmed or set to a binary value of 0 by following the steps:

Apply elevated voltage to the control gate

Now the channel is turned on, and electrons can flow through the source to the drain

The source-drain current is sufficiently high to make some high-energy electrons jump through the insulating layer onto the floating gate.

NOR Erasaing
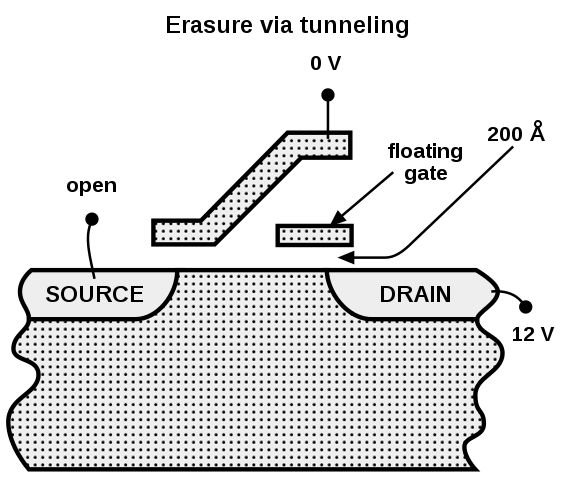
A high reverse polarity voltage is applied between the control gate and source terminal to erase the NOR-Flash cell and pulls the electrons off the floating gate through quantum tunneling. The latest model NOR chips are divided into multiple erase segments called blocks or sectors. The erasing operation can be done block-wise. Moreover, all the cells in the erase segment will be erased altogether. The Programming of NOR cells is done one word or byte at a time.

NAND Flash:

NAND flash uses floating-gate transistors connected in the same way as NAND gate. Several transistors are connected in series. Further, the bit line is pulled low if all the word line is pulled high above the VT. In addition, this group is connected through some additional transistors to a NOR style bit line array in the same method as a single transistor linked in NOR flash.

Replacing single transistors with serially linked group add more level of addressing. Due to serially linked transistors, NAND flash can address it by pages, word, and bit, whereas the NOR flash memory can address by word. This bit-level addressing best suits bit-serial applications such as hard disk emulation, which can access only one bit at a time.

To read data, the desired group is first selected in a similar way the NOR array selects. Then most of the word links are pulled up above the VT of the programmed bit when one of them is pulled up to just over the VT of an erased bit. Even though there are additional transistors, a reduction in the number of ground wires and bit lines allows a tightly packed layout with higher storage capacity per chip. Besides, the NAND flash is generally permitted to contain certain number of faults. The latest models are more compact since the manufacturers are maximizing usable storage by minimizing the size of the transistors.

NAND Writing and Erasing:

Tunnel injection and Tunnel release are used for writing and erasing in NAND flash. It is used in removable USB devices called USB flash drives. Besides, most memory cards and solid-state drives have NAND flash type.

The NAND flash structure starts from cell level to strings, then pages, blocks, planes, and a die. A string is a series of connected cells in which the source of one cell is connected to the drain of the neighboring cell. Generally, the NAND string consists of 32 to 128 NAND cells. Besides, strings are organized into multiple pages. Further, the pages are organized into blocks in which each string is connected to an individual line called a bit line.

The cells, which are in the same position in a string, are connected through the control gate by a word line or WL. In addition, the plane contains a definite number of blocks that are connected through the same bit line or BL. Moreover, the Die consists of one or more planes connected by the circuit wiring that needs to do the read, write and erase functions.

In NAND flash, the data can be read and programmed in pages typically between the size of 4KiB and 16KiB. However, it can be erased only on the entire block level, consisting of multiple pages.

How Flash Memory Read and Write:

When a page is erased, all the cells in the blocks are logically set to “1”. Any cell that has been set to “0” by programming can be reset to “1” only by erasing the entire block. New data can be fed into a page; if the page already contains any data, then the current content of the page plus the new data will be copied to a new erased page. Further, if a page is available to copy then, the data will be written to it immediately.

If no erased page is there, then an entire block should be erased before copying the data to a page in that block. The old page will be marked invalid, and it is available for erasing and reusing. To prevent early failure in the page, the controller meant for wear leveling ensure all blocks are used equally. The data will be moved to one of the least used pages. If the repeated failure occurs when erasing the block, that block is marked as bad and will not be used further. Flash memories are built with excess spare blocks; they can handle the bad blocks easily.

In V-NAND, memory cells are stacked vertically, and it uses a charge trap flash architecture. The vertical layers allow larger bit densities without requiring smaller individual cells.

Structure:

V- NAND uses a charge trap flash that stores the charge on an embedded silicon nitride film, and it is purposely made thicker to hold a large number of electrons. It warps the planar charge trap cells in a cylindrical form. In 3D NAND floating gate, the memory cells are entirely isolated from one another, but in Charge Trap, the 3D NAND, vertical groups of memory cells share the same silicon nitride materials.

Every memory cell is made up of one planar polysilicon layer containing a hole filled by multiple concentric vertical cylinders. These holes act as gate electrodes. The outer-most silicon dioxide cylinder acts as the gate dielectric, enclosing a silicon nitride that stores the charge.

The memory cells in different vertical layers do not interfere with each other. The vertical collection is electrically similar to the configured series linked group. As a result, the V-NAND Flash is double time faster than the conventional NAND.

Flash Memory Limitations:

The flash memory can read or programmed a word or a byte at a time in a random access fashion, but it can be erased only on, by blocks. Once erased, all bits in the block will be 1. Any cell within the block can be programmed in a freshly erased block. Once any cell bit has been set to 0 to change it back to 1, we need to erase the entire block.

The NOR flash offers random access, read, and programming operations, but it will not offer a random-access rewrite or erase function. But a location can, however, be rewritten as the new value “0” bits are the superset of the overwritten values.

The data structure cannot be updated completely, but it can be removed, marking them invalid.

Each cell may hold more than one bit in multi-level cells, so this technique may need to be modified.

Memory cards and USB flash drives are only block-level interfaces or flash translation layers. It helps to control write to a different cell each time to control the wear level of the device. In addition, it prevents incremental writing within a block.

Memory wear- It has a finite number of program erase cycles

A flash memory without wear leveling will not last for long. If there is no wear leveling, every write to a previously written block will be first read, erased, modified, and rewritten in the same location, and it will consume more time and wear out quickly. Besides, the other locations will not be used at all in the entire life cycle.

The X-ray can erase the program bits.

The memories that have to go through a large number of programming cycles cannot be a flash memory unit.

NOR Memories Management:

The reading method may cause nearby cells in the same memory block to change over time in NAND memory. It is called read disturb. If reading continuously from one particular cell, that will not fail but the surrounding cells on a subsequent read. The flash controller will count the total number of reads to a block since the last erase to overcome the read disturb issue. When the count exceeds the target limit, the block is copied over a new block, erased, and released the block pool. The new after-erase is fine as the original block. If the flash controller is not function and intervenes in time, the Read Disturb Error will occur with some data loss if the errors are many.

The NOR memory has an external address bus for Reading and Programming. The Reading and writing are done on page-wise, and erasing and unlocking are done on block-wise. But in NOR, Reading and writing is at random access, and unlocking and erasing are done block-wise.

The reading process in NOR- Flash is similar to reading from RAM by providing the address and data bus mapped correctly. With this feature, the processors can use the NOR memory as execute in place memory. The programs stored in NOR flash can be executed directly from the NOR without the need of copying from the RAM first. The NOR flash can be programmed in a random-access manner similar in Reading. The block sizes are 64, 128, or 256 KiB. The latest NOR chips come with Bad Block Management. It is controlled by the device driver controlling the memory chips that handle the blocks that wear out. A typical NOR Flash does not need an error correction code, and they have very slow writing speed when compared to NAND chips.

NAND Flash Memories:

The ECC will correct a one-bit error in every 2048 bits using 22 bits of ECC. Even if ECC cannot correct the error during the read, it can detect and point out the error. For example, during Erasing, the device can detect the blocks that fail to erase and mark them as bad. Then the data can be written to the different blocks, and the bad block map will be updated, including the present bad block. Generally, NAND flashes are shipped from the manufacturer with some bad blocks.

Moreover, they are marked as bad blocks according to the bad block marking strategy. NAND is best suited for the systems which require high volume data storage. It offers higher density with greater capacity at a lesser cost. It is swift to erase, sequential write, and read.

NAND standardization:

ONFI is a consortium of technology companies developed to standardize the low-level interface for NAND flash chips. Its objective is to make it easier to switch between NAND chips from various producers to develop NAND products at a lower cost. In addition, it ensures interoperability between the NAND devices from various vendors.

It specifies the following:

Standard  pinout for NAND devices

Standard set of commands for reading, writing, and erasing

A fault-free mechanism for self-identification similar to SPD (serial presence detection)

Difference between NOR and NAND:

  • The connection to the individual memory cells varies.
  • The interface for reading and writing the respective memories are different.
  • The NAND allows only page access, whereas the NOR allows random access.
  • Nor Cells are larger than the NAND cells since they need separate metal contact for each cell.
  • NOR flash cells are connected in parallel, and NAND flash cells are connected in series.
  • The series connection occupies less space than the parallel one. Therefore NAND flash is cheaper than the NOR.
  • With the series connection and removal of word-line contacts, a large grid of NAND flash cells occupy lesser space when neither compared with NOR cells.
  • The cost of the NAND cell can be further reduced by removing the external address and data bus circuits. Instead, the external device can communicate with the cells through sequentially accessed commands and data registers.
  • NAND flash can replace the mechanical hard disk, whereas NOR flash can replace the ROMs.
  • Write endurance of NOR flash is typically greater than NAND flash.
  • The 3D NAND performance may degrade if more layers are added.

Flash File System:

It is a file system designed to store the files on flash memory-based storage devices and gadgets. Though it is similar to the file system in general, it is optimized for the nature and characteristics of the flash memory. It can avoid write amplification. Write amplification is an undesired phenomenon associated with it.

Write Amplification:

In flash memory, it must be erased before it should be rewritten. The erase operation is more delicate and complicated than the write operation. While writing or rewriting, it needs to do moving user data and Metadata more than once. The rewriting process requires an already used portion of Flash to be read and updated, and written to a new location together with the initially erased location if it was used at some point of time.

Due to the nature of its working, a much larger portion of Flash must be erased and rewritten than the actually required amount of data. As a result, it multiplies and increases the number of write requests tremendously. Therefore it shortens the reliable operation time. Besides, it increases the bandwidth of the flash memory, which directly affects the random write performance. On the other hand, reads do not require an erase of the memory. Therefore, they will not be affected by write amplification, but the read disturbs error may happen in that block that is going to read and rewrite.

Error Corrections:

We know the Data is written on memory at the page level, which is made up of multiple cells. But the memory can only be erased in larger units called blocks that are made up of multiple pages. If the data in some of the pages of a block are no longer needed, then the pages with good data in that block are read and rewritten into another previously erased vacant block. The free pages with the stale data are available now for new data writing.

This process is named as garbage collection. It is best used with a controller to do Wear Leveling and Error Correction that is specially designed for flash file systems to overcome these issues. The basic concept is that when the flash storage is updated, the file system of the memory will write a new copy of the changed data to a new block and re-map the file pointer, then erase the old block later when it has time.

The memory cards, SSDs, and USB flash drives have inbuilt controllers to perform the error corrections and wear leveling.

The file system is optimized to handle erasing the blocks. As a result, flash memories devices impose no seek latency. In addition, flash file systems are designed to spread out writes evenly to avoid wear leveling.

Flash Memory Capacity:

More chips are often dying stacked to achieve higher capacities in most of the devices. The flash memory is made of interrogated circuits and techniques; increasing the capacity of flash chips is always following Moore’s law. However, in the latest devices, after introducing 3 D NAND scaling, Moore’s law is no longer applicable since the tiny transistors are no longer used. Typically the size of the memory capacity is expressed in multiple powers of 2s, Such as 4 GB, 512MB, etc. The capacity available for file usage is slightly lesser than the size expressed. It is due to the space occupied by the file system Metadata.

The memory chips are sized in strict binary multiples. It is considerably larger than the labeled capacity. But some space is occupied and allotted for distribution of Write Wear Leveling, Sparing, Error Correction codes, metadata, and internal firmware.

Transfer Rates:

Flash memory is much faster at Reading than at writing. Further, its performance depends on the storage controller. The work of the storage controller is critical when the storage is partially full. The absence of any appropriate controller can result in degraded speeds.

Applications of Flash Memory:

Serial Flash:

It is a tiny low powered flash memory that can only provide serial access to the data instead of addressing the individual bytes. It reads or writes a large closest group of bytes in the address space serially. The serial peripheral interface bus protocol is used to access the data. When serial Flash is included into an embedded system, it requires only very few wires on the printed circuit board than the parallel flash memory. It transmits and receives Data only one bit at a time. It allows a reduction in board space, power consumption, and total system cost.

Elimination of bond pads permits more compact and elegant ICs on smaller die. It, in turn, helps increase the number of dies on a wafer. And thereby minimize the cost per Die. Furthermore, it eliminates the number of external pins used and thereby reduces the packaging and assembly expense. As a result, a serial flash drive device can occupy lesser space than a parallel-connected flash device.

Less number of pins occupies a lesser PCB area and minimizes the overall size. Further lesser number of pins simplifies the PCB routing.

There are two types of serial peripheral interface (SPI) flash types. The first type is of all small pages that have only one or more internal SRAM page buffers allowing a complete page to read the buffer and partially modified and then write back. The second one has larger sectors. These types do not have an internal SRAM buffer. Therefore complete page must be read out and modified before being written back, making it slow to manage. The second type is cheaper. Unfortunately, these two types do not have the same pinout; they are incompatible and not exchangeable.

Firmware Storage:

Modern Central Processing Units are of higher speed, but the parallel flash devices are often much slower than the memory bus of the motherboard they are connected to. The modern DDR2 SDRAM offers access times much below than 20 nanoseconds. So it is more advantageous to allow the shadow code stored in Flash into RAM. For that, the shadow code is copied from Flash into RAM before execution so that it may access it at full speed. The device’s firmware is stored in the serial flash device and then copied to the RAM when the device is powered up. Using a serial flash device is better than using the onboard chip flash removes the need for significant process compromise.

Flash Memory as Hard Drive Replacement:

One of the most recent developments in flash memory applications is that it is treated as a replacement for hard disks. When compared, it does not have the mechanical limitations and latencies of the hard drive. Therefore the Solid-state drive is better when considering the speed, noise, power consumption, and reliability. Now they are used as a substitute for the hard drives in high-performance desktops.

The cost per gigabyte of flash memory is significantly higher when compared to the hard disks. The deleted files on SSDs can remain for a long time before being overwritten by the fresh data. The software or erasing techniques have no effect on SSDs. Using the TRIM command, the solid-state drives can mark the logical block addresses of the deleted files as unused to enable garbage collection. Even data recovery software cannot restore the files deleted in such a way.

The Archival or Long Term Storage:

The floating gate transistors in the storage device hold the charges that represent the data. However, this charge gradually leaks over time. That will lead to more logical errors that are known as bit rot or bit fading. It is not clear how long the Data on the flash memory will stay secured under archival conditions. The retention span varies with the model and type of storage. When connected to the power and staying idle, the charge of the transistors that hold the Data is routinely refreshed by the storage firmware. Therefore the ability to retain data will be affected by the following factors such as data redundancy and error correction algorithms.

Scalability:

Due to its simple design and structure and high demand, NAND flash memory is the most belligerently scaled technology. Due to high demand and competition on the higher capacity flash drives, they are shrinking the floating gate MOSFET design rule. As a result, the MOSFET feature size of the cells reaches a 15 to 16nm limit, and the density increases to 3 bits per cell combined with the vertical stacking of NAND memory planes.


read more
AppsGadgetsTechnology News

How to View the Clipboard History on Android & Windows

How to View the Clipboard History on Android & Windows

The Clipboard is an area in mobile where you can find the copied data before pasting it into the target location. However, it can store one element only. Therefore, your Windows replaces contents while copying something every time for which you are unable to retrieve the data you have copied before. For instance, if you forgot to paste any text after copying and then if you copy another text, you will lose the earlier one forever. Let us know How to View the Clipboard History on Android & Windows.

What is a Clipboard?

Clipboard lets you copy and paste various data types. Hence, the information may be text, images, binary stream data, etc.

What is Clipboard History?

Clipboard History is an app enabling you to copy & paste anywhere, edit, manage, remove clips easily. Besides, it is possible to access items very fast. A few Android mobiles enable you to access it, while others only showcase the earlier copied content.

It is a set of all data you have copied to the application, such as different format texts— plain text, RTF, HTML, images, file lists, etc. If you are willing to access it, you need to use specific software. We advise you to use Clipdiary. The software can remember copied items like plain text and text with formatting (RTF), HTML, pictures, and files. However, if you use a Samsung phone, you cannot access the file without rooting the mobile. Take the help of a clipboard manager app to access it on the android device.

What Gets Stored in Clipboard?

It was available first in Windows 10’s October 2018 Update. Recently, it has been compatible with text, HTML, and images coming in less than 4 MB size. But, unfortunately, you can’t store oversized content there.

It can save up to a maximum of 25 entries. In addition, the app will reset each time you reboot the device till you pin an item to it.

How to View the Clipboard History on Android Mobile:

You can view the app in a few ways, even on android devices that don’t come with the default function. The way you view it on your android phone relies on the type of model you use. Despite sharing similar OS, android mobiles differ in multiple features, where a keyboard is one of them.

In most cases, smartphones come with built-in clipboards. But a few devices allow you to view the history.

You should follow the way to view the app on the devices.

  • First, your task is to navigate to Messages, Notes, Email, or any place you are willing to paste a message from it.
  • You should now press the display and hold it to access several options.
  • After that, you should choose the option “Clipboard.”
  • Finally, you have to turn it off to see the complete history.

Unfortunately, most android mobiles don’t come with the feature. Rather than that, these enable you to paste the most recent item that you have copied. You can view the app and manage it, but it needs installing third-party apps.

Best Ways to Check and Recover Clipboard History on Android Using Keyboard Apps:

Most android mobiles have default keyboards, but many people are there who want to install a third-party keyboard app. The reason is that keyboard apps provide exciting features like clipboard managers.

Gboard:

It is one of the most famous keyboard apps. Gboard is the official keyboard of Google and is simple to use. Over one billion people have downloaded the Gboard app from the play store, and multiple new devices have Gboard pre-installed.

We have given here the process to use it to set up and view on the android device.

  • You should ensure that you have completely installed the software and set it as the default keyboard. You should download it from the Play Store if you have not installed the software.
  • Tap on the clipboard icon above the letters while writing in Gboard.
  • Hit the option “Turn on Clipboard.”
  • You should copy the items you are willing to save in the app.
  • After that, tap on the clipboard icon again, and view the copied items below the option “Recent.”
  • The software allows you to save all the items you have copied forever by pinning. Hence, you should tap on the clip and hold it for a while. Now, you can find the software available under “Pinned.”
  • You need to remember that the feature will not work if you make the feature disabled. As soon as you disable it, Gboard will not save items that you have copied, and you will not find any way to retrieve them.

SwiftKey:

It is a fantastic keyboard app with clipboard options. The process of accessing the app and viewing the history is as follows:

  • Use the app first. Whether the app is not available, you should download it from the Play Store.
  • Next, your task is to copy the items you are willing to save to the app.
  • Hit the clipboard icon, 3rd one from the left.
  • The items you have copied are available, with the most recent one at the top. It allows you to pin specific items and stop them from expiring. Tap the pin on the right part of the items you are willing to save.

Other Apps:

Multiple keyboard apps have specific features. These may have different features, but in most cases, they offer good options that provide more control over the items in most cases. We advise you to go with Chrooma and Ai.type. However, multiple apps are available, giving excellent features.

How to View the Clipboard History on Android & WindowsUsing Dedicated Clipboard Apps

Use this type of app to view the app. It is a perfect choice for those who copy & paste different content and want to use a solution to organize it. A few apps provide more features than famous keyboard apps like Gboard. These let you arrange copied items into categories, turn into QR codes, and translate them into different languages.

Clipper:

It is a famous app available on the Play Store. The app provides multiple features making the model easier to control.

The process of viewing the app in Clipper is:-

  • You should make sure that the software is available on your mobile. If you have not installed it previously, you should download the software from the Play Store.
  • After that, your job is to hit the option “Clipboard.”
  • Now, the copied items are available in front of the display. You will find the most recent article available at the top of the list.
  • The app lets you save automatically everything you have copied and add your clippings manually. Tap the plus sign available at the bottom-right and then write the clipping.
  • It is possible to access the app through the status bar and save time if you want to view it.
  • The software allows you to pin items that you use often and helps to sort these into different categories.

Clipboard Manager:

It can make the app managing a breeze. More than one million people have downloaded it from the Play Store.

Use the software to view the app by following these steps—

  • You need to make sure that the software is available on the android device. If the software is not available on your mobile, you should download it from the Play Store.
  • Next, your job is to open the application.
  • Then, you can find the copied items available below the “Clipboard” section, where the most recent articles are available at the top.
  • When you install the software, it will sync with the android device. If you are going to copy a text on the mobile, you will automatically find this in the app. The app lets you adjust the app manually, indicating that it helps to add text within the app.

It is possible to add favorite clipboards, create many categories, use the Search option to navigate quickly, merge notes, etc. You can access the app from the status bar directly. Besides, you may use the “Smart actions” feature by going there, making it separate from the rest. It allows you to include new notes, run a Google or Wikipedia search, or translate various content.

Other Apps:

Clip Stack and Clipboard Actions & Notes are examples of other apps enabling you to manage. These let you use them freely and don’t contain any ads. The Standalone apps are ideal for people willing not to change the default keyboard but often use copy & paste features.

Tips:

We have given here a few tips to help to use its functions safely.

  • Ensure that you should not keep sensitive details in the app. Try not to save passwords, SSNs, PINs, or credit card details, as these may go to the wrong hands. If you use any third-party app, the probability is higher. You should download reputable apps only with positive reviews.
  • While providing app permissions, you should know that some apps can access it without you knowing.
  • Whether you are using an app that you may access from the status bar directly, ensure its showing details.

How to Check and Recover Clipboard History on Android:

If you copy something in your email before copying another text, you can check and recover content from the app. The two ways let you know how to retrieve any text copied previously without losing them.

  1. Using Google keyboard (Gboard):

With the help of Google keyboard, you can view and recover the history on your mobile. In addition, you can find a clipboard manager in multiple keyboard apps enabling you to access previously-copied texts.

Most devices have installed the app already, and it has been working with the feature for two years. So these are the steps to check and recover it on the mobile device.

Step 1: Press the clipboard icon beside the Google logo while typing with Gboard.

It will launch the feature of Gboard.

Step 2: If you are willing to recover any specific text from the app, you only need to click on it to paste it into the text box. Texts will not remain in the Gboard after an hour by default.

Pin the copied text manually if you are willing to stay here. Hence, your task is to click on the clip and hold it. After that, choose the pin icon. You can now see the clip moved to the Pinned section of the clipboard manager.

Ensure that you have enabled the feature to get the best from the app. For example, while launching the feature, the app will say ‘Gboard clipboard is off,’ and you should toggle on it with the help of the switch.

If you find the feature disabled, Gboard can’t back up the copied texts, and you cannot recover them. Whether you cannot find or use the feature on the app, assure that you have updated the app. To update the app, go to the google play store on the device.

  1. Use dedicated Clipboard Apps:

Using third-party apps is another way to retrieve the content on the device. Compared to Gboard, the apps can offer advanced and quick copying and pasting features. If you need to copy and paste plenty of texts, you will find a few of the apps helpful.

These apps can encode the app content into QR codes and share the clips with others. Multiple apps are available on the Google Play Store.

How to Clear the Android Clipboard:

Are you using the Clipper Clipboard Manager? If yes, you may see a Delete option while choosing the three dots to the right of a selection. Use the option to clear out the items.

  • Turn on the Gboard keyboard and use it. If you don’t find the app available on your mobile, you may install it from Google Play.
  • Navigate to the messaging app and open it on the android phone. After that, hit the + symbol to the left of the text field.
  • You should now choose the keyboard icon. As soon as the keyboard appears, your task is to select the > symbol at the top. Finally, hit the clipboard icon for opening the app on your android.
  • Whether you have not used it before on the android device, a notification appears on your mobile to enable the Gboard.

If you are willing to enable the Gboard, you should click on the option Turn on the Clipboard.

  • You can copy anything and check it on the Google Android keyboard again. You can find a list of current items you have added.
  • Hit the edit icon to delete any of the items from the Clipboard.
  • Choose every item that you are willing to delete. After that, your task is to hit the trash icon to delete.

The clipboard manager with the default keyboard app relies on the android mobile and brand. For instance, you will find a tool that depends mainly on your Android phone Samsung Keyboard. The keyboard is the initial way to access the software without an app.

Best Ways to Check and Recover Clipboard History in Windows 11:

clipboard Windows
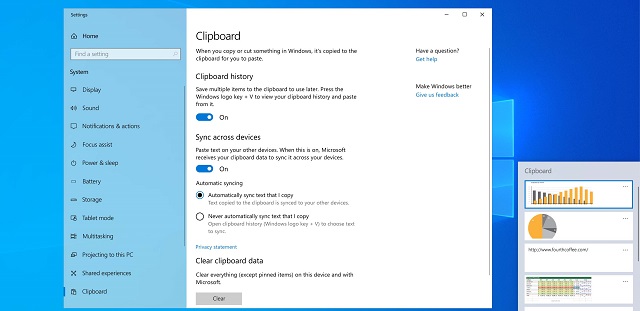
How to Enable the Clipboard App:

Two ways are possible to enable the app— the Settings app or emoji panel.

Enable from Settings:

If you are willing to enable it through the Settings app, you should follow these steps.

  • Your first job is to navigate to the Settings and open it.
  • Tap on the System.
  • Tap the app’s page available on the right side.
  • Now, your task is to open the settings of the software.
  • After that, enable the app toggle switch.
  • As soon as you finish the steps, you may start copying and pasting, with an extra interface letting you adjust the contents you copied.

Enable from Emoji Panel:

If you want to enable it through the emoji panel, you must follow the steps.

  • Your first job is to invoke the Windows key + V keyboard shortcut.
  • Hit the Turn on button.
  • As it is a part of the emoji panel, you may access the feature with the help of the Windows key +; or Windows key + . keyboard shortcuts. Thus, you can open the “Clipboard” tab.

How to Sync:

While enabling the app, it is possible to configure the feature to upload and sync the contents you have copied across devices connected to the Microsoft account.

The process of syncing to the cloud and across devices is as follows:

  • First, go to the Settings and open it.
  • Then, tap on the System.
  • Next, tap the app page available on the right side.
  • After that, you should enable the Sync across the devices toggle switch.
  • Then, choose the sync option to use with it.

Automatically sync text that I copy — It will sync to the cloud and across the devices connected to the same Microsoft account.

Never automatically sync text that I copy — Hence, your job is to choose the contents you are willing to upload to the cloud to make these available across devices.

As soon as you finish the steps, the items stored will sync across the devices. In addition, it enables you to paste text and images you previously copied on other devices.

How to Use:

  • It can work similarly to the classic experience. The interface allows you to review and adjust the stored content, the only difference from the classic experience. While selecting the sync option, you can paste text and images uploaded across devices to the app.
  • As soon as you enable the feature, continue to use both the Ctrl + C & Ctrl + V
  • keyboard shortcut to copy and paste, respectively. With the help of the context menu or the command bar in File Explorer, it is possible to do the same.
  • The Windows key + V keyboard shortcut can open the emoji panel to see the list of items copied from other apps like Microsoft Edge, Word, OneNote, Notepad, etc.

Copy and Paste:

If you are willing to copy & paste content with the feature, follow the steps.

  • You should go to an app and open it.
  • Choose the text or image. You should know that the app allows you to copy images from specific apps like the Snipping Tool. Unfortunately, it isn’t possible to copy image files to the app. However, you can copy & paste files usually, though these don’t appear in the interface.
  • Tap on the selection and select the Copy (or Cut) option.
  • Switch to the application for pasting the content.
  • After that, your job is to invoke the Windows key + V keyboard shortcut.
  • If you are willing to paste the content, choose the item to paste it.
  • Whether you are willing to paste as text without formatting from the source, you should tap the See more (three-dotted) menu. After that, your job is to tap on the Paste as Text option.
  • As soon as you finish the steps, you can see the text or image appearing in the app, relying on the output selection.

Manage Items:

If you are willing to manage items in history, use the steps.

  • Your first task is to invoke the Windows key + V keyboard shortcut.
  • Then, hit the Pin button to quickly access the content you frequently use.
  • Next, tap the See more (three-dotted) menu button. Then, your job is to tap the Delete option for removing the items from the history.
  • As soon as you finish the steps, you will not get the text or image available in the history.

How to Clear Clipboard:

If you are willing to delete all items in the history, use the steps.

  • Navigate to the Settings and open it.
  • After that, your job is to tap on the System.
  • Next, you need to tap the app’s page on the right side.
  • You should now open the app’s settings by going there.
  • Hit the Clear button for the “Clear clipboard data” setting.
  • As soon as you finish the steps, you will find the history cleared on the mobile, except pinned items.

How to disable the app:

First, perform the four steps of the previous section.

Now, you have to disable the Clipboard history toggle switch.

As soon as you finish the steps, you can copy and paste them as before. But you will not get any access to the history. Besides, the contents are not going to sync across devices.

How to Check and Recover Clipboard History on Windows 10:

How to Enable:

  • Your first job is to hit the “Start” button. After that, you have to tap on the “Gear” icon available on the left side of the Start menu. Thus, you can open the “Windows Settings” menu. If necessary, then tap on the Windows+i to get there.
  • While in the Windows Settings, you should tap on “System.”
  • As soon as you are on the Settings sidebar, tap on the “Clipboard.” You should find the “Clipboard history” section in the app settings. Then, your task is to toggle the switch to “On.”
  • Now, you have enabled it. Turn off Settings and use the feature in any app.

How to View the app:

  • As soon as you have enabled it, a list of items will appear in front of the display you have copied recently while using any app.
  • If you are willing to view it on Windows 10, your first job is to tap Windows+V.
  • As soon as you tap there, you can see a small window popping up. You will find the most recent copied items available at the top of the list.
  • Tap on any item in the list to paste it into an open app.
  • If you are willing to remove items from there, you should tap on the ellipses (three dots) beside the item that you want to delete. Then, choose the option “Delete” from the small menu popping up.
  • Whether you are willing to remove all items from there, you should tap on the “Clear All” In the ellipses menu.
  • However, you can pin an item on the list. Thus, you can see the option available on the list although you restart the PC or tap on the option “Clear All.” Then, you have to tap on the three-dot menu and choose “Pin.” It is possible to unpin the item later by choosing “Unpin” from the ellipses menu.

You will find a different look at the interface on older versions of Windows. Follow the steps for the devices running a build before 1909.

As soon as you use the Windows+V keyboard shortcut, you can see a small floating window. It is available near the app you use, or all windows remain closed or reduced in the lower-right corner of the display. Items you have last copied will appear at the top of the list.

If you keep the window opened, tap on any item in the list to paste it into an open document. Whether you are willing to remove items from there, you should tap on the small “X” beside an item on the list. It is possible to clear the whole list. But to do so, you need to tap on the option “Clear All” in the window’s upper-right corner.

Tap on the small pushpin icon beside the item to pin an item to the list. The item is available on the list even if you restart the PC or tap on the option “Clear All.”

How to Disable the App:

If you are willing to disable it in Windows 10, you should move to Settings. After that, go to the System and the app. Next, you need to look for the option “Clipboard history,” After that, toggle the switch to “Off.”

After disabling the option, a small window will appear when you tap Windows+V. It lets you know that Windows 10 cannot display your app as the feature is not enabled.

Use the Clipboard App on a Mac:

Mac does not enable you to use it like windows. The Operating System allows you to paste only the most recently cut or copied item.

You may install a third-party tool. Multiple tools are available to select, such as CopyClip, or PasteBot.

Conclusion:

The article lets you know how to view the app on Android devices. Besides, we expect you to like our recommended keyboard and clipboard apps.

Frequently Asked Questions:

  • How do you view the app in Chrome?

As soon as you are ready to paste or take a peek at the application, you should tap on the Search/Launcher key+v. After tapping there, you can see the floating clipboard manager.

  • Where is the app stored?

Navigate to Settings, System, and the app, respectively, and then your task is to enable the switch for the app. Tap on the Win key+V to see it. Now, you can see all the copied items available in recent history.

  • Where is the app on Gmail?

You can find this on the keyboard while the cursor is available on the subject line for Gmail. But it isn’t available on the keyboard if the cursor is available in the body of the email.


read more
GadgetsTechnology News

Best Bluetooth Transmitter in 2022

Best Bluetooth Transmitter in 2022

In recent times, Bluetooth technology and wireless devices have had the most uses. Therefore, many people prefer to stream all the virtual content with wireless headphones or TV.  You can use them after plugging them into your device. Then, with the help of a bluetooth transmitter, it is possible to stream content quicker than before. But which model should you use? Before knowing about the five best BlueTooth transmitters, you should know what it is.

What is Bluetooth Technology?

It is a low-power wireless communication standard of short-range. The technology uses radio transmission to connect electronic devices. People use it for mobile accessories like headsets, speakers, telepresence tools, video equipment, and different transmitters.

What is a Bluetooth transmitter?

It is a type of adapter used to upgrade old technology. A Bluetooth transmitter is an electronic gadget that communicates and transfers data between two connected devices in 2.45 GHz. It first decodes the source file into a particular transferable format and then sends it using the radio waves, namely Bluetooth Signals. Besides, it helps to connect newer, Bluetooth-enabled devices. If you have an old item and you are not willing to replace it, a transmitter is an ideal option in such a case.

These seem like small USB dongles, loaded with intelligent Bluetooth protocols completely. The devices send out strong signals making them compatible with other electronics. These come with a radio frequency of more than 2.4 GHz.

The devices have a helpful USB cable using which it is possible to connect your device through a plug-in receptacle or a USB port.

How much can you expect to invest in a Bluetooth Transmitter for a TV?

You can purchase a decent model for less than $50. However, whether you want to have improved better battery life and capability to connect many devices at a time, you need to invest at a price tag over $50.

What to know before buying a Bluetooth FM transmitter?

These are the things that you should know before purchasing the best device.

Is it for devices in your home?

If you want to buy for your home, you don’t have to use FM radio signals. However, an FM signal is essential to use a transmitter in a vehicle.

What Bluetooth version do you want?

Ensure that this type of adapter supports the Bluetooth version you want. The new versions come with more stable connections and quicker speeds. If you wish to have an affordable option, look for an older, cheaper model that supports previous versions of Bluetooth.

Which connection methods do you need?

While connecting the device, you may want to use different ports. For instance, radio stereo systems have 3.5-millimeter audio ports useful for compatible cords. On the other hand, FM transmitters suitable for vehicles have to plug into automobile auxiliary power outlets to function.

5 Best Bluetooth Transmitters in  2022

  1. Avantree Oasis Plus Certified aptX HD Bluetooth 5.0 Transmitter Receiver

Avantree Oasis Plus
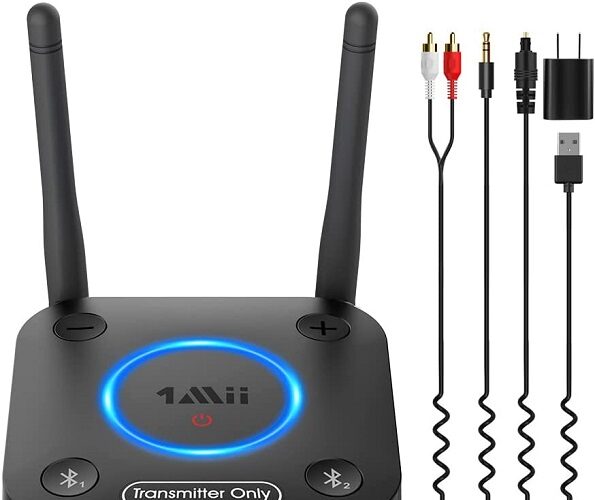
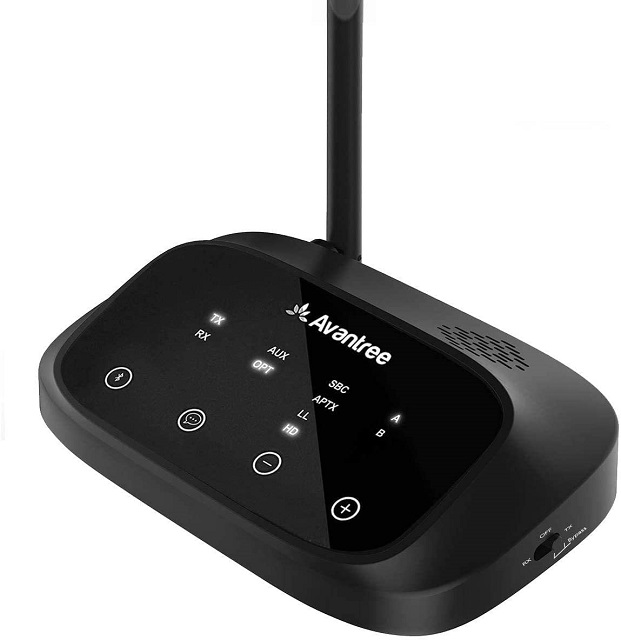
Description: The product is aptX Low Latency certified. You can get the ultimate “no lip-sync delay” experience while using the device with a speaker or headphone supporting aptX Low Latency or FastStream. Thus, it makes you sure that you will get perfectly synced visual audio for every content you will watch on display.

It comes with a “Pass-Through” or “Bypass” feature that guarantees simultaneous audio output through the headphones connected to the device and external TV speakers like Sound Bar or Stereo AVR. It enables other members to hear the TV though you use headphones.

Features:

“dual-link” function: It comes with a “dual-link” function enabling you to connect two Bluetooth headphones/speakers at a time. The feature allows you to play audio through both devices simultaneously. So now, you can enjoy any Netflix content with your friends without disturbing other people in your household.

Broad Compatibility: The TX mode is suitable with TVs with an audio output port. Besides, it allows you to pair Bluetooth-enabled devices with headphones/speakers. The Receiver (RX) mode will enable you to get wireless audio signals from iPhone, iPad, or Android through Bluetooth and stream audio.

Long Range: The model has the highest Bluetooth range of the Class 1 model of version 5.0. As a result, it can offer stable & reliable connectivity up to 164 ft.

Pros:

  • Stable connectivity
  • Wide Compatibility
  • “dual-link” function
  • “Pass-Through” or “Bypass” feature

Cons:

  • Sound delay
  1. 1Mii Bluetooth 5.0 Transmitter Receiver

1Mii Bluetooth 5.0 Transmitter Receiver
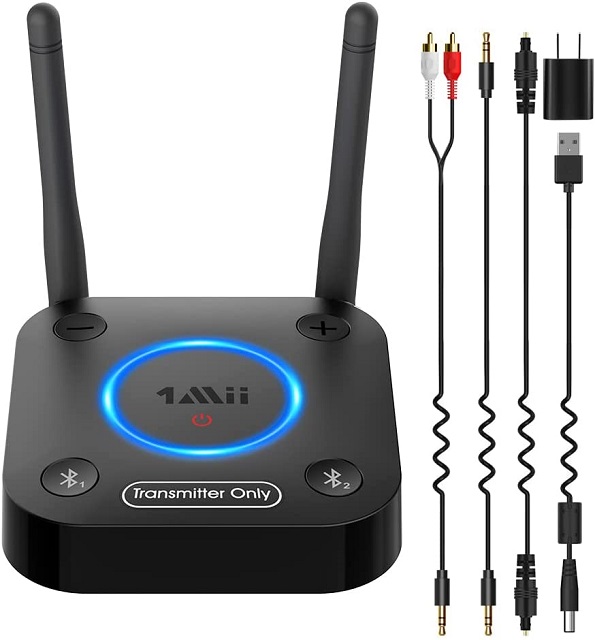
Description: The product comes with the recent Bluetooth 5.0 (CSR8675) version. Besides, it is compatible with Qualcomm aptX HD, aptX Low Latency, aptX, and AAC decoding. If you find the device supporting both codecs, you can switch them to alternate between HD and low latency.

It features a default ESS SABRE DAC recognized widely by audiophiles as a gold standard for audio performance. This standard can support the Qualcomm chip enabling you to enjoy a superior resolution, and it can offer an excellent signal-to-noise ratio 121dB. In addition, there presents a true Hi-Fi 384kHz/32-bit upsampling Audiophile Digital to Analogue Converter DAC. Finally, it enables you to use a 1Mii HiFi Adapter to decode and play audio files.

Features:

Long Range: The product has dual antennas and uses Class 1 Bluetooth technology. It can achieve up to 265ft line-of-sight in the open air and 80-110ft indoors. Wi-Fi routers, Wireless TV adapters, physical obstructions like walls, metal obstacles, etc., can affect operation range. However, the operation range relies on the receiver also.

No Lip Sync Delay: You won’t face any audio delay as it has AptX Low Latency technology. The long-range adapter is compatible with dual-link simultaneously, and the device supports two headphones or speakers.

Each device features ultra-fast audio streaming. However, if you are willing to experience low latency ( <40ms delay), the receiver needs to be compatible with AptX Low Latency, else experience a 70-220ms delay.

Simple to operate: You can use the model with ease. First, your task is to plug the audio cable and hit the Power button to start.

The adapter can identify the BT device quickly. It supports 99% of TVs, BT headphones or speakers, a Home stereo system, Optical, AUX, RCA Audio outputs/inputs.

Pros:

  • Easy to operate
  • Supports most televisions
  • No sync delay

Cons:

  • Hard to deal
  1. Anker Soundsync A3341

Anker Soundsync A3341
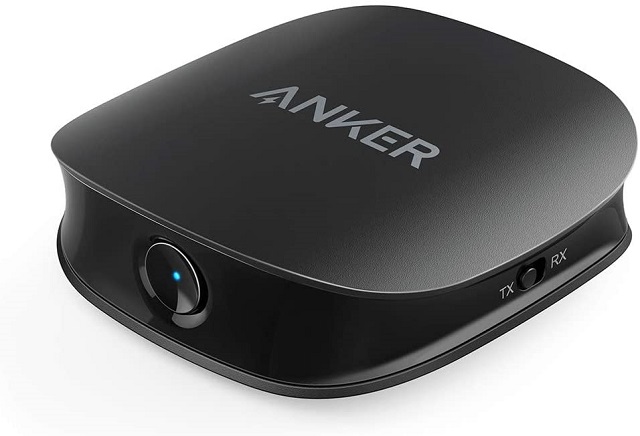
Description: The product comes with a 2-in-1 Design that means a transmitter and receiver in one body. As a result, the model can support Bluetooth functions.

Version 5 offers transmission speeds two times quicker than Bluetooth 4.2. In addition, you can get a super stable connection over a distance of 33 ft (10 m).

Features:

No lag: The aptX Low-Latency helps decrease the delay between the audio and picture to undetectable levels to ensure that you are not experiencing any distracting lag.

Enjoyable: The model lets you connect two headsets to the TV in TX mode. Besides, it helps to pair two devices to a home stereo system for streaming music in receiver mode.

Accessories: It includes Anker sound sync A3341, Micro USB cable, aux cable, RCA cable, optical cable, 18-month warranty, and friendly customer service.

Pros:

  • 18-month warranty
  • Micro USB cable is available
  • Great customer service
  • No lag

Cons:

  • Short USB charging cord
  1. TROND V5.0 Bluetooth Transmitter Receiver

TROND V5.0 Bluetooth Transmitter Receiver
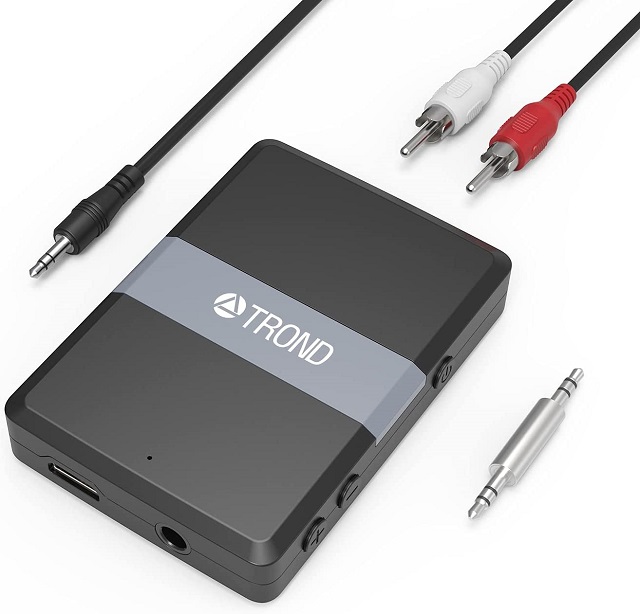
Description: Along with a premium CSR8670 chipset, the model is also compatible with the latest Bluetooth V5.0. Besides, it features aptX and aptX Low Latency applicable to both the TX and RX modes. The aptX enables you to enjoy CD-quality sound wirelessly over BT connections with TV, phones, tablets, and other aptX-source devices. Besides, the aptX Low Latency allows you to watch a video and hear audio wirelessly at a time in a synchronized fashion. Moreover, you will not experience any audio delay in this case.

Plug the device into the non-Bluetooth audio sources like TV, iPod, MP3, or Kindle e-Book reader. Thus, it allows you to listen to top-quality songs wirelessly or enjoy night shows without irritating your family members. Moreover, you can use the device while charging. Besides, it comes with a default battery, compatible with the BT adapter, can last 9-10 hours per full charge.

Features:

Volume control: The adapter can upgrade the old wired headphones like Bose QC25/QC15 or speakers into wireless using aptX Low Latency. It has volume/track buttons used to play or pause music, turn volume up/down, and choose track forward/backward. However, you won’t find any hands-free calling feature without a microphone. Moreover, it is impossible to power up while starting the car ignition automatically.

Compact design: Coming in a round shape body, it has merely 0.61oz weight. The product supports most BT headphones, and you can store them at home with ease. Besides, you can carry while traveling to any location or taking a flight to enjoy music. However, you can use the RX-mode only in the car.

Compatibility: You should see if any AUDIO OUT socket is available in the TV’s back panel. You cannot use the BT-DUO S while inserting into any AUDIO IN/COMPONENT IN sockets. Whether you find your TV with one digital optical port for audio out, you can use another model.

Accessories: It includes a 3.5mm Bluetooth V5.0 Transceiver, 3.5mm male aluminum audio adapter, 3.5mm male audio cable, 3.5mm female to RCA male audio cable, USB to micro USB charging cable, user manual in English, etc. The audio cable is 50cm extra-long.

Pros:

  • 50cm extra-long audio cable
  • Compact design
  • Great aptX Low Latency

Cons:

  • Unable to hold pairing with AirPods
  1. ZIIDOO Bluetooth 5.0 Transmitter and Receiver

ZIIDOO
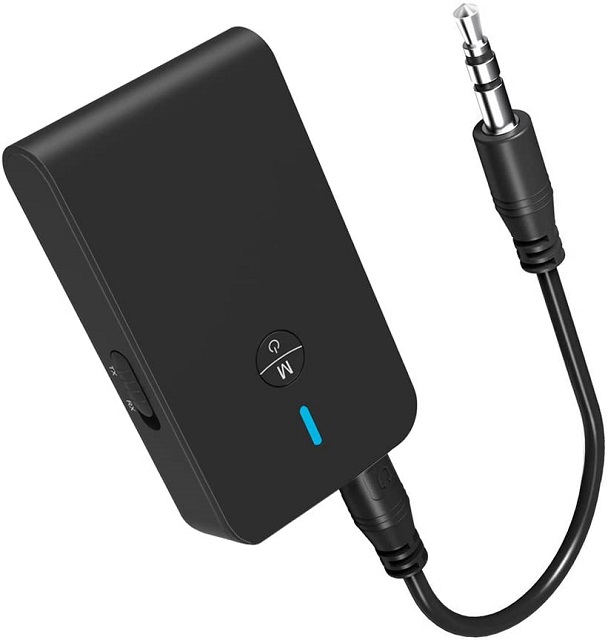
Description: The product allows you to relax on your couch and watch TV with headphones, and it will not disturb any person staying in the room. The model enables you to stream music from phone or tablet to speakers easily.

Features:

Low Delay: It offers low latency while allowing you to enjoy high-fidelity stereo sound. Besides, it can share content without making any delays in TX mode. Therefore, you may need a low latency Bluetooth receiver.

Multi-function: There presents a portable adapter that you can use as both transmitter or receiver together with hands-free function.

Bluetooth: While the device is in TX mode, you can convert a computer, TV, CD player, iPod, MP3 / MP4 into a Bluetooth transmitter. On the other hand, the receiver mode is suitable for sound systems that transmit songs in the car or at home.

Easy to port: It has a BT adapter of compact design. The adapter comes in a small size, and it weighs light.

Enjoyable: You can see late-night TV shows without disturbing anyone in your house.

Pros:

  • Simple to port
  • Compact BT adapter
  • Multi-functional
  • Hands-free function

Cons:

  • High audio latency while using Bluetooth headphones

Buying guide of the Best Bluetooth Transmitter for TV:

The tool enables you to transmit audio from one device to another. It helps to add Bluetooth to those devices where the feature is unavailable. An old smart TV is an example of such a device without Bluetooth. It uses a wire to connect itself to the source device and transmit audio wirelessly to receivers like wireless headphones.

Transmission Range:

Two kinds of classes are available for the transmission range.

Class 1: It can offer approximately 100 meters to 300 feet of audio.

Class 2: It delivers an audio transmission ranging up to 10 meters, i.e., 33 feet.

You can get a good transmission range from these devices if no outside impact directly affects you. However, if you want to use it for home purposes, you should choose Class 2 models. There exist alternative methods to increase the range for Class 2, but it is not as high as Class 1.

People can buy extra accessories like cables or an audio hub for supporting the range expansion. Usually, brands come with their accessories to help customers.

Battery Life:

A built-in battery can allow you to operate it for 15 hours on average, and if you have a lower battery, it can last for only 12 hours. Devices that have dual functions can let you experience a significant drop in the battery percentage while the device is transmitting and receiving signals.

These come with a rechargeable battery that is handy for people who are willing to use them in the long run. It has a portable device and a lightweight battery that can save your time for packing. Moreover, you can enjoy your favorite music using it. Besides, a built-in microphone is helpful for business meetings.

Try not to use the gadget while charging because it can cause overheating and damage the battery. Multiple brands offer an anti-overheating battery as a solution. The battery provides enough charging time and can preserve energy, helping it last for a long time.

Transition Modes:

These devices can switch modes from transmitter to receiver and vice versa. It helps you to send audio to a remote gadget via TX mode. Besides, you can receive or play audio from a remote gadget in receiver mode.

Thus, use the device to turn on Bluetooth connection in non-Bluetooth audio sources. Besides, you can allow audio that you are receiving from your mobile and play via wired headphones or speakers. If you find these available at the same rate as transmitter-only models, you should go with TX/RX combo models. It is because buying these can offer you more bang for your buck.

Default Volume Control:

Built-in volume control is one of the aspects that you can consider while using the device. It helps to manage the volume on your device directly rather than changing it on the audio source itself. As a result, people can access it easily.

Audio Output Compatibility:

The device needs a wired connection between the TV’s audio output and the device’s audio input to connect to the device for the television.

Each television has various types of audio output. A few devices provide both digital and analog audio output, whereas a few models offer one of them. Ensure that the device caters to the proper type of audio connection. You may need to invest more money to buy a converter for the connection to work.

These are a few audio output devices that are compatible with such devices.

  • Digital Audio Output
  • Optical Audio (TOSLINK)
  • USB
  • Analog Audio Output
  • 5mm jack (AUX)
  • RCA (red- and white-colored)

Audio Codec:

The Bluetooth audio codec is a technology that can encode and decode audio. Therefore, it can affect the bandwidth and audio transmission quality. Besides, it may affect the latency of transmission.

We know the latency issue as the lip-sync problem. It can happen while a person on television speaks, and you will hear the audio some seconds later, and it can let you have a jarring listening experience.

The Bottom Line:

Always try to purchase a top-quality device to convert a wired device into a wireless one. The model is highly cost-efficient. It doesn’t matter which device you choose, and you should ensure that you will have the best performance. The best Bluetooth transmitter can let you experience minimal audio lag and the most extraordinary connectivity.

Frequently Asked Questions:

  • Can a Bluetooth device be compatible with products from different brands?

As per the Bluetooth Logo Certification program, all BT products support products from other manufacturers. Otherwise, these are unable to acquire the Bluetooth logo. The policy can offer people high flexibility while selecting products matching the purposes and budget. These devices can work efficiently with products from famous brands like Apple and Samsung.

  • How many devices can one device connect?

Generally, a device allows you to connect up to two devices. Products produced by a similar brand enable the device to pair up to four devices together. If people buy different products from various brands, accessories can support the pairing procedure.

  • Can a Bluetooth device transmit and receive at the same time?

The devices can transmit and receive various signals, but it relies on the design. For example, it indicates that while listening to music on the speaker, another person may connect the device with a game console. As a result, users will get seamless sound quality.

read more
AppsDo It YourselfInternet SecurityTechnology News

How to Ping a Phone?

How to Ping a Phone?

As a mobile user, you may want to find the location of someone’s mobile like your kid, any employee, etc. Besides, you may need to check if your mobile is active or getting network connectivity. You can ping a phone in this case. Have you faced such a situation? You will be glad to hear that many ways help you hence. The process is known as ‘pinging a phone.’ In this article, you will learn how to ping a phone.

What does it mean to Ping a Mobile Phone?

Pinging a device indicates knowing the device’s location that you want to check. Almost all major operating systems are compatible with this network utility, and Android, iOS, and other operating systems support this feature.

Technically, ping means a signal to the mobile querying about its network location. Then, the mobile will respond to the request with the required details. This technology takes the help of the device’s GPS location.

Use-cases for Pinging a Phone:

Its primary purpose is to find the location of the mobile. However, there are a few reasons why you may want to find the location of a mobile.

  • It enables you to find the location of a phone you have lost or stolen.
  • Using the technology, you can watch your kid’s or employee’s location.
  • You can keep people with a criminal record.
  • Spy apps are used to perform the operations. You should know that spying on someone is illegal without their will.

How does pinging a phone technology work?

Two methods are there to locate a cell phone location by the cellular network provider— Pinging and Triangulation. The first is a digital method, whereas the second is an analog method to find a device location.

To “ping” indicates sending a signal to a specific mobile phone and getting a response with the requested data. While pinging a new digital mobile, it will determine the latitude and longitude through GPS, and then, it will send the coordinates back through the SMS system.

Why ping a mobile?

People use modern technology to find the location of a stolen or lost Android or iPhone device. Likewise, using the technology, you can track the live locations of criminal people.

Besides, the android spy app companies use the technology to keep track of users’ devices. So guardians who are willing to keep track of their kids’ location can use different spy apps.

However, without the person’s permission, spying on them or tracking a device’s location is illegal. So it would be best if you let the person know, like your kid, about using the technology before installing any spy apps.

How to Ping a Phone?

How to Ping a Phone?
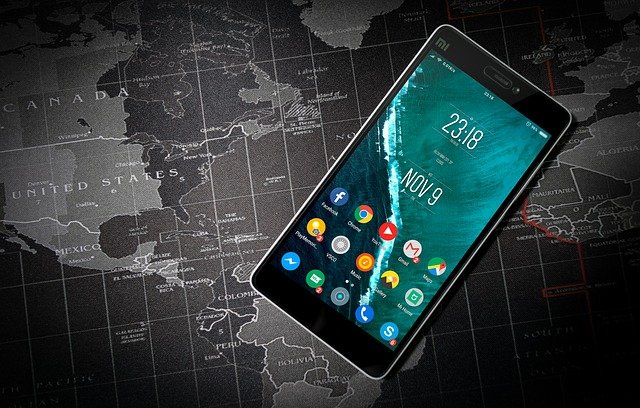
Multiple mobiles are there supporting the ping functionality. But mobiles released currently don’t come with the feature enabled. Therefore, if you are willing to ping the devices, you will require specialized apps on the mobile. PingD, Google Find My Phone, etc., are a few examples helping to return the ping request. Therefore, you should ensure that you have the apps installed and configured on the system before you proceed. Besides, remember that you cannot ping a mobile that is turned off. However, having a firewall installed on the system does not allow other devices to ping the mobile. Besides, if the AP Isolation feature is turned on the router, other devices may not work.

Ping from a Phone:

  • It would be best to launch the App Store or Play Store first. Then, look for Ping.
  • After that, you need to ping any app that you want. Of course, as soon as you install the app, it would be best to launch it.
  • After that, your job is to put the IP of the mobile. For example, you can enter 192.168.8.101 if it is the IP address. Next, tap on the Ping or Start option.

Use command prompt:

The process is applicable with Android mobiles only. Your first task is to tap on the ‘Windows’ key plus the ‘R’ option for opening the ‘Run’ box. Next, write ‘cmd’ in lowercase letters for bringing up the command prompt. Next, you should write ‘ipconfig,’ and tap on the ‘Enter’ option after that. It offers you the machine’s IP address if it is not available.

When you go to the following line of the command prompt, you must write ‘ping’ there. After that, you should complete the IP address of the mobile to get a ping to the mobile automatically. If it is successful, both the ping and a minimum of 2-3 lines of ‘Reply from’ the address appears. Every line represents a data packet that was sent.

It is a speedy process giving the actual data packets sent to the phone, not the technical ping only. Whether you face a problem, you should try to close the PC or mobile and reboot your wireless router. The issue may be an IP address error. Hence, the process helps send a ping only, and it won’t get any details about the user’s physical location.

GPS tracking software:

It is the quickest way to find a stolen android or iPhone mobile. With the help of GPS tracking software, you can track the location of your family and loved ones. Multiple GPS tracking software is available in free and paid versions. In addition, we have given a few GPS tracking software that helps you ping the device’s location.

  1. GOOGLE MAPS:

It is one of the effective GPS tracking apps for android and iPhone devices that help to find the device location. You can use the application for free for both android and iPhone devices. It allows you to adjust the sharing options. With the help of the latest technology, you can track the lost device’s location.

  1. LIFE 360:

This GPS tracking software lets you ping a phone to find its location. It has plenty of excellent features that help to find the lost device. Besides, it helps to track the location of your family members. Apart from this, many location tracking software is available on iPhone and Android OSs.

With the help of GPS tracking apps, you can find the live location of any device. But it is not possible if GPS is disabled on the device or you have installed fake GPS on the mobile.

Default phone mechanisms:

Take the help of the default mechanism of your mobile phone if the GPS location is disabled. It will help you to ping your mobile to find out the device’s location. Generally, android devices have a default feature called “Find My Device,” whereas iPhone devices have an inbuilt feature called Find My iPhone to track the device location.

The steps you should follow to use Find My Device are as follows:-

  • Your first task is to visit the site android.com/find.
  • Then, you should log in to your Google Account via Gmail details.
  • After that, while using the map, the live location of the device you want to find out will appear.
  • If you are willing, play a ringtone, delete the data, or lock the lost device remotely.

Spy Apps:

You can use a spy app to ping a mobile to know where it is. These apps are equipped with excellent and advanced features to monitor the lost mobile or that you want to track.

These enable you to use android and iPhone devices. The apps help track any person’s live location, read conversations, monitor social media chats, check browser history, record screens, listen to live phone calls & surrounding sounds, etc.

You can find multiple spy apps available in the market, allowing you to track both Android and iPhone devices.

Follow the guide to know how to ping a mobile using spy Apps.

  • Your first job is to make a new account from an Android or iPhone device.
  • After that, your task is to choose the mobile you are willing to monitor and check your call history.
  • Now, you should choose the plan as per the requirements.
  • Next, you must install the application on the device you want.
  • As soon as you complete installing, you can experience Wi-Fi or GPS data in real-time.

Ping from computer:

Taking help from the PC, you can also find out the device you have lost. Then, you should undergo the steps given here to ping mobile using a PC.

  • First, your task is to move to the “Settings” on your android phone and open it after

that.

  • After that, your task is to click on the “About Phone” option.
  • Now, hit the option “Status,” and you should get the IP address.
  • After that, your job is to power on the computer and look for the Windows Command Prompt.
  • Next, you should open the CMD or command prompt as “Run as Administrator.”
  • Write “ping” followed by the IP address of the android device, and next, you should tap on the “Enter” option.

How to Ping a Phone in macOS System:

You can use the macOS system to ping the mobile. However, if you are willing to ping a mobile from macOS, you must follow the steps.

  • Your first job is to go to the Finder and open it on the Mac, followed by Applications. If not, you should tap on the Command and A key to get the list of apps available.
  • Tap two times on Utilities and after that on the Terminal app.
  • While opening the terminal app, you need to write ping followed by the IP address of the mobile. For example, suppose you can ping 192.168.2.1.
  • You can see the results similarly to the Windows system.

How to Ping a Phone from ChromeOS systems:

Use the ChromeOS system if you are willing for this purpose. This one is a Google-developed OS available on the PlayStore in Chrome OS. However, it is beneficial if you use the default command prompt app.

  • If you are willing to open the command prompt application on ChromeOS, you should tap on the link ctrl, alt, and T keys to open it up.
  • Write ping followed by the IP address of the device. Use 192.168.2.1 for pinging.
  • Tap on “Enter” to start connection tests and the results after the test.
  • Thus, you can ping a mobile from a system running Android or iOS.

Tracing the phone number details:

By tracing the details of a mobile number, you can find out the location of a sim number or a device. In addition, multiple apps can bring universal caller ID services to your mobile, enabling you to track the mobile number.

You can take the help of the famous mobile number tracking apps like True caller, Showcaller, CallApp. These allow you to check the sim card name, registered place, etc. It is beneficial in finding fraud caller, unknown caller location details, etc.

Take help from the phone’s carrier:

The last method is to take help from your mobile carrier by contacting them. As soon as you contact your mobile phone carrier company, they will help you to find out the mobile you have lost. They trace the live location using the triangulation process and find out the device.

How Can you prevent your location from being tracked?

A few people are unwilling to have their phone’s location traced. These are the ways to prevent the location from being tracked.

Power Off the GPS Location: You should disable the live location of your phone. Thus, you can vanish from live tracing software’s reach.

Power On The Airplane Mode: You can prevent your location from being tracked by enabling the Airplane mood. It does not allow the device to send signals to the closest GPS towers.

Power Off Your Phone Completely: You can power off the mobile and take out the battery. Thus, you can prevent all the software or tracking device from tracking the location.

Power Off Location Services In mobile Settings: Your first job is to move to the phone’s location settings and then disable them.

How to ping mobile location for free with a phone company?

You should know that all iPhone and Android devices come with a default trigger, and it enables you to return all data regarding location and GPS to the actual cell service provider.

An option is available under the “Location Services” tab in the settings section. The data will remain protected with the service provider until you use the service data given by your mobile provider.

While switching to another phone provider, they will have the authorization to track location and maintain its history.

Mobile companies have different phone towers around the area covered. Therefore, when you move, your mobile connects to every tower.

The companies can triangulate your position depending on the tower you join. It is vital to know that 911 operators and service station operators can access location software, enabling them to expedite operations and respond in an emergency. Therefore, these are legal processes using which companies can ping the mobile, and thus, they will know your location.

How can you ping your mobile, which has been switched off?

It is not possible to ping a switched-off phone. As soon as you power off the mobile, you cannot track your device. The reason is that the signals don’t interact more with nearby GPS towers. Thus, it stops letting other devices know where it is. In this case, you can know the last active location of the mobile.

However, a few rates cases always exist. For example, you can detect signals from any switched-off mobile in war zones using NASA technologies. However, the details of these operations remain unknown. As per a report, NASA helped previously to find out the location of people. Usually, there is no way to track a closed mobile.

How to ping a cell phone tower in ping a mobile?

If you are willing to trace the original location of the last cell tower giving the signal to the kid’s phone, you need to ping the mobile. Using a wireless carrier, you can do the job. However, it is not legal to ping a mobile phone not registered to you if you don’t approve it.

Phase 1:

You should first contact the wireless carrier’s customer service department. After that, you should go through the prompts to speak to a representative.

Phase 2:

Let the representative know about your intention to ping the phone or the mobile registered in your account.

Phase 3:

You need to verify the wireless account while asked. In this case, you need to give the representative the mobile you are willing to ping.

Phase 4:

Wait till the representative is not pinging your mobile. Then, it may give you instructions to enroll in a mobile pinging service of your wireless carrier, enabling you to ping the mobile without assistance.

Phase 5:

You should note down the pinged location as soon as it appears.

How to find a lost iPhone:

Use Find My:

Using the Find My app, you can track the location of the Apple products, and it helps to find out the mobile on the map. While using Find My, you can easily know where the mobile is, and you don’t need to ping it. However, if you know that your iPhone is in your home but do not know where it is, the pinging will help you.

Launch the Find My there if an Apple device is attached to a similar Apple ID like iPhone. Otherwise, if you are willing, sign in to icloud.com and then select “Find iPhone.” If you want, select the iPhone from the list and then hit the “Play Sound” option to ping. Firstly, your device will start vibrating. After a while, it starts playing a high-pitched sound. The sound is playing continuously till you will not find your iPhone. Remember that you can stop the sound using the Find My device.

Use An Apple Watch:

Pinging becomes easier while iPhone and Apple Watch have a connection between them. It is very simple, like swiping up on the Apple Watch to the Glances mode. Choose the “ping” button available under other options such as airplane mode, do not disturb, and silent mode. It lets your mobile emit a high-pitched sound.

In addition, you can give instructions to your mobile to blink the LED by tapping the “ping” button and holding it. You may use the feature to find the mobile in a dark room.

Use Siri:

Take the help of Siri if you have any other iOS 12+ device attached to the account. It may be another mobile, iPad, PC, or Apple watch. If you are willing to use Siri, ensure that you have turned on Find My and Siri. Call Siri, and you will get a reply from her. As soon as she replies, you should say, “Siri, find my iPhone.”

Whether many devices are connected to the account, you must specify your mobile. Then, Siri will ask if you are willing to play a sound on the mobile to find out.

You should say “Yes.” Next, you will get an option to see a visual map of the location of the mobile.

From the Cloud:

If you don’t have many Apple devices, there might not exist a simple way to access Siri or the Find My app. If necessary, use a device of another person or your non-Apple device to sign in to iCloud, and it will help you to ping your missing iPhone.

If you are willing to do this, go to this www.icloud.com/find site and log in using your Apple ID and password. After that, your task is to choose the mobile you are willing to find from the list of devices. Then, you should tap on the “play sound” to ping the iPhone.

Whether you have enabled the two-factor authentication and want to log in to the Apple account from an unrecognized device, you should use a 6-digit verification code to bypass the two-factor authentication.

Conclusion:

If you have mistakenly lost your Android or iPhone, these hacks will help you find your mobile phone successfully. We hope that you will know now how to ping a phone.

Frequently Asked Questions:

  • Can you Ping mobile for location?

You cannot ping a mobile number directly without access to the carrier’s system, indicating that it has limitations to carriers and is within range.

  • Is it illegal to ping a cell phone?

A few federal laws are there applicable to cell phone pings. According to the regulations, you can make one thing clear tracing the mobile of someone without their permission is against the law. You can do this only in a criminal investigation or emergency 911 call.

  • Can a private investigator ping the cell phone?

As per federal law, private investigators are not allowed to monitor mobile conversations without the permission of at least one person based on the state.

read more
Do It YourselfGadgetsTechnology News

Memory Card: Complete Guide to Memory Cards

Memory Card: Complete Guide to Memory Cards

If you are willing to expand storage in your mobile, tablet, camera, or any handheld gaming system, the memory card is the card that you should use. There are many options available in the market, due to which you may feel confused. You should pinpoint the type, storage capacity, read/write speed, etc. Besides, you should know whether the card comes with data protection capabilities or not.

The best memory card always contains an adapter. Therefore, while you will buy this, you can find an adapter. The adaptors allow the devices to work with various types of memory cards. Some devices are available in the market, enabling you to use two types of memory cards or more. It is why you should figure out the best one that suits you most. This article contains the best memory card on the market, and it will help you select the suitable one for you.

What is a memory card?

A memory card is a storage device used to store digital data and electronic information using flash memory. It is a form of flash memory used in electronic gadgets like digital cameras or video game consoles. In addition, it helps store information, pictures, songs, saved games, other PC files, etc. Flash memory devices don’t have any moving parts, due to which these are not going to be damaged so easily.

What does a memory card do?

A memory card is used mainly for adding digital storage to a device. You only have to insert a small plastic rectangle item containing memory chips, and it can store files for a long time. People use the additional memory to expand the phone’s storage and keep videos, images, apps, audio files, games, etc.

How do memory cards work?

You should know first that a memory card is a typical device made of a plastic case & metal connectors. It contains many different technologies like flash memory, a controller, and other parts, and the latter quality determines both speed and quality.

File Allocation Table or FAT helps to arrange Memory card file locations. The files will not be erased while you delete any picture or data. It is the record from the table of contents, which is deleted. It indicates that your PC or other electronic devices cannot show the file location in a folder. However, the File you have deleted is still available on the memory card. You should know that these data remain stored on the memory card till you are not overwriting this. Therefore, if you have mistakenly erased the essential files, you should stop using this instantly. You can recover the deleted information with specialized software.

How do I use my memory card for storage?

If you find your mobile not prompting automatically, you should try the steps.

  • First, your job is to put your SD card on the Android mobile. Then, you should wait for this to be recognized.
  • Navigate to the Settings, and then move to the Storage section.
  • After that, your task is to click on the name of the SD card.
  • You can see three vertical dots available on the top right corner of your mobile display. Click on the dots.
  • Hit Storage Settings.
  • You are required to choose “Format” as an internal option.
  • Next, your job is to click on the Erase & Format at the prompt. At last, your Android device enables you to migrate the data.

Memory card sizes:

Generally, the memory card is available in 8GB, 16GB, 32GB, 64GB, and 128GB capacities. In addition, a few high-capacity cards are available, which can hold terabytes (TB) of data.

When you choose the best one to buy, the first thing you should note is their amount of storage. In short words, you can say this memory size. In some years, the memory sizes have boosted remarkably. Previously, 1GB size was enough for people, whereas 128 GB is not uncommon in recent times.

What types of devices need memory cards?

Nintendo Wii and devices that are similar to this use SD cards. The cards took off as the storage medium while photography, with cameras dispensing and film rolls.

Like digital cards, people use memory cards in smartphones to store data (images and music), camcorders for storing video, etc.

These are used in televisions, portable game devices, printers, DVD recorders, and other electronic devices. Plenty of televisions even has card slots that enable you to see any stored images on a big display. A few printers will allow you to print directly the pictures stored on a card.

It is possible to swap cards from one product to another. However, you should know that different devices use different memory card types. Whether there is a Memory Card in your device already, and you want to buy more gear, ensure that the card is similar.

Types of memory cards:

We have given here different types of memory cards available in the market. CompactFlash and Secure Digital ( Micro and Normal) are basic memory cards.

CompactFlash:

This type of card is specially designed for professional photographers. You can find CF cards in high-end DSLRs like Canon EOS-1D X Mark II. Compared to the size of SD cards, these come in a larger size but are used less commonly.

These are physically bulky than SD cards and less commonly used. Besides, CF cards have more significant capacities and enable you to run at very high speeds.

Secure Digital:

It is the basic format of the SD card. The thickness of the SD card is 2.1 mm, whereas the size is 32 mm x 24 mm. Their performance is quite good, but these are not as quick as other SD cards.

Its size is limited to 4GB above which anything will be an SDHC card.

Secure Digital High Capacity:

The SDHC card was designed to fulfill the high demands for high-definition photography and video. Like standard SD cards, these come in similar physical sizes and shapes. But these can fit the specifications of version 2.0. This type of card is limited to 64 GB above which anything will be considered an SDXC card.

It has classes— 2,4,6,8,10 with a minimum speed of 2 MB/s, 4 MB/s, 6 MB/s, 8 MB/s, and 10 MB/s.

Secure Digital Extended Capacity:

This type of card is a beefed-up SDHC card. Their range of size is between 64 GB and 2 TB.

SD – Up to 4 GB

SDHC – Between 4 – 64 GB

SDXC – Anything higher than 64 GB

There are two classes, 1 & 3, that come with a minimum speed of 10 MB/s and 30 MB/s.

Micro Secure Digital:

MicroSD card is a miniature version of an SD card. These come in 15 mm x 11 mm physical size with 1 mm thickness.

Micro Secure Digital High Capacity:

MicroSDHC or Micro Secure Digital High Capacity card is similar to the SDHC card, where you can store up to 32 GB of data. It came to the market in 2007 and allowed you to transfer up to 10 MB per second.

Micro Secure Digital Extended Capacity:

Format Focal Length F-number Crop Factor Equivalent Focal Length Equivalent Aperture

Full Frame comes with a focal length of 85 mm and F-number f/1.2. Its crop factor is 1, and 85 mm is the equivalent focal length. f/1.2 is its equivalent aperture.

APS-C has a focal length of 56 mm and F-number f/1.2. Therefore, its crop factor is 1.5, 84 mm is the equivalent focal length, and f/1.8 is its equivalent aperture.

42.5 mm is the focal length of Four Thirds, whereas f/1.2 is the F-number. Therefore, its crop factor is 2, 85 mm is the equivalent focal length, and the equivalent aperture is f/2.4.

Micro Secure Extended Capacity:

This type of micro card is similar to the SDXC, and it comes with a storage limit from 32 GB to 2 TB. However, the card can transfer data more quickly than the MicroSD and MicroSDHC.

MicroSD – Up to 4 GB

MicroSDHC – Between 4 – 32 GB

MicroSDXC – Anything more than 32 GB

Extreme Digital Picture Card:

This Digital Picture Card is a type of removable flash memory. The primary purpose for its use is in digital cameras. 20 mm x 25 mm is the compact size of the card, whereas 1.7 mm is its thickness.

Wifi Card:

wifi card is a memory card of a modern type, and this kind of card has a built-in wifi feature. The primary benefit of this card is that you can transfer the pictures to your cloud storage, PC, or mobile without the help of any cable. If the first one is filled, there is no need to replace any spare card. In this case, you are required to wait for a while to share the images with the cloud. Then, you should begin capturing images by clearing the space of the memory card.

Multimedia card:

You can use the MMC cards with the cameras compatible with SD cards. You can use the memory cards in the device and MP3 players. In this case, it is essential to remember that the MMC cards don’t contain any protection switch, and it indicates that your data may be wiped off automatically.

Memory Stick:

It is another kind of storage device manufactured by Sony initially for CyberShot. However, people still use this today, and it allows you to store information for only 256 MB.

Let’s have a look at the types in short—

  • PCMCIA ATA Type I Card (PC Card ATA Type I)
  • PCMCIA Type II, Type III cards
  • CompactFlash Card (Type I), CompactFlash High-Speed
  • CompactFlash Type II, CF+(CF2.0), CF3.0
Microdrive
  • CFexpress
  • MiniCard (Miniature Card) (limited to 64 MB / 64 MiB)
  • SmartMedia Card (SSFDC) (limited to 128 MB) (3.3 V,5 V)
  • xD-Picture Card, xD-Picture Card Type M
  • Memory Stick, MagicGate Memory Stick (size is limited to 128 MB); Memory Stick Select, MagicGate Memory Stick Select ( Here the term “Select” indicates 2×128 MB with A/B switch)
  • SecureMMC
  • Secure Digital (SD Card), Secure Digital High-Speed, Secure Digital Plus/Xtra/etc. (SD with USB connector)

miniSD card

microSD card (aka Transflash, T-Flash, TF)

SDHC

Wifi SD Cards

  • Nano Memory (NM) card
  • MU-Flash (Mu-Card) (Mu-Card Alliance of OMIA)
  • C-Flash
  • SIM card (Subscriber Identity Module)
  • Smart card (ISO/IEC 7810, ISO/IEC 7816 card standards, etc.)
  • UFC (USB FlashCard)
  • FISH Universal Transportable Memory Card Standard
  • Intelligent Stick ( a USB-based flash memory card with MMS)
  • SxS (S-by-S) memory card. SanDisk and Sony invented this new card specification.
  • Nexflash Winbond Serial Flash Module (SFM) cards. The range of its size is 1 MB, 2 MB, and 4 MB.

Why do we have different Memory Cards?

Each camera manufacturer generally uses different cards of various sizes & shapes. Along with the card, they also use different shapes of lens mounts, flange distances, lens sizes, batteries, wires, etc.

The cards are available in different sizes according to storage and physical shape. Manufacturers like Canon are willing to use Compact Flash (CF) memory cards, and other cards can use the smaller Secure Digital type.

Make sure that you have checked the camera specifications before buying the cards. If you want, then use the Micro Secure Digital with an adapter. However, it is not possible to make SanDisk memory cards smaller.

How much can I select a good memory card?

The amount of data you can store on the memory card relies on mainly three factors. These are — the device, data type you want to store, and the data quality.

When you use High megapixel cameras, you need to have more memory space for each shot than low-megapixel models. The type of information will always determine the amount you can fit on a card. Pictures need more space than text documents, whereas digital music can consume even more. Besides, video is another space hog.

It is the quality of the files that is the ultimate determining factor. The aspect will determine how much is possible for you to cram onto a memory card. The better quality you want to have, the more space it will require. Compared to the low-resolution shots, the high-resolution images need more memory space. Whether you shoot in RAW mode on your camera, every File will need more space than a standard JPEG image. If you want to store music compressed at a good quality, it can take additional space compared to those with average compression. We know this as bitrate also.

What is inside the memory card?

The memory card components are some transistors and an oxide film. These are used to construct the internal circuits of memory cards. The components are used to create two types of circuits: the floating and control circuits. First, you need to place the transistors to form a junction, and after that, you should derive a network with some rows and columns.

Oxide separation sheet is a significant component of the device, which you need to place in between both circuits. In addition, it helps to link the processing flow between the printed circuits.

What is the difference between a memory card and a secured digital card?

Memory card speed:

When it comes to speed, the memory cards can vary, and these depend on how they can read and write information. However, the speed ratings and the marking style vary according to the memory card type.

Speed classes:

Speed Class defines a minimum sequential writing speed offered by a memory card. A bus speed is also there that you can define as “UHS.”

It displays the theoretical maximum offered by a card over the bus. The UHS Speed Class and Video Speed Class specifications also define minimum sequential write speeds.

Bus interface:

We have given here different bus interfaces and their limits. Therefore, this short table can summarize different bus interfaces.


Bus Interface Compatible Memory Cards Maximum Bus Speed
High Speed SD, SDHC, SDXC 25 MB/sec
UHS-I SDHC, SDXC 104 MB/sec
UHS-II SDHC, SDXC 312 MB/sec
UHS-III SDHC, SDXC 624 MB/sec


Here, you can see a massive difference between High Speed, UHS-I, UHS-II, and UHS-III cards for maximum bus speed. The original cards have speeds like 25 MB/sec, whereas the UHS-I bus interface has a speed of 104 MB/sec.

The new UHS-II bus can multiple the speed at 312 MB/sec three times. The new UHS-II standard came to the market recently, but it can enable insane speeds of up to 624 MB/sec.

You should know that cards with a quick bus speed need a memory card reader/writer to support the bus speed. For instance, when you buy a memory card with a UHS-II bus interface, you should ensure that the card slot on the camera should support UHS-II. Otherwise, you can experience different reliability problems. The same thing is applied to a memory card reader on the PC, and it should support UHS-II for supporting the higher speeds.

What is an UHS speed class?

UHS stands for Ultra High Speed, and it is the quickest performance category. The UHS speed class lets you know bus-interface speeds of a maximum of 312 MB/S. Its primary purpose is for SDHC and SDXC memory cards, which support SDHC and SDXC devices.

It comes with two ratings within the UHS Speed Class:

U1 (UHS Speed Class 1): 10 MB/s is the minimum write speed of UHS Speed Class 1.

U3 (UHS Speed Class 3): 30 MB/s is the minimum write speed of UHS Speed Class 3.

It was the SD Association that introduced the UHS Speed Class in 2009. This one uses a new data bus that cannot work in non-UHS host devices. If you use this type of memory card in a non-UHS host, the standard data bus “Speed Class” rating becomes default rather than the “UHS Speed Class” rating. The cards have a full higher potential that allows you to record real-time broadcasts to capture large-size HD and professional HD videos.

Video Speed Class:

This class offers the quickest speeds available. It is perfect for ultra-high-resolution videos, top-quality videos, multi-file recording in drones, and 360-degree cameras. The speed class is compatible with HD formats up to 8K video in drones. Besides, it supports action cams, 360-degree cameras, and VR cameras.

V6 (Video Speed Class 6): 6 MB/s is the minimum write speed of Video Speed Class 6.

V10 (Video Speed Class 10): 10 MB/s is the minimum write speed of Video Speed Class 10.

V30 (Video Speed Class 30): 30 MB/s is the minimum write speed of Video Speed Class 30.

V60 (Video Speed Class 60): 60 MB/s is the minimum write speed of Video Speed Class 60.

V90 (Video Speed Class 90): 90 MB/s is the minimum write speed of Video Speed Class 90.

Video Speed Class is also referred to as “V Class.” The SD Association created the speed class to determine cards to manage higher video resolutions and recording features. In addition, the speed class can guarantee minimum sustained performance to record videos.

The other speed classes can not be optimized. Besides, these can’t accommodate the recording of multiple video streams, 360  capture, virtual reality content, etc.

What is Minimum sequential write speed:

‘Sequential Read/Write Speed’ indicates the quick speed at which the drive can write or read the data from a series of blocks. Speed classes like the UHS speed class or video speed class define minimum sequential write speed.

How safe is the data stored on memory cards?

If you are thinking about the safety of your information, then these have a few unique benefits compared to hard disks or CDs/DVDs. First, these are more shockproof compared to other storage mediums. However, if it is a standard hard drive, there is a chance of damage due to moving parts.

Compared to CD/DVD, these are far less fragile. A memory card can take a scratch or two. But when it comes to scratches for a CD or DVD, you may experience data loss or an unreadable disk. Some cards are available that are so small that they can lose the whole card itself instead of by some other accident.

Card Formats:


Name Form Factor (mm) Abbreviation DRM
PC Card 85.6 × 54 × 3.3 PCMCIA No
CompactFlash 43 × 36 × 3.3 I CF-I No
CompactFlash 43 × 36 × 5.5 II CF-II No
CFexpress 38.5 × 29.8 × 3.8 CFX Unknown
SmartMedia 45 × 37 × 0.76 SM/ SMC ID
P2 card 85.6 × 54 × 3.3 P2 No
SxS 75 × 34 × 5 SxS No
SD card 32 × 24 × 2.1 SD CPRM
microSD card 15 × 11 × 0.7 microSD CPRM
xD-Picture Card 20 × 25 × 1.7 xD No
Intelligent Stick 24 × 18 × 2.8 iStick No
Serial Flash Module 45 × 15 SFM No
MMC micro Card 12 × 14 × 1.1 MMC micro No
Reduced Size MultiMediaCard 16 × 24 × 1.5 RS-MMC No
Multimedia Card 32 × 24 × 1.5 MMC No
Memory Stick Pro-HG Duo 31.0 × 20.0 × 1.6 MSPDX MagicGate
Memory Stick Pro Duo 31.0 × 20.0 × 1.6 MSPD MagicGate
Memory Stick Duo 31.0 × 20.0 × 1.6 MSD MagicGate
Memory Stick 50.0 × 21.5 × 2.8 MS MagicGate


Name

Form Factor (mm) Abbreviation DRM
Nano Memory card 12.3 × 8.8 × 0.7 NM Card Unknown
XQD card 38.5 × 29.8 × 3.8 XQD Unknown
NT Card NT 44 × 24 × 2.5 NT+ No
µ card 32 × 24 × 1 µcard Unknown
Universal Flash Storage ? UFS Unknown
Memory Stick Micro M2 15.0 × 12.5 × 1.2 M2 MagicGate

Memory Card Best Practices:

  • You should keep the card consistently formatted in the camera. When you format your card, it will erase all images. You can format it in two ways— in the camera or on the PC. However, you should know that it is better not to format a card on the PC. It cannot generate the proper directory for the camera, and the files are not saved accurately.
  • You should not use one card in many cameras. Make sure that you are not using the same one in different camera brands. The reason is that you may damage the card via overlapping incorrectly. Whether you want to switch cameras, you should format the card in the new camera again before using it.

Best Practices:

  • Use a card for one year at least. However, you should not leave cards inactive for a long time.
  • You should use cards with smaller capacities. It may happen that you have lost cards, broken them, gotten corrupted, etc. As you are not willing to lose the huge data amount, it is recommended to use 64GB or 32GB cards. However, if you are an experienced videographer, you will need higher-capacity cards.
  • Ensure that you are using a card reader for sharing images. With the help of card readers, you can transfer pictures quickly. Besides, these corrupt your card far less compared to a USB cable while being used to the PC directly.
  • You should not use a microSD card in a slot for an SD card. It is because microSD cards are available at a low price. However, in this case, the adapter piece is not designed to handle the data amount necessary for your computer, and it can damage your card or corrupt your data. Therefore, you should only use the microSD cards in native devices, such as drones, action cameras, or mobile devices. In this case, you can use the adapter piece to download your files on the PC.

How to Store Your Memory Cards:

We have given here three methods to store memory cards.

Method 1:

How to Mount a Micro SD Card for Android Phones

Step 1:

You should first see whether your mobile is compatible with SD expansion or not. Multiple new mobiles are trending away from SD cards’ use. You can check the user manual or visit the manufacturer’s web page to check if it is compatible with SD cards.

Whether your mobile cannot offer SD card support, take the help of cloud-based storage service to get additional storage. Google Drive is an example of a cloud-based storage service.

Step 2:

Now, you are required to turn off the mobile. If you are willing to do this, tap the power key on the right side of the mobile. After that, your job is to hit the Power Off option, and you should select the “Power Off” option again to shut down the device.

Step 3:

Next, your job is to insert your Micro SD card into the SD card slot. In most cases, for newer mobiles, the SD card is available in the SIM card tray. If you are willing to install a SIM card, you should first find the SIM card tray. Sometimes, it is available on the side of your mobile, and there exists a little oval-shaped compartment having a pinhole on the side. You should now use a paperclip or the SIM card removal tool available with the mobile. Insert the removal tool in the pinhole and then remove the tray by pressing the tool down. After that, your task is to keep the SD card in the holder. Now, insert the SD card again in your mobile.

Step 4:

Now, your job is to turn on the android device. Then, you should hit the Power button available on the side to switch on the mobile. You should wait for some time to boot up this.

Step 5:

You need to click on the Mount when prompted. Multiple new mobiles mount the SD card automatically without offering a prompt. However, a few mobiles ask whether you are willing to mount the SD card or not, and you should hit the option Mount if prompted to mount the SD card.

Step 6:

After that, your task is to mount the card manually. If you have mounted the SD card earlier or cannot mount it automatically, you should use the steps to mount the card manually.

  • Your first job is to move to the Settings menu and open it.
  • Then, your task is to hit the option SD and Phone Storage.
  • Hit the option, Mount.

Step 7:

You should format the SD card again and then mount it. If the mobile identifies your SD card right away, it is okay. Otherwise, you can format the SD card and, after that, mount after formating. It helps to erase all information on your card. Ensure that you have backed up and stored all your data if you are willing to keep any data on the SD card. Then, perform the steps to format the SD card.

  • Your first job is to navigate to the Settings menu and open it.
  • Hit the SD and Phone Storage option.
  • Then, hit the Reformat option available under the SD card.
  • Click on the Mount option as soon as the SD card finishes the formatting process.

Step 8:

Use the Files app for accessing the SD card. With the help of the Files app, you can easily access all files stored on the card. If the app is not available on your mobile, navigate to the Google Play Store to download the Files application.

Method 2:

Mounting an SD Card for Galaxy Phones

Perform the first three steps as previously.

In step 4, you should power on the mobile. After that, tap on the button at the mobile’s bottom. If the mobile does not Power on, it may need to be plugged in. In this case, you should connect your device with the wall charger for 15 minutes. Then, you should try this again.

Step 5: Same as previous

Step 6:

  • Perform the steps hence.
  • Head towards the Settings menu, and then you should open this.
  • Hit the Device care option.
  • You should click on storage.
  • Next, your job is to hit the SD card option.
  • Click on the Mount option after that.

Step 7:

For formatting and mounting the SD card, you must perform the steps.

  • Go to the Settings menu first and then open it.
  • After that, your task is to click on Device care.
  • Now, hit the Storage option.
  • Click on the SD card option.
  • Hit the Format option.
  • Click on the SD card.
  • Finally, your task is to click on the Mount option.

Method 3:

Check for Hardware Problems:

Step 1:

Your job is to unmount the SD card, and then you should remount it. If you face difficulties while accessing the card, perform the steps for unmounting and remounting. After that, check if the error exists.

  • Your first job is to move to the Settings menu and open it.
  • Next, you should hit the Storage or SD and Phone Storage option. Finally, you can get the option below Device care.
  • Next, your job is to click on the SD Card option.
  • After that, hit the option Unmount.
  • Now, you should click on the SD card.
  • Finally, your task is to hit Mount.

Step 2:

Remove this and then go for the inspection to check if it is damaged. You should search for the missing gold prongs. Now, check to ensure that no dents or damaged areas are on the card.

Step 3:

You should now clean the card. If the card looks dirty, then use a soft cloth and some lukewarm water or metal cleaner to clean. Ensure that the card is dry entirely before reinserting this into the card.

Step 4:

Try to mount the card again. As soon as you remove the SD card and inspect this for dirt, you should insert this again back into the device. Then, remount this again. Sometimes, you can get rid of the problem by ejecting and reinserting.

Step 5:

You should again format the card in exFAT or FAT32 format. If you have used this on another device, it may format in the wrong Format. Format it again. It helps to remove all information from your SD card, and you should insert this into an SD card reader. Then, perform the steps to reformat the card in the correct Format.

  • Your first job is to tap on Ctrl + E to open File Explorer.
  • Then, you should hit the PC.
  • After that, your job is to tap on the SD card.
  • Next, you should tap on Format.
  • Choose the exFAT (recommended) or FAT32 option under “File System.”
  • Finally, you should tap on the Start option.

Step 6:

You can check the card on different devices if it cannot mount accurately. If you find your gadget working in another device, ensure that the SD card slot can be the culprit. But if the card cannot mount even on another device, you have to replace the SD card. Ensure that you have charged your device entirely before putting the Sd card into another device.

Memory Card Readers:

Your PC may not contain the actual default memory card reader, or there may not be any card reader. Card readers allow you to use them efficiently. In addition, there are portable attachments that need to be plugged into a USB port to share images, videos, etc., to your memory card. These come in a huge variety with various combinations.

How to insert a Memory Card into your PC?

If you are willing to use a memory card, plug it into the proper card slot. You can do this directly on the console of the PC or through a memory card adapter connected to a USB port. Windows detects the card immediately and mounts this into the system. As a result, you will see the available data instantly.

Make sure that you should not put force on a memory card to insert it into a slot. If you cannot get the card into one slot, you should use a different slot. These are inserted labels side up, and you should insert label-left for the mounted memory card readers vertically.

You can see the AutoPlay dialog box available when you have inserted the card. You should use a dialog box to select the “how to view the card’s contents” option. For instance, you should choose the View Pictures option for seeing pictures stored on the card from a digital camera.

Best Five Memory Cards:

1.SanDisk 128GB Extreme Pro UHS-I SDXC

SanDisk 128GB Extreme Pro UHS-I SDXC
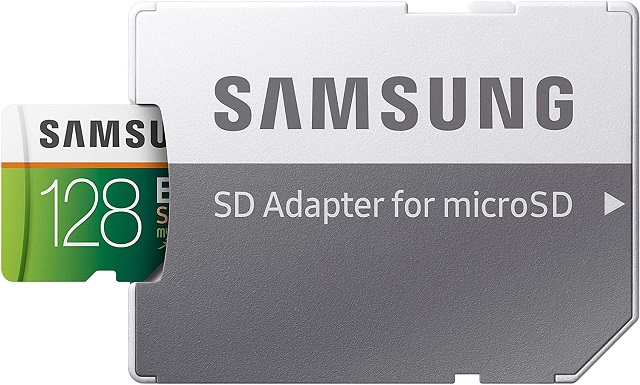
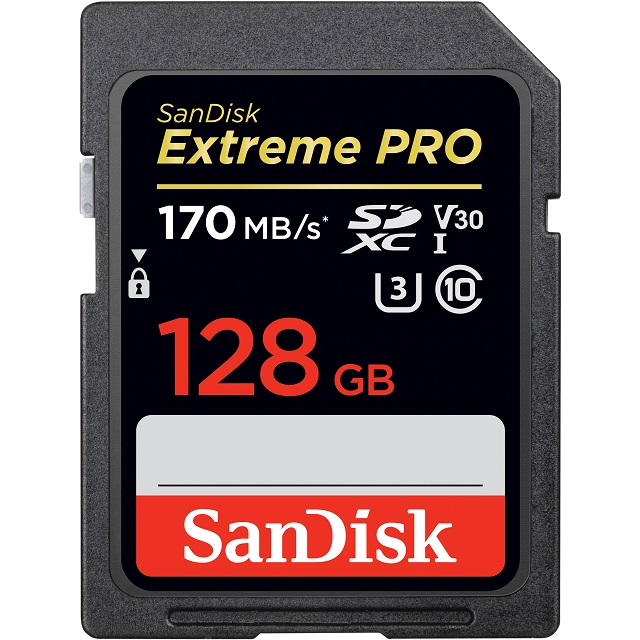
Description: SanDisk offers its products in 32 GB, 64 GB, 128 GB, 256 GB, 512 GB or 1 TB storage options. This product has a read speed of a maximum of 170MB per second, while the write speed is a maximum of 90 MB per second. It helps shoot 4K videos and store them using the digital camera.

It is temperature proof as well as X-Ray proof. Besides, the device offers a free code to download the Rescue Pro Deluxe data recovery software. This one is for both Windows and Mac computers.

Features:

Speed: It has a shooting speed of up to 90MB/s, whereas the transfer speed is up to 170MB/s. In this case, you need to use a compatible device to reach the speeds. For example, the SanDisk SD UHS-I card reader is a device that can be used. But it is sold separately.

Internal testing: It depends on the internal testing. Besides, you can get reduced performance relying on the host device, interface, usage conditions, etc.

Shoot: The product is ideal for shooting 4K UHD video and sequential burst mode photography. It is compatible with Full HD (1920×1080) and 4K UHD (3840 x 2160) video support. However, these rely on the host device, file attributes, etc.

UHS video and speed: The UHS Speed Class 3 (U3) and Video Speed Class 30 (V30) help to capture uninterrupted video. Besides, the UHS Speed Class 3 is designed in such a way that it helps to offer a 4K UHD video recording feature. Moreover, it comes with a sustained video capture rate of 30 MB/s. In addition, the product is designed to provide support to real-time video recording with UHS-enabled host devices.

Ideal for harsh conditions: The device is temperature-proof, waterproof, shockproof, and X-ray-proof. It allows you to store images that you have deleted accidentally.

Pros:

  • Waterproof
  • Perfect for harsh conditions
  • Support 4K UHD (3840 x 2160) video support

Cons:

  • Won’t work when it reaches 100 GB
  1. SAMSUNG EVO Select Micro SD Memory Card

SAMSUNG EVO Select Micro SD Memory CardDescription: It enables you to use different SD and micro SD devices. Besides, you can capture 4K UHD videos in detail. Moreover, it comes with an SD adapter that allows you to use it under almost each brand name.

The device lets you record 4K UHD videos and play them without glitches. It has a reading speed of up to 100MB/s per second, whereas the write speed is 90MB/s. These superfast speeds enable you to share a 3GB video to the notebook in only 38 seconds. Now, you can capture top-quality images and videos and share them instantly. Due to its vast capacity and high read/write speeds are ideal for 4K UHD video. Users can save almost every moment with the help of this product.

Features:

Capture & share files: The product is suitable for high-resolution photos, gaming, songs, tablets, laptops, action cameras, drones, smartphones, Android devices, etc.

Long-lasting: It keeps all the data and memories safe against extreme temperatures, water, as well as other harsh conditions. The product is temperature proof, Waterproof, as well as magnetic proof.

Capacity to Live Largely: The product offers a considerable space of 512GB. It is ideal for 24 hours of 4K UHD video, 78 hours of Full HD video, 150,300 photos, or 77,300 songs.

Pros:

  • 512 GB space
  • Durable
  • Lasts long
  • Suitable for tablets, phones, laptops, etc.

Cons:

  • Maybe corrupted
  1. Gigastone Gaming Plus 512GB MicroSD Card

Gigastone Gaming Plus 512GB MicroSD Card
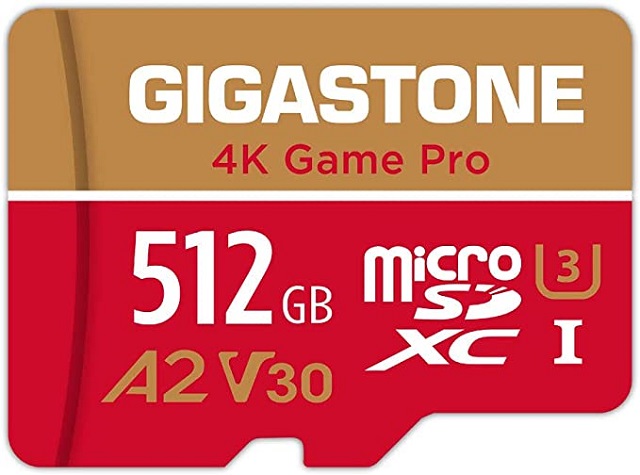
Description: It is best for Nintendo Switch. Generally, it has 32GB or 64GB of internal storage that relies on the model. So whether you are willing to store plenty of downloaded games and related data within a handheld console, you can go with this one.

You can use the product for this purpose, although it is not recommended by Nintendo officially. The read speed is 100MB per second, whereas the write speed is 60MB per second. Therefore, it helps to share files quickly and save time. This device is ideal if you play high-action games.

Features:

Design: It is mainly designed for gaming consoles. The A1 spec offers high-speed data transfer that is suitable for game professionals.

Support: The product enables you to use it for laptops, tablets, PC, Smartphones, Cameras, and e-Reader.

Environment: It is shockproof and X-Ray proof. Besides, it offers protection from water and temperature.

Warranty: The product comes with a 5-year limited warranty.

Pros:

  • 5-year limited warranty
  • Temperature proof
  • Compatible with laptop, tablet, etc.

Cons:

  • SD cards can’t be identified and formatted
  1. Kingston 128GB microSDXC Canvas React Plus

Kingston 128GB microSDXC Canvas React Plus
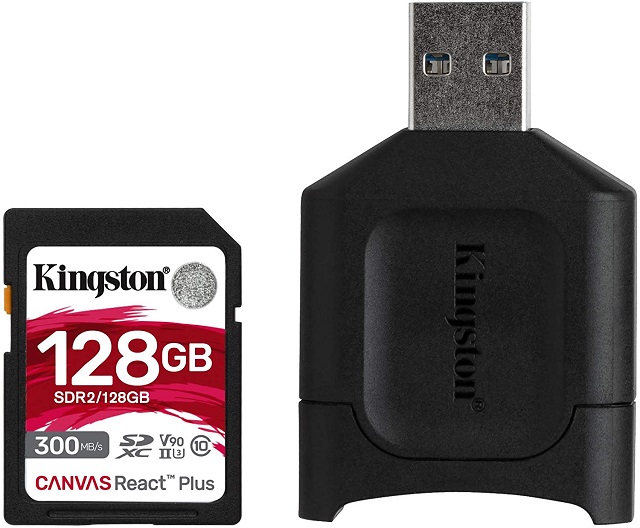
Description: Are you using two cameras or devices— one is compatible with an SD card, whereas the other one is with a microSD card? Then, you should use this with an adapter. The product is equipped with an SD adapter and a MobileLite Plus USB card reader. This USB reader can work as a discounted bundle.

The 128GB storage capacity and U3, V90, and UHS-II rating make the product ideal to use. Its data transfer speed is a maximum of 285MB per second, whereas the recording speed is 165MB per second. In addition, this device allows you to shoot video at up to 8K UHD resolution, ideal for higher-end action cameras.

Features:

Professional camera: The product’s ultimate speed allows you to use a professional camera. Therefore, people who are professional creators.

UHS-II standard: This device is ideal for high-resolution photography and video recording. It can shoot 4K and 8K Ultra-HD high-speed videos without dropping frames.

MicroSD Reader: It has a MobileLite Plus microSD Reader that helps share data quickly.

Pros:

  • MobileLite Plus microSD Reader is available.
  • Don’t drop frames
  • Ideal for professional creators

Cons:

  • Throws file system errors
  1. PNY Pro Elite Class

PNY Pro Elite Class
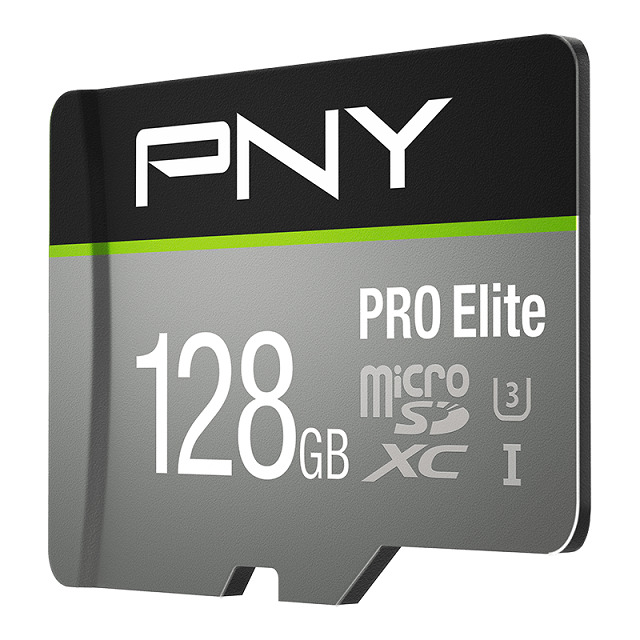
Description: Do you want to have huge storage from a high-end flash memory card? Then, the product is ideal for use. It is slightly on the costlier side, but the features justify everything.
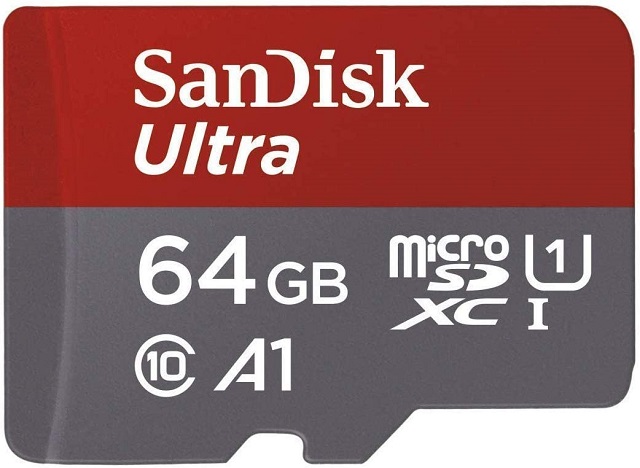
100 MB per second is the superfast read speed, whereas the write speed is 90 MB per second. It can deliver performance in any situation. The product comes with 1 TB of storage that can keep plenty of high-quality images and videos.

Features:

Performance: It is ideal for professional photographers and videographers due to its good performance.

Class 10, U3 rating: It offers speed and performance for the burst mode HD photography & 4K Ultra HD videography.

Video speed rating: The V30 video speed rating allows you to shoot uninterrupted 4K Ultra HD video at 4096×3072 Format​.

Support cameras: It supports point & shoot cameras, DSLR cameras, standard & advanced HD-enabled video cameras, etc.

Durable: It is shockproof, waterproof, temperature proof, etc.

Pros:

  • Magnet proof
  • V30 video speed rating
  • Class 10, U3 rating
  • Professional photographers

Cons:

  • Costly

Memory Card Buying Guide:

You can find modern DSLR and mirrorless cameras, mostly with memory card slots. If you are willing to use this, insert it into the camera supporting it. Remember the aspects before you are going to buy a new memory card.

While selecting the best one, it may seem that the biggest card is best. Whether you capture many pictures without importing them to the PC, you should use a giant card. It is suitable for travel photographers as they can go days without sitting down. The drawback, in this case, is whether you have lost the card; no pictures will be available after that. But when it comes to a small card, you may need to back up the pictures.

Professionals use cards in high-end DSLRs, which come with more extensive storage. The reason is that the size of the images is bigger. It is used if someone is shooting Raw, and in this case, the files are larger than 25MB each.

However, if you are willing, then go with the fastest card. It helps to write images quickly. But if it is quicker than a camera, then it is of no use. You can use the fastest memory cards, but you need to invest a lot of money in this.

If a DSLR captures four fps, you don’t need to choose one with quick writing speed. Instead, people who are looking for affordable ones can use a slower card.

The fastest cards are essential for the professionals who cover sports or news photography. It helps to buffer pictures when you capture them. So go with the best one as you never want to lose out in the photography field for having a cheaper model.

Compatibility:

Memory cards are suitable only when these enable you to use the proposed camera. For instance, you can use a MicroSDXC in a MicroSDXC-compatible slot.

UDMA Rating:

It is the short form of Ultra Direct Memory Access rating. These come with 0-7, where 0 is the lowest and seven is the highest. You should know that all devices don’t support all types of speeds. Therefore, ensure that you have checked twice before buying.

Reading Speed:

Make sure that you have selected the rate at which the pictures are downloaded to the PC.

Writing Speed:

You should consider the writing speed rate at which the card can record and store the pictures you have captured, and it is the vital speed that needs to be considered. Using an adapter, you can use the MicroSD cards as standard SD cards.

Capacity:

It is one of the significant aspects you must consider before buying. You obviously don’t want to use a memory card with a low capacity that cannot fulfill the demands. Hence, you should select the factor that relies on the number of shots taken in a single event.

Multiple photographers are there who want to use 64 G lB memory cards. These can store images up to 1500 to 2000 in RAW Format. It is advised to use a memory card with at least 64 GB of capacity. Those who shoot in RAW Format need to have such cards. On the flip side, if you want to store jpeg format, go with a memory card with 16 or 32 GB. Those willing to shoot videos should use one with a larger capacity.

Speed:

This is a significant factor that can make a good experience by storing images or breaking them. You may not want to wait for hours to share pictures from the card to the PC. SD cards are available with a limited speed and are used for reading and writing.

The reading speed indicates the amount of time a card takes to read images from its memory while sharing. Besides, the writing speed indicates the amount of time a card takes to store pictures or other information in its memory. So while you are going to shoot videos, writing speed becomes a vital factor. And when you share photos from the card, then the reading speed is the crucial one.

Price:

It is an important aspect you are willing to consider before buying anything despite its use and type. The CF cards cost higher compared to SD cards, and it is because they come with better speed and UDMA 7 technology. If you want a higher speed card, it will cost more. Therefore, if you consider the capacity, you should select a card with more capacity.

Ultra-High-Speed Class & Video Speed:

When it comes to SDXC and SDHC memory cards, you find an Ultra High Speed or UHS. These come with quick write speeds, ranging from 10 MB per second to 350 MB/ s. The feature is suitable for continuous & high-definition images. In addition, you can get the SD cards available, optimized for 3D recordings & 8K videos.

Memory Card Tips:

  1. You should not purchase a memory card of the wrong type. Ensure that you know the type used by your digital camera, mobile phone, or games device. After considering the factors, you should invest your money. Then, check whether you have bought the right one or not.
  2. Make sure that you don’t become dependable on the device’s included memory. A few devices feature bundled memory cards, indicating that you can use this straight out of the box. Unfortunately, the bundled cards are available at the bottom of the capacity spectrum, which means that you can’t store data very much.
  3. Allow your hardware to determine the memory card size. Try to buy memory cards that have large capacities. These are not only easy to use, but also they are helpful for some devices. For instance, cameras shooting full HD can chew up more memory space per video.
  4. In the market, there are a lot of models available, which are made out of multiple manufacturers. Many of these offer similar performance and have the same speed. However, all cards don’t have the same features. It is because these consist of different components and manufacturing standards. If there is already a cheaper generic card available, keep using it. Otherwise, you can use cards from famous brands.
Precatuions:
  1. It is essential to take care of the cards. Compared to other storage forms, Flash memory is more potent. However, it needs a little TLC to keep your information secured. You should always format a new memory card in the camera before you use this to take images. A few cameras will not work if you have already formatted the card on another device. You should keep the cards in a case while not using this. Ensure that you are not removing the card when the device is active.
  2. Are you making a trip for your holidays? Then, don’t buy one card only. You should know that Flash memory is available at low prices. Therefore, it is better to stock up these cards before visiting any location or making a trip. In addition, it is recommended to purchase some small capacity cards like 4 or 8 GB versions. Use these as storage despite using the 32 GB model only. The reason is that if you have lost your card, or it gets corrupted or stolen, you will lose all the images.

The Bottom line:

In this article, we have given brief details about the memory card. In addition, we have also included the top five best memory cards in the market.

Frequently Asked Questions:

  • For which purpose is a memory card used?

These previously come in a range from 8 to 512 MB storage space. However, the new models can store up to 8 GB of data. It is used to store pictures in digital cameras. Besides, you can store and share programs & information between handheld PCs like pocket PCs and Palm OS.

  • Is a SIM card a memory card?

A sim card has a connection with the mobile carrier. Besides, it needs to be compatible with the features on your device. It helps to store data like images or videos only.

  • Which is the best memory card?

The best memory cards are:

  • SanDisk 128GB Class 10 microSDXC
  • Samsung EVO Plus 32GB microSDHC
  • SanDisk 32GB Class 10 Micro SDHC HP 64GB Class 10 MicroSD
  • Strontium Nitro A1 128GB Micro SDXC
  • SanDisk 64GB Extreme microSDXC


read more
AppsGadgetsInternetTechnology News

How to Fix a Corrupted SD Card?

How to Fix a Corrupted SD Card

It may happen that you are using your SD card, and it fails suddenly without warning. In most cases, SD cards display tell-tale signs of corruption/damage before they stop working. Whether you can recognize the signs, you can backup your data in time. Then, you can fix the problem. This article lets you know how to fix a corrupted SD card.

How to Fix a Corrupted SD Card:

These are some Ways to fix a corrupted or damaged SD card.

  1. Try another USB Port or change Adapter or Card Reader:

It is one of the most straightforward processes that you can try. That’s why you need to try this method first, and then you are required to move on to other fixes to solve the issue.

Whether you are using a laptop with a default SD card reader, buying a USB card reader is advised. You should try different types of USB ports, and it will be better if you use these more than one computers.

  1. Try CHKDSK Command for Checking Memory Card Issues:

A command-line utility exists in all types of windows, allowing you to check a volume’s file system and file system metadata. We know the utility as CHKDSK, and the command is simpler to use than you think.

If you are willing to solve issues related to a corrupted SD card with the help of a CHKDSK command, you should perform the steps.

  • Your first job is to write “cmd” in the search box that you can see available on the taskbar. After that, you are required to choose Run as administrator.
  • Next, you need to put the command given below, and after entering the command, you should tap Enter. Ensure that you have replaced X with the letter assigned to your SD card.

chkdsk X: /f

Here, this /f parameter says the utility to fix your memory card.

  • Now, you should wait for a while till the CHKDSK process is not finished. This method can take some hours, but it relies on the size of your SD card.

You can use all the methods given in this article to fix a corrupted SD card. These help to fix all types of SD cards.

  1. Use SD Card Data Recovery Software:

When your SD card becomes corrupted and damaged, it may happen that you have lost your essential files. If you want to get these back, you must use SD card data recovery software. There are plenty of data recovery software available online.

Most of the online data recovery software is compatible with all SD card types, such as SD, SD High Capacity (SDHC), and SD Extended Capacity (SDXC). It helps to recover documents, images, videos, etc., quickly. In addition, the recovery solution allows you to preview recoverable files before recovery.

That enables you to recover up to 500 MB. In addition, the tool features a few helpful data protection and backup features, which help to learn to keep your SD card secured against future data loss.

If you are willing to recover files with the help of the data recovery software, then perform the steps—

  • In this case, you should first download the software and install this after that.
  • Next, you need to attach your SD card to the PC, and then you should launch the tool.
  • Now, you have to choose your SD card, and after that, tap on the Search for lost data.
  • You are required to check files that you have recovered.
  • Then, you should tap on the Recover button at the bottom.
  • You should now specify your destination for recovery. Then, tap on OK to start the recovery process of the files.
  1. Use Card on Another Computer:

It may happen that the SD card that you use is working correctly. Therefore, problems that you experience are caused by the PC. In this case, you need to use the card on other PCs or devices to rule out the chance.

Hence, if necessary, you can take help from any of your friends, so they will allow you to use their PC. In addition, you may go to a public library and use any PC. Thus, you can verify your problems to check if it is occurring on other devices.

Want to diagnose a microSD card? If you have a mobile where a microSD card slot is available, you can use the device as an easy-to-use test device. You can verify the card’s functionality without a PC if you want. However, you need to be careful because your device may need to format your SD card. Therefore, you should ensure that you are not erasing this accidentally.

  1. Assign a New Drive Letter:

Multiple SD card issues are there, which you can solve by assigning a new drive letter to the SD card. These errors usually have something to do with conflicting drive letters.

If you are willing to assign an updated drive letter to an SD card, you must perform the steps.

  • You should first navigate the search box and write “disk management” there. You can see the box on the taskbar. Then, you should choose the Create and format hard disk partitions.
  • Next, you need to tap on the SD card. Then, you should choose the ‘Change Drive Letter and Paths…’ option.
  • Now, you have to tap on the ‘Change…’ button.
  • After that, you should choose a new drive letter and then hit OK.
  • Lastly, you should tap on OK again to turn off the Change Drive Letter and Paths window.

Conclusion:

This article lets you know how to fix a corrupted SD card. First, make sure that the memory card you have should support your mobile device. Try always not to lose data. That’s why you should follow the right processes to fix the corrupted SD Card problems. If you cannot solve the problem through these methods, then use some online SD card recovery services. Finally, ensure that you have chosen the correct memory card to strike a balance between a memory card and your device.

Frequently Asked Questions: 

  • Can a corrupted SD card be reused?

Yes, you can use this unless physical damage is the reason behind corruption. Then, after fixing the corruption problem, you can reuse the SD card.

  • Why does an SD card get corrupted?

A few common reasons for SD card error are—  improper use, malware, accumulated bad sectors, manufacturing defects, and physical damage.

  • Is it possible to recover photos from a damaged SD card?

Yes, it is possible to recover images from a corrupted SD card. But it relies on the condition of your card.

read more
1 3 4 5 6 7 20
Page 5 of 20