close

Technology News

Do It YourselfInternetInternet SecurityTechnology News

Printer Driver is Unavailable Error on Windows — Fixing

Printer Driver is Unavailable Error on Windows — Fixing

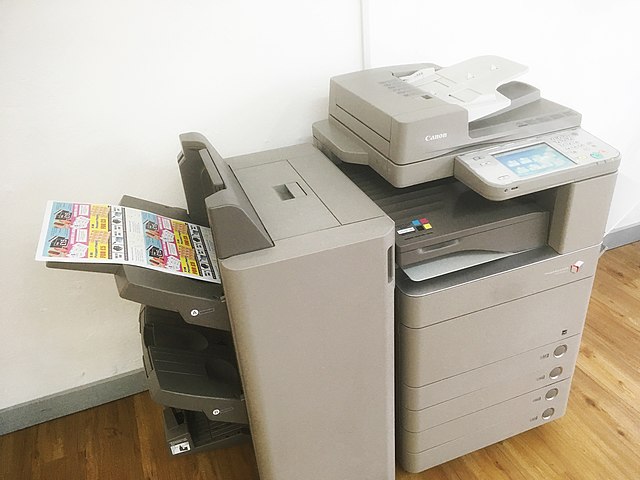
Generally, the Printer has excellent usage. Your Printer may run for a long year, but it doesn’t mean that it will not malfunction. It can also stop giving responses completely. We have given here a few basic printer problems, and this blog post will assist you in fixing the printer driver is unavailable issue related to Printer.

Sometimes, you can experience a “Printer Driver is unavailable” error while printing documents. For HP printers, it is very common. However, other brand drivers can face trouble also. For example, Epson printers face an “Epson printer driver is unavailable error” that occurs frequently.

When this error message appears in front of the display, it indicates that the Printer’s software is not installed correctly on the PC. Besides, it also happens that your device drivers are facing troubles. However, we are fortunate that there are methods to fix the issue.

What does ” Printer Driver is Unavailable” on Printer indicate?

The error indicates that your Printer’s driver has a specific problem that doesn’t allow your Printer to work with the PC correctly. It can be available as a status on your Windows driver software.

The issue typically occurs while the printer driver is not corrupted or up-to-date. Besides, it can happen if your system needs new Windows updates. Corrupt and incompatible printer drivers are the basic reasons for the issue.

What is a Printer Driver?

A printer driver is a small program that is available on the PC. The function of the driver is to enable communication between the Printer and itself.

Printer Driver Working:

It has two primary functions. The first one is that it works as a bridge between the Printer and the PC. It helps the PC to realize the hardware specifications and printer details.

The second function is that the driver helps translate the print job data to signals that your Printer understands. Each Printer comes with its driver. The driver is written to fit its profile on a specific OS. If the Printer cannot configure correctly or installed a wrong device driver, your PC could not detect the Printer.

However, a few printer models are there capable of using generic drivers. These come preloaded with Windows 10 and enable you to print. In this case, you are not required to install extra drivers from the manufacturer. But it can sometimes not allow you to use your Printer to its full potential due to the absence of additional printer-specific functions and settings.

Why is your Printer unable to print with Windows 10?

Plenty of reasons can be there due to which your Printer behaves like unresponsive. Hence, it is vital to check out the common causes. For example, you should check if any paper is in the tray, wires are attached to the Printer, toner cartridges are not exhausted, and your Printer is hooked up to your Wi-Fi. Check the warning lights on your device or the error messages you see on your Windows 10 computer.

Besides, whether you have updated your OS from Windows 7 or 8 to Windows 10 recently and find your device unable to print, then it may be the upgrade process due to which your printer driver has been damaged. You may have a printer driver also that doesn’t support your new Windows version.

Microsoft indicated that there would be no backward compatibility preloaded into the operating system for a few specific software and apps. The same thing applies to a few specific printer drivers. Multiple printer manufacturers are unable to update the drivers in a timely fashion.

The issue can occur due to an incompatible driver or corrupt file. However, you can fix the problem by applying a systematic approach. In this case, you are only required to check for any Windows updates. After that, you need to install the recent driver for your Printer.

How to Fix Printer Driver is Unavailable Error?

The error message prevents you from printing though you change printer ink cartridges. It doesn’t enable you to use other functions such as Scan and Copy. Whether you face trouble, try to follow these processes to fix it.

But before proceeding, it is important to know about the requirements. These help to troubleshoot the methods very easily. Make sure that you will use the second requirement only when the first requirement won’t work.

First Requirement – Change UAC Settings:

UAC or User Account Control is a setting that lets you know when your windows (10, 8, or 7) make any system changes. The changes are mainly related to the user or admin rights. You should configure the UAC settings so that it will not prevent you from installing essential components and drivers for the Printer.

Perform these steps here:

  • First, your job is to ensure that you are signed in as the Administrator on the PC.
  • Then, your task is to move to the Control Panel and then User Accounts. After that, you should go to the option, “Change User Account Control Settings.”
  • You can see that there are three levels, including two levels above Never Notify and a level below Always Notify. Hence, you need to set the slider to the third level.
  • A box is available on the right side that lets you know the summary of the setting. It will say, “Notify me only when apps try to make changes to my computer (default)” at the top. You can also see this message “Recommended if you use familiar apps and visit familiar websites” at the bottom part of the box.
  • Tap on the OK.
  • Then, you have to tap Yes when a User Account Control Settings window is available. It asks permission for the application to make changes on the machine.

Second Requirement – Complete Admin Account Verification:

If the first one is not working, then the reason is that windows have added a verification step. In this process, the identity is verified as the Administrator and stops illegal access to your account. Besides, it provides control to the admin user on all the changes made on the computer.

Steps:

  • First, your task is to ensure that you have signed in as the computer’s Administrator.
  • After that, you are required to head towards the Control Panel, User Accounts, and Make Changes to my Account in PC settings, respectively.
  • Then, your job is to tap on the Verify that is available under the Your Info heading Windows. It asks you, “how would you like to get this code.” Now, you need to select the Email Address and tap on Next.
  • Microsoft will send a verification code to your email address. You need to copy & paste the code on your required entry and tap on Next.
  • After verifying your account, as soon as the installation of the printer driver starts, the verification step won’t be available.

Here, we have given some basic troubleshooting methods that you have to apply to resolve the issue.

Ways to Resolve Printer Driver Unavailable Issue

  • You need to check if your Printer is connected to a power source and PC through Wi-Fi or a cable is used.
  • Make sure that it is powered on and not in sleep/hibernation mode.
  • Whether you send a task through email, ensure that you have specified the proper email address.
  • Wi-Fi printers are tricky due to which you have to connect your machine to a similar Wi-Fi network. It is because the Printer is going to begin a task.
  • Check if the wires are attached correctly to the PC.
  • Try to use a different wire if the recent one is damaged.
  • Whether you have a USB-enabled printer, attach it to another one if your recent USB port is malfunctioning.
  • Make sure that the printer ink cartridges must not remain empty.

Way 1) Reinstall Printer’s Drivers:

Sometimes, the driver can lose important files or become corrupted. If something like this happens to you, you must uninstall every related software. Then, you have to install your driver back on the PC.

  • In this case, your first task is to head towards the Control Panel, then Hardware and Sound, Device and Printers, and Device Manager, respectively.
  • Tap on the option Print queues to see the drop-down list. Now, you need to look for the printer model on the list. As soon as you find this, tap on its icon. Then, your job is to select the Uninstall device option. Next, tap on the Uninstall option when your Windows ask you to confirm the action.
  • Now, you are required to move to the Control Panel of your PC, and then you have to tap on Devices and Printers. Hence, you need to select the Printer and then tap on Remove device available at the Window’s top right corner.
  • Finally, you have to reinstall the driver. Ensure that you have added each essential component in the installation.

Restart Automatically:

  • In this case, tap on the Start Scan first to detect the outdated or incompatible drivers.
  • You can take Smart Driver Care’s help as it helps scan the Windows for outdated drivers.
  • As soon as the scanning process completes, you can see the outdated drivers.
  • Tap on the Update button that is available to the printer driver. Whether you use the Pro version, then you need to tap on Update All for downloading automatically and installing all outdated drivers.
  • Now, restart the OS.
  • Finally, you have to check your OS to see if the problem remains.

Way 2) Update the Windows Operating System:

If your system is outdated, it can be a reason for the issue. If it happens to you, you have to install all available Windows updates. Thus, you are capable of fixing the issue. To update the windows operating system, perform these steps.

  • You should first hit the Search Bar button next to the Windows Start Menu button. Then, you are required to tap on the “Update” word.
  • Then, the Search Bar appears with a list of possible options regarding the query. Find the Windows Update option next. After finding this, you should tap on the Check for Updates button.
  • Now, windows start checking tor the available updates. Then, you need to install these automatically.
  • When the method ends, you have to restart the computer.
  • Finally, you are required to print any page to check the issue.

Way 3) Exclusive for Plug-and-Play Printers:

Do you have a plug-and-play printer? If you have this type of Printer, then the work will be a lot simpler.

To deal with the issue, you should first unplug the Printer from the PC. It indicates that you need to unplug all cords and wires connected between these. Then, you need to connect everything again and perform the steps given by the Setup Wizard.

When you see the Wizard not appearing, your task is to navigate to the Start and then Settings.

  • After that, tap on Devices.
  • Then, you should choose to Add a printer or scanner.
  • Wait for a while now till your system is not identifying the Printer. You are required to follow the instructions.
  • Now, you can see the windows identifying all devices attached to the computer. As soon as it identifies the Printer, you should finish the instructions given on display.

Way 4) Manually Update Your Printer Drivers:

If you face any trouble after carrying out a Windows update, update the printer drivers. Navigate to the printer manufacturer’s website and check if your device is compatible with Windows 10. You can get the Driver downloads option in the manufacturer’s Support section.

When you find your device supported, you have to download the recent stable version. You need to tap two times on the installer files to add the new driver as soon as you download. Sometimes, your device can only be compatible with the manual installation of drivers. Perform the steps to do this.

  • Head towards the Control Panel first and then open it.
  • Choose the Small Icons view option available on the top right of the dialog. Next, you need to tap on the Device Manager.
  • When you go to the Device Manager window, look for the printer you are willing to install. Sometimes, you can find your Printer missing. Besides, it can have corrupt or outdated drivers, due to which you can see a yellow exclamation mark beside the name.
  • Tap on the printer name, and then you need to select the Update Driver Software option from the pop-up menu.
  • Now a new window will appear with two options. Hence, you should select the option that is marked “Search automatically for updated driver software.”
  • You need to follow the steps available in the Wizard. It helps to install the recent drivers for your Printer if these are not available. If these have been downloaded already from the manufacturer’s support site, you have to choose “Browse my computer for driver software” instead.

Way 5) Run the Windows Update Tool:

Having an outdated operating system can be a reason for the issue. It is why you are required to install all the windows updates instantly as fast as you can. Thus, you can print again and get the overall stability and security of the PC. We have given here the process of running the Windows Update utility.

  • You should first hit the Start button that is available at the bottom-right corner of the display.
  • Then, your task is to tap on the Settings icon.
  • Now, you should select the Update and Security option.
  • Windows will find updates after that. If there is any, then you have to download and install it automatically.
  • As soon as the update method is finished, you need to reboot the PC.
  • When you reboot the PC, you should check if the error message is still available or not.

Way 6) Check for Damaged System Files:

Sometimes, corrupted or damaged system files can generate multiple issues. If you are willing to fix the error, then you need to use the Reimage to perform a full Windows scan and repair.

  • First, your task is to download the Reimage and install it.
  • Then, your job is to open the Reimage. After opening this, you need to tap Yes to run a free scan.
  • With the help of Reimage, you can scan the PC thoroughly. However, it can take some minutes.
  • As soon as you do this, a detailed report of all the troubles will be available on your computer. If you want to resolve these automatically, then you need to tap on START REPAIR. But to use this, you should buy the full version. Besides, it also comes with a 60-day money-back guarantee. Therefore, if you want, you can refund any time if Reimage is unable to fix the problem.
  • Now, you need to check your driver’s status as it will be normal now.

Way 7) Uninstall the Printer Driver:

Especially, two significant solutions are there that you can follow to fix the issue. The first one is to uninstall your Printer with all related software. Then, install this in your operating system. And the second one is that go through all the available drivers and then choose the correct one. It helps to uninstall them, and then you should try to connect it. Thus, the default drivers can be installed.

Steps:

  • First, your task is to tap on Windows + R buttons. Then, write “control” in the dialogue box and hit Enter. As soon as you enter the control panel, ensure that you have chosen the option View by Large icons. After that, you need to tap on the Devices and Printers.
  • You can now see all the names available in the list.
  • Tap on the name that is creating the issue. Then, you have to choose the “Remove device” option.
  • Now, you must hit Windows + R again, and after that, your task is to write “devmgmt.msc”. Your task is to move to the “Print queues” category and then tap on the Printer. After that, your task is to choose the “Uninstall device” option. Sometimes, the option may not be available in the Printer after removing it from the control panel. Therefore, there is nothing to take tension if you won’t find this.
  • Write “appwiz.cpl” in your dialogue box after typing Windows + R button. After that, your task is to hit Enter. All the apps are available in the list.
  • You should now tap on the printer applications and then choose “Uninstall.”
Further Steps:
  • When you complete performing the steps given above, you need to unplug the device from your PC. You should do this while the device is connected via a USB connection. You should unplug it from your router if it uses wireless. Then, your task is to close the PC, Printer, and router. After that, you are required to plug the power supply out.
  • You should wait for ten minutes. After waiting, you need to connect all of these and start all modules. You should then plug the device into your PC with the help of a USB cable initially. Now, you should wait till the detection process is not finished, and then you have to install your essential drivers.
  • You should then move to the control panel and tap on the device. After that, your job is to choose “Set as default printer.” You need to print a test page to check if the issue remains.

Via Device Manager:

  • First, you are required to hit the Start button. Then, your job is to move to the Device Manager section.
  • Hit the arrow button that is beside Print queues to extend this group.
  • If your Printer is not available in the list, then you need to open the View menu. Then, your task is to choose Show hidden devices.
  • Tap on the Printer and then choose Uninstall device.
  • Now, your task is to tap on Uninstall for confirmation.
  • As soon as you uninstall the device, you need to go to the Action menu and open it. Then, choose Scan for hardware changes.
  • Now, your task is to reboot the computer. Windows will install the missing device automatically.
  • At last, you should try using the Printer.

Way 8) Start Windows in Safe Mode:

You can try to boot your windows in Safe Mode as it is an ideal way to disable any non-critical drivers, services, or processes. These can affect the PC and cause errors.

The process of doing this is as follows:
  • Head towards the Start menu first and open it after that. Then, your job is to hit the power button.
  • Hold the Shift button down and then tap on Restart.
  • Now, you can find your Windows booting in Recovery startup mode with a blue screen.
  • Then, you should choose the Troubleshoot area.
  • After that, you must navigate to the Advanced options and then Startup Settings.
  • Tap on the Restart.
  • You should then tap F4 to turn on the Safe Mode.
  • As soon as your Windows boots, use your Printer.

Way 9) Install Generic Printer Driver:

Your PC may not detect the Printer or get stuck as an Unknown device. Hence, your task is to install default generic printer drivers manually. Perform the steps to do so.

  • Your first task is to tap the Windows key and hold this. Then, you need to tap X.
  • Next, you should choose the “Device Manager” option.
  • As soon as you open the Device Manager, you need to find the Printer. If you cannot find this, you should check if the “Unknown Devices” option is available in the category.
  • Tap on the device and tap on the “Update Driver” option.
  • Then, your task is to tap the “Browse my computer for drivers” option.
  • You should choose “Let me pick from the list of available drivers…..” and then select “Generic Software Device.”
  • Next, your job is to tap on the “Next” Option, and then you should restart the PC.

You should know that installing the Generic driver might not allow you to use some functionality. But it makes your device usable, at least.

Way 10) Reinstall Printer:

If you cannot solve the ‘Printer driver is unavailable’ error message, you should reinstall the Printer. The effective way that you can choose is to solve irregularities. If you are willing to do this, then perform the steps.

  • You should switch off the printer device and unplug it after that.
  • Then, you must write Add Or Remove Programs by going to the search field.
  • Next, you can choose the Printer that you are willing to uninstall.
  • Wait for a while till the uninstallation procedure is not completed.
  • You should now reboot the operating system and then connect it again. Now, you can turn on your Printer.
  • You can take the help of the installation disc or USB in this case.

Way 11) Roll back the Printer Driver:

Have you installed a driver mistakenly which does not support your Printer and operating system? It may be a reason why you are facing the error message. Hence, the easiest way to do this is to roll back your driver to an earlier version. These are the steps that you are required to perform to do this:

  • Your first task should be to tap on the Win key + R buttons. Then, you need to write devmgmt.msc. After that, you have to tap on the Enter to open Device Manager.
  • Then, your job is to expand the category of the Print queues.
  • Tap on the printing device, and then your task is to move to the Properties.
  • Now, go to the Driver tab.
  • You should now tap on the Roll Back Driver and then go through the instructions.
  • If you see the button in grey color, it indicates that no earlier version is saved on the computer. As a result, you are unable to perform the process.
  • Finally, your task is to reboot the Windows PC and then check your Printer.

Way 12) Set the Default Printer:

Have you connected many printers and scanners with your PC? If yes, your OS can take a hard time detecting your default printer. Therefore, the device will not function properly and show the error message. However, you can resolve this by setting the default printer.

  • First, your job is to tap Win key + R and then write Control Panel. Next, you need to hit Enter to open this app.
  • Then, you need to go to the Devices and Printers.
  • Now, you need to identify your printer name in the category of Printers.
  • Tap on this and then choose Set as the default printer.
  • Tap OK for confirmation.
  • Finally, check your Printer to see if it works.

Conclusion:

If you don’t want to face Printer driver-related issues such as printer driver is unavailable, or driver unavailable on the Printer, or Printer says a driver is unavailable error messages, then you should perform specific things. You need to keep the hard disk constantly optimized and install a driver from an actual source. Make sure that you haven’t installed any software from unknown sources. Try to use reliable driver updater software and keep the drivers updated. Wish our guide will help you to fix the error message ‘printer driver is unavailable’. Try all the methods one by one to resolve the error.

Frequently Asked Questions: 

How do you fix Printer Driver Is Unavailable Error?

You can solve the error by installing or updating the printer driver. Besides, you can also update the Windows Operating System to fix the issue.

How do you make your Printer Driver available?

The issue is usually seen when your driver becomes corrupted or outdated. In this case, updating your windows or the printer driver (manually or automatically) can help you.

What is the Driver Is Unavailable Error For The Printer?

It happens while the PC and printer driver is outdated or not compatible. Your Printer can experience multiple problems like paper getting stuck, unclear, blotched print, etc. The printer driver unavailable error is one of the examples of technical issues hence.


read more
InternetTechnology News

Best DNS for PS4 in 2022

Best DNS for PS4 in 2022

Have you faced a lag during an intense match with your friends on PS4? Can’t perform the actions properly? Then, ensure that it is not a good sign. It can happen due to having a poor connection to the Internet. The internet connection is not always the problem because the DNS server may be a reason also. Therefore, you will need to use fast and best DNS for PS4 to enhance the quality of your ping and connection stability.

The ISP or Internet Service Provider you are using offers the default DNS settings for your connection. However, it is better if you will avoid using the default DNS. It is always recommended to use a custom DNS server. If you use a lousy DNS on your end, it can spoil the gaming experience you are having. It can ruin the experience whether you play multiplayer online gaming.

If you want to improve the lag in your gaming on your PlayStation4, it is advised to use a custom DNS server. When you use a custom DNS, it helps to improve latency problems. Besides, it is helpful for the gaming console. This guide will help you get the fastest and best DNS for PS4. You can use this for gaming PCs and mobile phones.

What is DNS?

DNS is the short form of the term Domain Name System. It is pretty similar to a phonebook for the Internet. Suppose you take a phonebook and click on a name. It will call the number associated with the name when you do this.

The function of DNS is to assist in setting up a connection between two different addresses. We can read one address, whereas one can be read by PC. A few reasons are there due to which your network speed may slow down. However, assigning a good DNS can provide better internet speed results. In simple terms, it is a tool to translate domain names to IP addresses.

What are the different types of DNS?

Like address books, there are different types of DNS also. We have given here three basic types of DNS.

Public and Private DNS:

Big telecom companies usually use private DNS. Whether you use Verizon, they offer private DNS servers. Therefore, you are unable to use any DNS server. On the flip side, the DNS servers that people can use are called Public DNS servers. Compared to a few private DNS servers, public servers are a little bit faster and safer. Google’s Public Server is an example of this.

Router DNS:

Sometimes, you can find routers that set themselves as DNS servers. While you are going to request a new URL, the router’s DNS server needs the DNS of the internet service provider for the respective IP address. After that, it will complete the request. Whether you will make a similar request next time, you are not required to put the address again. You will get a quicker response. Thus, Router DNS helps to set up an improved network connection.

Custom DNS:

Multiple private companies are there that offer Custom DNS servers. These are usually available as free or paid versions. You can use the free versions, but these have limitations. Compared to the default servers, the servers are quicker. These help to avoid censorship.

What is a DNS server?

It is a server that collects IP addresses with their corresponding hostname. People use DNS resolvers to resolve IP addresses and domain names. Besides, it is capable of translating web addresses to their IP addresses.

Why is a DNS server important?

We have said before that it is pretty similar to a phone directory of the Network. While you accept a page, your system will begin a DNS search. Websites with a very complex code or a multifaceted variant can be seen in many DNS lookups before the completion of loading the page. It indicates that your device is performing plenty of DNS searches each day. However, it relies on how many websites you visit and the degree of complexity of each webpage.

How to Find the Best DNS Server for PS4:

It is simple to test DNS latency, and hence you need to use the command prompt or any terminal tool defaulted into the PC. You can do this on Android or iOS. But you are required to download any ping utility.

You can use the ping command. In this case, you have to type the word ping followed by the IP address. After writing this, you should hit the enter button. Next, you will receive replies from the server with the latency. It is measured in milliseconds (ms). If you get lower latency, it will be better for you.

How to Setup DNS on PS4?

Your first task is to power on the PlayStation you have, and then you should head towards the “Settings” menu. Choose the “Network” option that is available in the Settings menu. Next, you can see some available options under the network menu. From all of the options, your task is to choose the option “Set Up Internet Connection .”Now, your job is to select one of these two— LAN or Wi-Fi. But it relies on how you use the Network to connect your PlayStation 4.

While you choose one of these two to connect the Network and your PlayStation 4, you should change the IP Address to Automatic. Next, you should set the DHCP as Do not specify. Now, you are required to change the DNS Settings to Manual when you set up the fastest DNS for PS4 of custom type. Select any custom DNS that you prefer, and then write the Primary DNS and Secondary DNS. After a while, you should tap on the Done option for updating the DNS. At last, you need to set the Maximum Transmission Unit as Automatic whereas setting the Proxy Server as Do Not Use. Check different DNS individually until you get the best DNS for PS4.

How to Configure DNS for PS4:

If you are willing to configure the DNS of your choice, your first task is to configure a static IP. It works on the parameters of network connection in a manual way.

If you are using PS4, you should navigate to the toolbar first and then select the icon available on the gear (adjustments). Now, you should hit the X button to get on the controller.

Next, you are required to select the menu’s RED View connection status similarly.

Then, you need to write these essential details: IP address from the PlayStation, subnet mask, and Default Gateway.

Sometimes, your device may not be connected to the Internet. In this case, details that are required need to be retrieved through these ways.

Default Gateway: The router’s internet protocol address to which the device should attach (usually 192.168.1.1 o 192.168.0.1).

Subnet mask: It displays how many IP addresses are there that the router can assign. The value usually is 255.255.255.0.

PlayStation IP: It is quite similar to the router’s IP rather than the last three digits.

Connect Your Play Station to the Wi-Fi

Now, you should attach the device to the Wi-Fi.

While you come with the essential details, you need to return to the menu Settings and then to the Network on PlayStation.

After that, you should choose the option and configure the network connection.

Then, you need to select the Wi-Fi for connection or use a LAN network cable.

Next, your task is to select Custom, and then you should continue with Wi-Fi.

Now, you should choose the wireless Network for connection purposes, and then you are required to type the password for access. However, if you use a wired LAN connection, you don’t need this.

When you are on the IP address settings display, you should choose Manual. Then, you have to enter the correct details and fill-up the form in the appropriate fields:

  • The retrieved information
  • The IP address that you assign to your PS4
  • The subnet mask Default Gateway
  • Primary and secondary DNS addresses that you have chosen.

At last, you are required to fix the value of the “Automatic MTU,” which means you can’t use proxy servers. When you complete acquiring the static IP address, the console can use the new DNS for PS4.

You are capable of checking the network connection. But to do this, you need to head towards the Settings first, then to the Network. After that, you can check the connection to ensure that it works.

How to Test DNS Speed:

We have given here two ways through which you are capable of testing the available DNS servers. Thus, you get to know which are the fastest PS4 DNS servers.

Automated Test using Namebench: You can use the free Google-created software as it can test many servers automatically. Thus, you are capable of measuring speed and response time.

Manual Test: Through the method, you may test the servers by changing them one by one. Then, you should perform a speed test individually.

Whether you are very serious, combine the two processes. It means that you have to run the Namebench first to get the three quickest options. After that, you need to test these on the gaming system manually. After testing, you can know which one performs the best in which conditions.

Check DNS Server Speeds Using Dig:

If you use a quick DNS server, it can help you improve the browsing experience. Hence, you are capable of checking the response time of a specific DNS server with the help of the Linux ‘dig’ command. The standard form of Dig is domain information groper. It is actually a Linux tool that users may use for querying DNS servers. Here, we have given an example where a standard dig command is used. The command uses an inbuilt DNS server that is configured on your server. The command is asking Dig for querying ‘wordpress.org.’

$ dig @1.1.1.1 wordpress.org +noall +stats

; <<>> DiG 9.10.3-P4-Ubuntu <<>> @1.1.1.1 wordpress.org +noall +stats

; (1 server found)

;; global options: +cmd

;; Query time: 96 msec

;; SERVER: 1.1.1.1#53(1.1.1.1)

;; WHEN: Tue Aug 07 08:28:18 IST 2018

;; MSG SIZE  rcvd: 58

How to find the Fastest DNS using Namebench:

The way to find the fastest DNS is as follows:

  1. Download and install Namebench:

First, you are required to download this. To do this, you need to move to the official downloads page and install the version you prefer.

After that, you need to extract the installer and run it. You can drag .dmg to the app folder for installation of the Namebench.

  1. Running the Test:

When you test the possible DNS servers, you must copy the IP address and then paste it into the ‘Nameservers’ field of Namebench. Ensure that you have put a comma and a space between IP addresses.

You can check the boxes automatically to test the most famous global DNS providers such as GoogleDNS and OpenDNS.

How to Reset DNS?

You can reset the DNS by resetting the router. Thus, you can get rid of the DNS error. In this case, you should head towards the router and see a reset button on it. Then, you need to tap on the button to reset the configurations.

Benefits of DNS Changes When Gaming:

To offer the best connection, DNS servers help to decrease the traffic. Besides, most DNS services can be used safely, due to which people can use them to get access to the blocked content.

Connection stability: Changing the DNS settings can provide a reliable connection to reroute your traffic.

Quicker loading times: You may face web pages loading more quickly if you have lower query times. You can decrease ping, jitter, and packet loss.

Parental Controls: After going to the Settings, you need to use DNS to help parental control.

Better security: If you use DNS, you will get better security through firewalls and Phishing protection.


20 Fastest DNS Servers For PS4:

Google:

8.8.8.8

8.8.4.4

Cloudflare DNS:

1.1.1.1

1.0.0.1

DNS Advantage:

156.154.70.1

156.154.71.1

OpenDNS Home:

208.67.220.220

208.67.222.222

Safe DNS:

195.46.39.39

195.46.39.40

Comodo DNS:

8.26.56.26

8.20.247.20

OpenNIC:

23.94.60.240

128.52.130.209

Dyn:

216.146.35.35

216.146.36.36

FreeDNS:

37.235.1.174

37.235.1.177

Yandex.DNS:

77.88.8.8

77.88.8.1

DNS. Watch:

82.200.69.80

84.200.70.40

Alternate DNS:

198.101.242.72

23.253.163.53

SmartViper:

208.76.50.50

208.76.51.51

Verisign/Neustar:

64.6.64.6

64.6.65.6

Uncensored DNS:

91.239.100.100

89.233.43.71

Quad9:

9.9.9.9

114.112.112.112

OneDNS:

117.50.11.11

117.50.22.22

Fourth Estate:

45.77.165.194

45.32.36.36

Century Link:

205.171.3.66

205.171.202.166

CleanBrowsing:

185.228.168.168

185.228.168.165

Primary DNS is called preferred DNS, whereas secondary DNS is called alternate DNS.

About Five Best DNS for PS4:

Now, we let you know about the best DNS servers for PS4 and gaming. All services can offer high performance.

  1. Smart DNS:

The server allows you to load quickly, and it doesn’t need any help to set up. It is a reasonably new service than the other heavyweights we have mentioned. The server was founded in 2013.

  1. Google Public DNS:

Privacy and transparency are the two core advantages. 8.8.8.8 & 8.8.4.4 are the primary and secondary DNS servers, respectively. It is the best DNS server for gaming and is very easy to use. This one is an ideal replacement for the default one you use. It offers the best IP address for gaming and provides a steady connection that enables your device to run easily. Besides, it is the reason due to which Google Public server is called the best one for gaming. It will log whole IP data to troubleshoot and diagnose for about 24 to 48 hours.

  1. Cloudflare:

This server delivers excellent performance, airtight privacy levels, etc. Its primary DNS server is 1.1.1.1, whereas the secondary is 1.0.0.1.

It comes with a content delivery network, and most cybersecurity professionals prefer to use this. However, the range has been expanded now, and people can get a new server – 1.1.1.1. The new one has insisted on many additional things than the fundamentals that are made depending upon performance and DNSPerf. Independent testing has been done that lets you know that it is the fastest public DNS service available.

The server won’t log the querying IP address. If any logs are taken, these will be removed in 24 hours. KPMG is the one that has been contracted to audit the server.

The server does not offer AD-blocking. Besides, it won’t monitor your work. 1.1.1.2 or 1.0.0.2 & 1.1.1.3/1.0.0.3 services are used for enabling content filtering for malware. It is used to block the adult contents also.

  1. OpenDNS:

OpenDNS, a seasoned operator, was established first in 2005. The recent owner of the company is CISCO. It offers web filtering though it is optional. Besides, the phishing sites available will remain blocked by default.

The primary DNS server is 208.67.222.222, whereas 208.67.220.220 is the secondary DNS server.

The Open DNS comes with two service packages: OpenDNS Home and OpenDNS Home VIP.

These services cost US$19.95 each year for the OpenDNS Home VIP service.

This server has impressive features such as blocking phishing sites, high operating speeds, 100% uptime, optional parental controls, and free email technical support. The server is capable of offering the best IP address for PlayStation.

If you use the paid OpenDNS plan, check the internet activity history. After that, you are required to lock down your system. But to do this, you have to allow access to the particular sites merely. However, average users must not be required to do this.

  1. Comodo Secure DNS:

The server contains a good focus on security, but its performance is not so good. It comes with a feature of smart handling of parked domains. The primary Comodo DNS server is 8.26.56.26, whereas the secondary server is 8.20.247.20.

The server is capable of blocking phishing sites. Besides, you will get a warning whether any site contains malware, spyware, or parker domains. People can get the Comodo Dome Shield service also as an extra benefit. This service includes additional features to the Comodo Secure DNS.

The query time of the server is 72ms, which is less impressive compared to its intelligent routing technology. Whether you are searching for an additional web filtering layer, then it is an excellent choice. 

The Bottom Line:

The final thing you should know is that DNS settings need to be merely one component of your gaming speed stack. However, the overall connection speed is vital. But if you are willing to get the maximum percentage of your allotted speed, it is necessary to use an ethernet connection. Make sure that you are not using Wi-Fi for gaming. The reason is that you may experience speed loss, interference, and latency while using Wi-Fi. We have discussed in this article about the best DNS for ps4. I hope you like this very much.

Frequently Asked Question:  

  • How to find my DNS Server?

When you want to find the DNS server, you must head towards the IP address of the Wireless Router. After that, you need to check the DNS server. If not possible, you may ask the Internet Service Provider about the DNS they use.

  • What is the best DNS for PS4?

The first thing you need to know is that there is no specific DNS suitable for everyone. It is recommended to check Google and Cloudflare DNS first. These are the best DNS servers for PS4. The performance of the DNS server is no constraint and relies on the location and ISP.

  • Is it safe to change DNS on PS4?

Yes, you can change the DNS on the playstation 4 device safely. Whether you are willing to revert to your default DNS, you can do it at any time.


read more
AppsDo It YourselfGadgetsInternetInternet SecuritySoftwareTechnology News

How to Fix err_address_unreachable Error in Your Browser

How to Fix err_address_unreachable Error in Your Browser

Most of the people across the world prefer to use Google Chrome as a browser. However, many users have already encountered the message ERR_ADDRESS_UNREACHABLE on Chrome. If you have already faced the problem, the reasons can be router issues, proxy settings, wrong website access environment, server problems, etc. Due to these issues, you may be unable to access a few sites on your PC.

What Does The err_address_unreachable Error Mean?

This err_address_unreachable error message is common on the Chrome browser while using a Windows PC. It usually happens for the Domain Name System (DNS) when it carries an error. This is the reason due to which you are unable to load web pages using the host.

What causes the error “ERR_ADDRESS_UNREACHABLE” in the Chrome browser?

We have given here the reasons for which you can face the issue while trying to access any site on the browser.

Router Issues:

The router that you are using can create problems in submitting requests to the designated ports.

Proxy Settings:

Whether you use a proxy network to access websites, it might not handle your requests properly. In this case, you have to disable the proxy server or try to enable it as per the situation.

Wrong Website:

This message can appear while you are trying to access a private address in a public network.

Server issues: Whether you are a website owner, you should know whether your users can access your site or not. The error can appear due to some other reason related to your site.

DNS Cache Problem:

The chrome browser stores caches of different sites. Hence, the DNS cache can be a reason for the err_address_unreachable issue.

Antivirus Issue:

If you use antivirus to check websites, you can find the site spam or harmful. The installed antivirus may block the chrome browser and not allow it to reach the website.

Slow Internet Connectivity:

While you are using any network, the internet connection can be low, due to which you may not load a website. Hence, the browser displays the err_connection_timed_out message. Sometimes, it can display the message Err_network_changed where the address is unreachable.

When you are trying the fixes, ensure that you have a proper internet connection. However, whether you are willing to access a private address, you should be in the network.

err_address_unreachable’ Error on Chrome:

When you see the error, you cannot access the websites you prefer for some reason on the Google Chrome browser. The ‘This site can’t be reached’ message comes with the ‘err_address_unreachable’ error code. The message says that you are unable to get access to the webpage. So, it is essential to run Network Diagnostic to identify the real reason for the error. Ensure that you are refreshing the webpage on the chrome browser, then check if it works.

Sometimes, you can face the problem due to temporary glitches in the networking equipment and Windows. Hence, you are required to try to reboot both your router and PC. Then, you should check whether restarting the device helps to get rid of the issue or not. Generally, router and router settings-related issues are the reasons for the error. If you’re willing to solve the error, restarting or resetting the router can help you. If the proxy server settings are turned on on the Windows computer, you can also see the error. However, problems with the website server itself are also one of the causes of the issue.

Similar Types of NET::ERR_ADDRESS_UNREACHABLE Error problem:

  • Err_address_unreachable ubuntu
  • Err_address_unreachable opera
  • Net::err_address_unreachable
  • Err_address_unreachable mac 2018
  • This site can’t be reached
  • Err_address_unreachable mac 2020
  • Err_address_unreachable wordpress
  • How to fix err_address_unreachable chromebook
  • Err_address_unreachable reddit
  • Jio fiber err_address_unreachable

How to Fix err_address_unreachable the Error on Your Browser:

First, ensure that no problem will be there at the server-side. If there is no problem with the server, then the issue is at your side. Before proceeding with the fixing methods, you have to ensure that you have proper network connectivity. When you see the network connection is fine, then check these solutions given below.

Restart Your Router:

In most cases, when you restart the router, you can solve the issue immediately. Multiple cases are there where the router goes into an error state. If you face the situation, restart the router to get rid of the error message.

First, your job is to close the power supply of the router. After that, your task is to wait for around 2-5 minutes.

When the time has gone, turn it back on. Wait for a while, and then try to attach the PC again.

After that, try to access the website and then check if you are still facing the error.

Are you unable to fix the problem? Are you facing it till now? Then, reset the router. In this case, one thing you have to ensure is that you must know the details of the ISP of the router. If you don’t know, then you should know it first before resetting the router.

Hence, your job is to first find the small hole behind the router device with the reset tag.

Use a little pin after that, and then try to tap the hole continuously for 4-5 seconds.

Now, you can connect the router after a reset. Use an Ethernet wire if necessary and then head towards the router address. You can find the router’s address on the backside of it in most cases.

Next, you are required to put the details that you get from your ISP to access the network. Finally, check if the issue remains.

Disable Proxy Server:

A proxy server is the same as a VPN, and therefore you can use it with ease while connecting to a public network. When you use a proxy server outside of the organization or office, it can cause connection problems. In this case, you have to turn off the Proxy settings.

If you want to disable the proxy server, your job is to tap the Windows key + R button available on the keyboard to open the RUN dialog box.

When you are in the RUN dialog box, you must write inetcpl.cpl. Then, you should tap the Enter key or OK for opening the Internet Properties window.

Tap the Connections tab when the Properties window is opened.

Then, navigate to the LAN settings tab below the Local Area Network (LAN) settings.

Ensure that you have unchecked the “Use a proxy server for your LAN” option.

Then, you are required to mark the “Automatically detect settings” option.

After that, your task is to tap the OK to make changes. Then, get out of the LAN settings.

Finally, your task is to tap the OK button to get out of the Internet Properties window.

Clear Google Chrome DNS Cache:

Domain Name Server is the full form of DNS. The function of the server is to store the IP addresses of those domains you have visited. This browser helps to increase the speed of your internet browsing. To do this, you have to keep all the DNS data of the sites. You can face the issue due to this error. The reason is that Chrome may use the cache data for accessing the page that has moved to a different IP address.

It is better to delete the DNS cache memory to fix the issue. If you are willing to remove the DNS cache of the browser, then you need to copy the address and paste it into the address/URL bar. Next, your task is to tap the Enter button after pasting this address chrome://net-internals/#dns.

A page appears in front of the display after that. You need to tap the Clear host cache button.

Now, you have to remove the Host data DNS from the PC.

At last, your job is to relaunch the browser. Then, move to the troubled website again. Deleting the cache helps you to reset the device.

Disable your Antivirus App:

If you use any Antivirus software or third-party antivirus programs, it can create issues like ERR_ADDRESS_UNREACHABLE. Whether you want to solve the problem, you have to disable the antivirus program temporarily. Then, you can check if the issue remains.

If you find the antivirus software not causing the issue, you must enable the antivirus software again to keep the PC protected.

For Windows Defender:

Tap the Start button or Windows logo key first to get available at the lower left.

Then, you can see the settings icon. Tap on that for opening the section of Windows Settings.

When you are in the Windows settings section, you need to tap the Update and Security option.

Next, your task is to tap the Windows security available at the left pane.

Navigate to the protection areas section and tap on the Virus and Threat protection. After that, you will see a window appearing on display.

When the new window appears, you must tap the Manage settings option from Virus and Threat Protection settings.

Then, your job is to toggle the Real-time protection off.

Finally, reboot the PC.

For AVG:

First, tap two times on the AVG icon on the system tray.

Hit the option Temporarily disable AVG protection.

Then, choose the timing for how long you want it to be disabled. Select if you are willing to turn off its Firewall too. Tap the OK option if you are ready to disable the antivirus program.

For McAfee:

First, your task is to tap on the McAfee icon two times. The icon is available on the system tray.

Tap the Exit option after that.

Next, you can see a dialog box appearing saying that McAfee protection will be turned off. Hence, you have to tap the Yes option for turning off the antivirus program.

For Avast:

Hence, you need to tap on the Avast icon twice, which is available on the computer system tray.

After that, your job is to tap the Avast shields control option.

Now, you have to find the options for turning off the program. The options are as follows— for 10 minutes, an hour until the computer is restarted, or permanently. The option permanently indicates that it remains disabled until you turn this on again. After that, you have to select an option suitable for you. Use the option for turning off the program.

Launch the browser again and then check whether the issue remains or not

Reset TCP/IP:

We know TCP/IP as an internet protocol component useful for connecting with a network. When this gets corrupted, you can face a problem due to which you may not be capable of loading a webpage. Hence, resetting the TCP/IP of the PC can help you to solve the problem. If you cannot fix the error, you may want to reset TCP/IP with Command Prompt.

You should always be careful as your device may be affected if any wrong operation occurs while using Command Prompt. An improper operation can lead to data loss.

Step 1: First, your task is to navigate the Run window and open it. After that, you need to write cmd and then tap the Shift + Ctrl + Enter buttons for running Command Prompt as administrator.

Step 2: Hence, your job is to enter the following commands. Tap on the Enter after each.

  • ipconfig /release
  • ipconfig /all
  • netsh Winsock reset
  • netsh int ip set dns
  • ipconfig /flushdns
  • ipconfig /renew

Now, get out of the Command Prompt and then helps to reboot your PC. After restarting the computer, you have to launch the browser.

Clear Browsing Data:

Sometimes, the data you are using can be corrupted. In this case, what you should do is clear the browsing data.

We have given here the method for clearing the browsing data from the Chrome browser.

Hence, first, your task is to launch the browser.

After that, you are required to tap the vertical three dots. This menu is available at the top right corner of the browser display.

Next, move to the options list and then select the Settings option.

After that, head towards the Privacy and security section while you are in the settings.

When you enter the section, your job is to move to the Clear browsing data.

Now, go to the Advanced tab.

You should make changes to the Time range to All time. After that, you should check these items.

Browsing history,

cookies, and other site data,

site settings, and

hosted app data.

Tap on the Clear data button at the bottom of the display. Now, you should wait for a while till the data is cleared.

If you don’t clear data from the chrome browser, you should know that the more you clear data, the quicker the process will complete.

Check Address:

You can encounter the error if you try to access a private address while connecting to a public network. There are network addresses like ‘192.168.1.8’ etc. that you can access only in private networks.

You need to ensure that the address you are willing to access is not bound because of networks. If it happens, then you can confirm that you have connected to the correct network. Next, you should try to reaccess the network.

Try these solutions we have given below:

You can access the site in another network using a different ISP.

Besides, if necessary, then use another browser to access the site. If you find the other browser working correctly,

then the issue is with your browser. Hence, you are required to reset the browser or try to reinstall that.

You can check the address in the incognito tab. In this way, you can make sure that if the browser add-ons are the ones who are responsible for the issue.

If you are willing, you can try to access the site on another device but on the same network. Repeat the same process while you are connected to a different network. Thus, you can diagnose the issue to check if the culprit is your device or the network.

Whether each solution fails, you need to contact your ISP.

Change to Google DNS server on DNS Settings:

In most cases, whenever you find DNS (Domain Name System) related problems, you can fix them by changing DNS servers with the help of a Google Public DNS server. Hence, your task is to change the settings on Internet Protocol Version 4 (TCP/IPv4) for your preferable DNS server and Alternate DNS server. Now, check whether you are capable of solving the problem or not.

To get rid of the issue, first tap the Windows key + I buttons together that are available on the keyboard. By pressing the buttons, you can open the Windows settings section easily.

After going inside Windows Settings, your job is to tap the option Network & Internet.

Tap the option Change Adapter that is available below Advanced network settings of network status. Hence, you can see a new window appearing.

Then, your task is to tap on the network that is available in the Network Connections window. After that, you should tap the Properties option from the drop-down menu.

You can see the Networking tab option available below the Wi-Fi Properties. Hence, you have to tap on the option.

Now, you are required to scroll the page down and then tap two times on the Internet Protocol Version 4 (TCP/IPv4) for opening the section.

Tap the “Use the following DNS server addresses” option now.

Input 8.8.8.8 as a Preferred DNS server.

Input 8.8.4.4 as Alternate DNS server

Hit the OK option for making changes.

Next, your job is to relaunch the browser and check whether the message alert is still available in the Chrome Browser or not.

Reset Network Settings:

If you encounter problems with the network settings, you may experience this error message where the address can’t be reached. Besides,  if you are willing to get rid of the issue, try resetting the network settings by going to the command prompt.

If you want to do this, your first job should be to write ‘Command Prompt at the search bar on the lower left.

Next, you are required to tap the option command prompt result. After tapping, a drop-down menu will appear. From there, you have to choose the Run as Administrator option and tap on that.

When you are at the Command prompt window, you should try to write these commands. Then, you should tap the Enter option after each command.

You have to write the command ipconfig/release and then hit the Enter option.

Now, write ipconfig/all and tap Enter.

Write ipconfig/flushdns and hit the Enter key again.

Next, you need to type the command ipconfig/renew and then tap the Enter key.

Write this command now netsh int ip set dns, and after writing the command, you should hit the Enter key.

You have to write the command netsh Winsock reset and now hit the Enter key.

Write the ipconfig/renew command and then tap the Enter key again.

Finally, your job is to restart the PC.

As soon as the PC finishes the rebooting process, you should check whether the ERR_ADDRESS_UNREACHABLE error message is available or not.

Forget Wi-Fi Network and Reconnect:

Hence, you can try to delete the current Wi-Fi network and then connect it again. If you are willing to get rid of the error, you should follow the steps.

First, a drop-down menu appears to see the Network Preferences option at the bottom part of the menu.

Tap on the Wi-Fi option, which is available on the left side, and then tap on the Advanced option available at the bottom right of the pop-up window.

Now, you are required to choose the Wi-Fi network that you prefer to “forget” and then tap the minus sign. After that, your job is to hit the OK option.

Finally, you should type the username and password to reconnect the Wi-Fi network.

Turn on and Turn Off the Airplane Mode:

If you are willing to restart the device’s Wi-Fi and mobile-data components, you need to enable and disable the airplane mode. Try to restart the components as it can solve the error.

Remove Chrome Extensions:

Your PC can display the err_address_unreachable error for the chrome extensions you use. It is another strong reason for experiencing the error message. Using the Incognito mode of Chrome can help you in this case. When you use this mode, your browsing history or extensions are not stored because of the private browsing settings.

You should try to open the page in incognito to check the extensions if these cause the issue. If you can open the webpage with ease in the incognito tab, then ensure that this one is an extension error.

In this case, you must head towards the chrome://extensions to uncheck every extension manually. Then, you have to run the webpage to check which one is the culprit.

Update Google Chrome:

We primarily use Google Chrome as our regular browser to update automatically. However, if necessary, you can update it manually.

First, your task is to tap the three vertically aligned dots that you can see on the browser’s upper-right corner.

After that, your job is to tap the Settings and then Tap the About Chrome option. Make sure that you are updated. Otherwise, it asks you to update.

You should know that other browsers come with similar layouts and update procedures.

Use a Different Web Browser:

While you are using Google Chrome, you can experience plenty of err_address_unreachable error messages.

The reason is that the chrome browser may use its IPv6 DNS settings, due to which you can face the DNS resolving issue. Therefore, you are unable to get access to the websites. A few people experienced in the dns probe identified no internet problem due to this.

It would be best to try to access a similar webpage using a different web browser. For example, you can use Mozilla Firefox or Microsoft Edge. You may be capable of using the page on another browser but face the issue on Google Chrome merely. If it is the reason, then try this method.

Website is Down, Moved or not Exist:

Have you found your ISP not the culprit? Has it not blocked the webpage that you are using? Then, one thing that you can ensure is that your webpage server may be down. You can wait for a day until it comes alive again. Whether the web page won’t come, it either moves to another new address or doesn’t exist.

Use ‘PC Repair Tool’:

If the windows PC is causing the error, then the best way you can follow is to take the help of a ‘PC Repair Tool’ for solving the error. The additional benefits you can get from the software are that it can solve BSOD errors, EXE errors, DLL errors, programs/applicators issues, malware or viruses problems, and other system issues.

What will you do if no method will work for err_address_unreachable Chrome Windows 10?

If you have been experiencing the issue till now, then ensure that you are not the one who is causing the problem. Your device also works well.

How to Fix err_address_unreachable Error on Mobile?

Not only on a computer, but you can also face the issue on your mobile while surfing the web on a chrome browser. Hence, you are required to check the internet connectivity first. If it is fine, then you are required to restart the device.

You should check whether the mobile data or the Wi-Fi is working accurately or not. If the network is working fine, then the issue is on the server side. However, if your server is not responding to your device and responding to another one, follow the steps.

First, your task should be to enable the flight mode. Then, you have to wait for sixty seconds and then disable it.

Next, you should disconnect the Wi-Fi and then connect this again if you see the error.

Now, try to reboot the android mobile.

You can try to remove the browsing data and cache of the chrome browser

If you want, you can uninstall the browser and then try to install this.

Conclusion:

ERR_ADDRESS_UNREACHABLE is a type of error that is available in chrome browsers mostly. When it appears, it indicates that the browser you are using cannot get an answer from the site. It is actually on the IP address linked to your preferred domain name.

However, you should know that you can face the error on the other end of the connection. It indicates that your website may be down or moved. You can also see the error message while your network service provider or network administrator blocks the website.

Frequently Asked Questions:

  • Why are you unable to find the address of all websites?

There are a few websites that are unreachable due to server-related problems. For example, the server may be down or under maintenance. If you want to access an unreachable webpage, wait until the server becomes active. However, when you find the server responding to another device, then the issue is at your end.

  • How can you solve err_address_unreachable on mac?

Hence, you are required to diagnose your Chrome browser and mac book. You can reboot the system and modem, check the network connection, clear the Chrome cache, browsing history, etc.

  • What is Err_timed_out?

While trying to open any website on Google Chrome, it may take too much time to load. But if it fails to load the page, you can see the Err_timed_out error appearing.


read more
AppsDo It YourselfInternetInternet SecurityTechnology News

How to Fix ERR_SSL_VERSION_INTERFERENCE Error

How to Fix ERR_SSL_VERSION_INTERFERENCE Error

When it comes to online, you can find plenty of online fraudsters trying to crack a password code, steal information like personal, payment related, etc. In this case, it is good to install an SSL certificate to offer protection against online fraudsters. If you know the method of troubleshooting the problem, you can easily access a website or page. Here, we have discussed the process of fixing the ERR_SSL_VERSION_INTERFERENCE issue in Google Chrome.

What is mean by the ERR_SSL_VERSION_INTERFERENCE in Google Chrome?

ERR_SSL_VERSION_INTERFERENCE is a type of error that you can face while browsing a site with the help of Chrome or Firefox browsers. When your browser fails to load the visiting page with SSL protocol this type of error may happen. stands for ‘Secure Sockets Layer.’ It uses TCP sockets to transmit information. We are using the browser Google Chrome that enables us to communicate with secured sites such as YouTube, Google, Facebook, etc.

While you see the problem, it means that your system is facing errors in determining the SSL version. It may also happen that your device has an SSL version conflict. Generally, you are capable of fixing the problem efficiently.

The error generally happens while the network server uses TLS1.3. You can fix the error in a few ways. According to some guides, you should disable TLS1.3 entirely in your browser. However, it is not preferable because TLS1.3 provides more security features than TLS1.2 and lower TLS versions.

A mismatch in the TLS1.3 version that is compatible with the browser and the web server may be a reason for the problem. You should know that the TLS1.3 is still developing now. Therefore, if your browser is compatible with the latest TLS1.3 only, but you have the older version of this, then it can cause errors. However, what you should try the first time is to update the browser. It is always recommended to have an updated browser. The reason is that the recent version of the browser must come with the newest security features.

When you find the error caused due to web browsers, the error may happen for the update of your browser.

Why Do You See This ERR_SSL_VERSION_INTERFERENCE Error?

Multiple reasons are there due to which the error happens in Google Chrome. We have given a few here.

  • The site you want to use is not compatible with a mutually agreeable TLS protocol version. TLS 1.3 is supported merely by the server or the client. No other party is capable of supporting this.
  • You are unable to use TLS 1.3 with the earlier versions of the protocol.
  • A few sites are there that are not comfortable with 1.2. If you use any recent browsers, then it won’t create a problem.
  • The SSL you have maybe expired, or it might not be installed properly.
  • Your system may have an improper date and time.
  • Hardware acceleration can cause an error.
  • Google Chrome may be outdated, or the antivirus you are using may not be up-to-date.
  • Having corrupted browser cache data can cause the issue also.

How to Fix the ERR_SSL_VERSION_INTERFERENCE Issue in the Google Chrome (for Owner):

We have given here the process of solving the error in Google Chrome.

Check Your Server Configuration:

If the browser is updated, it may happen that the webserver has been using an old TLS version. Hence, you should check the server configuration.

Look at the SSL:

  • You should check the SSL with the help of an SSL checker tool. Use the tool to check whether you have installed SSL correctly or not. If you find this not appropriately installed, then you should reinstall it.
  • You should see also if the SSL has validity. If you are willing to check the validity of the SSL, you should navigate to the address bar. Then, you are required to hit the padlock icon.
  • Now, you will see a box popping up. Then, you should select the option Valid available in the box below the Certificate tab. Tap on the option.
  • You can see the expiration date available in the list alongside the Certificate icon. Whether the SSL is no longer for use, it needs to be renewed. If you want, you can use a new SSL.

Disable TLS 1.3:

Whether the browser you are using is running in TLS 1.2, then you can face the error. Then, you should check the server’s configuration and enable the configuration to support TLS 1.2.

  • If you are willing to disable TLS 1.3, you should first open the Chrome browser.
  • Navigate to the address bar after that, and then you should write chrome://flags/. Tap on the Enter button at a time.
  • Now, you can view the flags options.
  • Move to the flag search box after that, and then you should write TLS to look for5 the TLS 1.3 option.
  • You are required to select the Disable option from the dropdown menu.
  • After that, you should tap on the Relaunch option to start the browser again.
  • You need to check the site displaying the ERR_SSL_VERSION_INTERFERENCE error.

How to Fix ERR_SSL_VERSION_INTERFERENCE Error (for Visitors):

Check Time and Date :

  • If you are willing to check the time and date in Windows, you should first tap on the Start key.
  • Then, you should tap on the Settings option.
  • Now, go to the Start menu and then tap the Settings option.
  • When you open the menu, you need to look for the option. As soon as you find this, tap on it.
  • After that, you should turn on the Set time and Set time zone automatically.
  • Next, you are required to begin the chrome browser again. Then, you should navigate to the site showing the ERR_SSL_VERSION_INTERFERENCE error.

Disable Antivirus Software:

When you disable your antivirus software, you should try to update it first to the recent version. In case you are facing the problem still now, disable the antivirus software.

  • If you are willing to uninstall your antivirus software, then move to the taskbar.
  • Then, you should look for the hidden trays. After that, you need to tap on the option.
  • Now, you have to find the security software icon. Then, you should tap on this and select the Exit option.
  • Next, your job is to tap both CTRL + SHIFT _ ESC buttons. As soon as you press these, it will take you to open the Task Manager.
  • After that, you should look for the tasks that are linked to the antivirus engine. Then, you should close these.
  • Now, your task is to tap on the Start option and then write ‘Control Panel.’
  • You should then move to the Programs option. After that, your job is to navigate to the option Uninstall a program.
  • Next, select the antivirus you prefer. Then, you should tap on the option and choose the Uninstall/Change option.
  • Finally, the on-screen instructions are seen. You should follow those instructions.

Erase Browsing Data:

Check out these steps for removing the browsing data on chrome.

  • First, your task is to launch the Google Chrome app.
  • Then, you need to tap on Ctrl+H that are available on the keyboard. As soon as you press these, it will open the browsing history along with other stored information.
  • Navigate to the left-pane menu after that. Then, your job is to tap on Clear Browsing Data.
  • You can see here a new window popping up. Ensure that the Advanced Tab is opened.
  • Then, you are required to choose all the boxes.
  • Next, your job is to tap the Clear Data option.
  • Finally, your task is to relaunch the browser. And then, check if the error remains.

Disable Hardware Acceleration:

If you are willing to Disable Hardware Acceleration, you should follow the steps below.

Follow these steps:

  • Go to the browser Google Chrome and open it.
  • Tap on the ‘Menu’ option. Next, your task is to the Settings option. Hit the ‘Advanced’ option now.
  • Here, you should find out the category System.
  • After that, you have to turn off the option Use hardware acceleration.
  • At last, your job is to disable the hardware acceleration.

Flush DNS Cache:

Whether there exists any corrupt local DNS cache, you may not be capable of reaching servers quickly.  That’s why it is always better to flush the DNS cache.

  • First, your task is to tap both Windows Key+S buttons on the keyboard.
  • Then, you should write “Command Prompt” in the prompt box.
  • After that, go to the results and then tap on the Command Prompt option. You should now choose as Administrator from the results.
  • When you find the cmd up, you are required to run this command following command:

ipconfig /flushdns

  • After the completion of the method, a message appears in front of you:

Windows IP Configuration. Successfully flushed the DNS Resolver Cache.

Disable and Eliminate Browser Extensions:

The browser extension you are using can cause the ERR_SSL_VERSION_INTERFERENCE error.

  • If you are willing to eliminate these installed browser extensions, move to Google Chrome and open it.
  • Then, your job is to go to the Menu option and then select the option More.
  • Look for the More Tools option after that. Next, you should choose the extensions in the menu.
  • You are required to disable extensions individually. Delete the extension until you find the specific extension causing the problem.

Disable QUIC Protocol:

We have given here the steps of disabling the QUIC protocol.

  • First, your task is to move to Google Chrome and open it then.
  • After that, your job is to navigate to the address bar. Then, hit the enter button after typing – chrome://flags/#enable-quick.
  • You can keep this Experimental Quic Protocol default.
  • Finally, you are required to disable this and restart the browser. You should move to the site where you can face the error.

The Bottom Line:

In this above post we have shared some tips to resolve the ERR_SSL_VERSION_INTERFERENCE error. read the entire post before proceeding to resolve the issue.  It is essential to have an SSL certificate for that website you are going to use. However, you may not access websites for various SSL errors. We know SSL certificates as such ones that can offer you the most security. It is because this is capable of encrypting data. As a result, hackers are unable to decrypt. While making customer trust, you can use SSL to keep your site secured.


Frequently Asked Questions:

  •  Why do you need an SSL certificate?

It is useful to keep user data safe, verify the ownership of the site, etc. Besides, It also helps to stop attackers from creating a fake version of the site.


  • Should all websites have SSL?

The site on which you want to use your personal information should have an SSL certificate. Without SSL, the sites will become HTTP.


  • Does Google require SSL?

It is Google who is now pushing web owners to use a certificate. If Google wants to do this, it must display only the secure sites in the search results.


read more
AppsInternetSoftwareTechnology News

Xbox Error Code: How to Troubleshoot Xbox Error Codes

Xbox Error Code: How to Troubleshoot Xbox Error Codes

Have you ever experienced an unwanted “pause” by your Xbox while you are enjoying your favorite game? Or Have you heard or seen some numbers (0x80010108) / or the so-called “Xbox Error Code” on Xbox while playing your games?

If yes, you will be annoyed to see these kinds of pauses while striving to enjoy your game. But it happens; if you haven’t faced these with your Xbox yet, then you will undoubtedly face these in the long run.

These error codes are quite common, so there is nothing to worry about. You can solve most of the Errors by troubleshooting Xbox or doing what I’m sharing in this article.

In this article, I’m going to explain all the latest Xbox error codes with code names so that you can efficiently resolve them and move ahead by enjoying your gaming experience.

Xbox Error Code: How to Fix and Troubleshoot Xbox Error Codes

Here is the complete guide to fix and troubleshoot XBox error code.

0x8b0500b6

0x87E105DC

0x87E105DC

0x87E107DF

0x8923101c

0x89231022

0x89231806

0x8b050066

0x903F9006

0x903f9008

and more?

As per Microsoft,” the real solution to these error codes is to restart your console.

  1. Press and hold the Xbox power button on the controller.
  2. Choose to turn off the console or restart the console.

If this doesn’t resolve your problem, then try connecting to a different network. It means, use Wi-Fi or Ethernet cable or so on.

0x8b0500b6 Error Code:

This error code is quite a common error code, and it mainly occurs due to the update on the Xbox console.

All these error codes can be resolved with the below steps. Let’s start with Xbox startup errors.

Troubleshoot Xbox Startup Errors:

Generally, if you see “Something went wrong Screen” with an Error Code “E” whenever you start your console, then you can go ahead with the below steps to resolve this error.

How to TroubleShoot Xbox Error Codes:

E100, E207, E204, E200 (You can try these steps for almost all the error codes)

To resolve the above error codes, please follow the below steps. If you are getting different error codes, then scroll down to other Xbox error Codes.

Step 1: Restart your Xbox Console

Firstly, use the “D-pad” and A button which is there on your controller – to select “Restart Xbox” whenever you see “Something went wrong screen or above error codes.

If this helps you resolve the issue, you should return to your home screen after Xbox restates, and it should work correctly.

In case if the above step doesn’t work, then let’s try out another step.

Step 2:  Reset your Xbox

  • If restarting doesn’t work, then you have to reset your console. You can do it from Xbox Startup Troubleshooter.
  • Use the “Dpad” + A button on your Xbox Controller and select “Troubleshoot.”
  • It opens the Xbox troubleshooter and goes with resetting.

Manual Reset:

  • To reset it manually, you have to power off your console and remove the power cord.
  • Insert the power code back in after 30-45 seconds.
  • Now, hold both the “Eject and pair button on the console” and press the “Xbox button on the console.
  • Continue holding the pair and eject buttons for 15-20 seconds.
  • You will get two “power-up” tones in a couple of seconds. Now, you can release both buttons after the second power-up tone.
  • It will take you directly to the “Xbox Startup troubleshooter.”
  1. To reset – select “Reset this Xbox.”
  2. Then select “Keep games and Apps” when prompted. This option will only reset the OS and delete corrupted data without deleting your apps and games.

If this resolves, your screen and everything works fine, and you can then it’s good you can enjoy playing or move to the next step.

Step 3: Download Offline System update file (OSU1)

If the above steps don’t work, then you have to perform a system update. For offline system update, you need

  • Windows PC – with Internet connection + USB Port.
  • NTFS formatted 6 GB Space USB drive.

 Note: Most USB flash drives come with FAT32, so you have to reformat that to NTFS. It will format all data during this process, so use an empty drive.

Process:

  • Firstly, plug your USB drive into the USB port of your Windows PC.
  • Open “Offline System Update file OSU1) – This you will find in “Xbox Site.”
  • Click on “Save” — It will save the console update in the .zip file
  • Now, unzip the file and extract it all.
  • Copy the “$Systemupdate” file from extracted zip file to your USB drive.
  • Unplug the USB drive from your computer system, and proceed to update the console.

Step 4: Update Xbox

 Now, let’s update your Xbox using “ Xbox startup troubleshooter.

  1. Power off Xbox — Unplug the power cord for 30 seconds – Press and hold “Pair & Eject.”
  2. After 15-20 seconds release it after two power-up tones.
  3. It will straightaway take you to the Xbox startup troubleshooter.

Xbox Process:

  • Plug the USB flash drive with offline system update in the “Xbox USB Port.”
  • Now, the “offline System update option will become active in troubleshooting.”
  • Use Dpad + A button and select “Offline System update” to start the process. This process takes some time, and it restarts many times.
  • When the update is completed, you will see the home screen and Xbox functioning fine without errors.

Step 5: Restore your Console to factory defaults:

If the above methods don’t work, then you can try “resetting your console to factory default settings.” This might work and resolve your error codes. However, resetting the console will lose all your saved games, settings if they are not synchronized with Xbox Live. So, this should be the last option for your issue.

  1. Open Xbox Startup troubleshooter ( Steps mentioned in above step 1 & 4)
  2. Now, select “Reset this Xbox.”
  3. After selecting that, you will get a prompt “Remove everything.”
  4. Now, select that and this will delete all the data, games, and apps.

Your Xbox should function perfectly now; if the problem persists, you should go-ahead to the service shop.

This is all about the Xbox error Codes; although there are more error codes in the Xbox for all those error codes above points will be helpful. These are official ways to solve the error codes as per Microsoft as well.


read more
AppsDo It YourselfInternetInternet SecurityTechnology News

YouTube Private Vs Unlisted- Know the Difference

YouTube Private Vs Unlisted- Know the Difference

YouTube is one of the effective social media platforms to showcase our video skills. This social media platform allows you to post different types of your favorite videos. But sometimes, you don’t want the entire world to see your videos. It is when you need to go to either the private or to the unlisted. To know the difference between YouTube Private Vs Unlisted, first determine the level of security for your videos.

It depends on you whether you limit your videos to only friends and family or the public. Wanna share links with prospective customers or your friends? We have unpacked a lot of questions in this article.

What is  YouTube Public Video?

This Public setting is built-in in YouTube for all videos. Whether you want to showcase your video to everyone and see your videos in Google search results, then it is your perfect choice.

What is YouTube Private Video?

YouTube private video is a very secure type. People whom you invite can see only your videos. Here, you can allow up to 50 people in total. You should know that this type of video is not available in video tab sections, search results, video recommendations, etc.

Besides, your invitees are unable to share it with other people. In addition, someone can’t see your video despite having your link unless they have the invite.

What is YouTube Unlisted Video?

The unlisted video setting is a cross between private and public. These appear in search results, subscriber feeds, suggestions, and user video tabs. However, in this case, people are capable of seeing and sharing your video.

It is a basic gist of private vs unlisted YouTube. We have given here advantages of these videos.

Advantages of Making Private Video:

Are your videos very personal? Do you have any secret company projects? Then, this YouTube private setting is ideal.

We have given here a few advantages.

  • Sharing Videos With Loved Ones: Do your relatives live far away? If yes, then this option will be a perfect forum to share special moments more personally.
  • Private Video Library: Everyone has some personal collections such as art, comic books, or records. These are very essential to them. Videos are also one of the important collections.
  • Storing Company Information: If you are a businessman and want to share videos with your employees, it will be a great strategy. This mode doesn’t allow your competitors to see them.
  • Saves Storage Space: People who want to store plenty of their videos should use this setting.
  • Online Video Portfolio: Wanna start up your company? Then, you can showcase your work through these videos. Here, you can present your resume and video portfolio to potential clients or employers in free storage. Nowadays, it has become very common to have an online video resume. If you’re a videographer, then this video Setting is an excellent option. Thus, you can keep unwanted comments away from appearing and stop any personal issues.

Advantages of Making Unlisted Video:

Wanna share videos with a large group? But you may not prefer your videos to appear in search results. In this case, YouTube unlisted is a perfect option.

The benefits of the unlisted videos are as follows:-

  • Perfect for Co-Worker Feedback: If your company has more than 50 employees, you should use this setting.
  • Sharing a Portfolio With Employers: You can share your video resume with over one job prospect through these videos.
  • Field Testing a Potential Public Video: It is perfect for storing reviews and positive comments from a small group. In case you find bad reviews, then enter the delete option.
  • Cleaning YouTube Page: It helps to set up your page and remove old embarrassing videos. However, by changing videos to unlisted, you are capable of deleting the visibility from your channel.
  • Availability: Whether these are on a playlist, these can appear publicly.

Advantages of Making Public Video:

  • Generally, people will prefer to subscribe to any channel if it has a significant following. For business purposes, it is perfect to have a big subscriber count.
  • It helps to generate brand awareness.
  • These can be monetized and are capable of proving to be profitable.
  • Whether your videos have good performance, then you can become famous.

Drawbacks of Public Video:

We have given here a few disadvantages of public video.

  • These attract trolls.
  • Sometimes, videos can be compromising or controversial. If it happens to you, then it can imperil your future job prospects.
  • Anyone is capable of finding videos. Therefore, if they want, they can leave an online mark even after your deletion.

How to Modify Privacy Settings:

The process of modifying privacy settings is as follows:

When you upload videos to YouTube, first, your task is to log into your YouTube account. Then, you should look for the camera icon. It is available at the top right corner.

As soon as the Upload page appears, a key will be available that you have to hit to select files. YouTube says that the video remains private till you choose to set them up.

You should follow the normal process of uploading the video. During this, in the last screen, you can see an option to change the privacy settings.

Select options just save or publish the video. Then, you can see their options—

Private, unlisted, or public with their description and details.

This social media platform comes with a Scheduled feature. It enables you to keep your videos private for a while. After that, these will get published automatically at a specific date.

How to Change Video Privacy Settings: 

For PC:

  • If you are using a computer, you should first login to YouTube Studio.
  • After that, your job is to navigate to the left menu and choose the Content option.
  • Now, you should select the video that you are willing to update. If you want to see the live uploads, choose the Live tab option.
  • Next, you have to hit the down arrow option that is available under “Visibility.” After that, select any of the options— Public, Private, or Unlisted. Save it at last.

For Android:

  • First, your job is to log in to the YouTube app available on your Android device.
  • Next, your task is to hit the Library option and then tap on the option Your videos.
  • After that, you should hit the More More option, which you prefer. Now, hit the Edit option.
  • After that, you need to hit the Privacy setting option. Select any of these options— Public, Private, and Unlisted.
  • Then, tap on the back option and hit the SAVE button available at the top.

For iPhone & iPad:

  • Log in to the app on the iPhone and iPad first.
  • Now, follow the similar method that you have done for Android.

When Should You Make Your Video Private? 

These are three famous situations when you must need a private video setting.

Only For Family Purposes:

Do you live far away from your family? Have you got a holiday to share with your family? The private setting is perfect in this case. It allows you to share high-quality videos with them easily. No people can see the clips. Besides, your family members don’t need to download the video before seeing it.

Only For Company Members: 

Generally, through videos, you can share a lot of information in the shortest time. As a result, plenty of companies and organizations benefit from the video. You can share a guide of training new members, company’s policy, or update the company’s strategies through videos.

These are especially for merely internal circulation. That’s why we consider the private mode always as the best resolution for this situation. Thus, you can reduce the chances of leaking your contents.

Helpful For Applying For Jobs Or Attracting New Clients:

A few years ago, many candidates preferred to use video resumes, and it became the trend. This quality makes them unique in the list of dozens, hundreds, or thousands of applicants. Giving your CV to the recruitment team through this mode will save their time a lot. Besides, they must be impressed by your creativity and profession.

People who will get the invitation of the uploader can see the content only. Hence, HR will see your resume. They just need to tap on the link and can see the resume without downloading anything.

Videographers can also get benefits, but they should not make all videos public. There will be an issue for the author also that is related to copyright. If you have any sensitive topic, it can cause multiple negative feedback from strangers. It is when people are willing to use private videos. As soon as you post your private video, you can share it with potential clients directly.

When Should You Make Your Video Unlisted?

This type of video is a mixture of both Public video and private video. These appear in the search result, uploader’s channel, or the subscriber newsfeed. People who have links to these videos can easily watch them. Moreover, people treat this type of video like public ones.  For instance, if the content is improper or violates the copyrighted audio and video policy, YouTube will flag your videos.

Here, we have given a few situations when you require to use Unlisted videos.

Videos Posted On Your Website:

People who are running a blog or website must use the feature. It is constructive while you are going to make your content exclusive. When you switch your videos to the unlisted ones, these become invisible on Google and YouTube. Thus, you merely have to visit the web to watch your videos. It helps to increase the traffic amount on your page significantly.

Deleting Videos from Your Channel:

Plenty of people started to use this social media platform very early. Therefore, as you grow up, some videos may seem embarrassing to you while you mature. As a result, you want to remove them immediately. When you make your videos unlisted, these become invisible on your YouTube channels. But people who have links to the video can see them.

While Doing Surveys Before Publicizing:

When you upload videos, you will be glad to see the increase in the rate of positive feedback in your video’s comment. Users can share the videos in advance to them who they want.

Besides, they can see the reaction of people while switching to the public one. Thus, when you are going to publicize, you can know the method of dealing with the feedback from your viewers professionally. In this process, viewers will get better impressions about your channel. In this process, you can share clips and music with your fans quickly.

Publish Video At A Suitable Time:

People working as social media marketers have to publish their posts at the right time. Thus only, they can get attention from the crowd. It may be a few times in a day or a few days in weeks. However, you may feel confused waiting for that time. Rather than doing this, you should upload your video in unlisted mode. Then, you can schedule your time for publicizing.

Users can get two choices to schedule time for their video. These will be directly from YouTube or any other platform for social media distribution.

Many of us are familiar with social media platforms like YouTube. But we are still aware of this feature.

When Should You Make Your Video Public?

People can see Unlisted videos & playlists and share them. You should know that these won’t appear in the Videos tab of your channel homepage. No one can see it in YouTube’s search results until anyone adds your video to a public playlist.

How to Upload an Unlisted YouTube Video:

Wanna share your video with a large group of people? Willing to deliver “early access” to your newsletter subscribers? Then, you can upload your video as unlisted. It is a handy way to share online. If you want, you can set the video to public at a later date.

Here, we have given a method of uploading an unlisted video to YouTube.

  • First, your task is to sign in to the YouTube Studio. If you want, you can set up the channel you have.
  • Now, tap on the create option that is available at the top right. Then, your job is to tap on the Upload videos option.
  • Next, you should keep your videos in the upload videos box. You can select the files also by tapping on the select files button.
  • After that, your task is to fill out the video details. Then, you can add video elements as you want.
  • Choose the option “Unlisted” after that that is available under the visibility tab.
  • Now, your job is to tap on the Save button to publish your unlisted YouTube video.
  • At last, copy the link and then share it.

How to Unlist a YouTube Video:

Wanna clean up your YouTube channel? Want to delete some videos from your channel? If it is the case, then the best option is to unlist your video. Thus, you can easily keep the external links to your channel from websites. People sharing your videos help you to grow with more engaged viewers. The reason is that your current niche-related videos are the ones only that are suggested to them.

The process of Unlisting a video on YouTube is as follows:

  • First, sign in to YouTube Studio.
  • After that, your task is to choose your preferred content from the menu available on the left.
  • Navigate to the video now that you are willing to unlist. Tap on the public/private option that you can see under the visibility column. Hence, it relies on the visibility it had before.
  • As soon as you see the list of options, you are required to choose the option “Unlisted.”
  • After that, your job is to tap on the Publish option to save your video as unlisted.

Steps:

If you want to make many videos unlisted at a time, then follow this method.

  • First, sign in to YouTube Studio.
  • Then, choose the content you want for your video from the menu on the left.
  • Now, you are required to select every video that you want to unlist from the checkbox on the left. Choose the checkbox that is available at the top. You need to use the check box to select all videos on the current screen. There are many rows 10, 30, or 50. It relies on the number of rows. As soon as you tap on the checkbox at the top, you can choose all videos. Using the “Select all” option, you can easily make it done.
  • After choosing the videos you want to unlist, your job is to select the edit dropdown menu. After that, you have to hit the option “Visibility.”
  • Choose the option “Unlisted,” which is available in the following dropdown menu.
  • Now, tap on the “Update Videos” key for saving your changes. This update may consume a couple of minutes. But it relies on the number of videos you are going to update.

How to Upload a Private YouTube Video:

Uploading videos to this platform is a simple way to share a large video file. While uploading, you should set the mode as private. You can send them to colleagues for training, to family and friends.

The process of uploading a private YouTube video is as follows:

  • First, your task is to sign into YouTube Studio. You can set up your channel also.
  • Then, tap on the option Creates that is available at the top right. Then, tap on the
  • Upload videos option.
  • Now, your job is to keep your videos in the upload videos box. If you want, you can tap on the select files key to select the files.
  • After that, you are capable of filling out the video details. However, you should know that in this case, the video elements are not available. Therefore, you should skip the step.
  • Choose the “Private” option that is available under the visibility tab.
  • Whether you are willing to share it with anyone, then do it under the share privately option. You merely need to put their Google email addresses. Then, choose the option ‘notify by email.’ When you complete saving your video file, they will get notifications.
  • At last, your task is to tap on the save option for publishing your private YouTube video.

How to Share a Private YouTube Video:

As you know the difference between YouTube private vs unlisted, now see how you share the videos.

You are required to follow step by step to know the process of sharing a private YouTube video.

Step 1. First, your task is to log into your YouTube account. After signing in, tap on the profile picture available in the right corner of the page.

Step 2. Now, your job is to select the YouTube Studio to get its interface. After that, you should click on the Videos option. Now, you can view the uploaded videos listed here, like private videos and unlisted videos.

Step 3. As soon as you find the target video, tap on the title. It will help you to view the details of the video.

Step 4. Tap on the three dots available beside the Save button. After that, your job is to choose the share Privately option from the dropdown list.

Step 5.  At last, you are required to enter the email addresses of those whom you are willing to share. Save the changes that you want to make. To do this, return to YouTube Studio. You should know that in this case, a maximum of 50 email addresses can be entered.

How to Watch Private YouTube videos:

You can watch from the received email from the uploader. Go to the email and open it. Then, you can see the iconic YouTube red box that has three white horizontal dots. As soon as you tap on the link, the YouTube video will be available in a separate window.

How to Watch Unlisted YouTube videos:

For watching these videos, you need to navigate to the mail. Tap on the link available on the received mail. If you require the link only, then copy and paste the URL. After that, you can send the mail to other people.

Ensure that you share these videos only with trustworthy people who will get benefits from them.

YouTube Unlisted VS Private:

If you have an Unlisted YouTube video, it doesn’t appear in search results such as related videos, recommendations, and Subscriber feed. No one can see it on your channel. When you upload your video, it makes a URL link. Then, it helps to change the setting as Unlisted. People who are aware of the link are capable of visiting and watching the unlisted video.

It is not mandatory to have Google accounts. Therefore, while you are willing to share the video with someone, you must send the link only. Whether your video has some sensitive information, YouTube video Private is a better option in unlisted vs Private YouTube comparison.

Private videos are quite different. These don’t appear in search results, channels, related videos, recommendations, and Subscriber feed.  Invitees are capable of seeing the videos only. People who are willing to see a private video must have an active Google account. After that, they can get the invitation from the video uploader. An uploader can allow up to 50 users to view his private content.

Which One Should You Choose:

Private ones are the most secure type. You cannot download a private video which is one of the differences in the private vs. unlisted YouTube chart.

Conclusion:

While you are on the web, protecting privacy is very essential. YouTube private and unlisted settings have a barrier from the public. Whether you want to secure your videos, then YouTube videos private is the best option. However, it does not completely depend on the level of security you want.

Frequently Asked Questions:

  •  Is unlisted safe on YouTube?

People who are larger, more security-conscious businesses and have a huge amount of sensitive info must not use Unlisted YouTube videos. The reason is that you are unable to control your intended viewer in sharing your URL with someone.

  • Can subscribers see private videos?

People who are invited by the uploader can view these videos. These are not available in any search results. As a subscriber, you won’t get any notification while a private video is uploaded.

  • Can an unlisted YouTube video be embedded?

Users can set the videos to “unlisted” rather than making them “private.” Thus, they can restrict them from showing up on your channel or any search results. However, if you have the link to the video, then you can view it. Besides, you are capable of embedding the video also on any site.


read more
AppsDo It YourselfGadgetsInternetInternet SecuritySoftwareTechnology News

How to Delete Win Log Files in windows 10

How to Delete Win Log Files in windows 10

If you are a Windows user, you will find a lot of unnecessary documents and folders available in Windows. There are plenty of hidden caches, old junks that take up space. You can delete them from your Operating System, but it may be challenging. This blog post is all about ‘How to Delete Win Log Files in windows 10’ for the File Edge Readers.

If you are willing to free up disk space, then you can remove Win log files in Windows 10. Here, we have given a lot of ways through which you can remove the log files.

What do you mean by Win Log Files in Windows 10?

Windows always store a record of the operation you are doing on it. It saves the records in the directory to its log files. We know the log files as Win log files also. Generally, the files can be found by navigating to the path – C:\Windows\System32\winevt or C:\Windows\System32\config. However, it relies on the windows version.

The files can consume huge disk space of your hard drive and may have large sizes. If you are willing to free up the disk space, it is essential to remove them from your computer or laptop.

Location in Windows 10:

Users can find these log files easily in Windows 10. But as a user, you should know the location of the event viewer default path and the event logs. If you know the location, it becomes very beneficial when you are going to resolve the problem or clear the Windows log files.

You should know that two folders are there, and it relies on the Windows version you are using.

You can go to the folder of:-

%windir%\System32\Winevt\Logs\

In case it doesn’t work, you should then navigate to the folder location given there:-

%windir%\System33\config\

You need to ensure that the %windir% you are using is the directory of your PC’s Operating System.

What Does The Event Log Store? 

Users can access the event log with the help of Windows Event Viewer. It was invented in 1993. Those who are administrators are capable of using this to view actions in five categories that are as follows: application, security, setup, System, and forwarded events.

If you cannot perform the steps completely, the error codes with recently installed updates will display. If you are an Admin, you can access installed apps, Office notifications like “Want to save your changes to x.docx?”.

This windows event log doesn’t keep too many personal details like the text from web pages or documents, mouse clicks’ records, desktop screenshots, etc. However‌, these should not fall into the wrong hands as they can use these to attack.

You should remove these log files for maintenance purposes. Thus, you can free up hard drive space. In case you find the event log cleared, it may be someone else who is hiding something. This article will let you know how to remove a Windows log file using both the Event Viewer program and an Event Viewer command in PowerShell.

How to Delete Win Log Files in windows 10:

The event log of windows is capable of offering an entire record of a user’s activity. If someone accesses the event log file, they will know about your private information. That’s why if you are willing to keep your privacy protected, you are required to remove the event log daily on your computer or laptop. Users should do this thing regularly to clear the Windows event log. Let me explain How to Delete Win Log Files in windows 10.

  1. Delete Event log:

Multiple ways are there to remove event log files with the help of the Windows native interface and a third-party tool.

  •  Removing the Event logs:

The event log may store an in-depth record of your activity on the windows. As a result, if anyone attains the log file, they may know about your activity. It is possible to remove the event log from your OS’s interface directly. Users can use the Command Prompt to remove the event log. This method of removing the event logs through the Windows native interface.

  • First of all, your task is to access the Event Viewer window. If you are willing to do, then you should open the Run prompt. After that, you should give the “eventvwr.msc” command to launch.
  • You should tap on the Windows and X buttons on the keyboard together. It will help you to get a quick access menu. Choose the option “Event Viewer,” and then you should open the Window.
  • After that, you can launch the Event Viewer interface. You are capable of accessing the event logs and editing these as per your requirements.
  • Next, you can access most logs available under the “Windows Log” section. It is available on the left panel. If you’re willing to free up any log, choose the option and then tap on that. Now, you should select the “Clear Log” option.
  • If you are willing to remove application logs, you should choose the “Application” option and tap on that. You can see there all the options. Tap on the “Clear Log” option.
  • If you are willing, you are capable of removing the Windows event log selectively. Choose the event log type by going to the left panel to clear it. After that, you can access the log you prefer to remove from the right panel. Then, you should select the “Clear Log” option from the list.
  • As soon as you choose “System” from the left panel, you must make a selection on the right side. Then, you should select the “Clear Log” action to eliminate the event log.
  • When you finish completing the selection, a pop-up message appears in front of you. It allows you to remove the logs or clear them after saving them.
  • Finally, you should make the final selection and wait for some moments. It is because Windows will remove the event log from it.

Depending on the windows version, the correct technique and interface vary. You are capable of storing the documents again after performing a recovery operation. If a user wants to permanently remove the event log files except for any recovery scope, use a third-party data eraser tool.

  • Remove Windows Event Log Entirely:

When you go through the instructions, you are capable of removing the Windows event log. If you cannot remove the files permanently, you will require a reliable data eraser tool. You can use the Data Eraser tool to delete your information completely within seconds. This tool comes with a simple-to-use interface. You can remove internet activities, system traces, and apps, event logs, etc. We have given here a few features of the tool.

  • Stellar BitRase is very useful if you are willing to delete the various types of system traces.
  • Using the tool, you are capable of freeing up unused and empty space.
  • This tool supports almost all windows versions.
  • Users can use the tool for removing internet activities, data files, app data, etc.
  • As soon as you complete the method successfully, it will offer a deletion certificate.
  • The tool features various types of algorithms that you are capable of selecting from its settings.
  • It doesn’t give any recovery scope and helps to remove your data permanently.
  • Stellar BitRase comes with a scheduler that allows you to remove your data automatically.
Steps:

1: First, your task is to download this tool on the Windows PC. After that, you are required to launch the tool.

2: Tap on the option “System Traces,” After that, you should access the significant features from the right panel.

3: You should then scroll the page down to look for the option of “Windows Event Log.”

4: Your task is to choose the option. Then, hit the “Erase Now” button for deleting the Windows event log. Thus, you are capable of erasing your event log files quickly from the Operating System.

With the help of BitRaser, you are capable of deleting the event log except for creating an issue. You merely have to tap on the option once, and the Windows event log will be removed permanently.

You are not required to wait anymore as the tool is here to help you. It helps to protect your privacy. You are capable of removing almost all system traces and Windows event logs from their interactive interface. The tool becomes useful for multiple occasions to keep your privacy protected.

  1. Using the GUI:

Users can move to the Settings of the Event Viewer GUI easily. Use GUI whether you are not willing to work with command-line tools. You need to go through the steps for launching the event viewer. It will help you to remove the event log.

  • First, your task is to navigate to a Run dialog and open it.
  • After that, you should select the option eventvwr.msc. Next, you should tap on these Ctrl + Shift + Enter buttons at the same time. You should have admin rights while launching the Event Viewer tool.
  • Then, your job is to tap on the small arrow option to expand the folders by going to the leftmost pane. You will get the option available next to the folder.
  • When you navigate to the list of entries, you should choose the entry option from the middle pane. Then, your task is to tap on the Clear Log, which you can see from the Action section in the rightmost pane.
  • The shift button can be used to choose various types of entries in the middle pane.
  • You are required to repeat all the steps for all entries. The method may look quite long, but it is very easy to navigate through.

Delete Saved Console.log:

Every console file comes with a function of recording recent activities. We don’t give importance to these because of their small size. As a result, the error remains. You should occasionally check the log files to offer the solutions.

  • First, navigate to the Event Viewer and launch it.
  • Then, your job is to go to the File option available in the menu and then move to the Options. It shows you the disk space available in the file and the area consumed by the saved files.
  • After that, you are required to tap on the Disk Cleanup option and then navigate to the Delete Files.
  • Finally, you should tap on the Exit option and then tap the OK button.
  1. Use PowerShell:

If you are willing to use a very strong command-line tool, then use it for removing the log files. You should just go through the steps that are:

  • First, your task is to navigate to the PowerShell and open it after that as an admin.
  • To do this, move to the Start menu first. If you still have not exchanged PowerShell with CMD, you must navigate to the WinX menu.
  • After that, your task is to write the command given and then hit the Enter button:

wevtutil el | Foreach-Object {wevtutil cl “$_”}

powershell_clear_all_event_logs

  • Once you write the command, it will remove almost all the event logs available in your Windows 10.
  1. Use Windows Disk Cleanup:

  • Hence, you should first tap on the option This PC. After that, you should choose the option Properties.
  • Navigate to the General tab after that and then tap on the Disk Cleanup option. As soon as you tap on the option, it will begin to calculate the volume of temporary files needed to be deleted.
  • Then, you should choose all the items, such as System archived Windows error reporting.
  • Finally, you are required to tap on the OK key.

How to Do Disk Cleanup:

Windows Update Cleanup: You should delete this as it removes the old copies of Windows Update files. Users can remove them easily, but it is essential to troubleshoot if they run into update-related issues.

Windows Upgrade Log Files: Windows keeps the data files for troubleshooting problems around installations. Whether you don’t encounter any Windows up-gradation issues, you should remove them.

Language Resource Files: Whether you have downloaded another language or keyboard layout, you can delete it.

Recycle Bin: The process of deletion is similar to the Recycle Bin. Ensure that there doesn’t exist anything inside it.

Temporary Files: Users don’t use temporary files for long periods. Therefore, deleting these won’t cause any effect.

These are the things you are capable of removing from Windows 10.

  1. The Hibernation File:

Location: C:\hiberfil.sys

This mode is similar to the sleep mode. In this case, the System stores all the openwork and saves it to the storage drive. After that, you should close the operating System. It is possible to erase the battery from the PC and keep the PC on hibernation mode. After that, you are required to begin the backup and then start from where you left off. The hibernation file consumes plenty of gigabytes, but it relies on the hard drive size.

Users can take help of the command prompt in case they don’t prefer to use hibernation and disable it. Ensure that you are not removing the hiberfil.sys only as your windows are capable of making it again.

You should then tap on the Start key or hit the Win + X buttons. After that, you are required to navigate to the resulting menu and open Windows PowerShell (Admin) window or a Command Prompt (Admin). Hence, you should write the command for turning off the hibernation:

powercfg.exe /hibernate off

It is all the things you need to do to turn off hibernation. Your windows will remove the hiberfil.sys. You should know that turning off the hibernate mode will stop the PC and won’t allow using fast startup.

  1. Windows Temp Folder:

Location: C:\Windows\Temp

These temporary files are required only when in initial use. The folders and files keep the details of the windows used at one time.

Navigate to the folder despite removing it with the help of Disk Cleanup. Then, you should erase the contents necessary. To do this, you must tap Ctrl + A buttons to choose all the options inside it. After that, you should tap on the Delete option. You can encounter some errors in your windows. Hence, you are merely required to remove everything else.

  1. The Recycle Bin:

Location: shell:RecycleBinFolder

It is a folder available below the C:\ drive. Users don’t have to access the drive. While users remove any files, Windows send them to this folder. It is storage where all the removed files are kept. When you erase them from that place, then these will be deleted permanently. If you want, you can restore the deleted files again.

The folder is available as a shortcut on the desktop of your laptop or computer. Therefore, it is simple to access. However, if you won’t find this, you should write shell:RecycleBinFolder into the navigation bar of File Explorer. After entering into the recycle bin, you can find all the things deleted instantly.

When you are going to erase them, you should tap on the individual items. Here, you should tap on the Delete option to remove them permanently. You can select the Restore option to get the file back to its real place. There are buttons available on the top of Ribbon’s Recycle Bin Tools tab. These help to clear the folder at a time and store the files again.

Tap on the Recycle Bin properties for tweaking through which the folder works. Hence, you are capable of changing the maximum bin size. If you want, you have to select the option Don’t move files to the Recycle Bin.

If you tap on the option, your Windows will skip the bin and erase items permanently. However, it is not recommended to use it to restore any file deleted mistakenly from the recycle bin. You can use the Display delete confirmation dialog, but you require an additional file to use this.

  1. Downloaded Program Files:

Location: C:\Windows\Downloaded Program Files

You may find the name of the folder a little bit confusing. The function of the folder is to hold files that Internet Explorer’s ActiveX controls and Java applets use. However, people who are using a similar feature are not required to download the file twice.

But it has become useless nowadays. You should know that ActiveX has become old & outdated technology. It is full of security holes and compatible with Internet Explorer only. It can be seen only on ancient corporate websites recently.

Generally, people are not using IE anymore. The folder containing Downloaded Program Files may be empty. You can remove the contents easily, so don’t hesitate.

  1. Rempl Folder:

Location: C:\Program Files\rempl

The folder doesn’t come in a big size. Therefore, while you see this on the Operating System, you may be surprised. It contains multiple small files. There are some Task Manager methods also connected to it.

It has a connection to Windows 10 update delivery. This folder contains “reliability improvements” that help to perform Windows 10 updates easily.

  1. Use Command Prompt:

With the help of the Windows command-line utility tool, users are capable of doing any task. We can take the help of the command prompt for removing the event viewer in Windows 10. Users can use this for removing individual log files. If necessary, you can remove the entire event log.

We have given here a few steps following which you are capable of removing all Windows log files.

  • First, your task is to navigate to the elevated command prompt and open it then. To do this, you need to navigate to the Windows search context menu. If you want, you can go to the Run dialog. Use hence Ctrl + Shift + Enter buttons to open the command prompt with the admin.
  • With the help of the change directory command, you should navigate to the event viewer default path.

cd %windir%\system32\config

  • Write this command for removing all the win log files. Then, you should hit the Enter button.

del *.log /a /s /q /f

delete_win_log_files_using_cmd

  • As soon as you do this, the .log extension files will no more available on your PC.
  1. Erase Single Log Files Taking Help of Command Line:

You can even erase the log files of individual files. Go through the commands that needed to be entered.

Step 1: Hence, your task is to move to another command prompt with admin and open it then.

Step 2: You should now list all the log files. To do this, first, you should type the command given below. After typing, you should tap on the Enter button.

.wevtutil el

Step 3: You can see there is a list available on display. People who are willing to remove the required log file need to write the following command. After that, you should hit the Enter button.

wevtutil cl <name of the log>

As soon as you do this, it will help you to remove the required log from the Event Viewer file.

  1. Create A Command File for Removing Log Files Automatically:

If you are trying the latest experimental features, it may happen that you have made plenty of win log files on the PC.in this case, you should know the process of erasing the log files in Windows 10 automatically.

Make a .cmd file to make the process automated. You should go through the steps for making this command file.

  • First, you should go to a text editor such as Notepad or MS visual code. Open it after that.
  • Then, your job is to write the code and perform copy & paste in the editor.

@echo off

FOR /F “tokens=1,2*” %%V IN (‘bcdedit’) DO SET adminTest=%%V

IF (%adminTest%)==(Access) goto noAdmin

for /F “tokens=*” %%G in (‘wevtutil.exe el’) DO (call :do_clear “%%G”)

echo.

echo Event Logs have been cleared! ^<press any key^>

goto theEnd

:do_clear

echo clearing %1

wevtutil.exe cl %1

goto :eof

:noAdmin

echo You must run this script as an Administrator!

echo ^<press any key^>

:theEnd

pause>NUL

  • Use the extension command prompt file to save the command name in any place you want.

clear_log_files_cmd_file

  • After that, your task is to run the command file as administrator. To do this, you need to select the right option from the right-click context menu.
  • Here, a command prompt window will open in front of you. Then, all the log files are removed automatically.

You should run the file as admin for removing event log files.

  1. Use CCleaner to Clear Log Files:

People who are using the drive-maintenance program CCleaner can scan the files. You are capable of removing the files except by downloading a dedicated log cleaner program. Hence, you need to open the tool as you normally do. As soon as you open the “Cleaner” menu, your job is to hit the “Windows” tab. Then, you should scroll down the page. After that, you must tap on the check box marked as the “Windows Log Files” option. Next, you should choose the option “Run Cleaner.” When the tool recognizes the system for those files you can remove, tap on the key again. It will help you to erase the Windows log files along with other chosen files. You are required to ensure the deletion of the log files, but it relies on the configuration process of the CCleaner installation.

  1. Use Third-Party App for Erasing Log Files Windows 10:

Plenty of third-party cleaner apps are there, which you can use to remove temporary files and other junk files. In this case, you are capable of using an app to erase the event log files.

Along with the most famous tool CCleaner, you can use BitRaser For File. CCleaner helps to clear up all junk files on the PC for free. BitRaser For File is a powerful file deletion software that you can use here.

How Can You View Windows Log Files?

The method of viewing the Windows log files is as follows:

First, your job is to tap on the Start button on the Taskbar of your PC.

After that, your job is to tap on the All Programs option.

Next, you should tap the Accessories menu item.

Now, you should hit the option WordPad application.

After doing this, you will see a new Wordpad window.

Hence, you should tap on the File menu option.

Then, you have to hit the option Open menu item.

Finally, your job is to move to the log file that you prefer. Then, you are required to hit the Open button.

Final Words:

In this article, you must have learned How to Delete Win Log Files in windows 10. Whether you are willing to remove log files, the methods given here are perfect. We hope you will find these easy to apply. Select any one of these first and perform after that accordingly.

Frequently Asked Questions:

  • Can you remove CBS log files?

You should first remove all existing log files in \Windows\Temp directory. After that, your task is to prevent The Windows Module Installer services. Then, you should remove the \Windows\Logs\CBS\CBS.log file. Hence, you are required to begin the Windows Module Installer service. It helps you to recreate the CBS.log.

  • Is it safe for removing the Windows upgrade log files?

If you want, you are capable of erasing the Windows Upgrade Log Files. But for this, your job is to solve the error if you cannot complete the up-gradation process successfully. When you choose the disk cleanup software, you should tap on the OK button to erase the documents. As soon as you tap on the Cleanup System Files, it will help you to erase more junk files.


  • Can you remove event log files?

Now, you are capable of removing event log files easily from your Operating System. Just take the help of online tools to remove the files and the event log without making any issues. Thus, you can remove the event log files permanently just with one tap. You only have to erase the Windows event log along with the system traces from the interface, while using online tools.

read more
GadgetsTechnology News

Sennheiser CX Plus True Wireless Earbuds

Sennheiser CX plus True Wireless Earbuds

It was not a long while ago that Sennheiser launched its first true wireless earbud. The new Sennheiser CX plus True Wireless Earbuds has been garnering much attention, and Sennheiser is aware of this. They have revealed the product to the world on September 13th, but its availability in the local stores is only from September 29th, 2021.

Sennheiser CX plus True Wireless Earbuds

What’s new in CX plus True wireless?

The stand-out feature in the new version is the Active Noise Cancellation ( ANC). ANC is still available with Sennheiser‘s flagship product, ‘ Momentum True Wireless – 2,’ but the cost is $300.00. The new product is priced at $ 179 .00 thus creating a huge gap in pricing.

The new wireless buds are available in two colors only, namely Black or white. They are slightly large compared to normal earbuds, but they snuggle into your ears quite comfortably. You cannot shake off the lightweight earbuds easily, though. They hang on tight even if you are running down a street with your head shaking all the time.

The wireless buds are secured with IPX4 technology, making them completely water-resistant and sweat generated.

The pairing between the buds and the device is accomplished via Bluetooth, and both the buds are activated simultaneously. If you still wish to know which the ‘master’ bud is, you can place it in the box and release it one by one to know that.

It has its codecs as the buds support all four of them. They are the

  • AptX
  • SBC
  • AAC
  • AptX Adaptive.

These codecs allow you to control the earbuds with the touch or tapping of your fingers. Functions get activated depending upon the one, two, or triple touch.

The EQ system can also be customized with both earbuds in either ear, functioning independently. In case you wish to hold the music, removing one bud alone can pause it. The unique feature of independent working between the two buds is an innovation over the Momentum 2, allowing only the bud on the right to work.

CX plus True Wireless Earbuds

Sennheiser claims that the battery would last a full 24 hours of usage compared to the previous CX, which lasted 27, and the Momentum 2 for 28. One can safely assume that the new features like ANC and the Transparent Hearing Mode are bound to drain it more. We have to also wait to check on the battery’s longevity in each earbud once it is released from the charging box with USB provisions. One can only wish for a wireless charging box from them in the future.

The ANC does block all the external noises, thus delivering wonderful clarity to the user’s ears.CX plus True Wireless Earbuds has another feature called the Transparent Hearing Mode, which helps you focus on all those external noises, making it a 2 in 1feature.

Conclusion:

The clarity is further enhanced in the new CX plus True Wireless Earbuds as Qualcomm Snapdragon is introduced. Sennheiser is a win-win situation even though the price is higher by $50.00, and you get most of the features available on their expensive flagship product, Momentum True Wireless 2!

read more
AppsDo It YourselfSoftwareTechnology News

Java Vs C++: Similarities and Differences

Java Vs C++: Similarities and Differences

Let us discuss Java Vs C++: Similarities and Differences in this blog post

What is Java?

Java is defined as a high-level programming language, the purpose of which is general and is designed in such a way as to curtail dependencies while remaining class-based.

Any application to be developed needs a computing platform to which it caters. Therefore the need for this language to be speedy and reliable and security features in place is imperative.

Every computing device does require its program to develop applications in it. To cite a few, it could be laptops, mobile phones, data centers, computers, supercomputers, etc. The IT industry uses this language, and it is considered an indispensable one for developing software.

It was developed at Sun Microsystems (now a part of Oracle) by James Gosling in the early 1990s.

What is C++?

Similar to Java, C++ is yet another computer language that is object-oriented but in reality an extension of the ” C’ language only. It is considered a high-level language as it has the standard features of its predecessor, ‘ C.’

This familiarity with C allows for low-level manipulation and a step closer to the primary machine language.

Bjorne Stroustrup developed the language to continue the rising trend of C languages. It does, however, usher in further control over system sources and memory.

Java Vs C++ Key Differences:

Here are a few key features in which both feature and the differences between them.

Platform

Java Platform:

The platform of this language has a suffix. It is platform-independent. In other words, all operating systems are ‘ user friendly’ with their compiled codes. The usage of the compiler has to be emphasized at this stage.

Humans write programs, and one can read those. It is known as ‘ Source Code. ‘ The compiler becomes a translator for these source codes and converts them into executable codes for machines. That language is known as Machine Language.

When there are many instructions in machine language, it has to arrange in sequence. The CPU can work on these instructions and execute them in two ways. It can carry out the work directly.

The other way is for the CPU to make an intermediate representation. Such a representation can only be understood by a virtual machine and then interpreted.

The interpretation is in Java, and it is called Java Byte Code.

Java Program Execution: The Step by Step Procedure.

  • It compiles all programs whenever written.
  • Such compilation would not be in machine Native Code. It is called the • Class file (or) bytecodes.
  • Without using an interpreter, execution on the machine is impossible, so the bytecodes are always ‘ non-executable ‘ codes.
  • JVM acts as the interpreter, and the JVM can only execute all executions of Bytecodes.
  • The desired output can only be achieved by running the final program.

C++ Platform:

  • They are not platform-independent.
  • The compiler can only generate a file in the • exe extension, which is OS-dependent.
  • It can only run on that OS from where it has been generated and not any other OS. Therefore the compatibility with other OS is redundant.

Java maintains independence across platforms, whereas JVM is 100% dependent on media. – Explained why!

Points to be noted:

  • Pointers can be used in C and achieve a call by reference
  • In C++, the choice of pointers and references (either one) for pass by.
  • As far as Java is concerned, the primitive types are always the values, and the non-primitive can only reference.

Call by Value & Call by Reference:

Call by Value:

The method or practice of attaching values to variables is known as Call by Value instead of calling it a function.

On the same note, we substitute addresses in place of values to the same function. It is known as ‘ Call by Reference.’

So, what is the difference between both?

The commonality is the function between both. Therefore, the procedure is invoked using these two methods only.

The difference between the two ways is ascertained by the value types which are passed on to them. These are called Parameters.

A function can either be given a parameter or receive them. When it is passed onto them, it is called ‘ Actual Parameters. ‘ On the other hand, when accepted, it is called ‘ Formal Parameters.

Call by Value:

To understand this better

  • The Actual Parameters are transferred to the function.
  • Now, the function has two parameters that can be stored in two memory locations independently. Due to this, if any changes occur internally inside the functions, the actual parameters would not be reflected.

Call by Reference:

They share the exact locations under this. We refer to the actual parameters and the formal parameters in which only the Actual Parameters reflect the changes inside the function.

Features:

JAVA C++
1. Many features are available and are capable of adding many more It does not have this capability and has no features that would be equivalent to many in Java.
2.
  • Packages
  • Interfaces
  • Multithreading is are certain features here.
There are no features that can complement these here. The library functions under a standard header file are the only plausible solution.
3. The main objective of multithreading is that

• It permits simultaneous execution

•Conditions are that the pieces should be from the same program

In here, one would do it only manually. No program exists for such multithreading.
4 The string is one of the built-in types in it. In some respects, this string resembles the string class type provided by C++. It is important to note that in C++, the string is available only if its class declaration is included. There is no built-in type for this.
5.


It consists of API classes that are it is own. In case the standard library of C++ exists, it would be removed.


Has only the standard library.


The C++ programming language and Java have many similarities and differences. Following are a few of the significant differences between them:

Comparison Index

C++ Java


Platform-
independent
It is entirely platform-dependent. Compiling its code on each platform is necessary. It is completely platform-independent.
Mainly used for
System programming is the primary function of this language. Application programming is its primary usage. It is to be used here, conditions are, it should be

  • Windows-based,
  • Web-based,
  • Enterprise,
  • And mobile applications.
Design Goal
It was designed for systems and application programming. It was an extension of the C programming language. Originally designed as a printing system interpreter, it later expanded to support network computing. An easy-to-use interface facilitates the use of the program by a wider audience.
Goto
It supports the goto statement, but it should be avoided as much as possible to prevent adverse effects. It does not support Goto statements as it is initially not available.
Multiple inheritances
Unlike interfaces, multiple inheritances are possible in this language. It supports many types of inheritance, including multiple and single inheritance. Even though there are issues, When numerous estates are encountered in it, the virtual keyword is used to solve the problems.  The  classes do not support multiple inheritances.
Operator Overloading
It is possible to override methods and operators in it. The excessive workload for operators The only way to overload methods in it is by using strategies. The system does not allow operator overloading.
Pointers
It is possible to use pointers in this language. You can write Pointer programs in it. Pointers are the foundation of it. We have seen in previous tutorials that C++ has strong support for pointers. Pointers are limited in this language. Java‘s internal pointer system supports pointers. It is, however, impossible to write a pointer program in it.
Compiler and Interpreter
It uses a compiler only. And, is compiled and run using the compiler, which converts source code into machine code, which is platform-dependent. It uses both compiler and interpreter. And the source code is converted into bytecode at compilation time. In addition, the interpreter executes this bytecode at runtime and produces output. This language is interpreted; that is why it is platform-independent.
Call by Value and Call by reference
It supports both

  • Call by value and
  • Call by reference.
 It supports

  • Call by value only.
Thread Support
It does not

  • Have any built-in support for threads but do rely on
  • On third-party libraries for thread support.
It has built-in thread support.
Documentation comment
It doesn’t support documentation comments. It supports documentation comment  such as /** … */ to create documentation for java source code.
Virtual Keyword
It supports virtual keywords so that we can decide whether or not to override a function. It doesn’t have the virtual keyword. By default, We can override all non-static methods. In other words, non-static methods are virtual by default.
unsigned right shift >>>
It doesn’t support >>> operator. It supports an unsigned right shift >>> operator that fills zero at the top for the negative numbers. For positive numbers, it works the same like >> operator.
Inheritance Tree
It always creates a new inheritance tree. It uses a single inheritance tree because all classes are the child of the Object class in Java. The Object class is the root of the inheritance tree in it.
Hardware
On a relative basis, it is much close to Hardware. Java and Hardware have minimal interaction.
Object-oriented
It is an object-oriented language. But in C language, a single root hierarchy cannot exist. It is also an object-oriented language. However, everything (except fundamental types) is an object in this language. It is a single root hierarchy as everything gets derived from it. Lang.Object.
Structure and Union
It supports

  • Structures and
  • Unions.
It does not

  • Support structures
  • And unions.
String
The string is one of the built-in types in Java. In some respects, this string resembles the string class type provided by C++. It is important to note that in C++, the string is available only if its class declaration is included. There is no built-in type for this.


Library
Java consists of API classes that are its own. In case the standard library of C++ exists, it would be removed.


Has only the standard library.


Memory
 

In this, compound-type objects are allocated in a typical manner in the form of a local stack bound.

The idioms are not the same used as far as resource management is concerned.

Memory is allocated by using object instantiation. In this, by initially allocating an array of bytes, arbitrary memory can be assigned.


Which one is better?

It is certainly not the easiest of answers.  In fact, there is no straightforward answer at all to point out one above the other.

The advantages and disadvantages are there with both.

System programming is excellent with C++, but that does not make Java redundant or less worthy. Java continues to prove its worth in many apps like the internet, Desktop, etc.

C++ on its own is versatile and can help even in gaming to leave alone system programming. On the other hand, Java cannot be trusted to develop low-level applications, gaming included.

The decision which is better weighs on the application which is to be developed. For this purpose, do the following.

  • Jot down the Pros and Cons of both
  • Check the compatibility and uniqueness with the application in development and decide which one suits better. Choose that one.

Which one is harder between them?

Java is simpler. It’s preferable because:

  • Syntax is easier to read comparatively
  • It is an object-oriented programming language and helpful to learn
  • Automatic garbage collection is available in it.
  • The quantum of undefined behavior is far lesser with Java which makes debugging easier.
  • It has a library that is of better standard and more extensive.
  • It does not necessitate dealing with pointers.
  • As Booleans are strictly required, the cause of concern for bendiness is removed
  • It surpasses any language in job postings
  • Billions of manufactures trust this language and run it on their devices.
  • In addition, it is racing up the popularity charts with C++ in a declining mode.
  • It has better packaging.

Besides, it does have its merits, and there are many. But Java makes things easier.

Conclusion:

Both C++ and Java are excellent object-oriented languages. C++, in addition to this, is also a procedural language.

There exists a few new features which are available in both but differ in their characteristics.

Likewise, a few features of C++ are powerful compared to Java. Such features make C++ stay in the reckoning for a long time to come.

Web-based applications would embrace Java more for features like templates, automatic garbage collection, etc.

read more
Do It YourselfGadgetsInternetTechnology News

APU vs CPU- How Do They Differ- Explained

APU vs CPU- How Do They Differ- Explained

Let us discuss APU Vs CPU in this blog post. Sometimes people get confused between them. But they are neither same nor perform similar functions.

Suppose you are going to buy a new computer or a new setup. Then one must know the difference between these. So that you can make intelligent choices while setting the pc.

Here, we will provide a complete and easy guide to know these and benefit from them. So, read the article till the end.

In this article, we put some light on these acronyms and their differences. Knowing about these will provide you an advantage and also help you in saving you precious money.

Without further due, let’s know them in-depth and have a clear picture of these units.

Firstly, before moving ahead, quickly understand the definitions.

What is a CPU?

 It stands for Central Processing Unit. We have studied about this one in our schools. It is called the mastermind or brain of the computer as it works in processing all the main functions and executing them. All information is processed here. It is a controlling chip responsible for the execution of arithmetic, logic, or other operations. Besides, it is an excellent calculator which computes and calculates in just a few seconds. Further, it is also responsible for telling other components what they are supposed to do.

It is nothing complex but a simple chip. The processing rate differs according to the clock speed, thread count, or several cores. Previously, a single-core was only able to do a single task at a time. But nowadays, 16 core CPUs are available, which has 3GHz speed that means it can perform three billion instructions per second only.

The Central processing unit has a default factory clock; It can be overclocked to perform even more instructions per second. But sometimes, due to overclocked heat, heat is generated, which is eliminated by an external third-party cooler.

What is a GPU?

 GPU stands for Graphics Processing Unit. It is crucial and responsible for rendering graphics like its name suggests, i.e., Images or videos. Also, most importantly, for gaming purposes like video games, 3D modeling, video editing, and more. If its base clock is slow, then like the CPU, it can also be overclocked.

If you are about to set up a gaming computer, GPU must comment because powerful and effective graphic cards are needed. That’s why these cards are pretty expensive. But cheap ones are also available in the market, but these are not recommended for more excellent performance in gaming.

GPU is more effective than Central Processing Unit as they process heavier loads of data in parallel. In simple words, it performs various data simultaneously and improves the performance of graphics or video.

The GPU is interfaced via PCLe ( PCI express) slot on the motherboard and via Thunderbolt 3 port, its interface with laptops or PCs.

 GPU is in two forms:

#1 Integrated Graphics

 #2 Dedicated Graphic Card

  • Dedicated Graphic Card is not a part of the motherboard, but it is a small chip that comes in different cards; and the best part is these cards are removable, and one can upgrade them. It has its RAM, which can be customized to increase performance for graphics-related processes.
  • Integrated GPU is the part of the motherboard, and it’s not removable. It doesn’t come with its dedicated RAM but uses the system RAM for operations. It means it refers to a computer where the GPU is built onto the same as the Central processing unit. So many benefits you get Inside, like Small Energy and its Efficiency. A few years ago, this Graphic had a bad reputation. But now, so many you see in recent years.

As compared to Dedicated GPU, Integrated GPU is slow.

Note: Without GPU, CPU alone is not sufficient for gaming as GPU does all the heavy lifting and renders 3d experience. Also, without a Central processing unit, GPU can’t work to a full extent. So, a combination of both is best for gaming and avoiding bottlenecking.

Therefore an average Central Processing Unit with GPU is good enough for high-level gaming purposes.

What is an APU?

 It’s an Accelerated Processing Unit. It is a combination of both CPU and GPU on a sole die. Or it can also be called a Central processing unit with an integrated chip on the motherboard.

It performs both units; it serves as the Central processing unit with the basic graphic processor.

For gaming, its performance is not as effective as dedicated ones. But it is fine for some PC and Console games. Maximum performance is not gained with this.

It is a good option for budget-friendly users. It’s a good solution for rendering graphics for Pcs and laptops. And it can be overclocked as well.

It works efficiently and has capabilities of both, and also consumes less power. But the sad part is that its performance is not strong.

There are many series of Accelerated Processing Units in the market like:

  • Its A-Series is an affordable option, but its potential is weakest.
  • The Athlon series is better than the A-series. Work performance is average.
  • And, Rayzen is strong nowadays.

At last, it’s an affordable option and power-efficient but not powerful enough for running AAA games nicely.

What makes Accelerated Processing Unit a worth buy is its low manufacturer, increased power efficiency, good performance speed, and pocket-friendly. So if you want to upgrade your PC, then go for this affordable option which falls within your budget.

APU without Dedicated Graphic Card

If your budget is tight but still wants to build gaming, then It is the ideal option. Its latest models come with quad-core processing with multi-threading and thus results in an impressive performance.

But if you need more graphical performance, then this device lacks in this regard. Also, it is an affordable option, but still, it makes you spend money on other factors.

Buy this one as per your need and preferences as it provides many benefits like dual-channel, fast-acting memory, etc.

CPU with Dedicated Graphic Card

 The Central processing unit with Dedicated Graphic Card is the best combo for best and high gaming performance. But the only thing is it is an expensive option as it increases build cost.

For a greater extent of gaming, both components are needed. Some people think that only the Central processing unit is an essential component, but one can’t enjoy many games without a dedicated graphics card. GPU offers more power as it comes with its power, cooling, and memory. It is a small chip that comes separately.

APU vs CPU- How do they differ?

With the difference between them, one can more easily get a clear picture of these acronyms. Let’s see some major factors in which they differ so that you can decide clearly which one to buy.

#1.What they process

 They sound similar, but actually, they differ in process. CPU processes all the arithmetic, calculations, and computation and lets other components do what they are supposed to do and receive and give direction to the command or data. Also, GPU handles all the graphics like directing or receiving data. Whereas Accelerated Processing Unit has both CPU and GPU work capabilities, it’s not as pro as the combo of these components.

#2.Power and Efficiency

 Many people have only knowledge about CPUs. And we suppose it is the most powerful and effective one as it is the mastermind of the computer. But I’m reality the GPU is more effective than the previous one as all the heavy and lifting tasks are done. So, GPUs are more effective and powerful than CPUs.

Talking about Accelerated Processing Unit offers high power as it combines the two of a 2 in 1 component. It is an affordable option but does not beat the performance of a dedicated CPU and GPU.

#3.Necessity

 The question must arise in your mind: what component or unit to run a computer? Or which one can single-handedly do the job?

Then the answer is GPU is not much needed for the running of the computer, or you can play some games also. But for heavy gaming and gaming to another level of experience, a graphic card is needed to provide higher-speed quality and more.

#4.Pricing

 Getting both CPU and GPU will cost more. So, considering pricing, it is an affordable option and even good to play some games. Its cost differs depending on frame rates.

Similarly, if you want a more effective and powerful for Both, you need to pay more.

Overall, the Accelerated Processing Unit is much cheaper.

CPU Vs APU- How Easy is it to Upgrade?

It’s a truth that everyone wants to hold thing’s for a long time, but We can’t ignore Updates that will Come for a lifetime. Now we need to prepare for upcoming updates. But here we’re talking about Upgrading Graphic cards that can be expensive for you. Changing a graphic card is straightforward because you need to replace the graphic card with New Version.

We all know that before the release of Ryzen, It was seriously an issue. So, overall we can say that if you want to do some upgradation, then it’s a compelling Swap Process.

If we talk about the previous years, it’s tough to do this job, but now after launching Ryzen, everything changed, and Now anyone can upgrade easily. It means a lot when we add a graphic card inside the Central processing unit, but after the Ryzen game is completely changed and it’s so easy to implement a Graphic card. And you have decision capabilities to decide whether you want to update later or not.

Conclusion:

Well, buying any processing unit depends on your needs. If you are a new baby, it’s always better to go for Accelerated Processing Unit as it’s sufficient for start and affordable. But for higher gaming needs and have enough budget, then go for both.

So as per your wallet, go for the right one which suits you. It just depends on the price and gaming needs. So decide accordingly. If you still think who wins this battle, then let me clear you – Accelerated Processing Unit is good, but it’s not for ideal gaming lovers. Still, it’s a powerful game-changer and Comes with fantastic flexibility and Time-saving.

In my choice, going for the combo as Accelerated Processing Unit will not be the right or ideal for gamers. For much better performance and experience, choose CPU and GPU.

But if you want to play games casually, then, of course, Accelerated Processing Unit is sufficient, and you can upgrade it as well.

Frequently Asked Questions:

Q.1 Is APU better than CPU & GPU?

  • Well, if you’re looking for typical computing, then you can say that the Accelerated Processing Unit is all you’re looking for. But if you’re looking for applications, then you need both because, as we noted, Two are better than one. For 3D animation or Gaming purposes, both are better options.

Q.2 What is the Most Powerful APU?

  • Without a doubt, AMD Ryzen 5 3400G is the best and most potent Accelerated Processing Unit. With this processor, you can play almost any game without any Hitches.

Q.3 Will APU replace GPU?

  • As we discussed in the Entire Article, to be summed up, we know that the Accelerated Processing Unit alone is not Fulfilled all the requirements, but Yes, we can say that It can replace GPU.

Q.4 Can an APU work with a GPU?

  • 100% Yes, It can work with GPU. Even though you should know that the GPU is compatible, it is the best point of the Accelerated Processing Unit. Well, you can start with Small and wait until you’ve something big to invest in hardware.

Q.5 How much RAM does the APU use?

  • If we talk about Its User’s they’re using Two 4GB memory modules that Come with 8 GB capacity. These are especially Value for Ryzen 3 2200G.

Q.6 Is 8GB RAM enough for a Ryzen?

  • 8GB is enough for casual games, but I suggest you go with 16GB RAM if you’re looking for intense gaming.
read more
1 4 5 6 7 8 20
Page 6 of 20